Table of Contents
Advertisement
Advertisement
Table of Contents

Related Manuals for Oasis PCPEBQ


Summary of Contents for Oasis PCPEBQ
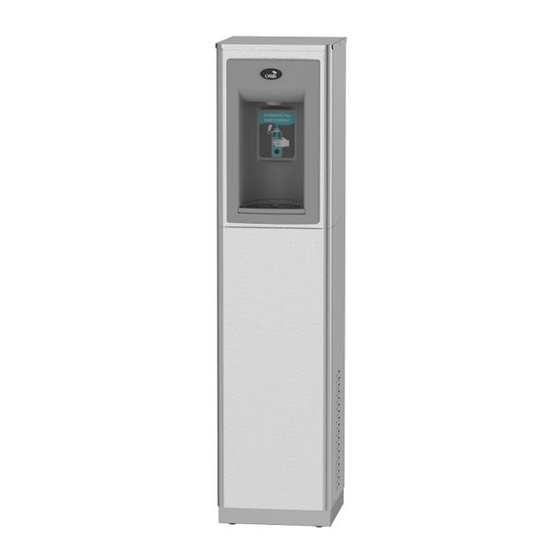
- Page 1 FREE STANDING ONTACTLESS BOTTLE FILLER WITH QUASAR UVC-LED Installation Instructions For: UNIFILTERED: PCPEBQ PCPEBQY (230V) PCP10EBQ PCP10EBQY (230V) FILTERED: PF2CPEBQ PF2CP10EBQ OASIS International 222 East Campus View Blvd. Columbus, OH 43235 614-861-1350 www.oasiscoolers.com...
-
Page 2: Product Specifications
INDEX INDEX INDEX INDEX PRODUCT SPECIFICATIONS IMPORTANT REQUIREMENTS SAFETY WARNINGS GETTING STARTED PROPER QUICK CONNECT FITTING CONNECTION INSTRUCTIONS INSTALLATION QUASAR UVC-LED OPERATION SET-UP GUIDE FOR DISPENSER PCB ELECTRONICS 1. PRODUCT SPECIFICATIONS 1. PRODUCT SPECIFICATIONS 1. PRODUCT SPECIFICATIONS 1. PRODUCT SPECIFICATIONS Dimensions: Depth 13.35”(339.0 mm) - Page 3 ROUGHING-IN AND DIMENSIONAL DRAWING...
-
Page 4: Important Requirements
2. IMPORTANT REQUIREMENTS 2. IMPORTANT REQUIREMENTS • Use only original and new parts to guarantee the reliability, optimization, and performance of the OASIS water machine. • Always wear proper protection when performing any type of service or maintenance. • When cleaning the unit, do not use corrosive acidic products, or metal brushes. -
Page 5: Getting Started
4. GETTING STARTED: 4. GETTING STARTED: 4. GETTING STARTED: 4. GETTING STARTED: What’s Included: CONTACTLESS BOTTLE FILLER STABILIZER BRACKET OPTIONAL VERSAFILTER III OPTIONAL REMEDI FILTER STABILIZER BRACKET Remedi filter element VERSAFILTER III (filtered models (filtered models only) only) NOTE: This comes installed in the cooler. - Page 6 5. PROPER QUICK CONNECT FITTING CONNECTION 5. PROPER QUICK CONNECT FITTING CONNECTION 5. PROPER QUICK CONNECT FITTING CONNECTION 5. PROPER QUICK CONNECT FITTING CONNECTION INSTRUCTIONS: INSTRUCTIONS: INSTRUCTIONS: INSTRUCTIONS: Quick-Connect Fittings • If you need to cut the plastic tubing, be sure to cut tube ends square and straight.
- Page 7 6. INSTALLATION: 6. INSTALLATION: 6. INSTALLATION: 6. INSTALLATION: STEP 1 & 2: Carefully unpack Water Dispenser and remove filter from the alcove. (filtered models only) Remove Front Panel by removing the 2 screws at the bottom of the panel on the sides. See Diagram 2. Filtered Model Shown...
-
Page 8: Installation
6. INSTALLATION: 6. INSTALLATION: 6. INSTALLATION: 6. INSTALLATION: STEPS 3 through 5 (for optional filters) Note: If this unit is equipped with a two stage filtration system, then the remedi filter was shipped installed. The VersaFilter III was placed in the alcove on the front of the cooler for shipping. - Page 9 6. INSTALLATION: 6. INSTALLATION: 6. INSTALLATION: 6. INSTALLATION: STEP 6: Locate the snap bushing in the back of the cabinet and feed 1-1/2” OD Drain Pipe through the hole. See Diagram 4 & 5. Drain Pipe – shown after completing Step 6.
- Page 10 6. INSTALLATION: 6. INSTALLATION: 6. INSTALLATION: 6. INSTALLATION: STEPS 7 through 9: (See Diagram 6) Connecting 1/4” OD water supply tube to 1/4” quick connect fitting on the back of the unit. Refer to Section 5 for instructions on how to properly connect to quick connect fittings.
- Page 11 6. INSTALLATION: 6. INSTALLATION: 6. INSTALLATION: 6. INSTALLATION: STEPS 10 through 17: NOTE: This unit contains the QUASAR UVC LED. Do not attempt to operate the electronic bottle filler dispenser until the cooling tank is filled and the water filters are flushed.
- Page 12 7. QUASAR UVC 7. QUASAR UVC 7. QUASAR UVC 7. QUASAR UVC- - - - LED OPERATION LED OPERATION LED OPERATION LED OPERATION QUASAR is a form of dispense point water treatment that utilizes UVC-LEDs to inactivate pathogens. Operation: The QUASAR activation is automatic. The UVC-LED’s turn ON when water is dispensed and OFF when the dispense stops.
- Page 13 Pushbutton To change the program settings, follow these steps: P/N 030099-629, 7/2020 ©2020 LVD Acquisition, LLC; OASIS is a registered trademark of LVD Acquisition, LLC dba OASIS International.
Need help?
Do you have a question about the PCPEBQ and is the answer not in the manual?
Questions and answers