
Related Manuals for German pool EVC-173


Summary of Contents for German pool EVC-173
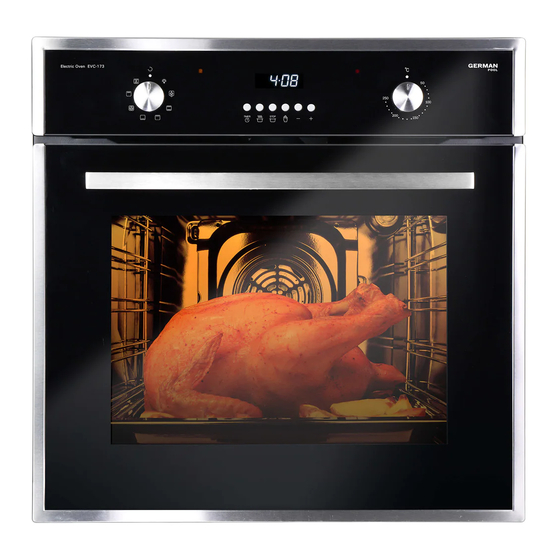
- Page 1 Built-In Oven EVC-173 Online Warranty Registration Please read these instructions and warranty information carefully before use and keep them handy for future reference. U S E R M A N U A L...
-
Page 2: Table Of Contents
Content Safety Instructions Product Structure Installation Instructions Operating Instructions Care and Maintenance 請即進行保用登記﹗ 有關保用條款細則,請看本說明書最後一頁。 Electrical Connections Please register your warranty information now! Troubleshooting For Warranty Terms & Conditions, Eco-Friendly Disposal please refer to the last page of this user manual. Technical Specifications Warranty Terms &... -
Page 3: Safety Instructions
Safety Instructions Safety Instructions General Information • If the supply cord is damaged, it must be replaced by the manufacturer, its service agent or similarly qualified persons in order to avoid a hazard. • Your safety is of the utmost importance to us. Please make sure that you read this instruction •... - Page 4 Safety Instructions Safety Instructions installation site. Considerable oscillation may result in product damage. Child Safety • Do not use the oven when the power cord is damaged or there is a heating fault. Contact the • We strongly recommend that babies and young children are prevented from being near to the nearest service center for electrical and mechanical adjustments and repairs.
-
Page 5: Product Structure
Product Structure Product Structure Main Body Standard accessories: • Stainless steel grill grate (1 pc) Electric Oven EVC-173 C ° • Food deep tray (1 pc) • Screws (4 pc) 7 8 9 10 11 Control Panel Electric Oven EVC-173 C °... -
Page 6: Installation Instructions
Installation Instructions Installation Instructions This appliance must be correctly installed by a suitably qualified person, strictly in accordance with the manufacturer’s instructions. Exhaust vents The manufacturer declines any responsibility for injury or damage, to person or property, as a result of improper use or installation of this appliance. - Page 7 Installation Instructions Installation Instructions Ventilation requirements Ensure that the oven has been securely fixed into the housing unit. The fixing of the oven into the housing is made Remove rear panel C ° by using four screws. These should be screwed through the from this section EVC-1 Oven...
- Page 8 Operating Instructions Operating Instructions Thermostat control knob • The oven thermostat control knob sets the required Selecting an Oven Function Watch the video clip temperature of the oven. It is possible to regulate the The oven function selector knob should be used to select the particular mode of temperature within a range of 50 - 250°C.
-
Page 9: Operating Instructions
Operating Instructions Operating Instructions Before first use Selecting Manual Operation Mode • To remove any residue from the oven that may have been left from the manufacturing process, • After your appliance is connected to your mains supply for the first time, the numbers on the timer you should select the fan oven function and set the thermostat to its maximum temperature display will flash. - Page 10 Operating Instructions Operating Instructions After the time ended, you should Press the duration button , the alarm can be silenced. “AUTO” keeps flashing, goes off, and the Setting the Alarm Function display shows “0:00”. Within 5 seconds, you can press to adjust the cooking time and An alarm can be set to ring when needed, including when not cooking.
- Page 11 Operating Instructions Operating Instructions Rapid Heating • If there is no guidance given on the food packaging specifically for cooking in fan oven mode, you can generally reduce the cooking time and temperature by 10% from the information given for •...
-
Page 12: Care And Maintenance
Operating Instructions Care and Maintenance Shelf positions Cleaning operations must only be carried out when the oven is cool. Your oven will come supplied with the following oven features: The appliance should be disconnected from your mains supply before (A) Stainless steel grill grate commencing any cleaning or maintenance process. - Page 13 Care and Maintenance Care and Maintenance Replacing the oven bulb Remove the inner glass panel a. Glass door has two plastic fixed blocks. Use a slotted screwdriver to insert into the hole of the plastic IMPORTANT: The oven must be disconnected from your mains supply before you fixed block and gently pry it.
- Page 14 Care and Maintenance Care and Maintenance Install Inner Glass d. Insert the upper right fixed block into the radiator panel. Fix the block into the iron frame and pay attention to the card position. a. After cleaning the inner glass from the top to the plastic fixed block. b.
-
Page 15: Electrical Connections
Electrical Connections Electrical Connections Installation Guidelines CONNECTION DIAGRAM • Circuit requirement: single-phase AC power supply (220V - 240V ~ 50/60 Hz). Caution! Voltage of heating elements 220V~240V • Drawings below shows the lid of the connection box. Caution! In the event of any connection the safety •... -
Page 16: Troubleshooting
Troubleshooting Troubleshooting IMPORTANT: If your appliance appears not to be operating correctly, then you Phenomenon Solution should disconnect it from your mains supply and then contact the Customer Care Check that the oven is in manual operation mode. The oven isn’t coming on Check that you have selected a cooking function and Department a cooking temperature. -
Page 17: Eco-Friendly Disposal
Eco-Friendly Disposal Technical Specifications Packing Material Model EVC-173 Protective packaging is used to protect the product from any damage during Gross Capacity transportation. Rated Voltage/Frequency 220-240 V / 50 - 60 Hz Please discard all packaging material with due regard for the environment. - Page 18 目錄 安全注意事項 一般說明 • 在 沒 有 仔 細 閱 讀 說明 書 前 請 不 要使 用 焗 爐 。若 您 對 於 本說 明 書 有 任何 不 確 定 的 資訊 , 請 安全注意事項 聯 繫 客 戶 服 務 部 門。 •...
-
Page 19: 安全注意事項
安全注意事項 安全注意事項 受 監督或指導並了解有 關 危害 ,則 可 以使 用 本 產品 。 兒 童 不得 玩 耍 本產 品 。 如 沒有 人 監 • 請 勿 嘗 試 使 用焗 爐 門 或 手柄 來 提 升 或移 動 烹 飪 用具 , 因 為 這 可能 會 導 致 設備 損 壞 或 導 督... -
Page 20: 產品結構
避免使用海綿或擦布 清 潔焗 爐內 部 ,以 免 造 成焗 爐釉 面 損 壞 。 • 當產品發生故障時, 請 不要 使用 。 請立 即 拔 掉電 源並 通 知 服 務中 心 進 行 維修 。 Electric Oven EVC-173 C ° 慳 電小 帖 士... -
Page 21: 安裝說明
安裝說明 產品結構 必須由合格的人員嚴格按照說明正確安裝本產品。 標準附件 本公司對未遵照此規定而引致之損失或問題概不負責。 • 不銹鋼烤架(1個) • 食物烤盤(1個) • 工作時,產品溫度上升,並會產生高溫蒸氣。請注意避免受傷並確保房間通風良好。 若需長 • 螺絲(4顆) 時間使用本設備,則可能需要增加額外的通風設施。 • 若對產品的具體通風要求有疑問,請諮詢安裝人員。 • 安裝焗爐時,確保所有控制元件都能正常運作。 • 此嵌入式焗爐可以安裝在高的傢俱和牆體上。安裝產品的塗料或膠合板必須是耐高溫黏合劑。 這可以防止表面變形或者塗層分離。 • 請根據圖紙給出的尺寸安裝焗爐。 • 圖示的四顆螺絲在焗爐完全插入櫥櫃處時不允許拆下。 P.40 P.41... - Page 22 安裝說明 安裝說明 通風要求 排風口 拆下後背板 踢腳線 ≥550 如圖切割40-50mm的凹位 裝上假抽屜面板 ≥560 (上圖為將焗爐安裝到標準櫥櫃時的通風和開口要求。) ≥560 進風口 後背板 儲物空間 產品尺寸 安裝開孔尺寸 ≥ 550 mm 高:595 mm ≥ 560 mm 寬:595 mm 拆下後背板 ≥ 560 mm (min) (左圖為將焗爐安裝到高身櫥櫃時的通風和 深:530 mm 開口要求。) 定位焗爐 • 請確保安裝位置的尺寸與上圖一致。 • 焗爐必須安裝於在滿足下述“通風要求”的地方。...
- Page 23 安裝說明 操作說明 為確保焗爐已牢固安裝到櫥櫃中,需通過使用四個螺釘 功能選擇 觀看 操 作 視 頻 將焗爐固定。這些螺絲應該通過焗爐機櫃擰入櫥櫃中。 通過旋轉功能按鈕選擇所需的預設功能。焗爐會根據您所需的功能,利用不同 C ° 部位的發熱管來加熱。選擇功能完成時,電源指示燈將亮起。 EVC-1 ic Oven Electr 功能 描述 獨立的照明壁燈設計,即使焗爐不工作時仍可打 照明壁燈 開。 焗爐內的風扇啟動。可將冷凍的食物快速解凍或將 熱的食物冷卻。 解凍 注意︰除響鬧功能外,其他時間設定功能均不適用 於解凍。 立體加熱模式 散熱風扇 頂部及底部發熱管啟動,焗爐進行常規加熱。 頂部及底部發熱管 • 焗爐內部裝有散熱風扇,以保持焗爐內部溫度穩定並降低外表面溫度。 頂部發熱管啟動,焗爐從上往下加熱;該功能可應 • 完成烹飪並關閉焗爐後,風扇將繼續運行一段時間。時間的長短取決於焗爐工作的時間和溫度。 頂部發熱管 用於蛋糕製作。 底部發熱管啟動,焗爐從下往上加熱;可應用於慢 底部發熱管...
-
Page 24: 操作說明
操作說明 操作說明 溫度旋鈕 初次使用前 • 溫度旋鈕與焗爐恒溫器相連接。可調節溫度範圍 • 為除去製造過程中可能留下的殘留物,可選擇「燒烤功能+風扇」,並設置為最高溫度。 為50-250℃。 • 此過程中可能產生異常氣味,屬正常現象。 • 順時針轉動溫度旋鈕。 • 請打開房間裡的窗戶,保持良好通風。 • 發生意外時,建議不要留在房間。 • 應將焗爐設定為最高溫度下工作30-40分鐘。 • 待焗爐內部冷卻後,應使用沾有肥皂水的海綿或軟布清洗。不應使用研磨清潔劑。 • 應使用沾有溫暖的肥皂水的海綿或軟布擦拭焗爐外部。不應使用研磨清潔劑。 • 建議使用合適的清潔劑和拋光劑,定期清潔焗爐的表面。 加熱指示燈 • 指示燈亮起時表示焗爐的加熱元件正在工作。達 自檢模式 到設定溫度時,指示燈熄滅。整個烹飪過程中, 通電後進入自檢模式,顯示屏顯示“AUTO”和“00:00”閃爍。 指示燈會不時熄滅。 5秒內同時按 和 鍵,顯示屏顯示所有指示全部亮起,蜂鳴器響。鬆開按鍵,蜂鳴器停 • 待焗爐溫度升至所需溫度後,方可放入食物進行 止蜂鳴,顯示屏顯示“12:30”; 烹調。 或同時按 和... - Page 25 操作說明 操作說明 烹調時間設定 預約功能的設定 轉動功能旋鈕和溫度旋鈕設定所需的烹調功能。 轉動功能旋鈕和溫度旋鈕設定所需的烹調功能。 按 進入烹調時間設定,顯示屏顯示“AUTO”閃爍。 輸入烹調時間後,按 ,顯示屏顯示“AUTO”閃爍,按 和 輸入預約的完結時間。 按 和 輸入烹調時長,等待5秒後自動確認。烹調時長範圍由1分鐘至10小時。 預約時間範圍是24小時。 烹調開始,顯示屏顯示“AUTO”常亮,顯示屏顯示當前時間。 焗爐會根據您設定的完結時間和烹調所需的時長,計算出焗爐需要開始烹調的時間,並自動開 如需查看剩餘時間或調整烹調時間,可在烹調過程中按 或 ,顯示屏顯示剩餘時間, 始工作。 “AUTO” 閃爍。此時可按 和 調整烹調時間,等待5秒後自動確認並返回介面。 當前12:00,假設設置的完結時間為13:30,烹調所需的時間為2小時,焗爐便會在11:30開始 烹調結束時,顯示屏顯示“AUTO”閃爍, 熄滅,蜂鳴器響起,顯示屏顯示時鐘。 烹調,13:30完成。 響鬧設定 烹調結束後︰ 按 ,蜂鳴器停止蜂鳴,顯示屏顯示“AUTO”一直閃爍, 熄滅,顯示屏顯示為“00:00” 可設定在需要的時候發出響鬧聲以示提示,包括不烹調時也可使用。設置的時間會倒數計時,時間 。 可以在5秒內按 和 調整烹調時間,繼續烹調,否則顯示屏會返回時鐘顯示。 到時會有響鬧提示。...
- Page 26 操作說明 操作說明 快速加熱 警告:使用任何烹飪功能(包括燒烤功能)時,請保持焗爐門緊閉。 • 焗爐通過啟動風扇和加熱器來實現熱風對流。如果運行燒烤功能 + 風扇,焗爐可在約4分鐘 內加熱到150℃。 • 請勿使用鋁箔覆蓋烤盤或加熱置於烤盤下用鋁箔包裹住的食物。鋁箔的高反射率可能會損壞加 • 設置焗爐功能為“燒烤功能+風扇”。 熱元件。 • 通過溫度旋鈕,將溫度調至150℃。 • 請勿將鋁箔鋪在焗爐底部。 • 焗爐加熱到150℃,設備停止加熱。 • 在烹飪過程中,切勿將平底鍋或炊具直接放在焗爐底部。 他們應該始終放在烤架上。 • 將裝有生麵糰的托盤放入焗爐內。 • 在工作過程中,焗爐的內部元件溫度升高,請小心避免觸碰。 • 扭動功能旋鈕選擇焗爐加熱模式。 • 重要:打開焗爐門時要小心,避免接觸焗爐的高溫部分和蒸氣。 重要! 當選擇了快速加熱功能時,焗爐內腔的托盤必須放有食物。 • 從焗爐中取出高溫托盤時需要佩戴隔熱手套。 燒烤 警告:部分部件在使用過程中溫度可能升高。兒童應避免靠近。 燒烤過程中發熱管處於白熾狀態將紅外線發射到食物表面。 運行燒烤功能你需要: • 關好焗爐門,功能旋鈕轉到指示位置,預熱約5分鐘。...
-
Page 27: 清潔與保養
操作說明 清潔與保養 觀看 操 作 視 頻 焗爐隨機附有: 焗爐還未冷卻的時候請勿進行清潔。 (A)不銹鋼烤架 清潔或維修保養前請先切斷電源。 (B)食物烤盤 數位1-5表示焗爐內放置烤架或烤盤 • 在初次操作和每次使用後應徹底清潔焗爐。以避免殘留的食物在焗爐內被 烘烤。 殘留物經過多次烘烤後,會大大增加清潔難度。 的不同位置。 • 請勿使用蒸氣清潔焗爐表面。 (圖片僅供參考 - 實際產品可能略 • 請使用沾有溫肥皂水的海綿或軟布清洗焗爐內部。不能使用研磨類清潔劑。 有不同) • 焗爐工作時食物飛濺或溢出將導致焗爐底部產生污垢。這可能是因烹調溫度過高或炊具太小而 導致的。 • 應確保設定合適的的烹調溫度並使用適當尺寸的盤子。有需要時可使用搪瓷烤盤。 • 可用溫熱水加適量洗滌劑清洗焗爐外表面。隨後用足量的清水洗淨並立即用柔軟的布擦乾。請 勿使用腐蝕性清潔劑。 • 建議使用不銹鋼專用洗滌劑清潔不銹鋼部分。 • 為徹底清洗焗爐,在焗爐冷卻的狀態下,請使用焗爐專用清潔劑清洗。若採用專用焗爐清潔 劑,請向清潔劑生產商確認本產品是否適用。 •... - Page 28 清潔與保養 清潔與保養 取出內部玻璃面板 更換燈泡 a. 玻璃門有兩個塑膠固定塊。使用一字螺刀插入塑膠固定塊撬起它。 重要:為了避免觸電,更換燈泡前確保焗爐斷開電源。 • 取下所有焗爐架,拆下與燈泡同一側的集油盤 和放置架。 • 逆時針旋轉燈罩並取下。 • 逆時針旋轉燈泡並將其從支架上取下。 b. 取出兩端塑膠固定塊及頂通風柵格。 • 換上新的220V 25W/300℃的G9螺口小燈泡。 • 請勿使用其他型號的燈泡。 • 裝回燈罩於原位。 • 將焗爐門完全打開。 拆下焗爐門 c. 輕輕抽出玻璃面板,隨後用溫肥皂水清洗。清潔完成後把內層玻璃插入,隨後裝上塑膠固定塊並上 • 抬起兩個活動螺栓,即可鬆開門鉸。 緊螺絲。 • 輕輕關上焗爐門,直到你聽到嚙合的聲音,一旦 到達夾緊位置,雙手握住門柄繼續推並同時拉 起,把焗爐門取出。 • 清洗後,門鉸與焗爐門閂對齊,推至鉸鏈的凹口 互相咬合。 • 完全打開焗爐門,活動螺栓推回原來的位置,直 至爐門鎖定。...
- Page 29 清潔與保養 清潔與保養 d. 將右上方的固定塊插入散熱器面板。再把固定塊固定在金屬框上,同時注意卡的位置。 安裝內部玻璃面板 a. 清洗後,將內部玻璃面板放回原位,裝上塑膠固定塊。 b. 安裝左上角的塑膠固定塊,安裝時注意面板按鍵。 c. 將散熱器插入左上方固定塊。 P.56 P.57...
-
Page 30: 電氣連接
電氣連接 電氣連接 安裝準則 • 焗爐要使用單相交流電供電(220-240V ~ 50/60Hz)。 線路圖 • 圖紙上顯示了接線盒的蓋子。 注意:發熱管電壓為220V-240V • 連接電線的時候請確保供電電壓與焗爐銘牌上標稱電壓匹配。 記得連接安全電路中的連接端子標記 。 • 電源線應確保安全擰緊。 必須由合格的人員按照下列法規進行安裝︰ 220V-240V接地及電線連接: • 本地法規和安全標準 棕色線接L,藍色線接N, • 建築法規(由本地相關部門發布) 黃綠色線接 。 • 建築標準(由本地相關部門發布) • IEE接線規定 • 請按照上圖所示連接電線,必要時使用黃銅連結。 • 工作電力法規 • 接地(黃/綠電線)導線必須比線路導線長10 mm。 在連接設備之前,請確保銘牌上標明的電源電壓與您的主電源電壓相符。 • 必須留意並確保主電源電纜的溫度不超過50° C。 •... -
Page 31: 常見故障及處理
常見故障及處理 常見故障及處理 序列 故障現象 處理方法 重要提示:若設備不能正常工作時,請立即切斷電源並聯繫客戶服務及維修中心。 檢查焗爐是否處於手動操作模式。 焗爐不啟動。 檢查有無設定烹調功能及烹調溫度。 請勿嘗試自行拆卸修理。 檢查插頭是否已正確連接至電源。 焗爐不通電。 檢查保險絲是否正常運作。 維修人員進行維修時若發現故障原因並非設備原因,且產品處於保修期內,則使用 參閱本說明書將焗爐設定為手動操作模式。 者有可能需要自己承擔相關維修費用。 燒烤功能正常但焗爐不工作。 檢查是否已選擇正確的烹調程式。 設備應安裝在方便維修的位置。若維修人員判定維修時會損壞產品或廚房,維修人員將不會進行維 燒烤發熱管及頂部發熱管不工作; 修。 在煮食過程中焗爐自動關閉一段較 待焗爐冷卻2小時,隨後檢查焗爐是否正常工作。 長時間。 上述情況包括設備安裝在牆體中,用密封劑密封、設備前方裝有木質障礙物,如地腳線或其他非本公 確保為烹調中的食物選擇正確的溫度和功能。為達 司所要求的安裝方式。 食物不熟或過熟。 到最好的烹飪效果,可以將溫度升高或降低10℃。 檢查焗爐是否安裝正確且保持水平。 請參閱保修卡上的保修條款。 食物受熱不均勻。 檢查溫度設定及烤架、烤盤的放置位置是否正確。 焗爐照明燈不亮。 請參閱“更換燈泡”部分。 重要提示:產品規格及設計如有變更,恕不另行通知。 在烹調含水量高的食物如冷凍食物或雞肉時,產生 蒸氣和冷凝水屬正常現象。 焗爐內部及焗爐玻璃門之間產生冷凝水並不屬於產 焗爐內有冷凝水。 品故障。... -
Page 32: Warranty Terms & Conditions
- the serial number is modified, damaged or removed from the product. - 機身編號被擅自塗改、破壞或刪除。 4. German Pool will, at its discretion, repair or replace any 4. 總代理有權選擇維修或更換配件或其損壞部份。 defective part. 5. This warranty will be void if there is any transfer of EVC-173 5. - Page 33 Fax:+853 2875 2661 HONG KONG TOP BRAND TEN YEAR ACHIEVEMENT AWARD © All rights reserved. Copying, reproducing or using the contents of this manual is not allowed without prior authorization from German Pool, violators will be prosecuted. www.germanpool.com EVC-173-M-20(3) P.64...
Need help?
Do you have a question about the EVC-173 and is the answer not in the manual?
Questions and answers