
Summary of Contents for ELRO 2300 Series
- Page 1 Operating Instructions Appliances Serie 2300 Datum 05.12.2019 Ersetzt Verfasser Verantwortlich Dok-Nr. X101923E Revision Seiten...
-
Page 2: Safety Instructions
General Setting up, connection and first operation of appliances may only be carried out by concessionary specialists and personnel authorized by ELRO. Installation and Initial Operating Instructions must be read beforehand. Careless handling may cause burning or scalding due to: ... - Page 3 The mobile appliance may not be moved when it is full. The condition of safety equipment must be checked by ELRO After Sales Service in regular intervals. Shallow float-frying : Never close the appliance lid in this operation mode! If the lid is closed unintentionally,...
-
Page 4: Manufacturer
Season food after roasting High-speed*) mode is ideally suited for preparation of meal components. The High-speed function increases production output. Manufacturer Wohlerstrasse 47 CH-5620 Bremgarten www.elro.ch ELRO After Sales Service +41 (0)56 648 94 11 cs@elro.ch X101923E... -
Page 5: Table Of Contents
4.1.10 Procedure Vital pressure cooking with/without High-speed ............13 4.1.10.1 Aborting a cooking process ......................13 Basic preparation modes in the ELRO QCS cookbook ............14 4.2.1 Create, Editing and saving cooking programs ................14 Chef to Chef ........................... 15 4.3.1... - Page 6 Cleaning ............................24 ELRO High Pressure Cleaning HPC ....................24 Long non-use ..........................24 Contact Information Settings..................25 Contact - SW and HW, Software key ..................... 25 Information – Appliance information ..................25 Settings – User code ........................26 6.3.1 Preheating ..........................
-
Page 7: Elro Appliances Serie 2300
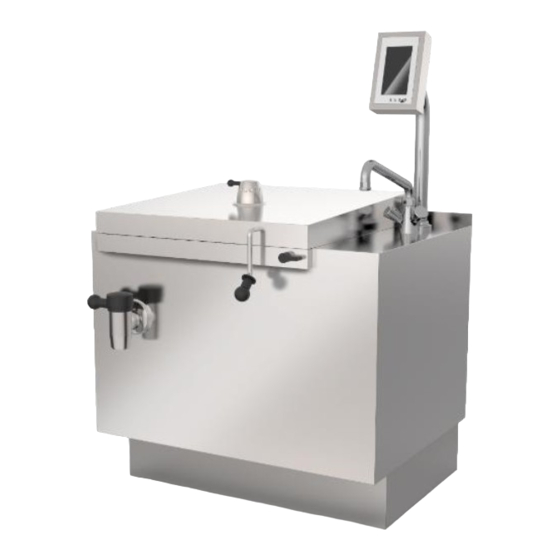
ELRO Appliances Serie 2300 Congratulations on your purchase of an ELRO series 2300 pressure bratt pan. We are sure that this appliance will satisfy all your requirements in your daily kitchen operations. Please read these operating instructions carefully. Options are designated with a *) in this instruction manual. -
Page 8: Appliances Overview
Appliances overview tilting mobile appliance 1. Appliance lid 10. ELRO drain valve, for tilting appliances 2. Pan/Cooking chamber 11. Engraved appliance number (5 digits) 3. Console 12. Control for tilting device 4. Base 13. Mixer tap / WDS Water Dosing System 5. -
Page 9: Elro Quick Cook Select Qcs
ELRO Quick Cook Select QCS ELRO QCS ensures easiest operation and reproducibility. You use the appliance with the help of coloured touch display control 90. You can prepare food using operation modes or cooking programs. Individualize the control system according to your needs and habits. -
Page 10: Working With The Qcs
4.1.1 Working with the QCS The philosophy of the QCS Touch is intuitive and the same in all operating modes. Depending on the equipment / options of the device, various functions are available. Set / Change Settings Heating up: -temperature / boiling level / time The bar shows the progress of the heating. -
Page 11: Temperature
4.1.2 Temperature Roasting Cooking Shallow float-frying Keypad Add default temperature Keypad, enter the required temperature Delete the input back to t he presetted temperatures Confirm / Apply If you want to add a temperature, press , enter the required temperature. If you want to delete or change a temperature in the preset temperatures, press the temperature to be changed with your finger for approx. -
Page 12: Start Time
4.1.6 Start time Enter the time at which the appliance must heat up. 4.1.7 WDS Water dosing system Cold water Warm water Mixed water Input via preset filling quantities Individual input Individual input Set the desired amount of water. Choose between cold, warm or mixed water. Start the water outlet If you want to stop the water outlet, press again. -
Page 13: Procedure Vital Pressure Cooking With/Without High-Speed
11. Close the ELRO multifunction valve 12. Start the process 13. Signal pin rises out of the ELRO multifunction valve as soon as pressure has built up in the cooking chamber 14. At the end of the pressure cooking process, lid cooling is activated. Pressure in the cooking chamber is released 15. -
Page 14: Basic Preparation Modes In The Elro Qcs Cookbook
Basic preparation modes in the ELRO QCS cookbook The ELRO QCS cookbook features easy access to basic preparation modes with predefined, process-proven values to guarantee optimal cooking results. These fixed programs are marked with a * before the cooking programs names. You can use these fixed cooking programs as a basis for your own cooking programs. To do so, modify the settings (temperature, time, options, phases, etc.) and save the cooking program under a... -
Page 15: Chef To Chef
Chef to Chef Please visit our homepage www.ELRO.ch. Under the heading Chef to Chef, you will find practical tips and information. 4.3.1 Slow overnight cooking Many products are very well suited for slow overnight cooking. This increases production performance, decreases energy costs, improves product quality, reduces weight loss and saves time! Boiled beef etc. -
Page 16: Standard Cooking Times
4.3.3 Standard cooking times It is possible to steam different vegetables together in the ELRO pressure bratt pan without taste transfer. Temperatures vary according to loading quantity and product (fresh or deep-frozen products). For deep- frozen products, the cooking times are reduced by 50%. -
Page 17: Production Capacity
4.3.4 Production capacity The maximum production output per hour Production capacity roasting (e.g. goulash, ragout, minced meat) Capacity up to max. filling mark [l] / 56 / 75 / 97 / 113 - 147 Max. volume [kg] per batch Max. production [volume per hour] Production capacity pressure The maximum production output per hour cooking... -
Page 18: Elro Drain Valve
Remove the valve piston (1) of the ELRO drain valve only when the appliance lid is open! The ELRO drain valve becomes hot during operation! Always use the foreseen handle when operating the drain valve. When draining the cooking chamber, hot liquids or escaping steam can cause scalding/burning. -
Page 19: Elro Multifunction Valve
Assemble the ELRO multifunction valve in the reverse order. 4.5.2 Cleaning Regularly check the proper functioning of the ELRO multifunction valve and if parts have been damaged. If this is the case, do not put the appliance under pressure and contact ELRO After Sales Service. -
Page 20: Elro Safety Lock System
Press down the handle (2) to 90°C with right hand Never put the appliance under pressure if the ELRO safety lock system is malfunctioning. Inform ELRO After Sales Services immediately. Never open the pressure lid with force. Danger of scalding! Before opening the appliance lid, make sure the cooking chamber is pressure free. -
Page 21: Autolift *)
Autolift 1 Frame holder 2 Frame holder clip 3 Basket holder 4 Basket holder clip 5 Frame holder cam 6 Basket holder cam 7 Slide guides 8 Basket holder edge Open the appliance lid. The Autolift is positioned slightly below the upper stopper. -
Page 22: Tilting *)
Danger of burning! Accidental or jerky tilting can cause food or fat to overflow. ELRO PMS, Power Management System With the ELRO PMS (Power Management System), you can reduce energy and installation costs. Three to twelve appliances can be connected to a PMS system. The appliances share the specified total connected load amongst each other. -
Page 23: Mobile Appliance
4.11 Mobile appliance 1 Appliance back side 2 Protection hood 3 Appliance cable clamp 4 Steering and locked castors 5 Mains supply 4.11.1 Initial operation Operate the appliance only on a level floor. When placed on a sloping floor, the appliance must be levelled out with an underlay. Position the appliance correctly. -
Page 24: Filter Control
Do not damage the seal during cleaning. Only use nonabrasive tools or cloths. Check the seal for tears and cuts. If the seal is damaged, it must be replaced by ELRO After Sales Service. After appliance cleaning, lubricate the dry, detergent-free seal with glycerine. -
Page 25: Contact Information Settings
Appliance configuration Contact - SW and HW, Software key choose choose Here you will find all information on ELRO customer service. In addition, you have the type of appliance and information about the installed hardware software version on the same screen. -
Page 26: Settings - User Code
Settings – User code choose choose Display control 90 has various user codes. Choose Depending on the user code, the user has various rights: • 2468 cooking programs • 2345 settings Enter the user code. Confirm entry. After confirmation, corresponding configuration menu for the user code is displayed. -
Page 27: Maintenance
(HPC) or a water jet. This also applies to additions or adaptations which were not authorized by ELRO. It is recommended to have your appliance checked for proper functioning every 4 years by ELRO After Sales Service. -
Page 28: Calibrate Water Dosing System Wds
7.3.1 Finding errors, error diagnosis and repair Write down the error message and conditions. This information is important for ELRO After Sales Service. If the steam valve blows off steam continuously during a pressure cooking process or if the maximum temperature is not reached, this could indicate a faulty setting of the boiling point at the appliance location.