Table of Contents
Advertisement
Available languages
Available languages
Quick Links
DVD RECORDER
BD-X201M
Thank you for purchasing this product. Before operating this unit,
please read the safety precaution carefully to ensure the best
possible performance.
For Customer Use :
Enter below the Serial No. which is located on the bottom of the
unit.
Retain this information for future reference.
Model No. BD-X201M
Serial No.
OPERATE
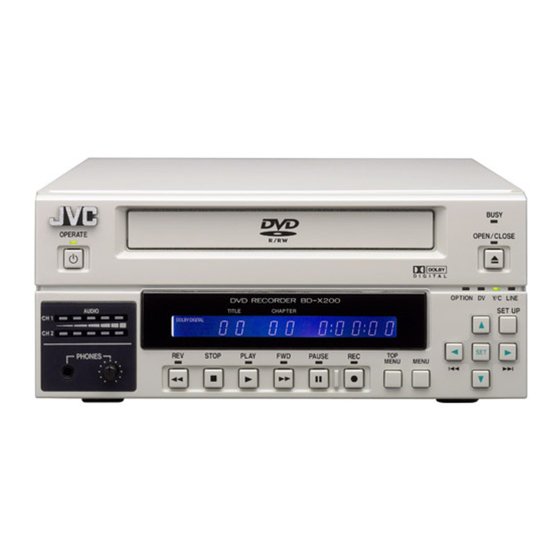
DVD RECORDER BD-X201M
AUDIO
TITLE
CH1
DOLBY DIGITAL
LPCM MPEG
CH2
PHONES
REV
STOP
PLAY
INSTRUCTIONS
OPTION DV Y/C LINE
CHAPTER
FWD
PAUSE
REC
TOP
MENU
MENU
(A)
BUSY
OPEN/CLOSE
SET UP
SET
LST0692-001A
Advertisement
Chapters
Table of Contents

Related Manuals for JVC BD-X201M


Summary of Contents for JVC BD-X201M
- Page 1 DVD RECORDER BD-X201M INSTRUCTIONS BUSY OPERATE OPEN/CLOSE OPTION DV Y/C LINE DVD RECORDER BD-X201M AUDIO SET UP TITLE CHAPTER DOLBY DIGITAL LPCM MPEG PHONES STOP PLAY PAUSE MENU MENU Thank you for purchasing this product. Before operating this unit, please read the safety precaution carefully to ensure the best possible performance.
- Page 2 IMPORTANT SAFEGUARDS Read all of these instructions. Save these instructions for later use. All warnings on the product and in the operating instructions should be adhered to. Unplug this appliance system from the wall outlet before cleaning. Do not use liquid cleaners or aerosol cleaners. Use a damp cloth for cleaning.
- Page 3 This device complies with Part 15 of the FCC Rules. Changes or modifications not approved by JVC could void the user’s authority The battery used in this DVD recorder must be replaced by a JVC to operate the equipment. authorized service dealer only.
- Page 4 Supplement This apparatus is designed for rack mounting or is used close to other apparatus. In order to keep the best performance and furthermore for electromagnetic compatibility we recommend to use cables not exceeding the following lengths: Port Cable Length AC IN Exclusive cable 2.5 meters...
-
Page 5: Safety Precautions
• AP/APG Category : No • Operation Mode : Continuous Changes or modifications not approved by JVC could void the user’s authority to operate the equipment. POWER SYSTEM Connection to the mains supply The use of ACCESSORY equipment not complying with the... -
Page 6: Supplement For Medical Use
Guidance or Manufacturer’s declaration - electromagnetic emissions The Model BD-X201M is intended for use in the electromagnetic environment specified below. The customer or the user of the Model BD-X201M should assure that it is used in such an environment. Emission Test... - Page 7 Guidance or Manufacturer’s declaration - electromagnetic immunity The Model BD-X201M is intended for use in the electromagnetic environment specified below. The customer or the user of the Model BD-X201M should assure that it is used in such an environment. IEC/EN 60601...
- Page 8 RF transmitters, an electromagnetic site survey should be considered. If the mea- sured field strength in the location in which the Model BD-X201M is used exceeds the applicable RF compliance level above, the Model BD-X201M should be observed to verify normal operation. If abnormal performance is observed, additional measures may be necessary, such as re-orienting or relocating the Model BD-X201M.
- Page 9 The Model BD-X201M is intended for use in the electromagnetic environment in which radiated RF disturbances are controlled. The customer or the user of the Model BD-X201M can help prevent electromagnetic interference by maintaining a minimum dis- tance between portable and mobile RF communications equipment (transmitters) and the Model BD-X201M as recommended below, according to the maximum output power of the communications equipment.
- Page 10 Beilage Dieses Gerät ist zum Gestelleinbau und zum Betreiben in unmittelbarer Nähe anderer Geräte und Vorrichtungen geeignet. Zur Erzielung einer optimalen Betriebsleistung und zur Einhaltung elektromagnetischer Schutzbestimmungen wird die Verwen- dung von Kabeln empfohlen, die jeweils die angegebene Länge nicht überschreiten sollten: Anschluss Kabeltyp Länge...
-
Page 11: Sicherheitsvorkehrungen
• AP/APG Kategorie : Nein heit. • Betriebsart : Kontinuierlich Änderungen oder Modifizierungen die nicht von JVC zuge- SPANNUNGSVERSORGUNG lassen sind können die Gebrauchsvollmacht um die Anlage Anschluss am Netz zu betreiben ungültig machen. Die Betriebsspannung für dieses Gerät beträgt AC 100 V bis 240 V, 50 Hz/60 Hz. -
Page 12: Ergänzungsbeilage Für Den Einsatz In Der Medizin
Richtlinie bzw. Erklärung des Herstellers - Elektromagnetische Emissionen Das Modell BD-X201M ist zur Verwendung in der unten angegebenen elektromagnetischen Umgebung vorgesehen. Der Kunde oder der Benutzer des Modells BD-X201M muss sicherstellen, dass es unter solchen Umgebungsbedingungen zum Einsatz kommt. Emissionsprüfung Konformität... - Page 13 Richtlinie bzw. Erklärung des Herstellers - Elektromagnetische Verträglichkeit Das Modell BD-X201M ist zur Verwendung in der unten angegebenen elektromagnetischen Umgebung vorgesehen. Der Kunde oder der Benutzer des Modells BD-X201M muss sicherstellen, dass es unter solchen Umgebungsbedingungen zum Einsatz kommt. Verträglichkeitssprü- IEC/EN 60601 Konformitätsstufe...
- Page 14 Richtlinie bzw. Erklärung des Herstellers - Elektromagnetischen Verträglichkeit Das Modell BD-X201M ist zur Verwendung in der unten angegebenen elektromagnetischen Umgebung vorgesehen. Der Kunde oder der Benutzer des Modells BD-X201M muss sicherstellen, dass es unter solchen Umgebungsbedingungen zum Einsatz kommt. Verträglichkeitsprü- IEC/EN 60601 Konformitätsstufe...
- Page 15 Das Modell BD-X201M ist zur Verwendung in einer elektromagnetischen Umgebung vorgesehen, in der abgestrahlte HF-Störun- gen unter Kontrolle sind. Der Kunde oder der Benutzer des Modells BD-X201M kann mit dazu beitragen, dass elektromagneti- sche Störungen vermieden werden. Dazu muss er die unten empfohlene Mindestentfernung zwischen den tragbaren (mobilen) HF-Datenübertragungsgeräten (Sendern) und dem Modell BD-X201M einhalten, die von der maximalen Nennleistung des...
-
Page 16: Table Of Contents
Thank you for purchasing Trademarks & Copyrights this DVD Recorder. • , Dolby and the Double “D” symbols are trade- marks of Dolby Laboratories. • The copying, broadcasting, screening, or rental of copy- Main Features righted material without the authorization of the copy- right holder is prohibited by law. - Page 17 Contents Preparation Connections ..................35 Power Connections .
-
Page 18: Introduction
Introduction Overview of Functions Video and audio signals from this DVD recorder’s input terminals can be recorded to DVD-R/DVD-RW (video mode only) or DVD+R/DVD+RW (compliance with video mode). (X Page 42) The types of signals that can be used are as follows. Video: Composite video, YC separate, or DV signals (including audio) Audio: Analog audio or DV signals (including video) A wide range of recording methods are supported. -
Page 19: Precautions For Dvd Recorder Use
• Do not place heavy objects such as a monitor on top of this DVD recorder was purchased or your JVC Authorized the DVD recorder. dealer. -
Page 20: Precautions For Disc Usage
Introduction Precautions for Disc Usage Care of Discs to Ensure High-Quality Playback Fingerprints, dust, or any other similar contamination of the surface of a disc can lead to distortion in the playback of recorded video and audio. For this reason, it is good practice to wipe each disc with a soft cloth before use. Looking After Discs Handling Discs •... -
Page 21: Details Regarding Discs
Once a disc has been finalized, it can be used as a DVD-R : Taiyo Yuden (Mitsubishi Chemical) 8× standard DVD and its recorded audio and video can be DVD-RW : JVC VD-W120HP/VD-W120HR (HG Series) played on this and other DVD players. DVD+R : Taiyo Yuden (Mitsubishi Chemical) 8×... - Page 22 Introduction Details Regarding Discs (continued) DVD Data Configuration Region Codes Generally speaking, the content recorded on a DVD is sepa- One of six numbers referred to as “region codes” is assigned rated into large units referred to as “titles”. A unique number to DVD content to control the global regions in which this con- called a “title number”...
-
Page 23: Component Names & Functions
Component Names & Functions Front Panel 1OPERATE button and indicator 4OPEN/CLOSE button and indicator • This button is used to make it ready for use. Press again This button is used to open and close the disc tray. to disable operation (Operate OFF mode). In addition, the OPEN/CLOSE indicator is lit up while the •... - Page 24 Component Names & Functions Front Panel (continued) 9 0 a b c 7Video input indicators 0STOP button • This button has the following effect when pressed in OPTION indicator Recording or Recording Pause mode. This indicator is lit up or flashes when INPUT SELECT If EDIT MENU from the DVD MENU screen is set to DIS- from the INPUT SELECT MENU screen has been set to ABLE, the DVD recorder stops recording (i.e., it per-...
- Page 25 Component Names & Functions dREC button and indicator eTOP MENU button • If this button is pressed together with the PLAY button in If this button is pressed while the DVD recorder is in a play- Stop mode, recording will be started. back condition, the current DVD’s top menu or title list will •...
- Page 26 Component Names & Functions Front Panel (continued) DENCE and either the g or h button is pressed h[g] button • This button is used to select menu items or setting val- while this button is being held, the audio recording ues when the Setup Menu is displayed.
-
Page 27: Rear Panel
Component Names & Functions Rear Panel 3 45 1VIDEO LINE IN terminal (BNC) 4VIDEO Y/C OUT terminal (4-pin) This terminal allows composite video signals to be input to For output of YC separate video signals. the DVD recorder. • Information that is the same as that of the VIDEO LINE In order to select these signals for input, set INPUT OUT terminal is being output. - Page 28 Component Names & Functions Rear Panel (continued) 0DV IN/OUT terminal This I/O terminal for digital signals conforms with IEEE1394 specifications. • In order to select this terminal’s audio and video signals for input, set INPUT SELECT from the INPUT SELECT MENU screen to DV.
-
Page 29: Lcd Display And On-Screen Content
LCD Display and On-Screen Content LCD Display The following information and data is presented on the DVD recorder’s LCD display. Description Encoding format for audio recordings (LPCM / DOLBY DIGITAL / MPEG) …… MPEG can only be selected when in the PAL mode. Recording mode : The encoding format set using AUDIO ENCODE from the RECORDER MENU (1/2) screen is displayed. - Page 30 LCD Display and On-Screen Content LCD Display (continued) Description Indication of the current operating mode PLEASE WAIT : The DVD recorder is starting up. OPERATE OFF : The DVD recorder is preparing to shut down. NO DISC : The DVD recorder currently contains no disc. LOADING : A disc is being loaded into the DVD recorder.
-
Page 31: On-Screen Content
LCD Display and On-Screen Content On-Screen Content In addition to E-E and playback screens, the monitor connected to the DVD recorder’s VIDEO LINE OUT terminal can display the following. • Status messages • Event messages • Alarm messages • The Setup Menu (X Page 73) Status Messages The DVD recorder’s setting condition and operation status are indicated by status messages, and these messages are displayed on E-E or playback screens. - Page 32 LCD Display and On-Screen Content On-Screen Content (continued) Item Description Title number / Use TITLE/CHAPTER/INDEX from the DISPLAY MENU screen to indicate whether Chapter number / or not this is to be displayed. Index number / : No information is displayed Counter TITLE+CHAPTER : Title No., chapter No.
-
Page 33: Event Messages
LCD Display and On-Screen Content Event Messages Event messages are displayed on the DVD recorder’s LCD display and on the monitor when incorrect operations are attempted. These messages will remain on-screen for approximately 3 seconds. Monitor screen 000 min LCD display Event messages: Displayed when... -
Page 34: Alarm Messages
If the alarm messages continue to appear after replacing the disc, the problem may lie within the DVD recorder, and in such a case, you are recommended to contact either the store where this DVD recorder was purchased or your JVC authorized dealer. -
Page 35: Connections
Note 5: The standard input level for audio signals input via the AUDIO IN terminals (i.e., +4 dB or –8 dB) can be selected using the AUDIO INPUT LEVEL switch on the rear panel. Note 6: Use the following cable as the DV cable. VC-VDV204 (2m, 4P-4P) from JVC VC-VDV206 (2m, 4P-6P) from JVC... -
Page 36: Power Connections
Preparation Power Connections Connect the Power cord (included) to the DVD recorder. Connect the Power cord (included) to the DVD recorder’s AC IN terminal. Connect the power cord (included) into an electrical outlet. MAIN POWER switch Set the MAIN POWER switch to ON. •... -
Page 37: Inserting & Removing Discs
Preparation Inserting & Removing Discs Disc tray OPEN/CLOSE indicator OPEN/CLOSE button Inserting a Disc Removing a Disc Press the OPERATE button to activate Operate On Stop the DVD recorder. mode. Press the OPEN/CLOSE button. Press the OPEN/CLOSE button. • The disc tray will open automatically. •... -
Page 38: Using A Keyboard
Preparation Using a Keyboard Menu settings, the title and chapter settings, and other DVD recorder settings are carried out from setting screens displayed on the TV or monitor. Although the DVD recorder’s buttons are used in setting and operation screens, a keyboard can be used as an alternative. Connections Connect a USB keyboard to the USB terminal on the back of the DVD recorder. -
Page 39: Setting & Displaying The Date & Time
Preparation Setting & Displaying the Date & Time Use the following procedure to set the internal clock’s date and time. Even when the DVD recorder’s power is turned off, the clock’s date and time settings are stored using the internal battery. Note that these settings are used to write the current date and time to a disc being recorded. - Page 40 Preparation Setting & Displaying the Date & Time (continued) Displaying the Date and Time Use the DISPLAY MENU screen to indicate whether or not the date and time are DISPLAY MENU screen to be displayed on-screen and to set a display style. (X Page 87 for details regarding setting methods.) DISPLAY MENU DISPLAY MENU Screen Makeup...
-
Page 41: Settings & Controls For Recording
Settings & Controls for Recording DVD Recording DVD recording is carried out using the following procedure. Pre-Recording Settings Preparation of the DVD-R/ • Insert a new DVD-R/DVD+R or DVD-RW/DVD+RW (video mode) or alternatively, a similar DVD+R or DVD-RW/ disc that has been recorded on using the DVD recorder. DVD+RW (video mode only) •... -
Page 42: Preparing A Disc For Recording
Settings & Controls for Recording Preparing a Disc for Recording This DVD recorder is capable of recording to DVD-R/DVD-RW (in video mode) and DVD+R/DVD+RW. DVD-R : Only discs that conform with DVD-R Standard 2.0 (video mode) can be used. DVD-RW : Discs of Version 1.1 or later can be used. - Page 43 Settings & Controls for Recording Erasing All Data From a DVD-RW/DVD+RW Disc Insert the DVD-RW/DVD+RW from which data is to be erased. DISC menu screen Press the SET UP button to display the Setup Menu. DISC MENU Use the N and M buttons to select DISC item and then press the SET button.
-
Page 44: Pre-Recording Settings
Settings & Controls for Recording Pre-Recording Settings Recorder switch settings • RECORDER MENU screen Use the AUDIO INPUT LEVEL switch on the DVD recorder’s The RECORDER MENU screen contains two different rear panel to select the reference input level for analog audio pages of parameters. -
Page 45: Specifying The Disc Status Created When The Disc Was Finalized
Settings & Controls for Recording Specifying the Disc Status Created when the Disc was Finalized It is possible to specify the action when a finalized disc is inserted into a DVD player, or the operation when playback of a title is finished. -
Page 46: Setting The Encoding Format For Audio & Video
Settings & Controls for Recording Setting the Encoding Format for Audio & Video The setting of encoding formats for audio and video is carried out from the RECORDER MENU (1/2) screen as described below. Setting Encoding Formats Stop the DVD recorder. Open the RECORDER MENU (1/2) screen. -
Page 47: Adjusting Of Audio Recording Levels
Settings & Controls for Recording Adjusting of Audio Recording Levels This DVD recorder’s audio recording levels can be adjusted using two different methods, and AUDIO REC VOLUME MODE from the RECORDER MENU (2/2) screen indicates the method to be used. In addition, it is also possible to return the audio recording levels to their default settings (i.e., unity gain). -
Page 48: Checking The Video Input
Settings & Controls for Recording Checking the Video Input Use the monitor connected to the VIDEO LINE OUT or Y/C OUT terminal to confirm that the input video signal is as required. The following procedure will allow you to monitor the quality at which the video will be recorded to a DVD. VIDEO LINE OUT terminal Monitor screen Signal Connections... -
Page 49: Title & Chapter Menus
Settings & Controls for Recording Title & Chapter Menus This DVD recorder can automatically create title and chapter menus in response to recording operations and can save these to the disc being recorded. When the disc is subsequently played, these title and chapter menus can be used to access specific sections of stored video and audio. -
Page 50: Selecting Styles For Title & Chapter Menu
Settings & Controls for Recording Selecting Styles for Title & Chapter Menu Each recorded DVD contains title and chapter menus that provide information relating to its titles and chapters. Whenever recording is carried out, title numbers, chapter numbers, and thumbnails are automatically generated in order to create the title and chapter menus. -
Page 51: Changing Styles For Title & Chapter Menus
Settings & Controls for Recording Changing Styles for Title & Chapter Menus The DVD MENU screen can be used to change the styles used for displaying title and chapter menus. One of eight different types of style can be selected for each of the title and chapter menus. This DVD recorder can also store a total of six different display patterns for title and chapter menus. -
Page 52: Recording Sequence
Recording Recording Sequence Use the following sequence as a reference when performing recording. • Input settings: X Page 77. • Video and audio quality settings: X Page 46. • Navigation settings (i.e., DISC IN ACTION , TITLE END and DVD MENU TYPE): X Page 82. REC button + PLAY button Index 1 *4 Start of recording... -
Page 53: Recording With The Front Panel
Recording Recording with the Front Panel On a DVD, the section of video recorded between the start of recording and pressing of the STOP button to end recording is stored as a single title, and a unique title number is assigned to each of these sections. A single disc can contain up to 99 different titles. -
Page 54: Inserting Chapter Marks Manually Or Automatically
Recording Recording with the Front Panel (continued) End recording and remove the disc. Note Depending on how the disc will be used, one of two different procedures is When recording is stopped or a title is implemented at this time. closed, the “PLEASE WAIT”... -
Page 55: Erasing The Last Title
Recording Erasing the Last Title Only the last title of an unfinalized disc that is recorded using this unit will be erased. Insert the DVD-R/DVD-RW/DVD+R/DVD+RW. DISC MENU screen Press the SET UP button to display the Setup Menu. Use the h and g buttons to select DISC item and then press the SET DISC MENU button. -
Page 56: Finalizing (For Playback On Other Dvd Players)
Recording Finalizing (for Playback on Other DVD Players) Finalize a disc recorded using this DVD recorder as described below in order to ensure that it can be played on other DVD play- ers. In the case of DVD-RWs/DVD+RWs, playback will be possible on DVD players that support video mode. After finalizing a disc;... -
Page 57: Title & Chapter Menu Settings
Title & Chapter Menu Settings Changing Chapter Menus (THUMBNAIL EDIT Screen) This DVD recorder can automatically create title and chapter menus as recording operations are started and stopped. Title and chapter menus are created using the following. • Chapter thumbnails : The frames at which chapter marks have been inserted are used as thumbnails. -
Page 58: Changing & Naming Thumbnails For Chapter Menus
Title & Chapter Menu Settings Changing & Naming Thumbnails for Chapter Menus The modification of chapter menu thumbnails and the entry of names and comments are carried out as described below using the THUMBNAIL EDIT screen. Changing Thumbnails For example, let’s change the thumbnail for the second chapter. THUMBNAIL EDIT screen Select the second chapter and press the SET button. - Page 59 Title & Chapter Menu Settings Entering Names and Comments for Chapter Menus Use the following procedure to apply names to the thumbnails used in chapter THUMBNAIL EDIT menus, and also to add comments to be displayed on a chapter menu screen. TITLE CLOSE 1 - 6 Names and comments are entered using a keyboard.
-
Page 60: Changing & Checking Chapter Menu Styles
Title & Chapter Menu Settings Changing & Checking Chapter Menu Styles Although display styles for chapter menus are created using settings from the STYLE item of the DVD MENU screen as described above, the following procedure can be used to modify these styles at the end of title recording. In addition, it will also be possible at this time to confirm that chapter menus are as required. - Page 61 Title & Chapter Menu Settings Checking the Chapter Menu Screen Use the following procedure to see how the chapter menu looks when the selected display style is used. Select CHAPTER MENU from the THUMBNAIL EDIT START screen and THUMBNAIL EDIT START screen press the SET button.
-
Page 62: Ending The Editing Of Chapter Menus
Title & Chapter Menu Settings Ending the Editing of Chapter Menus Once all of the necessary changes and checks have been made using the THUMBNAIL EDIT screen, title closing must be carried out. Please ensure that title closing is performed as the last stage of chapter menu editing. Even if the chapter menu is to be left unchanged, title closing must be carried out to leave the THUMBNAIL EDIT screen. -
Page 63: Changing & Checking Title Menu Styles & Names
Title & Chapter Menu Settings Changing & Checking Title Menu Styles & Names If EDIT MENU from the DVD MENU screen is set to ENABLE, the TITLE MENU EDIT screen will be displayed upon disc finaliz- ing. Using this screen, it will be possible to change the title menu’s display style, to enter title names, and to confirm that the title and chapter menus are as required. - Page 64 Title & Chapter Menu Settings Changing & Checking Title Menu Styles & Names (continued) Checking the Title Menu Screen Select TITLE MENU PREVIEW from the TITLE MENU EDIT screen and TITLE MENU EDIT screen press the SET button. • The TITLE MENU EDIT screen will appear. TITLE MENU Confirm that the other pages are as required.
- Page 65 Title & Chapter Menu Settings Changing Names for the Title Menu Each title will be automatically assigned with a recording date/time and ENCODE TITLE MENU EDIT screen QUALITY. Use the following procedure to enter manually names for titles in the title menu. TITLE MENU FINALIZE Names and comments are entered using a keyboard.
- Page 66 Title & Chapter Menu Settings Changing & Checking Title Menu Styles & Names (continued) Finalizing Discs Select FINALIZE from the TITLE MENU EDIT screen and press the SET TITLE MENU EDIT screen button. • A confirmation window will appear. TITLE MENU Select YES and then press the SET button.
-
Page 67: Playback
Playback Playing Back a Disc It is possible to playback a disc recorded on this DVD recorder. Playback operation may vary according to whether finalization has been performed. Playing Back a Disc before Finalizing Operation Insert the disc. Play the disc. Press the PLAY button. - Page 68 Playback Playing Back a Disc (continued) Insert a disc. The DVD recorder enters Stop mode. Play back. There are two playback modes. Press the TOP MENU button. Press the PLAY button. • The title menu (TOP MENU) will appear. The first title is played back. 1 Select the number of the title to be played.
-
Page 69: Selecting Playback Images From The Title List
07 : 2006/05/17 10:00 AAAAAAAAAAAAAAAAAAAAAAA When no ID was entered Title Number: Recording Year/Month/Day + Record- 08 : 2006/05/17 12:36 JVC-Victor ing End Time + Recording Mode (Example: Title 06 09 : 2006/05/17 13:50 BBB in the list on the right) -
Page 70: Fast & Slow Playback
Playback Fast & Slow Playback REV button FWD button Fast-Forward & Fast-Reverse Play Slow-Forward & Slow-Reverse Play Fast-forwarding Slow-forwarding • Press the FWD button during playback or fast-reverse • Press the FWD button in Still mode or during slow- play to start fast-forward play. reverse play to start slow-forward play. -
Page 71: Index Writing And Index Search
Playback Index Writing and Index Search Indexes are used to locate the beginning of specific positions when in the Playback mode. (Index search) Viewing of index information (index No. and counter data) and index search can be performed on the INDEX MANAGER screen. Writing Index Chapter points registered during the Recording mode are used as index values. - Page 72 Playback Index Writing and Index Search (continued) Selecting an index to search or erase. Upon starting up the INDEX MANAGER screen, the title and index of the point for which its screen is called up will be selected. When selecting a title No. 1Press the cursor buttons (r/q/x/y) on the main unit to highlight the title selection buttons (r/q/B/A) on the INDEX MANAGER screen.
-
Page 73: Setup Menu
Setup Menu Setting the Setup Menu Settings made in the setup menus are stored in this DVD recorder’s internal memory and will be retained even when the power is turned off. In addition to the buttons on the front panel, a keyboard can also be used to perform operations on these menus. The following section, however, will describe operations performed using the front panel buttons. -
Page 74: Setup Menu Configuration
Setup Menu Setup Menu Configuration The Setup Menu screen is displayed on both the monitor and LCD display. As shown below, this screen is used to access this DVD. DISC MENU screen (X Page 76) INPUT SELECT MENU screen (X Page 77) DISC MENU MENU INPUT SELECT MENU... -
Page 75: Setup Menus
Setup Menu Setup Menus The following table identifies and describes the parameters that may be set using the Setup Menus. Top half : Appearance on monitor screen Bottom half : Appearance on LCD display Option Description DISC This button opens a menu that allows settings to be made for finalizing and other similar disc processes. dISC INPUT SELECT This button opens a menu that allows input audio and video signals to be selected. -
Page 76: Disc Menu Screen
Setup Menu DISC MENU Screen The following table identifies and describes the parameters that may be set using the DISC MENU screen. Top half : Appearance on monitor screen Bottom half : Appearance on LCD display : Default setting Parameter Possible settings Description FINALIZE... -
Page 77: Input Select Menu Screen
Setup Menu INPUT SELECT MENU Screen The following table identifies and describes the parameters that may be set using the INPUT SELECT MENU screen. Top half : Appearance on monitor screen Bottom half : Appearance on LCD display : Default setting Parameter Possible settings Description... - Page 78 Setup Menu SYSTEM MENU Screen (continued) Parameter Possible settings Description PLAYBACK [DVD] For selecting whether to set DVD playback actions and display of a title’s elapsed time /index number to the VTR or DVD mode. Actions via RS-232C control will vary accordingly with this &232C TYPE setting.
- Page 79 Setup Menu SYSTEM MENU (2/2) screen Parameter Possible settings Description AC IN MODE [POWER ON] For selecting whether to start up in the Operate ON or OFF mode when the MAIN POWER switch at the rear of this unit is turned ON. POWER OFF POWER ON : Start up in Operate ON mode [oN]...
- Page 80 Setup Menu SYSTEM MENU Screen (continued) SYSTEM MENU (2/2) Screen (continued) Parameter Possible settings Description EE OUTPUT THROUGH This parameter is used to select whether to output E-E images from the VIDEO OUT terminal when in Stop or Recording mode. [MUTING] THROUGH : Outputs E-E images.
-
Page 81: Dvd Menu Screen
Setup Menu DVD MENU Screen The following table identifies and describes the parameters that may be set using the DVD MENU screen. Top half : Appearance on monitor screen Bottom half : Appearance on LCD display : Default setting Parameter Possible settings Description EDIT MENU... - Page 82 Setup Menu DVD MENU Screen (continued) Parameter Possible settings Description DVD MENU TYPE [TOP+MENU] Select whether to create a TOP MENU or MENU in a completed disc (finalized disc). This is set before inserting a disc or when a blank disc is inserted. TOP+MENU : When finalizing a TOP MENU is created.
-
Page 83: Recorder Menu Screen
Setup Menu RECORDER MENU Screen The following table identifies and describes the parameters that may be set using the RECORDER screen. Top half : Appearance on monitor screen Bottom half : Appearance on LCD display : Default setting RECORDER MENU (1/2) screen Parameter Possible settings Description... - Page 84 Setup Menu RECORDER MENU Screen (continued) RECORDER MENU (2/2) screen Parameter Possible settings Description [1,2ch r 1,2ch] AUDIO CHANNEL This parameter is to be set when recording an audio signal from the DV IN/OUT terminal. 3,4ch r 1,2ch Specifically, it indicates whether the signals from channels 1 and 2 or from channels 3 and 4 are (DV) to be recorded.
-
Page 85: Remote Menu Screen
Setup Menu REMOTE MENU Screen The following table identifies and describes the parameters that may be set using the REMOTE MENU screen. Top half : Appearance on monitor screen Bottom half : Appearance on LCD display : Default setting REMOTE MENU (1/2) screen Parameter Possible settings Description... - Page 86 Setup Menu REMOTE MENU Screen (continued) REMOTE MENU (2/2) screen Parameter Possible settings Description 232C FF/REW [SEARCH] This parameter is used to select the operation to perform when an RS-232C FF/REW command is received. TYPE FF/REW SEARCH : A search operation is performed. TITLE SKIP FF/REW : Fast-forwards or rewinds only the counter indication.
-
Page 87: Display Menu Screen
Setup Menu DISPLAY MENU Screen The following table identifies and describes the parameters that may be set using the DISPLAY screen. Top half : Appearance on monitor screen Bottom half : Appearance on LCD display : Default setting Parameter Possible settings Description DISPLAY [OFF]... -
Page 88: Clock Adjust Menu Screen
Setup Menu CLOCK ADJUST MENU Screen The following table identifies and describes the parameters that may be set using the CLOCK ADJUST MENU screen. Top half : Appearance on monitor screen Bottom half : Appearance on LCD display : Default setting Parameter Possible settings Description... -
Page 89: Others
Others Changing the Signal System (NTSC / PAL) This DVD recorder supports both the NTSC and PAL signal systems. The signal system can be altered at the TV TYPE item on the SYSTEM(2/2) menu screen, or via the following procedure. The signal system can be changed even when the monitor is not connected. -
Page 90: Specifications
: LPCM / DOLBY DIGITAL / MPEG (PAL only) Instructions ................×1 Quantization : 16 bit Sampling rate : 48 kHz External Dimensions (Unit: mm) BUSY OPERATE OPEN/CLOSE OPTION DV Y/C LINE DVD RECORDER BD-X201M AUDIO SET UP TITLE CHAPTER DOLBY DIGITAL LPCM MPEG PHONES STOP PLAY PAUSE... - Page 91 DVDレコーダー BD-X201M 型 取扱説明書 名 お買い上げ有難うございます。 ご使用の前にこの「取扱説明書」をよくお読みの上、正しく お使いください。...
- Page 92 このたびは 商標と著作権 DVDレコーダー • 、Dolby、ドルビーおよびダブル D 記号は、ドル ビーラボラトリーズの商標です。 BD-X201Mをお買い上げいただき • ディスクを著作権者に無断で複製したり、放送、上映、 レンタルすることは、法律により禁止されています。 ありがとうございます。 著作権保護技術について 主な特長 本機は、著作権保護技術を採用しており、マクロビジョン • DVD-R/DVD-RW (ビデオモード) 、 およびDVD+R/DVD+RW 社及びその他の著作権者が保有する米国特許及びその他 の知的財産権によって保護されています。この著作権保護 (ビデオモード準拠)ディスクに記録します。 • 映像はコンポジットビデオ、YCセパレートまたはDV信号 技術の使用は、マクロビジョン社の許可が必要で、また、 マクロビジョン社の特別な許可がない限り家庭用及びそ を入力でき、音声はアナログまたは DV 信号を入力できま の他の一部の鑑賞用の使用に制限されています。分解した す。 り、改造することも禁じられています。 • タイトル/チャプターメニューの自動作成や任意作成機 能を備えています。 • NTSC/PALの切り換え可能。 著作権について...
- Page 93 目次 記録時の設定・調整 DVD記録について ..................27 記録用ディスクを準備する...
-
Page 94: 本機でできることの概要
はじめに 本機でできることの概要 本機入力端子からの映像・音声信号をDVD-R、DVD-RW(ビデオモード)、DVD+R、DVD+RW(ビデオモード準拠)ディ スクに記録します。 (X 28 ページ) 次のいずれかの信号を記録します。 映像:コンポジットビデオ信号、YCセパレート信号、DV信号(音声含む) 音声:アナログ音声信号、DV信号(映像含む) いくつかの記録操作方法を備えています。状況に応じて、使い分けできます。 • 本体操作ボタン(REC, PAUSE, STOPボタン)による記録操作(X 39 ページ) • フットスイッチ端子に接続した外部スイッチで記録操作ができます。 (X 40 ページ) タイトルメニュー/チャプターメニューの自動作成および任意作成機能を備えています。 (X 43 ページ) タイトルメニュー/チャプターメニューの表示パターンとして、5種類の表示パターンを準備しています。表示パターン毎に タイトル/チャプターメニューの1画面に表示するサムネイルの配置(個数、位置、大きさ)や背景画が異なります。 DVD ディスクに記録する際、表示スタイルを選択することにより、自動的に選択したパターンでタイトルメニュー/チャプ ターメニューが作成されます。 8種類の表示スタイルは、DVD MENU画面でサムネイル表示スタイルや背景画を任意に変えることができます。 また、サムネイルエディット画面やCHAPTER MENU EDIT 画面でチャプターメニューの表示スタイルやサムネイル画像の変 更、チャプターの名称や注釈の入力ができます。名称や注釈は、USB端子に接続したキーボードで入力します。 TITLE MENU EDIT画面でタイトルメニューの表示スタイルの変更やタイトル名の入力ができます。 本機で作成したディスクの再生ができます。... -
Page 95: 本機使用上のご注意
はじめに 本機使用上のご注意 保管および使用場所 つゆ付きにご注意 次の場所での使用や保管は避けてください。 つゆ付きとは • 許容動作温度(5℃~35℃)範囲外の極端に暑いところ よく冷えたビールをコップにつぐと、コップのまわりに や寒いところ 水滴が付きます。この状態を「つゆ付き」 (または結露) • 許容動作湿度(20%~ 80%RH)範囲外の湿気の多いと といいます。 ころや乾燥したところ • ほこりや砂の多いところ つゆ付きが発生すると • 調理台の近くなど油煙や湯気の当る場所 本機内部のレンズに水滴が付き、正常に動作しないこと • 振動の激しいところや不安定なところ があります。 • つゆ付き(結露)の発生しやすいところ 次のような時に、つゆ付きになりやすいので、ご注意く • 変圧器やモーターなど強い磁気の発生するところ ださい。 • トランシーバーや携帯電話など電波を発生する機器の • 本機を寒いところから暖かい部屋に移動した時 近く • 急に部屋を暖房した時 • 放射線、X 線および腐食性ガスの発生する場所には設置 •... -
Page 96: ディスク使用上のご注意
はじめに ディスク使用上のご注意 きれいな画面でご覧いただくために(ディスクのお手入れ) ディスクに付いた指紋やほこりなどの汚れは、 映像や音声の乱れの原因になります。 柔らかい布などでいつもきれいにしてお きましょう。 ディスクのお手入れ ディスクの取り扱いかた • 柔らかい布でディスクの中心から外側に向かって軽く • ディスクを取り出す • ディスクをケースにしまう 拭きます。 • 汚れがひどいときは、少し水で湿らせた布で軽く拭きと り乾いた布で仕上げてください。 • 正しいディスクの持ち方 • シンナーやベンジン、従来のアナログレコード用クリー 記録/再生面に手を触れないように ナー、静電気防止用スプレーなどは絶対に使用しないで 持ってください。 くだい。ディスクを傷める原因となる場合があります。 ディスクの取扱上のお願い ディスクの保管は シンナーやベンジン、アルコール、レコードクリーナーで 次のような所はさけて保管してください。 • 湿気やほこりの多いところ、カビの発生しやすいところ 拭かない。 • 直射日光が当たるところや暖房器具の近く プロテクター(傷つき防止用)などは使わない。 • 夏の自動車の車内 シールや紙などのラベルを貼らない。 落としたり衝撃を与えないでください。... -
Page 97: ディスクについて
はじめに ディスクについて 録画/再生できるディスク ファイナライズについて DVD-R、DVD-RW、DVD+RおよびDVD+RWは、ファイナラ 本機で録画と再生できるディスクと表示マーク(ロゴ)は、 次のディスクです。 イズを行うと DVD ビデオディスクとして通常のDVD プレー ヤーで再生できます。 (X 42 ページ) 12 cm: 4.7 GB DVD-Rディスク ファイナライズを実行する前では、未記録部分への記録や General Ver. 2.0 タイトルの表示スタイル変更ができます。 (ビデオモード) • ファイナライズを実行する前でも、記録済み部分への上 書きはできません。また、部分的な消去はできません。 12 cm: 4.7 GB DVD-RWディスク • 他機で記録されたディスクは、ファイナライズを実行し Ver. 1.1以上 ていなくても、本機で記録ができません。 (ビデオモード) DVD+R 12 cm: 4.7 GB ファイナライズを実行すると、記録した映像や音声がDVD... - Page 98 はじめに ディスクについて(つづき) ディスクのデータ構造 リ-ジョンコードについて DVDビデオには、世界を6つの区域に分けたリ-ジョンコー 一般的にDVD ビデオはタイトルと呼ばれる大きな単位で構 成されています。それぞれのタイトルには番号(タイトル番 ドと呼ばれる、 再生可能な地域番号が割り当てられています。 このコード番号が再生する DVD 機器のリ-ジョンコードと 号)が付いていて、希望のタイトル番号が選べるようになっ ています。また、タイトルはさらにチャプター(章)という 一致しないとDVDビデオは再生できません。 • 本機は、リージョンコードをALLの設定で記録します。 小さな単位で構成されています。それぞれのチャプターには • リージョンコードを設定したディスクの再生はできませ 番号(チャプター番号)が付いていて希望のチャプターが選 べるようになっています。 ん。 ディスクに記録すると、 1回の記録が1タイトルになります。 1回の記録とは、STOP ボタンを押して記録モードを終了す ることです。 (タイトルクローズともいいます。 )記録の途中 画面サイズについて でRECボタンを押すと、お好みの画面にチャプターマークを 本機は、ワイドテレビ(アスペクト比16:9の横長画面)用の 付けて区切ることができます。 映像を記録することができます。 記録の途中でPAUSEボタンを押して一時停止にした時、 自動 アスペクト比4:3のノーマル映像、スクィーズ映像(画面の左 的にチャプターマークを付けることができます。 ( メニューで 右を圧縮した映像)...
-
Page 99: フロントパネル
各部の名称と働き フロントパネル 1[OPERATE]ボタン/表示灯 4[OPEN/CLOSE]ボタン/表示灯 • このボタンを押すと、本機は操作可能な状態になりま ディスクトレイを開閉するためのボタンです。 す。 (オペレートONモード)もう一度押すと、操作不可 ディスクトレイがオープン動作中や開いている時、表示灯 状態になります。 (オペレートOFFモード) が点灯します。 • 表示灯は本機の状態により、以下のように点灯します。 • このボタンを 3 秒以上押し続けると、ディスクをファイ : オペレートONモード 緑色で点灯 ナライズした後、イジェクトします。 オレンジ色で点灯 : オペレートOFFモード メモ メモ 記録または記録ポーズモード時、OPEN/CLOSEボタンの操 • 記録または記録ポーズモード時、 OPERATEボタンの操作 作は受け付けません。また、ファイナライズ、ディスク消 は受け付けません。また、ファイナライズおよびディス 去時、OPEN/CLOSEボタンは無効となります。 ク消去時もOPERATEボタンは無効となります。 5オーディオレベルインジケーター • OPERATEボタンで電源を切っても、 本機には微少な電流 CH1およびCH2チャンネルの音声レベルを表示します。... - Page 100 各部の名称と働き フロントパネル(つづき) 9 0 a b c 7映像入力信号表示灯 0[STOP]ボタン • 記録または記録ポーズモード時、このボタンを押すと以 [OPTION]表示灯 下の動作を行います。 INPUT SELECTメニュー画面のINPUT SELECT項目が DVD MENU 画面の EDIT MENU 項目がDISABLE に設定 OPTIONに設定されている場合、 点灯または点滅します。 されている場合は、 記録を停止します。 (タイトルクロー (本機は、設定できません。 ) ズ) [DV]表示灯 DVD MENU画面のEDIT MENU項目がENABLEに設定さ INPUT SELECTメニュー画面のINPUT SELECT項目がDV れている場合は、記録を停止し、サムネイルエディット に設定されている場合、点灯または点滅します。入力信号 画面を表示します。チャプターメニューを変更できま...
- Page 101 各部の名称と働き d[REC]ボタン/表示灯 f[MENU]ボタン • 停止時、 このボタンとPLAYボタンを同時に押すと記録を 再生関連の状態でこのボタンを押すと、モニタ-に現在選 始めます。 択されているタイトルのチャプターメニューを表示しま • ブランクディスクやタイトルクローズされている す。 ディスクの場合、新たなタイトルを作成し、そのチャ チャプターメニューがないDVD ディスクでは何も表示し プター 1へ記録を始めます。 ません。 • 記録中に、このボタンを押すと連続した映像内にチャプ g[SET UP]ボタン ターとインデックスを設定します。 • このボタンを押すと、モニタ-にセットアップメニュー • ディスク未挿入または停止時、このボタンを 2 秒以上押 画面を表示します。セットアップメニュー画面で各種メ すと、押している間、リアパネルのVIDEO OUT 端子か ニュー設定を行います。 (X 59 ページ) ら入力信号を MPEG エンコード/デコード処理した信 セットアップメニュー画面表示時、このボタンを押す...
- Page 102 各部の名称と働き フロントパネル(つづき) h[g]ボタン k[j]ボタン • セットアップメニュー画面表示時、メニュー項目や設定 • タイトルメニューやチャプターメニュー表示時、再生す 値を選択する時、このボタンを押します。 るメニュー番号を選択します。このボタンを押すと、選 • 再生中にこのボタンを押すと、次のタイトルを再生しま 択する位置が右方向に移動します。 • 再生中にこのボタンを押すと、1つ後のチャプターを再 す。 • タイトルメニューやチャプターメニュー表示時、再生す 生します。 • 停止または記録モード時、音声記録レベル調整するため るメニュー番号を選択します。このボタンを押すと、選 択する位置が上方向に移動します。 に使用します。 • 停止または記録モード時、音声記録レベル調整するため • RECORDER [2/2]メニュー画面のAUDIO REC VOLUME MODE項目がINDEPENDENCEに設定時は、 このボタン に使用します。 • RECORDER [2/2]メニュー画面のAUDIO REC VOLUME を押しながらgまたはhボタンを押してCH2チャンネ MODE項目がBOTHに設定時は、...
-
Page 103: リアパネル
各部の名称と働き リアパネル 3 45 1[VIDEO LINE IN]ビデオライン入力端子(BNC) 4[VIDEOY/C OUT]ビデオY/C出力端子(4P) YCセパレートビデオ信号を出力します。 コンポジットビデオ信号を入力します。 この端子の映像を入力する場合は、 INPUT SELECTメニュー • VIDEO LINE OUT端子と同等の情報が出力されます。 画面のINPUT SELECT項目をLINEに設定します。 • この端子の仕様をSYSTEM [2/2]メニュー画面のY/C • 入力信号がセットアップ付きの信号かどうかに応じて、 TERMINAL MODE 項目で選択できます。 (S1 またはS2 SYSTEM [1/2]メニュー画面のSET UP項目を設定してく 仕様) ださい。 (NTSCのみ) 5[AUDIO INPUT LEVEL]オーディオ入力レベル切換えス 2[VIDEO Y/C IN]ビデオY/C入力端子(4P) イッチ... - Page 104 FOOT SW 2 : 外部スイッチ(フットスイッチなど)を接続 することで DVD ディスクへの記録中にチャ プターマークやインデックスを付けます。 この 端子 によ るコ ント ロー ル方 法を REMOTE [1/2] メ ニュー画面の FOOT SW 1、2 項目で選択します。 (X 71 ページ) b[FOR SERVICE]ネットワーク端子(RJ-45) • タイトル/チャプターメニュー作成用のアプリケー ションソフトなどBD-X201M 用ユーティリティをイン ストールしたパソコンとこの端子で接続します。 • NETWORK メニュー画面でネットワーク設定が必要で す。 cオプションボード用スロットカバー このカバーを外し、別売のオプションボードなどを取り付 けます。 d等電位端子...
-
Page 105: ディスプレイ表示
ディスプレイおよびオンスクリーン表示 ディスプレイ表示 本機ディスプレイには下記の情報が表示されます。 番号 表示内容 音声記録のエンコード方式表示(LPCM/DOLBY DIGITAL/MPEG) ・・・MPEGはPAL信号時のみ選択可 記録モード時 : RECORDER [1/2]メニュー画面のAUDIO ENCODE項目で設定したエンコード方式 を表示します。AUDIO ENCODE項目をNO AUDIOに設定時、この表示は出ません。 再生モード時 : 再生中のディスクに記録されている音声のエンコード方式を表示します。 AUDIO ENCODE 項目をNO AUDIO に設定して記録したディスクを再生時、この表 示は出ません。 モードに応じて各種情報を表示します。 タイトルNo./チャプター No./インデックスNo./カウンター表示 表示内容は、DISPLAYメニュー画面のLCD項目で選択できます。 • LCD項目をTITLE+CHAPTERに設定時は、 タイトルNo.,チャプターNo.とタイトル経過時間を表示し ます。 • LCD項目をINDEXに設定時は、インデックスNo.,とタイトル経過時間を表示します。 SETボタンを押す毎に、カウンター表示は経過時間か残量時間かに変わります。 残量時間:記録時は、ディスクの残量時間(時:分)を表示、再生時は、タイトルの残量時間を表 示します。 LCD項目をTITLE+CHAPTERに設定時 SETボタン タイトルNo. - Page 106 ディスプレイおよびオンスクリーン表示 ディスプレイ表示(つづき) 番号 表示内容 動作モード表示 PLEASE WAIT : 起動中、表示します。 OPERATE OFF : 電源OFF動作中、表示します。 NO DISC : ディスクが未挿入時、表示します。 LOADING : ディスクをローディング中、表示します。 DVD-R : 未ファイナライズのDVD-Rディスクが挿入された時、表示します。 (約3秒間) DVD-RW : 未ファイナライズのDVD-RWディスクが挿入された時、表示します。 (約3秒間) DVD+R : 未ファイナライズのDVD+Rディスクが挿入された時、表示します。 (約3秒間) DVD+RW : 未ファイナライズのDVD+RWディスクが挿入された時、表示します。 (約3秒間) : ファイナライズしたDVD-R/DVD-RW/DVD+R/DVD+RWディスクが挿入された時、 表 示します。 (約3秒間) REC PAUSE : 記録から記録ポーズに移行中、表示します。...
-
Page 107: オンスクリーン表示
ディスプレイおよびオンスクリーン表示 オンスクリーン表示 本機のVIDEO OUT端子に接続したモニタ-にはE-E画や再生画の他に、下記のような表示をします。 • ステータス表示 • イベント表示 • アラーム表示 • セットアップメニュー画面(X 59 ページ) ステータス表示 本機の設定状態や動作状況を表示します。E-E画や再生画にステータスをオンスクリーン表示します。 ステータス表示するかどうかはDISPLAYメニュー画面で選択します。 DISPLAYメニュー画面 ステータス表示するには DISPLAY MENU DISPLAYメニュー画面のDISPLAY項目をONに設定します。 MENU 各ステータス情報毎に表示の有無を選択できます。 DISPLAY DISPLAY項目をOFFに設定すると、ステータス情報は全て表示されません。 TITLE+CHAPTER TITLE/CHAPTER/INDEX RECORDER MODE TIME+DATE TIME/DATE REMAIN MM/DD/YY DATE STYLE ステータス表示 REC系のステータス情報: TITLE+CHAPTER 記録モード時、SET UP ボ 000 min タンを押すと、映像のエン... - Page 108 ディスプレイおよびオンスクリーン表示 オンスクリーン表示(つづき) 番号 項目 内容 タイトルNo./ DISPLAY メニュー画面のTITLE/CHAPTER/INDEX 項目で表示の有無および表示内 チャプター No./ 容を選択します。 インデックスNo./ : 非表示 カウンター表示 TITLE+CHAPTER : タイトル No., チャプター No, およびタイトル経過時間(時間: (TITLE/CHAPTER 分:秒)を表示します。 またはINDEX/ INDEX+TITLE : インデックス No. およびタイトル経過時間(時間:分:秒)を TITLE) 表示します。 * SYSTEM [1/2]メニュー画面のPLAYBACK & 232C TYPE項目がVTR設定時、 タイ トル経過時間は、タイトル1からの累計時間を表示し、インデックスNo.はタイト...
-
Page 109: イベント表示
ディスプレイおよびオンスクリーン表示 イベント表示 誤操作などを行なったとき、イベント表示を本体のディスプレイやモニタ-にオンスクリーン表示します。 イベント表示は、約3秒間表示します。 モニター 000 min 本体ディスプレイ イベント表示 : DISPLAYメニュー 画面のDISPLAY項 イベント表示 TITLE FULL 目がON に設定時 表示します。 TITLE 01 0:11:22 06/05/06 11:20:00 CHAPTER 01 0:11:22 オンスクリーン ディスプレイ表示 内容 表示 INVALID TV INVALId TV 異方式信号を入力した。 または、異方式信号を記録したディスクを再生した。 TITLE FULL TITLE FULL 99タイトル記録したディスクに記録しようとした。... -
Page 110: アラーム表示
ディスプレイおよびオンスクリーン表示 オンスクリーン表示(つづき) アラーム表示 本機が動作を受け付けなかった時、アラーム表示を本体のディスプレイおよびモニタ-にオンスクリーン表示します。アラーム 表示は次の操作をするまで表示を続けます。 モニター 000 min 本体ディスプレイ アラーム表示: DISPLAYメニュー 画面のDISPLAY項 アラーム表示 REC INHIBIT 目がON に設定時 表示します。 TITLE 01 0:11:22 06/05/06 11:20:00 CHAPTER 01 0:11:22 オンスクリーン ディスプレイ表示 内容 表示 INVALID DISC INVALId dISC 指定外のメディアを挿入した時、表示します。 NOT SUPPORT NoT SUPPoRT 本機以外のセットで記録したディスクを挿入または再生した時表示します。 DISC REC INHIBIT REC INH... - Page 111 準備 接続 接続例 映像出力 注1 入力 コンポジット モニターテレビ 音声出力 YCセパレート 注2 入力 注3 アナログ音声 コンポジット LINE OUT RS-232C REMOTE 注4 YCセパレート Y/C OUT アナログ音声 注4 DV IN/OUT Y/C IN LINE IN AUDIO OUT ヘッドホン 注6 フロント DV IN/OUT PHONES ステレオ AUDIO IN REMOTE 注5...
-
Page 112: 電源を接続する
準備 電源を接続する 付属の電源コードを本体に接続します。 付属の電源コードを AC アダプターの AC IN端子に 接続します。 電源コードを電源コンセントに接続します。 MAIN POWERスイッチ [MAIN POWER]スイッチをONにします。 • 本機に電源が投入され、 OPERATEインジケーターが緑 色で点灯します。 (オペレートONモード) • オペレートONまたはOFFモードで起動するかはSYSTEM [2/2] メニュー画面のAC IN MODE 項目で選択できます。 POWER (X 65 ページ) コード (付属品) ご注意 OPERATEインジケーター • 本機の電源は付属の電源コードで供給してください。 他の電源コードは使用しないでください。 • 記録や再生中、電源を切らないでください。 DVD-R/+Rディスクの場合は、使用できなくなります。 OPERATE DVD-RW/+RWディスクの場合は、ディスクを消去後、最... -
Page 113: ディスクを入れる/取り出す
準備 ディスクを入れる/取り出す ディスクトレイ OPEN/CLOSEインジケーター OPEN/CLOSEボタン ディスクを入れる ディスクを取り出す OPERATEボタンを押してOPERATE ONモードにします。 停止状態にします。 OPEN/CLOSEボタンを押します。 OPEN/CLOSEボタンを押します。 • OPEN/CLOSEボタンを押すと、自動的にディスクトレ • OPEN/CLOSEボタンを押すと、自動的にディスクトレ イが開きます。 イが開きます。 ディスクトレイが開いている間、OPEN/CLOSEインジ ディスクトレイが開いている間、OPEN/CLOSEインジ ケーターが点灯します。 ケーターが点灯します。 • ファイナライズされていないディスクの場合は、モニ ディスクをディスクトレイの上に置きます。 タ-画面やディスプレイに“NOT FINALIZE”と表示し ラベル面を上にして、 ディスクトレイの溝にそって正確に ます。OPEN/CLOSE ボタンを3 秒以上押し続けると、 置いてください。 ディスクをファイナライズした後、イジェクトします。 • ディスクがフロントパネルにぶつからないように気を ディスクトレイからディスクを取り出します。 付けてトレイに置いてください。 ディスクトレイが完全に開いてからディスクを出してく ださい。 OPEN/CLOSEボタンを押します。... -
Page 114: キーボードで操作する
準備 キーボードで操作する 本機は、メニュー設定、タイトル/チャプター設定などをモニター上の設定画面で行います。 モニター上の設定画面や操作画面は、本体の操作ボタンの他に、キーボードで操作できます。 本機背面のUSB端子にUSB接続用のキーボードを接続します。 USB端子は2ケ所備えています。 推奨メディア:Logicool社製 付属のフェライトコアを取り付ける • USB ケーブルには不要電波放射を軽減するため、付属の フェライトコアを必ず取り付けてください。 • フェライトコアは本機の近くに取り付けてください。 付属のフェライトコア USB端子 ワイヤークランプ フェライトコアにケーブルを 1回巻く。 下記の機能がキーボードでも行えます。 機能 本体操作 キーボード操作 メモ Kボタン rキー 項目や設定値を選 本取扱説明書は、特に指示が無いかぎり、本体操作による方法で Lボタン qキー 択する。 記載しています。 Mボタン xキー Nボタン yキー SETボタン Enterキー 設定を確定する。 タイトルメニューやチャプターメニューの名称や注釈はキーボードで入力します。 ( キーボードのレイアウトに応じて、 SYSTEM [1/2]メニュー画面のKEYBOARD STYLE項目を設定します。... -
Page 115: 日付・時刻を設定および表示する
準備 日付・時刻を設定および表示する 内蔵時計の日付・時刻を設定します。設定した日付・時刻データは電源を切っても内蔵の電池によって保持されます。 ディスクには、ディスクに記録した時の日付・時刻が記録されます。 DISPLAYメニューの設定により、日付・時刻データをモニターにオンスクリーン表示できます。 Mボタン SET UPボタン Kボタン SETボタン Lボタン Nボタン 日付・時刻を設定する セットアップトップメニュー画面 日付・時刻はCLOCK ADJUSTメニュー画面で設定します。VIDEO OUT 端子に DISC 接続したモニター画面を見ながら設定します。 INPUT SELECT SYSTEM 電源を入れ、停止状態にします。 DVD MENU RECORDER SET UPボタンを押して、セットアップトップメニュー画面を表示さ REMOTE DISPLAY せます。 CLOCK ADJUST NETWORK CLOCK ADJUSTメニュー画面を表示させる。 EXIT 1MまたはNボタンを押して、CLOCK ADJUST項目をハイライト表示させ CLOCK ADJUSTメニュー画面... - Page 116 準備 日付・時刻を設定および表示する(つづき) 日付・時刻を表示する 日付・時刻情報をモニターにオンスクリーンするかどうかや表示スタイルを DISPLAYメニュー画面 DISPLAYメニュー画面で設定します。 (X 73 ページ) DISPLAY MENU DISPLAYメニュー画面の内容 MENU DISPLAY項目…オンスクリーン表示の有無を選択します。 DISPLAY : オンスクリーン表示します。 情報項目ごとに表示の有無を選択 TITLE/CHAPTER/INDEX TITLE+CHAPTER RECORDER MODE できます。 TIME/DATE TIME+DATE : 全情報をオンスクリーン表示しません。 REMAIN TIME/DATE項目…日付・時刻表示の有無および表示内容を選択します。 MM/DD/YY DATE STYLE : 日付・時刻とも表示しません。 TITLE+CHAPTER TIME : 時刻のみ表示します。 DATE : 日付のみ表示します。 TIME+DATE : 日付・時刻とも表示します。...
-
Page 117: 記録時の設定・調整
記録時の設定・調整 DVD記録について DVD記録は、下記のような手順で行ないます。 記録前の設定 DVD-R/DVD+RまたはDVD- • 新品または本機で記録したDVD-R/DVD+RまたはDVD-RW/DVD+RW(ビデオモード)ディ RW/DVD+RW(ビデオモー スクを挿入します。 • DVD-RW/DVD+RWで記録をやり直す場合は、DISC MENU画面のERASE項目で記録データ ド)ディスクを準備します。 を消去してください。 (X 29 ページ) 記録信号や記録条件などをメニュー画面で設定します。 (X 30 ページ) メニュー画面を設定します。 音声記録レベルを調整します。 調整方法は2種類あります。 (X 33 ページ) タイトル/チャプターメニュー タイトル/チャプターメニューは、ディスク再生時、再生画を選択するときに使用します。表 の表示スタイルを選択します。 示スタイルは5種類準備されています。DVD MENU画面で選択します。また、表示スタイルは 任意に変更することができます。 (X 36 ページ) 記録操作(X 38 ページ) • RECボタンとPLAYボタン操作で記録を開始し、 STOPボタンで記録を停止 した区間が1つのタイトルとして記録され、タイトル番号が付けられま... -
Page 118: 記録用ディスクを準備する
記録時の設定・調整 記録用ディスクを準備する 本機はDVD-R/DVD-RW(ビデオモード)およびDVD+R/DVD+RWに記録できます。 DVD-R : DVD-R規格2.0(ビデオモード)に適応したディスクのみ使用できます。 DVD-RW : Version 1.1以上のディスクが使用できます。 DVD-RWのVersion 1.1は、記録方式としてビデオモードまたはVRモードを選択できますが、本機はビデオモー ドでのみ記録します。 * DVD-RWのVersion 1.0はビデオモードに対応していないため使用できません。 DVD-R/DVD+RとDVD-RW(ビデオモード)/DVD+RWでは記録方式において次の様な特長があります。 DVD-R/DVD+R : 1枚のディスクに1回記録します。消去や記録のやり直しができません。 DVD-RW(ビデオモード)/DVD+RW(ビデオモード準拠): ファイナライズを解除して追加記録ができます。一度見たあとに全面消去して新しく記録できます。 ディスクの状態により、下表のような記録動作になります。 ディスクの状態 記録動作 DVD-R 未使用ディスク 新規記録します。新たなタイトルを作成し、そのチャプター 1 DVD+R に記録を始めます。 未記録部分に新たなタイトルを作成し、 そのチャプター 1に記 本機で記録したディスクでファイナライズ前 録を始めます。 DVD-RW 新規記録します。新たなタイトルを作成し、そのチャプター 1 未使用ディスク DVD+RW に記録を始めます。... - Page 119 記録時の設定・調整 DVD-RW/DVD+RWディスクを消去する 消去するDVD-RW/DVD+RWディスクを挿入します。 DISCメニュー画面 SET UPボタンを押して、セットアップトップメニュー画面を表示さ DISC MENU せます。 MENU NまたはMボタンを押しDISC項目を選択し、 SETボタンを押します。 FINALIZE CANCEL CANCEL DISC FINALIZATION CANCEL • DISCメニュー画面が表示されます。 AUTO FINALIZE AUTO CANCEL DISC FINALIZ. NまたはMボタンを押して、 DISC ERASE (QUICK) 項目またはDISC ( QUICK ) DISC ERASE EXECUTE ERASE(FULL)を選択し、SETボタンを押します。 DISC ERASE ( FULL ) CANCEL •...
-
Page 120: 記録前の設定
記録時の設定・調整 記録前の設定 • RECORDERメニュー画面 本体のスイッチ設定 リアパネルのAUDIO INPUT LEVELスイッチでアナログ音声 RECORDER メニュー画面は2ページ構成になっていま の基準入力レベルを選択します。 (+4 dB/–8 dB) す。 [1/2]画面 メニュー画面で記録に関する設定を行ないます。 • CHAPTER CREATION項目 (メニュー画面の設定方法:X 59 ページ) チャプターの作成を自動的に行なうか手動で行なうか • INPUT SELECTメニュー画面 を選択します。 映像・音声入力信号を選択します。X 詳細は63 ページを • SET INTERVAL項目 ご覧ください。 チャプターの作成を自動で行なう場合、チャプター自動 • SYSTEM [1/2]メニュー画面 作成時間間隔を1~59分の間で設定します。 SYSTEMメニュー画面は2ページ構成になっています。... -
Page 121: ファイナライズした時に作成されるディスク状態を指定する
記録時の設定・調整 ファイナライズした時に作成されるディスク状態を指定する ファイナライズしたディスクをDVDプレーヤーに挿入した時の動作やタイトル再生を終了した時の動作を指定できます。また、 ファイナライズやタイトルクローズした時、タイトルメニュー(TOPメニュー)やチャプターメニュー(MEMU)を作成するか どうかを選択できます。ブランクディスクに記録を始める前に設定することが必要です。設定は DVD MENU 画面のDISC IN ACTION項目、TITLE END項目、DVD MENU TYPE項目で設定します。 セットアップトップメニュー画面 ディスクが未挿入またはブランクディスクが挿入されている状態にします。 DVD MENU画面を表示させる。 DISC INPUT SELECT 1SET UP ボタンを押して、セットアップトップメニュー画面を表示させま SYSTEM す。 DVD MENU RECORDER 2MまたはNボタンでDVD MENU項目を選択し、SETボタンを押します。 REMOTE DVD MENU画面を設定します。 DISPLAY CLOCK ADJUST 1MまたはNボタンで項目を選択し、SETボタンを押すと、設定値のリスト NETWORK ボックスが表示されます。 EXIT 2MまたはNボタンで設定値を選択し、SETボタンを押すと、設定値が確定... -
Page 122: 映像・音声の圧縮方法を設定する
記録時の設定・調整 映像・音声の圧縮方法を設定する 映像や音声の圧縮方法はRECORDER [1/2]メニュー画面で設定します。 停止状態にします。 RECORDER [1/2]メニュー画面を表示させる。 1SET UPボタンを押し、 セットアップトップメニュー画面を表示させます。 SET UPボタン 2MまたはNボタンでRECORDER項目を選択し、SETボタンを押します。 RECORDER [1/2]メニュー画面を設定します。 SETボタン 1MまたはNボタンで項目を選択し、SETボタンを押すと、設定値のリスト RECORDER [1/2]メニュー画面 ボックスが表示されます。 RECORDER MENU (1/2) 2MまたはNボタンで設定値を選択し、SETボタンを押すと、設定値が確定 MENU します。 MANUAL CHAPTER CREATION Every05Min SET INTERVAL AUTO CHAPTER (RECPAUSE) 設定を終了する。 ENCODE QUALITY AUDIO ENCODE DOLBY DIGITAL 下記のいずれかの操作をします。... -
Page 123: 音声記録レベルを調整する
記録時の設定・調整 音声記録レベルを調整する 本機は、 音声記録レベルを調整できます。 調整方法は2種類あり、 RECORDER [2/2]メニュー画面のAUDIO REC VOLUME MODE 項目で調整方法を選択します。また、音声記録レベルを初期設定値にすることもできます。 (UNITYモード) メモ: アナログ音声の基準入力レベルはリアパネルのAUDIO INPUT LEVELスイッチで選択できます。 (+4 dB/−8 dB) 調整方法の選択 RECORDER [2/2]メニュー画面を表示させる。 RECORDER [2/2]メニュー画面 RECORDER [1/2]メニュー画面の上部にあるr項目を選択し、 SETボタンを 押すと、RECORDER [2/2]メニュー画面が表示されます。 RECORDER MENU (2/2) RECORDER [2/2]メニュー画面のAUDIO REC VOLUME MODE項目 BACK → AUDIO CHANNEL (DV) 1,2ch 1,2ch を設定します。... -
Page 124: 入力映像を確認する
記録時の設定・調整 入力映像を確認する VIDEO OUTおよびY/C OUT端子に接続したモニタ-で入力映像信号を確認できます。 下記の操作を行うと、DVDディスクに記録される画質を確認できます。 VIDEO OUT端子 (Y/C OUT端子) モニター VIDEO OUTまたはY/C OUT端子をモニタ-に接続します。 ディスク未挿入または停止時、REC ボタンを 2 秒以上押すと、押している間、 映像入力信号を本機で MPEG エンコード/デコード処理した信号がVIDEO OUTまたはY/C OUT端子から出力されます。 • DVD記録する前に、画質を確認できます。 RECボタン メモ 音声は消音されます。 LCDディスプレイには ENCODE QUALITYの設定値 が表示されます。 ENCODE XX エンコードクオリティー値 (UXP, XP, SP, LP, EP, DLP, DEP)... -
Page 125: 本機のタイトル/チャプターメニューについて
記録時の設定・調整 本機のタイトル/チャプターメニューについて 本機は、記録操作に応じてタイトルやチャプターメニューを自動的に作成し、ディスクに記録します。 タイトルやチャプターメニューはディスクを再生するときの映像や音声を選択するための目次として使用します。 • STOPボタン操作などで記録を終了する(タイトルクローズ)と、タイトル番号とサムネイル(記録開始時点の映像)がタイ トルメニューとして作成されます。一枚のディスクに99個までのタイトルを記録できます。 • 記録中にチャプターマークが付けられると、チャプター番号とサムネイル(マークが付けられた時点の映像)がチャプターメ ニューとして作成されます。1つのタイトルには99個までチャプターを付けることができます。RECORDER [2/2]メニュー 画面のINDEX CREATION項目がAUTOに設定時、チャプターマークと一緒にインデックスが書き込まれます。 (インデックス については:57ページ) 記録開始 停止 記録開始 停止 タイトル 1 タイトル 2 タイトルメニュー サムネイル サムネイル チャプターマーク チャプターマーク チャプターマーク 記録 記録 サムネイル サムネイル サムネイル サムネイル サムネイル チャプターメニュー チャプター 1 チャプター 2 チャプター... -
Page 126: タイトル/チャプターメニューのスタイルを選択する
記録時の設定・調整 タイトル/チャプターメニューのスタイルを選択する DVDディスクには、タイトルやチャプターの情報を示すためのタイトル/チャプターメニューが記録されます。 記録操作を行なうと、タイトルやチャプターメニューとしてタイトル/チャプター番号やサムネイルが自動的に作成されます。 タイトルメニューのサムネイルは、記録開始時点の静止画が使用されます。 チャプターメニューのサムネイルは、チャプターマークを付けた時点の静止画が使用されます。 (変更可能です。 ) タイトルメニューはチャプターメニューの先頭サムネイルになります。 タイトル/チャプターメニューのサムネイルパターンの組み合わせをSTYLE と呼びます。表示スタイルとして 8 種類の表示パ ターンが本機に登録されています。 この内、どのSTYLEを使用するかをDVD MENU画面で選択します。 DVD MENU画面の設定 セットアップトップメニュー画面 SET UPボタンを押して、セットアップトップメニュー画面を表示さ せます。 DISC セットアップトップメニュー画面のDVD MENU 項目を選択し、SET INPUT SELECT ボタンを押します。 SYSTEM DVD MENU • DVD MENU画面が表示されます。DVD MENU画面のSTYLE項目には、現 RECORDER 在選択されているタイトル/チャプターメニューの表示スタイルの TYPE REMOTE 番号が表示されています。... -
Page 127: タイトル/チャプターメニューの表示スタイルを変更する
記録時の設定・調整 タイトル/チャプターメニューの表示スタイルを変更する DVD MENU 画面でタイトル/チャプターメニューの表示スタイルを変更できます。8 種類の表示スタイル毎に、タイトルメ ニューとチャプターメニューのそれぞれに対して表示パターンを任意のパターンに変更できます。 本機は、タイトルメニューおよびチャプターメニューに対してそれぞれ 6個までの表示パターンを登録できます。出荷時点は 5 個のテンプレートファイルが登録されています。登録されている表示パターンを選択することにより、タイトル /チャプターメ ニューの表示スタイルをそれぞれ任意のスタイルに変更できます。 DVD MENU画面を表示させます。 STYLE項目に表示されているタイプ番号の表示スタイルに対して、表示スタ DVD MENU画面 イルが変更されます。 TITLE PATTERN : STYLE 項目に表示されているタイプ番号の表示ス DVD MENU タイルに対して、現在設定されているタイトルメ MENU ニューの表示パターンの番号を表示しています。 DISABLE EDIT MENU TYPE1 STYLE CHAPTER PATTERN : STYLE 項目に表示されているタイプ番号の表示ス TITLE PATERN タイルに対して、現在設定されているチャプターメ... -
Page 128: 記録操作のフローチャート
記録操作 記録操作のフローチャート 下記のフローチャートを参考にして記録操作を行ってください。 • 入力設定:X 63 ページ. • 画質・音質設定:X 32 ページ. • ナビゲーション(DISC IN ACTION/TITLE END/DVD MENU TYPE設定) :X 68 ページ RECボタン+PLAYボタン インデックス 1*4 記録開始 チャプター 1 RECボタン インデックス 2 チャプター 2 RECボタン インデックス 3 タ チャプター 3 イ ト PAUSEボタン... -
Page 129: フロントパネルの操作ボタンにより、記録操作を行なう
記録操作 フロントパネルの操作ボタンにより、記録操作を行なう DVDディスクには、記録開始からSTOPボタンを押して記録を終了するまでの区間を1つのタイトルとして記録され、タイトル 番号が付けられます。1枚のディスクには、99個までのタイトルを記録できます。また、記録中にチャプターマークを付けるこ とにより、1つのタイトルの内をいくつかのチャプターに区切ることができます。 (最大99個まで) タイトルやチャプター情報は、それぞれタイトルメニューやチャプターメニューとしてディスクに記録されます。ディスク再生 時、タイトル/チャプターメニューは収録されている映像や音声を選択するための目次として使用されます。 ディスプレイ OPEN/CLOSEボタン STOPボタン RECボタン PAUSEボタン 記録可能なディスクを挿入します。 残量時間 モニタ-オンスクリーン 停止状態時、必要なメニュー設定や音声記録調整を行ないます。 000 min 記録を開始させます。 RECボタンとPLAYボタンを同時に押します。 記録を一時停止する。 PAUSEボタンを押します。 • 記録ポーズモードになります。 RECORDER [1/2] メニュー画面のAUTO CHAPTER(REC PAUSE)項目 が ON に設定時は、記録ポーズモードになると、自動的にチャプターマー クが付けられます。 06/05/06 TITLE 01 0:11:22 また、別の方法でチャプターマークを手動または自動で付けることができ 11:20:00 CHAPTER 01 0:11:22 ます。... -
Page 130: 手動または自動的にチャプターマークを付ける
記録操作 フロントパネルの操作ボタンにより、記録操作を行なう(つづき) 記録を終了し、ディスクを取り出す。 メモ ディスク取り出し時の処置は、ディスクの使い方により 2通りの方法があり RECストップした時や、 タイトルクローズ ます。 した時、モニターに“PLEASE WAIT”と • 本機で追加記録を行なう場合: メッセージが表示されます。 OPEN/CLOSEボタンを押し、ディスクを取り出します。 (ファイナライズ 処理を行なわないでください。 ) * DISCメニュー画面のAUTO FINALIZE項目がOFFになっていることが必 要です。 • 他のDVDプレーヤーで再生する場合: ファイナライズを行なってからディスクを取り出してください。 ファイナライズの方法ついては42ページをご覧ください。 手動または自動的にチャプターマークを付ける 手動または自動的にチャプターマークを付けることができます。 RECORDER [1/2]メニュー画面 チャプターマークと一緒にインデックスが書き込まれます。 チャプターマーク付加方法は RECORDER [1/2] メニュー画面の CHAPTER RECORDER MENU (1/2) CREATIONおよびSET INTERVAL項目で設定します。 MENU •... -
Page 131: 最後のタイトルを消去する
記録操作 最後のタイトルを消去する 本機で記録した未ファイナライズディスクの最後のタイトルのみ消去できます。 DVD-R/DVD-RW/DVD+R/DVD+RWディスクを挿入します。 DISCメニュー画面 SET UPボタンを押して、セットアップトップメニュー画面を表示さ DISC MENU せます。 MENU hまたはgボタンを押しDISC項目を選択し、 SETボタンを押します。 CANCEL FINALIZE • DISCメニュー画面が表示されます。 CANCEL DISC FINALIZATION CANCEL AUTO FINALIZE hまたはgボタンを押して、 LAST TITLE ERASE項目を選択し、 SET AUTO CANCEL DISC FINALIZ. ( QUICK ) DISC ERASE CANCEL ボタンを押します。 DISC ERASE ( FULL ) CANCEL •... -
Page 132: ファイナライズする(他のDvdプレーヤーで再生するため
記録操作 ファイナライズする(他のDVDプレーヤーで再生するため) 本機で記録したディスクをファイナライズすると、他のDVDプレーヤーで再生できるようになります。DVD-RW/DVD+RWディ スクの場合は、ビデオモードに対応したDVDプレーヤ-で再生できます。 ファイナライズを行なうと • ファイナライズの解除を行うまで追加記録ができなくなります。 • タイトルメニューの変更ができなくなります。 • ファイナライズ前に作ったタイトルは「トップメニュー」として表示されます。 ファイナライズする ファイナライズは次の2通りの方法で行なえます。 • セットアップメニューのDISC MENUからFINALIZE項目を選択実行する。 • OPEN/CLOSEボタンを3秒以上押し続ける。 準備:ファイナライズするディスクを挿入します。 OPEN/CLOSEボタンを3秒以上押し続ける。 セットアップメニューを用いる場合: 1SET UPボタンを押し、セッ • 下記の DVD MENU 画面のEDIT MENU 項目の設定に関 DISC MENU トアップトップメニュー画 係なくファイナライズを実行します。 MENU 面 を 表 示 さ せ、そ の 中 の FINALIZE EXECUTE CANCEL... -
Page 133: タイトル/チャプターメニュー設定
タイトル/チャプターメニュー設定 チャプターメニューを変更する(サムネイルエディット画面) 本機は、記録の開始・停止操作に従い自動的にタイトルおよびチャプターメニューが作成されます。 タイトルやチャプターメニューは、次のような内容で作られます。 • チャプターのサムネイル :チャプターマークを付けた時点の静止画が登録されます。 • タイトルのサムネイル :記録開始時点の静止画が登録されます。先頭チャプターのサムネイルと同じ静止画です。 • 表示スタイル :DVD MENU画面で設定したスタイルでメニューが作成されます。 (サムネイルの配置および背景 画) 上記内容のチャプターメニューに対し、サムネイルの変更、名称/注釈の入力、表示スタイルの変更が可能です。 チャプターメニューの変更は、タイトル記録を終了するときに表示されるサムネイルエディット画面で行ないます。 サムネイルエディット画面を表示させる DVD MENU画面のEDIT MENU項目をENABLEに設定します。 DVD MENU画面 • 記録または記録ポーズモードから停止モードにしたとき、自動的にサムネイ ルエディット画面が表示されます。 DVD MENU MENU メモ EDIT MENU ENABLE STYLE TYPE1 DVD MENU 画面の EDIT MENU 項目をDISABLE に設定時は、サムネイルエ TITLE PATERN CAPTER PATERN ディット画面は表示されません。既定値でタイトル/チャプターメニューが作... -
Page 134: チャプターメニューのサムネイルの変更や名称を入力する
タイトル/チャプターメニュー設定 チャプターメニューのサムネイルの変更や名称を入力する チャプターメニューのサムネイルの変更や名称/注釈の入力はサムネイルエディットのスタート画面で行ないます。 チャプターメニューのサムネイルの画像を変更する (例)チャプター番号2のサムネイル画像を変更する。 サムネイルエディットスタート画面 チャプター番号2を選択し、SETボタンを押します。 THUMBNAIL EDIT • チャプター番号2のサムネイルエディット画面が表示されます。 TITLE CLOSE 1 - 6 CHAPTER LENGTH 項目は、このチャプターの長さ(sec)を表示してい ます。 POSITION 項目の分母はサムネイルの変更できる範囲、分子は現在の表示 位置を表示しています。 チャプター番号2のサムネイル画像を選択します。 CHAPTER MENU TEXT LOAD TEMP LOAD サムネイルエディット画面のrまたはq項目で画像を選択します。 • r項目を選択し、SETボタンを押すと、選択されているサムネイルの次に THUMBNAIL EDIT 記録されている画像(15フレーム後の画像)が表示されます。SETボタン BACK を押す毎に次の画像が表示され、サムネイル画像が変更されます。 B項目を選択し、SETボタンを押すと10個画像が戻ります。 CHAPTER LENGTH: •... - Page 135 タイトル/チャプターメニュー設定 チャプターメニューのサムネイルに名称や注釈を入力する チャプターメニューのサムネイルに名称を付けたり、 チャプターメニュー画面に THUMBNAIL EDIT 注釈を付けることができます。 TITLE CLOSE 1 - 6 名称や注釈は、キーボードで入力します。 キーボードのレイアウトに応じて、 SYSTEM [1/2]メニュー画面のKEYBOARD STYLE項目を設定してください。 ここでは、全てをキーボードで操作する方法で記載します。 CHAPTER MENU TEXT LOAD TEMP LOAD (例)チャプターメニュー番号1に名称を付ける。 カーソルキーでサムネイルエディットスタート画面のチャプター番 THUMBNAIL EDIT BACK 号1を選択し、Enterキーを押します。 • チャプター番号1のサムネイルエディット画面が表示されます。 CHAPTER LENGTH: 5000 sec カーソルキーでTEXT INPUT項目を選択しEnterキーを押します。 POSITION: • テキスト入力ボックスが表示されます。 40/100 テキスト入力ボックスで名称や注釈を入力します。...
-
Page 136: チャプターメニュー画面の表示スタイルの変更や画面を確認する
タイトル/チャプターメニュー設定 チャプターメニュー画面の表示スタイルの変更や画面を確認する チャプターメニュー画面の表示スタイルは、事前にDVD MENU画面のSTYLE項目で設定したスタイルで作成されますが、タイ トル記録を終了する時点で表示スタイルを変更できます。また、作成したチャプターメニュー画面を確認できます。 上記のことは、サムネイルエディット画面のCHAPTER MENU項目を選択・実行することにより行なえます。 チャプターメニュー画面の表示スタイルを変更する サムネイルエディット画面のCHAPTER MENU 項目を選択しSET ボ THUMBNAIL EDIT タンを押します。 TITLE CLOSE 1 - 6 • チャプターメニューエディット画面が表示されます。 april チャプターメニューエディット画面のPRESET STYLE項目を選択し、 SETボタンを押します。 • PRESET STYLEメニュー画面が表示されます。 PRESET STYLE 項目に設定されている表示スタイルのタイプ番号が表示 CHAPTER MENU TEXT LOAD TEMP LOAD されています。 CHAPTER MENU 表示パターンを変更する場合は... - Page 137 タイトル/チャプターメニュー設定 チャプターメニュー画面を確認する 設定された表示スタイルでチャプターメニュー画面を確認できます。 サムネイルエディットスタート画面の CHAPTER MENU項目を選択 サムネイルエディットスタート画面 し、SETボタンを押します。 • チャプターメニューエディット画面が表示されます。 THUMBNAIL EDIT TITLE CLOSE 1 - 6 チャプターメニューエディット画面の CHAPTER MENU PREVIEW 項目を選択しSETボタンを押します。 april • CHAPTER MENU PREVIEW画面が表示されます。 1ページ目のチャプター メニュー画面を確認できます。 他のページを確認する。 CHAPTER MENU TEXT LOAD TEMP LOAD CHAPTER MENU PREVIEW画面のr項目を選択しSETボタンを押すと、 次 のページを表示します。...
-
Page 138: チャプターメニューの編集を終了する
タイトル/チャプターメニュー設定 チャプターメニューの編集を終了する サムネイルエディット画面を終了するときは、タイトルクローズ処理を行なうことが必要です。 チャプターメニューを編集した後、最後にタイトルクローズ処理してください。 チャプターメニューを変更しない場合でも、 サムネイルエディット画面を終了するためにタイトルクローズ処理を行なってくだ さい。タイトルクローズ処理を行なうと、チャプターメニューの内容が確定します。 サムネイルエディット画面のTITLE CLOSE項目を選択し、SETボタ THUMBNAIL EDIT ンを押します。 TITLE CLOSE • 確認のダイアログボックスが表示されます。 BBBB april タイトルクローズする場合は、 YES項目を選択し、 SETボタンを押し ます。 • タイトルクローズを始めます。モニターに“PLEASE WAIT”とメッセー ジが表示されます。 CHAPTER MENU TEXT LOAD TEMP LOAD タイトルクローズ処理が終了すると、メッセージが消えます。 メモ • タイトルクローズ処理には、最大10分位の時間がかかることがあります。 TITLE CLOSE • DVD MENU画面のEDIT MENU項目がDISABLEに設定時は、STOPボタンな どでタイトル記録を終了した時点で自動的にタイトルクローズ処理されま... -
Page 139: タイトルメニュー画面の表示スタイルの変更、名称入力や画面を確認する
タイトル/チャプターメニュー設定 タイトルメニュー画面の表示スタイルの変更、 名称入力や画面を確認する DVD MENU 画面のEDIT MENU 項目をENABLE に設定した場合、ディスクをファイナライズする時点でタイトルメニューエ ディット画面が表示されます。 タイトルメニューエディット画面を用いて、 タイトルメニューの表示スタイルの変更やタイトル/ チャプターメニューの確認およびタイトル名称の入力ができます。 • タイトルメニューのサムネイルはチャプターメニューの先頭サムネイルになります。 タイトルメニューエディット画面を表示させる タイトルメニューエディット画面 DVD MENU画面のEDIT MENU項目をENABLEに設定します。 TITLE MENU FINALIZE PRESET STYLE TITLE TEXT INPUT TITLE MENU PREVIEW ディスクのファイナライズ処理を実行すると、 タイトルメニューエディット画面 EXIT が表示されます。 タイトルメニュー画面の表示スタイルを変更する タイトルメニューエディット画面のPRESET STYLE 項目を選択し、 タイトルメニューエディット画面 SETボタンを押します。... - Page 140 タイトル/チャプターメニュー設定 タイトルメニュー画面の表示スタイルの変更、名称入力や画面を確認 する(つづき) タイトルメニュー画面を確認する タイトルメニューエディット画面のTITLE MENU PREVIEW 項目を タイトルメニューエディット画面 選択し、SETボタンを押します。 • タイトルメニューエディット画面が表示されます。 TITLE MENU FINALIZE 他のページを確認する。 PRESET STYLE • TITLE MENU PREVIEW画面のr項目を選択しSETボタンを押すと、 次の TITLE TEXT INPUT ページを表示します。r項目を選択し、SETボタンを押していくことによ TITLE MENU PREVIEW EXIT り、チャプターメニュー画面を先頭ページから順番に表示します。 • q項目を選択しSETボタンを押すと、前のページにもどります。 • sまたはp項目を選択し、SETボタンを押すと、10ページ単位でペー ジを送ります。 TITLE MENU PREVIEW画面 前のページを表示します。...
- Page 141 タイトル/チャプターメニュー設定 タイトルメニューの名称を変更する タイトル名は自動的に記録日時とENCODE QUALITYが付けられます。 タイトルメニューエディット画面 タイトルメニューに名称を手動で付けることができます。 TITLE MENU 名称は、キーボードで入力します。 FINALIZE キーボードのレイアウトに応じて、 SYSTEM [1/2]メニュー画面のKEYBOARD PRESET STYLE STYLE項目を設定してください。 TITLE TEXT INPUT ここでは、全てをキーボードで操作する方法で記載します。 TITLE MENU PREVIEW EXIT タイトルメニューエディット画面のTITLE TEXT INPUT 項目を選択 し、Enterキーを押します。 • TITLE TEXT INPUT画面が表示されます。 TITLE TEXT INPUT画面 カーソルキーで名称入力したいタイトルを選択します。 • 選択されたタイトルは、ハイライト表示します。 TITLE TEXT INPUT BACK 1 - 6 Enterキーを押します。...
- Page 142 タイトル/チャプターメニュー設定 タイトルメニュー画面の表示スタイルの変更、名称入力や画面を確認す る(つづき) ディスクをファイナライズする タイトルメニューのエディット画面のFINALIZE項目を選択し、SET タイトルメニューエディット画面 ボタンを押します。 • 確認用のダイアログボックスが表示されます。 TITLE MENU FINALIZE ダイアログボックスのYES項目を選択し、SETボタンを押します。 PRESET STYLE • ディスクのファイナライズ処理を始めます。 TITLE TEXT INPUT ファイナライズ中は、プログレスバーで進行状況を確認できます。 TITLE MENU PREVIEW EXIT ディスクをファイナライズすると、プログレスバー表示が消え、ブラック画 面表示にもどります。 メモ 確認画面 • ファイナライズ処理には、最大20分位の時間がかかることがあります。 • ファイナライズを行なうと、 それまでに記録した映像や音声がDVDビデオ規 格に準拠して記録され、DVDビデオとして再生できるようになります。 • 本機でファイナライズされた DVD-R/RW ディスクは DVD-R/RW 対応の DVD プレーヤーで再生可能となりますが、すべての再生を保証するものではあり...
-
Page 143: ディスクを再生する
再生 ディスクを再生する 本機で記録したディスクを再生します。ファイナライズ処理の有無によって、再生動作が異なります。 ファイナライズ前のディスクを再生する ディスクを挿入します。 再生する。 PLAYボタンを押します。 • 最終タイトルを再生します。 スチルモードにする。 PAUSEボタン STOPボタン PAUSEボタンを押します。 PLAYボタン • スチルモードになります。 • スチルモード時、このボタンを押すと、コマ送りします。 リジュ-ムデータのクリア 再生を再開する。 PLAYボタンを押します。 • SYSTEM [1/2]メニュー画面のPLAYBACK タイトルエンドになると、次のタイトルにジャンプして全タイトルを再生し & 232C TYPE項目がDVDに設定時、 停 ます。 止中に STOP ボタンを押すと、リジュ ディスクエンドになると、自動的に停止モードになります。 -ムデータはクリアされ、最終タイト 停止位置は、SYSTEM [1/2]メニュー画面のPLAYBACK & 232C TYPE項目の ルの先頭が停止位置になります。... - Page 144 再生 ディスクを再生する(つづき) ディスクを挿入します。 • 停止状態になります。 再生する 再生方法は2通りの方法があります。 TOP MENUボタンを押す PLAYボタンを押す タイトルメニュー(トップメニュー)が表示されます。 タイトル1を再生します。 1 再生するタイトルメニュー番号を選択します。 カーソル(K/L/N/M)ボタンを押して、再生するタイト ル番号を選択します。 2 SETボタンを押すと、再生を始めます。 スチルモードにする。 PAUSEボタンを押します。 • スチルモードになります。 • スチルモード時、PAUSEボタンを押すと、コマ送りします。 再生を再開する。 PLAYボタンを押します。 タイトル内の再生を終了した時は下記のような動作を行います。 記録時のDVD MENU画面のTITLE END項目の設定により動作は下表のように異なります。 記録時のTITLE END項目の設定 MENUに設定時 REPEATに設定時 STOPに設定時 NEXT TITLEに設定時 停止状態になり、タイトルメ タイトル内のリピート再生を 停止状態になります。 次のタイトルを再生します。...
-
Page 145: タイトルリストで再生画を選択する
(Max. 25文字) 06 : 2006/05/17 09:08 SP IDが入力されていない場合 07 : 2006/05/17 10:00 AAAAAAAAAAAAAAAAAAAAAAA タイトル番号:記録年月日 + 記録終了時間 + 記録 08 : 2006/05/17 12:36 JVC-Victor モード(例:右記リストのTitle 06) 09 : 2006/05/17 13:50 BBB * 記録年月日の表示スタイルは、タイトル記録時の 10 : 2006/05/18 10:00 abcdefghijklmn DISPLAY MENU画面のDATE STYLE 項目で設定に... -
Page 146: 早送り再生/早戻し再生やスローフォワード再生/スローリバース再生する
再生 早送り再生/早戻し再生やスローフォワード再生/スローリバース再 生する REVボタン FWDボタン 早送り再生/早戻し再生 スローフォワード再生/スローリバース再生 早送り再生する。 スローフォワード再生する。 • 再生または早戻し再生中、 FWDボタンを押すと早送り再 • スチルまたはスローリバース再生中、 FWDボタンを押す 生します。 とスローフォワード再生します。 早送り再生中、 FWDボタンを押すと、 押す毎に早送り再 スローフォワード再生中、 FWDボタンを押すと、 押す毎 にスローフォワード再生速度がHIGH(>>>)rLOW (>>) 生速度がLOWrHIGHrLOWと変わります。 rHIGH (>>>)と変わります。 早戻し再生する。 • 再生または早送り再生中、 REVボタンを押すと早戻し再 スローリバース再生する。 生します。 • スチルまたはスローフォワード再生中、 REVボタンを押 早戻し再生中、REVボタンを押すと、押す毎に早戻し再 すとスローリバース再生します。 生速度がLOWrHIGHrLOWと変わります。 スローリバース再生中、REVボタンを押すと、押す毎に... -
Page 147: インデックス書き込みおよびインデックスサーチ
再生 インデックス書き込みおよびインデックスサーチ インデックスは、再生モード時に希望の位置を頭出しするために使用します。 (インデックスサーチ) インデックス情報(番号とカウンターデータ)の確認やインデックスサーチの操作はINDEX MANAGER画面で行ないます。 インデックスを書き込む 記録時に登録したチャプター点はインデックスとして使用されます。RECORDER [2/2]メニュー画面のINDEX CREATION項目 をAUTOに設定して記録した場合、記録開始点や記録ポーズ点は、インデックスとして使用されます。 インデックスサーチやインデックス消去を行なう インデックスサーチやインデックスの消去は、INDEX MANAGER画面を起動させて行ないます。 INDEX MANAGER画面を起動させる 再生モード(PLAYやSTILLモード)中に、フロントパネルのSET UPボタンを押します。 • モニターにINDEX MANAGER画面が表示されます。 * ファイナライズしたディスクのTOP MENUまたはMENUを表示中、INDEX MANAGER画面は表示されません。 タイトル番号表示部 選択されているタイト タイトル選択ボタン タイトル選択ボタン ル番号を表示します。 q : 1個前のタイトルに移動します。 r : 1個先のタイトルに移動します。 A : 10個前のタイトルに移動します。 B : 10個先のタイトルに移動します。 INDEX LISTスクロールボタン... - Page 148 再生 インデックス書き込みおよびインデックスサーチ(つづき) サーチまたは消去したいインデックスを選択します。 INDEX MANAGER画面を起動時は、画面を呼び出した地点のタイトルとインデックスが選択された状態になっています。 タイトル番号を選択する場合 1本体のカーソル(r/q/x/y)ボタンを押して、INDEX MANAGER 画面上のタイトル選択ボタン(r/q/B/A)をハイ ライト表示させます。 2本体のSETボタンを押して、タイトル番号を選択します。SETボタンを押す毎に、タイトル番号が変わります。選択され たタイトル番号はタイトル番号表示部に表示されます。 インデックス番号を選択する場合 1本体のカーソル(r/q/x/y)ボタンを押して、INDEX LIST内にハイライト表示を移動させ、希望のインデックス番号を ハイライト表示させます。 2本体のSETボタンを押すと、ハイライト表示のインデックス番号が選択されます。 • 選択されたタイトル番号はタイトル番号表示部に表示されます。 * INDEX MANAGER画面のg/hボタンをハイライト表示させ、本体のSETボタンを押すと、INDEX LISTがスクロール します。 インデックスサーチする。 1本体のカーソル(r/q/x/y)ボタンを押して、INDEX MANAGER 画面上のタイトル PLAYボタンをハイライト表示させ ます。 2本体のSETボタンを押すと、インデックスサーチを実行します。 • 選択したインデックスの位置を探し、再生を始めます。 • INDEX MANAGER画面は消えます。 インデックスを消去する。 上記2.の手順でインデックスを選択します。 1本体のカーソル(r/q/x/y)ボタンを押して、INDEX MANAGER画面上のERASEボタンをハイライト表示させます。 2本体のSETボタンを押すと、確認ダイアログが表示されます。...
-
Page 149: セットアップメニュー画面を設定する
セットアップトップメニュー セットアップメニュー画面を設定する セットアップメニュー画面で設定した内容は、本機メモリーに記憶され、電源を切っても保存されます。 セットアップメニュー設定は、本体ボタンの他キーボードで行なえます。ここでは、本体ボタンによる操作方法で記載します。 キーボードの場合:カーソル(x/y)キーで選択しEnterキーで実行します。 セットアップメニューは、VIDEO OUTまたはY/C OUT端子に接続したモニタ- カーソルボタン (M/N/L/K) を見ながら設定します。 セットアップメニューは本体ディスプレイにも表示され ます。 STOPボタンを押して、停止状態にします。 SET UPボタン セットアップトップメニュー画面を表示させる。 SET UPボタンを押します。 変更するメニュー画面を表示させる。 SETボタン 1M/Nボタンを押して、メニュー画面項目を選択します。 セットアップトップメニュー画面 2SET UPボタンを押します。 * EXIT項目を選択すると、通常画面に戻ります。 DISC メニュー画面の項目を設定する。 INPUT SELECT SYSTEM 1M/Nボタンを押して、設定したい項目を選択します。 DVD MENU RECORDER 2SET UPボタンを押します。 REMOTE • 設定値のリストボックスが表示されます。 DISPLAY CLOCK ADJUST 3M/Nボタンを押してリストボックスの中から設定値を選択し、... -
Page 150: セットアップメニュー画面の構成
セットアップトップメニュー セットアップメニュー画面の構成 セットアップトップメニュー画面はモニタ-および本体ディスプレイに表示されます。 セットアップトップメニュー画面は複数 の階層で構成されています。 DISCメニュー画面(X 62 ページ) INPUT SELECTメニュー画面 (X 63 ページ) DISC MENU MENU INPUT SELECT MENU FINALIZE CANCEL MENU CANCEL DISC FINALIZATION CANCEL INPUT SELECT AUTO FINALIZE AUTO CANCEL DISC FINALIZ. DISC ERASE ( QUICK ) CANCEL DISC ERASE ( FULL ) CANCEL... -
Page 151: セットアップトップメニュー画面
セットアップトップメニュー セットアップトップメニュー画面 項目欄および設定値欄の表記は次の通りです。 : モニタ-画面表示 上段 : 本体ディスプレイ表示 下段 項目 内容 DISC ファイナライズなど記録用ディスクの処理に関する設定を行ないます。 dISC INPUT SELECT 映像および音声の入力信号を選択します。 INPUT SEL SYSTEM 本機の機能に関する設定を行ないます。SYSTEMメニュー画面は2画面で構成されています。 SYSTEM DVD MENU タイトル/チャプターメニューの表示スタイルに関する設定を行ないます。 dVd MENU RECORDER RECORDERメニュー画面は2画面で構成されています。 [1/2]画面はチャプターの作成方法および映像/音声のエンコード方式を設定します。 RECoRdER [2/2]画面は記録時に必要な項目を設定します。 REMOTE REMOTEメニュー画面は2画面で構成されています。 DV端子やFOOT SW 1/2端子によるリモート操作に関する設定を行ないます。 また、 RS-232Cコントロー REMoTE ルに関する設定を行ないます。... -
Page 152: Disc Menu画面
セットアップトップメニュー DISC MENU画面 項目欄および設定値欄の表記は次の通りです。 上段 : モニタ-画面表示 : 本体ディスプレイ表示 下段 [ ] : 工場出荷時設定 項目 設定値 内容 FINALIZE [CANCEL] 記録したディスクをファイナライズするかどうかを選択します。本機で記録した EXECUTE ディスクをDVDプレーヤーで再生する場合、ファイナライズを行ないます。ファイ ナライズを行なうと、追加記録ができなくなります。 FINAL [CAN] CANCEL : ファイナライズしません。 EXECUTE : ファイナライズを行ないます。 *ファイナライズ処理には、最大20分位の時間がかかることがあります。 CANCEL DISC [CANCEL] ファイナライズしたDVD-RW/DVD+RWディスクのファイナライズを解除するかど FINALIZATION EXECUTE うかを選択します。ファイナライズしたDVD-RW/DVD+RW ディスクに追加記録す る場合、EXECUTEに設定します。 CANFIN [CAN] 他機でファイナライズしたDVD-RWディスクは解除できません。... -
Page 153: Input Selectメニュー画面
セットアップトップメニュー INPUT SELECTメニュー画面 項目欄および設定値欄の表記は次の通りです。 : モニタ-画面表示 上段 : 本体ディスプレイ表示 下段 [ ] : 工場出荷時設定 項目 設定値 内容 INPUT SELECT LINE 映像および音声入力信号を選択します。 [Y/C] LINE : 映像はVIDEO LINE IN端子のコンポジットビデオ信号を入力します。 音声はAUDIO IN端子のアナログ音声を入力します。 : 映像はY/C IN端子のYCセパレートビデオ信号を入力します。 音声はAUDIO IN端子のアナログ音声を入力します。 : DV IN/OUT端子のデジタルビデオおよびオーディオ信号を入力します。 INPUT LINE * 設定に応じてフロントパネルの映像入力信号インジケーターが点灯または点滅し [Y/C] ます。... - Page 154 セットアップトップメニュー SYSTEMメニュー画面(つづき) 項目 設定値 内容 PLAYBACK & [DVD] DVDディスクの再生時の動作やタイトル経過時間/インデックスNo.の表示をVTR 232CTYPE 方式にするかDVD方式にするかを選択します。 RS-232Cコントロール時の動作も同 様に変わります。詳細は下表を参照ください。 232C [dVd] 動作 VTRに設定時 DVDに設定時 再生動作 最終タイトルの最終地点まで AUTO REW 項目で設定した動作 最終タイトルの先頭を頭出しして 再生する。 を行ないます。 (X 63 ページ) 停止します。 インデックスサーチ ディスク内に存在する地点のイン 現在のタイトル内に存在する地点 デックスを受け付ける。 のインデックスを受け付ける。 停止中にSTOP 操作する。 (未 リジュームデ-タはクリアされま リジュームデ-タがクリアされま ファイナライズディスク使用...
- Page 155 セットアップトップメニュー [2/2画面] 項目 設定値 内容 AC IN MODE [POWER ON] 本機背面のMAIN POWERスイッチON時、オペレートオンまたはオペレートオフで POWER OFF 立ち上がるかを選択します。 POWER ON : オペレートオンで立ち上がります。 [oN] POWER OFF : オペレートオフで立ち上がります。 SYNC SYSTEM AUTO 本機の同期方式を選択します。 [INTERNAL] AUTO : 内部または外部同期を自動的に切り換えます。 INTERNAL : 内部同期固定になります。 SYNC AUTo [INTE] TV TYPE NTSC (U) 記録、再生時の信号方式を選択します。...
- Page 156 セットアップトップメニュー SYSTEMメニュー画面(つづき) [2/2画面] 項目 設定値 内容 EE OUTPUT THROUGH 停止または記録モード時、VIDEO OUT端子からEE画を出力するかどうかを選択し [MUTING] ます。 THROUGH : EE画を出力します。 EE oUT MUTING : ブラック画を出力します。超音波診断機との接続でループ接続を防ぎた [MUT] い時、この設定にします。 * いずれの設定でも、オンスクリーン表示は DISPLAY メニューの設定に応じて出力 されます。 DIGITAL STILL スチルモードにしたとき、本機のフレームメモリーを用いてデジタルスチルモード [FRAME] にするかどうかを選択します。 : 本機のフレームメモリーを使用しません。 FRAME : 本機のフレームメモリーを用いてフレームスチル画を出力します。 : 本機のフレームメモリーを用いて1stフィールドスチル画を出力します。 STILL : 本機のフレームメモリーを用いて2ndフィールドスチル画を出力します。...
-
Page 157: Dvd Menu画面
セットアップトップメニュー DVD MENU画面 項目欄および設定値欄の表記は次の通りです。 : モニタ-画面表示 上段 : 本体ディスプレイ表示 下段 [ ] : 工場出荷時設定 項目 設定値 内容 EDIT MENU ENABLE タイトルクローズやファイナライズを実行する時、チャプターメニューやタイトル [DISABLE] メニューの編集画面を表示させるかどうかを選択します。 ENABLE : タイトル / チャプターメニュー編集画面を表示します。タイトルクロー ズ時は、チャプターメニューのサムネイルエディット画面を表示しま EdIT す。 (X 43 ページ) [oFF] ファイナライズ時は、 タイトルメニューエディットメニュー画面を表示 します。 (X 49 ページ) DISABLE : タイトル/チャプターメニュー編集画面は表示されません。... - Page 158 セットアップトップメニュー DVD MENU画面(つづき) 項目 設定値 内容 DVD MENU [TOP+MENU] 完成したディスク(ファイナライズしたディスク)にTOPメニューやMENUを作成 TYPE するかどうかを選択します。 NONE ディスク未挿入またはブランクディスク挿入時に設定します。 TOP+MENU : ファイナライズ時、TOPメニューが作成されます。 MENUT [T+M] タイトルクローズ時、MENUが作成されます。 : ファイナライズ時、TOPメニューが作成されます。 NoNE タイトルクローズ時、MENUは作成されません。 NONE : TOPメニューおよびMENUは作成されません。 メニューレスディスク になります。 DISC IN ACTION MENU 完成したディスク(ファイナライズしたディスク)をDVDプレーヤーに挿入した時 [TITLE] の動作を選択します。 ディスク未挿入またはブランクディスク挿入時に設定します。 dISC IN MENU MENU : TOP MENU(タイトルメニュー)を表示します。...
-
Page 159: Recorderメニュー画面
セットアップトップメニュー RECORDERメニュー画面 RECORDERメニュー画面は2画面で構成されています。項目欄および設定値欄の表記は次の通りです。 : モニタ-画面表示 上段 : 本体ディスプレイ表示 下段 [ ] : 工場出荷時設定 [1/2画面] 項目 設定値 内容 CHAPTER [MANUAL] 記録時、一定時間間隔で自動的にチャプターを作成するかどうかを選択します。 CREATION AUTO MANUAL : 自動的にチャプターは作成されません。 手動でチャプターを作成する時、この設定にします。 CHAPTR [MANU] AUTO : 一定時間間隔で自動的にチャプターを作成します。 AUTo 時間間隔は、下記のSET INTERVALメニュー項目で設定します。 SET INTERVAL Every01min CHAPTER CREATIONメニュー項目がAUTOに設定時、有効です。 自動的にチャプターを作成する時間間隔を設定します。 [Every05min] 時間間隔は、分で設定します。... - Page 160 セットアップトップメニュー RECORDERメニュー画面(つづき) [2/2画面] 項目 設定値 内容 AUDIO [1,2chr1,2ch] DV端子からの音声を記録する場合、設定します。 (32 kHzのみ有効) CHANNEL (DV) 3,4chr1,2ch DV音声のうち、1&2チャンネルを記録するか3&4チャンネルを記録するかを選択 します。 dVCH [1 2] 1,2chr1,2ch : 1&2チャンネルを記録します。 3,4chr1,2ch : 3&4チャンネルを記録します。 AUDIOREC [BOTH] 音声記録レベル調整方法を選択します。 VOLUME MODE INDEPENDENCE 両チャンネルを同じレベルに保ちながら調整するか、各チャンネルを別々に調整す るかを選択します。 VRModE [boTH] BOTH : 両チャンネルを同じレベルに保ちながら調整します。 INdE INDEPENDENCE : 各チャンネルを別々に調整します。 ASPECT [AUTO] 記録映像の画面アスペクトの判別信号を選択します。...
-
Page 161: Remoteメニュー画面
セットアップトップメニュー REMOTEメニュー画面 REMOTEメニュー画面は2画面で構成されています。項目欄および設定値欄の表記は次の通りです。 : モニタ-画面表示 上段 : 本体ディスプレイ表示 下段 [ ] : 工場出荷時設定 [1/2画面] 項目 設定値 内容 REMOTE SELECT [OFF] DV IN/OUT端子による外部機器とのコントロール方法を選択します。 DV (SLAVE) : DV IN/OUT端子によるコントロールはできません。通常はこの設 DV (TRIGGER) 定にしてください。 DV (SLAVE) : 本機はスレーブ側になり、コントロールされます。 DV (TRIGGER) : DV REC TRIGGER機能を持ったDVカメラと接続し、カメラのト REMoTE [oFF] リガー操作でカメラ映像を本機のDVDディスクに記録する時、こ... - Page 162 セットアップトップメニュー REMOTEメニュー画面(つづき) [2/2画面] 項目 設定値 内容 232C FF/REW [SEARCH] RS-232CのFF/REWコマンドを受信した時の動作を選択します。 TYPE FF/REW SEARCH : サーチ動作を行ないます。 TITLE SKIP FF/REW : カウンターのみ早送りまたは早戻し表示します。 CHAPTER SKIP TITLE SKIP : 前後のタイトルにジャンプします。 CHAPTER SKIP : 前後のチャプターにジャンプします。 [SRCH] CHAP 232C SET UP STOP セットアップメニュー画面表示中、接続機器に返すRS-232Cステータスを選択しま MENU STATUS [PLAY] す。...
-
Page 163: Displayメニュー画面
セットアップトップメニュー DISPLAYメニュー画面 項目欄および設定値欄の表記は次の通りです。 : モニタ-画面表示 上段 : 本体ディスプレイ表示 下段 [ ] : 工場出荷時設定 項目 設定値 内容 DISPLAY [OFF] モニタ-にステータスやアラーム情報をオンスクリーン表示するかどうかを選択し ます。 : オンスクリーン表示しません。 dISPLY [oFF] : オンスクリーン表示します。 この項目をONに設定した場合でも、ステータス情報については、 下記の各メニュー項目で個別に表示の有無を設定できます。 TITLE/CHAPTER/ 記録または再生中、DVDディスクのタイトル/チャプター/インデックス情報をオ INDEX [TITLE+CHAPTER] ンスクリーン表示するかどうかを選択します INDEX+TITLE : オンスクリーン表示しません。 TITLE+CHAPTER : オンスクリーンにタイトルとチャプターを表示します。 TITLE INDEX+TITLE : オンスクリーンにインデックスとタイトルを表示します。... -
Page 164: Clock Adjustメニュー画面
HOS TNAME [bdx201m] 本機のネットワークでの名前をキーボードで入力します。 CANCEL 本体で名前を入力することはできません。 HoST (英数字とハイフン:最大20文字) CANCEL : ホスト名の設定をキャンセルします。 IP ADDRESS [192.168.0.2] IPアドレスを設定します。同一ネットワーク内でIPアドレスが重複しないよう設定 します。 IP Add [192] SUBNET MASK [255.255.255.0] サブネットマスクを設定します。接続する BD-X201M に対し同じネットワークの設 定にします。 SUbNET [255] DEFAULT [192.168.0.254] ゲートウェイアドレスを設定します。 接続するBD-X201Mに対し同じ設定にします。 GATEWAY GATE [192] MENU セットアップトップメニュー画面に戻ります。 MENU * IPADDRESSSETTING項目は、選択できません。... -
Page 165: 信号方式(Ntsc/Pal)の変更
その他 信号方式(NTSC/PAL)の変更 本機はNTSCとPALの両方式に対応しています。 信号方式はSYSTEM [2/2]メニュー画面のTV TYPE項目で変更できますが、下記の操作でも変更できます。 モニターが接続されていない状態でも信号方式を変更できます。 停止状態にします。 SET UPボタンとSTOPボタンを3秒以上同時に押します。 • NTSC (I) ←→ PAL信号方式が変更されます。この時、本機は自動的に電源が切れ、再起動します。 商品廃棄について この商品を廃棄する場合は、法令や地域の条例にしたがって適切に処理してください。... - Page 166 : LPCM/DOLBY DIGITAL/MPEG 記録方式 (MPEGはPALのみ選択可) 量子化 : 16 bit サンプリング周波数 : 48 kHz チャンネル数 : 2 外形寸法図(単位:mm) BUSY OPERATE OPEN/CLOSE OPTION DV Y/C LINE DVD RECORDER BD-X201M AUDIO SET UP TITLE CHAPTER DOLBY DIGITAL LPCM MPEG PHONES STOP PLAY PAUSE MENU MENU...
- Page 167 その他 「本機は第三者権利のソフトウェアを一部使用しています。ソフトウェアに関する情報については 本機に User : anonymous Password : なし でFTP経由でログイン後、readme.txtをご参照ください。 (FTPは、本機のIPアドレスが192.168.0.2と設定されている場合、Internet Explorerからftp://196.168.0.2で接続できます。 ) 」 お 客 様 ご 相 談 セ ン タ ー 0 1 2 0 – 2 8 2 8 – 1 7 携帯電話 ・ PHS ・ FAXなどからのご利用は ( 045 ) 4 50 - 89 5 0 [代表...
- Page 168 © 2008 Victor Company of Japan, Limited LST0692-001A...
Need help?
Do you have a question about the BD-X201M and is the answer not in the manual?
Questions and answers