JVC BD-X200U - Dvd Authoring Recorder Instructions Manual
Instruction manual
Hide thumbs
Also See for BD-X200U - Dvd Authoring Recorder:
- Instructions manual (48 pages) ,
- Instructions manual (48 pages)
Table of Contents
Advertisement
Quick Links
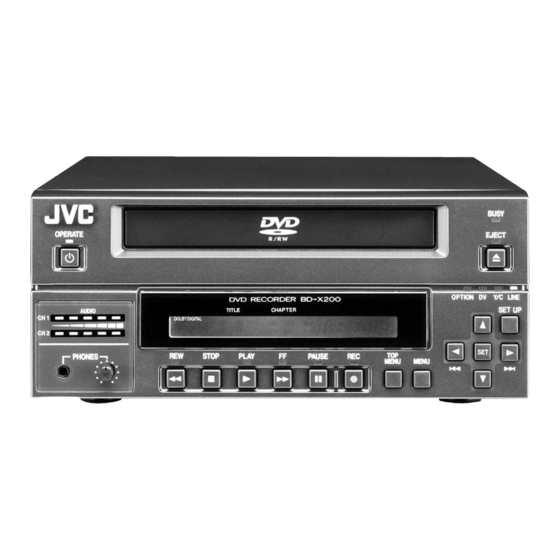
DVD RECORDER
BD-X200U
Thank you for purchasing this JVC product. Before operating
this unit, please read the instructions carefully to ensue the
best possible performance.
For Customer Use :
Enter below the Serial No. which is located on the bottom
of the unit.
Retain this information for future reference.
Model No. BD-X200U
Serial No.
OPERATE
DVD RECORDER BD-X200
AUDIO
TITLE
CH1
DOLBY DIGITAL
LPCM MPEG
CH2
STOP
PLAY
PHONES
REV
INSTRUCTIONS
OPTION DV Y/C LINE
CHAPTER
FWD
PAUSE
REC
TOP
MENU
MENU
This instruction manual is made from
100% recycled paper.
BUSY
OPEN/CLOSE
SET UP
SET
LLT0060-001A
Advertisement
Table of Contents

Related Manuals for JVC BD-X200U - Dvd Authoring Recorder


Summary of Contents for JVC BD-X200U - Dvd Authoring Recorder
-
Page 1: Dvd Recorder
PAUSE PHONES MENU MENU Thank you for purchasing this JVC product. Before operating this unit, please read the instructions carefully to ensue the best possible performance. For Customer Use : Enter below the Serial No. which is located on the bottom of the unit. -
Page 2: Important Safeguards
IMPORTANT SAFEGUARDS 1. Read all of these instructions. 2. Save these instructions for later use. 3. All warnings on the product and in the operating instructions should be adhered to. 4. Unplug this appliance system from the wall outlet before cleaning. Do not use liquid cleaners or aerosol cleaners. Use a damp cloth for cleaning. -
Page 3: Safety Precautions
Rules. These limits are designed to provide reasonable WARNING: protection against harmful interference when the equipment is The battery used in the BD-X200U must be replaced by a JVC operated in a commercial environment. This equipment authorized service dealer only. -
Page 4: Table Of Contents
Thank you for purchasing Trademarks & Copyrights this JVC BD-X200 DVD Recorder. , Dolby and the Double “D” symbols are trademarks of Dolby Laboratories. The copying, broadcasting, screening, or rental of Main Features copyrighted material without the authorization of the copyright holder is prohibited by law. - Page 5 Settings & Controls for Recording DVD Recording .................................. 29 Preparing a Disc for Recording ............................30 Pre-Recording Settings ..............................31 Selecting & Confirming Input Signals ..........................32 Setting the Encoding Format for Audio & Video ........................ 33 Adjusting of Audio Recording Levels ..........................35 Checking the Video Input ..............................
-
Page 6: Introduction
Introduction Overview of BD-X200 Functions Video and audio signals from this DVD recorder’s input terminals can be recorded to DVD-R or DVD-RW (video mode only). (☞ Page 29) The types of signals that can be used are as follows. Video: Composite video, YC separate, or DV signals (including audio) Audio: Analog audio or DV signals (including video) A wide range of recording methods are supported. -
Page 7: Precautions For Dvd Recorder Use
Do not place heavy objects such as a monitor on top of the the BD-X200 was purchased or your nearest JVC DVD recorder. Authorized dealer. Do not insert foreign objects into the disc tray opening. -
Page 8: Precautions For Disc Usage
Introduction Precautions for Disc Usage Care of Discs to Ensure High-Quality Playback Fingerprints, dust, or any other similar contamination of the surface of a disc can lead to distortion in the playback of recorded video and audio. For this reason, it is good practice to wipe each disc with a soft cloth before use. Looking After Discs Handling Discs Using a soft cloth, wipe the disc gently from the inside to... -
Page 9: Details Regarding Discs
Recommended manufacturers Once a disc has been finalized, it can be used as a DVD-R : JVC, Maxell, TDK 1×, 2×, 4× standard DVD and its recorded audio and video can DVD-RW : JVC, TDK 1×, 2× be played on this and other DVD players. -
Page 10: Region Codes
Introduction Details Regarding Discs (continued) DVD Data Configuration Region Codes Generally speaking, the content recorded on a DVD is separated One of six numbers referred to as “region codes” is assigned to into large units referred to as “titles”. A unique number called a DVD content to control the global regions in which this content “title number”... -
Page 11: Component Names & Functions
Component Names & Functions Front Panel BUSY OPERATE OPEN/CLOSE OPTION DV Y/C LINE DVD RECORDER BD-X200 SET UP AUDIO TITLE CHAPTER DOLBY DIGITAL LPCM MPEG PHONES STOP PLAY PAUSE MENU MENU Note OPERATE button and indicator The OPEN/CLOSE button will have no effect if pressed This button is used to turn on the DVD recorder and to while the DVD recorder is in either Recording or make it ready for use. - Page 12 Component Names & Functions Front Panel (continued) BUSY OPERATE OPEN/CLOSE OPTION DV Y/C LINE DVD RECORDER BD-X200 SET UP AUDIO TITLE CHAPTER & DOLBY DIGITAL LPCM MPEG ⁄ PHONES STOP PLAY PAUSE MENU MENU ¤ 9 0 ! @ # $ % ^ REV button and indicator PAUSE button and indicator When this button is pressed in Playback or Fast-Forward...
- Page 13 & SET UP button [8] button This button can be pressed to display the Setup Menu on If a title menu or chapter menu is displayed, this button can the monitor. A wide range of different menu settings can be used to select a menu number for playback. Specifically, then be made via the Setup Menu.
-
Page 14: Rear Panel
Component Names & Functions Rear Panel VIDEO AUDIO LINE INPUT LEVEL REMOTE DV IN/OUT SIGNAL DC 19V VIDEO LINE IN terminal (BNC) AUDIO IN terminals (RCA × 2) This terminal allows composite video signals to be input to These terminals allow analog audio signals to be input to the the DVD recorder. - Page 15 VIDEO AUDIO LINE INPUT LEVEL REMOTE DV IN/OUT SIGNAL DC 19V RS-422A REMOTE terminal (D-sub 9-pin male) DC IN terminal (2-pin) This terminal is used to connect the DVD recorder to a VCR This terminal is used to provide DC at 19 V to the DVD capable of being controlled via RS-422A.
-
Page 16: Lcd Display And On-Screen Content
LCD Display and On-Screen Content LCD Display The following information and data is presented on the DVD recorder’s LCD display. BUSY OPEN/CLOSE OPERATE OPTION DV Y/C LINE DVD RECORDER BD-X200 AUDIO SET UP TITLE CHAPTER DOLBY DIGITAL LPCM MPEG PHONES STOP PLAY PAUSE... - Page 17 BUSY OPEN/CLOSE OPERATE OPTION DV Y/C LINE DVD RECORDER BD-X200 AUDIO SET UP TITLE CHAPTER DOLBY DIGITAL LPCM MPEG PHONES STOP PLAY PAUSE MENU MENU TITLE CHAP DOLBYDIGITAL LPCM Description Indication of the current operating mode PLEASE WAIT : The DVD recorder is starting up. OPERATE OFF : The DVD recorder is preparing to shut down.
-
Page 18: On-Screen Content
LCD Display and On-Screen Content On-Screen Content In addition to E-E and playback screens, the monitor connected to the DVD recorder’s VIDEO LINE OUT terminal can display the following. Status messages Event messages Alarm messages The Setup Menu (☞ Page 74) Recording-operation control screens: REC CONTROL panel (☞... - Page 19 Status Messages (continued) Status Messages 000 min TITLE 1 0:11:22 04/05/04 CHAPTER 1 0:11:22 11:20:00 Item Description Title number / Chapter Use TITLE/CHAPTER from the DISPLAY MENU screen to indicate whether or not this number / Counter is to be displayed. Recording mode : The title number and chapter number currently being recorded are displayed together with the elapsed title-recording time (in hours, minutes, and seconds).
-
Page 20: Disc Status
LCD Display and On-Screen Content On-Screen Content (continued) Disc Status When a disc is inserted into the DVD recorder, one of the following disc status messages is displayed on the monitor screen. 090 min Disc status TITLE 1 0:00:00 04/05/04 11:20:00 CHAPTER 1 0:00:00 *: The disc status is not displayed if DISPLAY from the DISPLAY MENU screen is set to OFF. -
Page 21: Event Messages
Event Messages Event messages are displayed on the DVD recorder’s LCD display and on the monitor when incorrect operations are attempted. These messages will remain on-screen for approximately 3 seconds. Monitor screen 000 min LCD display DOLBYDIGITAL Event messages: LPCM Displayed when DISPLAY from TITLE FULL... -
Page 22: Alarm Messages
If the alarm messages continue to appear after replacing the disc, the problem may lie within the DVD recorder, and in such a case, you are recommended to contact either the store where this BD-X200 was purchased or your nearest JVC authorized... -
Page 23: Preparation
Preparation Signal Connections Audio and video signals Video outputs for VCR Note 1 Input Composite Audio outputs for VCR Monitor or TV YC separate Note 2 Input Composite Analog audio Analog audio Note 4 Note 3 LINE OUT DV IN/OUT Y/C IN LINE IN VIDEO... - Page 24 REMOTE MENU screen. Note 3: One of the following DV cables should be used. VC-VDV204 (2 m, 4P-4P) from JVC VC-VDV206 (2 m, 4P-6P) from JVC Note 4: When connecting a secondary device directly to your BD-X200, use a Category 5, cross-wired Ethernet cable.
-
Page 25: Power Connections
Power Connections Connect the AC adaptor (included) to the DVD recorder. VIDEO AUDIO LINE INPUT LEVEL REMOTE DV IN/OUT SIGNAL DC 19V AC adaptor Power cord (included) (included) DC IN Clamp Screw Connect the AC adaptor’s DC cord to the DVD recorder’s DC IN terminal. -
Page 26: Turning The Power On & Off
Preparation Turning the Power On & Off OPERATE indicator BUSY OPEN/CLOSE OPERATE OPERATE button OPTION DV Y/C LINE DVD RECORDER BD-X200 SET UP AUDIO TITLE CHAPTER DOLBY DIGITAL LPCM MPEG PHONES STOP PLAY PAUSE MENU MENU Turning the Power On Turning the Power Off While in Operate Off mode (i.e., the OPERATE indicator Stop the DVD recorder. -
Page 27: Inserting & Removing Discs
Inserting & Removing Discs Disc tray BUSY OPERATE OPEN/CLOSE OPEN/CLOSE indicator OPEN/CLOSE button OPTION DV Y/C LINE DVD RECORDER BD-X200 SET UP AUDIO TITLE CHAPTER DOLBY DIGITAL LPCM MPEG PHONES STOP PLAY PAUSE MENU MENU Inserting a Disc Removing a Disc Press the OPERATE button to activate Operate On mode. -
Page 28: Using A Keyboard & Mouse
Preparation Using a Keyboard & Mouse Menu settings, the title and chapter settings, and other DVD recorder settings are carried out from setting screens displayed on the TV or monitor. In addition, recording operations can also be carried out from similar screens. Although the DVD recorder’s buttons are used in setting and operation screens, a keyboard and mouse can be used as an alternative. -
Page 29: Setting & Displaying The Date & Time
Setting & Displaying the Date & Time Use the following procedure to set the internal clock’s date and time. Even when the DVD recorder’s power is turned off, the clock’s date and time settings are stored using the internal battery. Note that these settings are used to write the current date and time to a disc being finalized. - Page 30 Preparation Setting & Displaying the Date & Time (continued) Displaying the Date and Time Use the DISPLAY MENU screen to indicate whether or not the date and time are DISPLAY MENU screen to be displayed on-screen and to set a display style. ( Page 74 for details regarding setting methods.) DISPLAY MENU...
-
Page 31: Dvd Recording
Settings & Controls for Recording DVD Recording DVD recording is carried out using the following procedure. Pre-Recording Settings Preparation of the DVD-R or DVD- Insert a new DVD-R or DVD-RW (video mode), or alternatively, a similar disc that has been recorded on using the DVD recorder. RW (video mode only). -
Page 32: Preparing A Disc For Recording
Settings & Controls for Recording Preparing a Disc for Recording This DVD recorder is capable of recording to DVD-R and DVD-RW (in video mode). DVD-R : Only discs that conform with DVD-R Standard 2.0 (video mode) can be used. DVD-RW : Discs of Version 1.1 or later can be used. Although Version 1.1 of DVD-RW standards allows the selection of video mode and VR mode for recording, this DVD recorder performs recording in video mode only. -
Page 33: Pre-Recording Settings
Pre-Recording Settings • ENCODE QUALITY Recorder switch settings This parameter is used to manually set the bit rate for video Use the AUDIO INPUT LEVEL switch on the DVD recorder’s data. rear panel to select the reference input level for analog audio •... -
Page 34: Selecting & Confirming Input Signals
Settings & Controls for Recording Selecting & Confirming Input Signals The selection of audio and video input signals is carried out from the INPUT SELECT MENU screen as described below. In addition, the type of input signals that have been selected can be confirmed on the front panel. Video input indicators Selecting Input Signals BUSY... -
Page 35: Setting The Encoding Format For Audio & Video
Setting the Encoding Format for Audio & Video The setting of encoding formats for audio and video is carried out from the RECORDER MENU (1/2) screen as described below. Setting Encoding Formats BUSY OPEN/CLOSE Stop the DVD recorder. OPTION DV Y/C LINE Open the RECORDER MENU (1/2) screen. - Page 36 Settings & Controls for Recording Setting the Encoding Format for Audio & Video (continued) Audio Encoding AUDIO ENCODE This parameter is used to set the encoding format for audio data. LPCM : Linear PCM encoding DOLBY DIGITAL : Dolby AC3 encoding. Note If the SET UP button is pressed while in Recording mode, the video bit-rate setting and audio encoding format will be displayed on-screen.
-
Page 37: Adjusting Of Audio Recording Levels
Adjusting of Audio Recording Levels This DVD recorder’s audio recording levels can be adjusted using two different methods, and AUDIO REC VOLUME MODE from the RECORDER MENU (2/2) screen indicates the method to be used. In addition, it is also possible to return the audio recording levels to their default settings (i.e., unity gain). -
Page 38: Checking The Video Input
Settings & Controls for Recording Checking the Video Input Use the monitor connected to the VIDEO LINE OUT terminal to confirm that the input video signal is as required. The following procedure will allow you to monitor the quality at which the video will be recorded to a DVD. VIDEO LINE OUT terminal VIDEO AUDIO... -
Page 39: Selecting Styles For Title & Chapter Menu
Selecting Styles for Title & Chapter Menu Each recorded DVD contains title and chapter menus that provide information relating to its titles and chapters. Whenever recording is carried out, title numbers, chapter numbers, and thumbnails are automatically generated in order to create the title and chapter menus. -
Page 40: Recording
Recording Recording Sequence Use the following sequence as a reference when performing recording. Input settings: ☞ Page 32. Video and audio quality settings: ☞ Pages 33, 34. Navigation settings (i.e., DISC IN ACTION and TITLE END): ☞ Page 81. REC button + PLAY button Start of recording Chapter 1 REC button... -
Page 41: Recording With The Front Panel
Recording with the Front Panel BD-X200 recording operations can be carried out in two different ways — namely, using the buttons provided on the front panel and using the on-screen REC CONTROL panel. In the latter case, furthermore, recording operations can be performed using a keyboard and mouse. -
Page 42: Inserting Chapter Marks Manually Or Automatically
Recording Recording with the Front Panel (continued) End recording and remove the disc. Note Depending on how the disc will be used, one of two different procedures is When recording is stopped or a title is implemented at this time. closed, the state of progress will be If more content will be recorded to the disc using this DVD recorder: indicated on-screen using a progress bar. -
Page 43: Using A Keyboard & Mouse To Control Recording
Using a Keyboard & Mouse to Control Recording BD-X200 recording operations can be carried out using the REC CONTROL panel displayed on the monitor. In addition, a keyboard and mouse can also be used when working with this panel. VIDEO AUDIO LINE INPUT... -
Page 44: Finalizing (For Playback On This And Other Dvd Players)
Recording Finalizing (for playback on this and other DVD players) Finalize a disc recorded using this DVD recorder as described below in order to ensure that it can be played on this and other DVD players. In the case of DVD-RWs, playback will be possible on DVD players that support video mode. After finalizing a disc;... -
Page 45: Title & Chapter Menu Settings
Title & Chapter Menu Settings BD-X200 Title & Chapter Menus This DVD recorder can automatically create title and chapter menus in response to recording operations and can save these to the disc being recorded. When the disc is subsequently played, these title and chapter menus can be used to access specific sections of stored video and audio. -
Page 46: Selecting And Changing Styles For Title & Chapter Menus
Title & Chapter Menu Settings Selecting and Changing Styles for Title & Chapter Menus Title and chapter menus are used during playback of a DVD to select a title or chapter for viewing. Your BD-X200 provides a total of eight different styles for displaying title and chapter menus. Use the following procedure during the recording process to select styles for these menus. - Page 47 Selecting Display Styles The PRESET STYLE MENU screen can be used to change the styles used for displaying title and chapter menus. One of eight different types of style can be selected for each of the title and chapter menus. This DVD recorder can also store a total of six different display patterns for title and chapter menus.
-
Page 48: Easymenu: Freeware For Editing Menu Templates
Menu templates created with this application can then be transferred to your BD-X200 using a network cable, thus allowing you to make imaginative and creative DVDs with the minimum of effort. Easymenu can be downloaded from the following web page. Please refer to the software manual for details regarding usage and precautions. http://www.jvc-victor.co.jp/english/pro/prodv/ BUSY OPERATE OPEN/CLOSE... -
Page 49: Changing Chapter Menus (Thumbnail Edit Screen)
Changing Chapter Menus (THUMBNAIL EDIT screen) This DVD recorder can automatically create title and chapter menus as recording operations are started and stopped. Title and chapter menus are created using the following. Title or chapter names : Numbers are applied based on the recording sequence. Chapter thumbnails : The frames at which chapter marks have been inserted are used as thumbnails. -
Page 50: Changing & Naming Thumbnails For Chapter Menus
Title & Chapter Menu Settings Changing & Naming Thumbnails for Chapter Menus The modification of chapter menu thumbnails and the entry of names and comments are carried out as described below using the THUMBNAIL EDIT screen. Changing thumbnails THUMBNAIL EDIT screen For example, let’s change the thumbnail for the second chapter. - Page 51 Entering Names and Comments for Chapter Menus Use the following procedure to apply names to the thumbnails used in chapter THUMBNAIL EDIT menus, and also to add comments to be displayed on a chapter menu screen. TITLE CLOSE 1 - 6 Names and comments are entered using a keyboard.
-
Page 52: Changing & Checking Chapter Menu Styles
Title & Chapter Menu Settings Changing & Checking Chapter Menu Styles Although display styles for chapter menus are created using settings from the PRESET STYLE MENU screen as described above, the following procedure can be used to modify these styles at the end of title recording. In addition, it will also be possible at this time to confirm that chapter menus are as required. - Page 53 Checking the Chapter Menu Screen Use the following procedure to see how the chapter menu looks when the selected display style is used. THUMBNAIL EDIT START screen Select CHAPTER MENU from the THUMBNAIL EDIT START screen and press the SET button. THUMBNAIL EDIT TITLE CLOSE The CHAPTER MENU EDIT screen will appear.
-
Page 54: Ending The Editing Of Chapter Menus
Title & Chapter Menu Settings Ending the Editing of Chapter Menus Once all of the necessary changes and checks have been made using the THUMBNAIL EDIT screen, title closing must be carried out. Please ensure that title closing is performed as the last stage of chapter menu editing. Even if the chapter menu is to be left unchanged, title closing must be carried out to leave the THUMBNAIL EDIT screen. -
Page 55: Changing & Checking Title Menu Styles & Names
Changing & Checking Title Menu Styles & Names If EDIT MENU from the SYSTEM MENU screen is set to ENABLE, the TITLE MENU EDIT screen will be displayed upon disc finalizing. Using this screen, it will be possible to change the title menu’s display style, to enter title names, and to confirm that the title and chapter menus are as required. - Page 56 Title & Chapter Menu Settings Changing & Checking Title Menu Styles & Names (continued) Checking the Title Menu Screen TITLE MENU EDIT screen Select TITLE MENU PREVIEW from the TITLE MENU EDIT screen and press the SET button. TITLE MENU The TITLE MENU EDIT screen will appear.
- Page 57 Entering Names for the Title Menu Use the following procedure to enter names for titles in the title menu. TITLE MENU EDIT screen Names and comments are entered using a keyboard. Set KEYBOARD STYLE from the SYSTEM MENU screen in accordance with TITLE MENU the keyboard’s input language.
- Page 58 Title & Chapter Menu Settings Changing & Checking Title Menu Styles & Names (continued) Finalizing Discs TITLE MENU EDIT screen Select FINALIZE from the TITLE MENU EDIT screen and press the SET button. TITLE MENU A confirmation window will appear. FINALIZE PRESET STYLE Select YES and then press the SET button.
-
Page 59: Playback
Playback Playing Discs This DVD recorder can also be used to playback discs that it has recorded and finalized. When a disc is finalized, its title menu will be used to create the top menu. The action taken by your BD-X200 when a disc it has finalized is inserted or when playback of a title has ended will depend on the settings of DISC IN ACTION and TITLE END as set on the RECORDER MENU (2/2) screen during recording. -
Page 60: Fast & Slow Playback
Playback Fast & Slow Playback BUSY OPERATE OPEN/CLOSE OPTION DV Y/C LINE DVD RECORDER BD-X200 AUDIO SET UP TITLE CHAPTER DOLBY DIGITAL LPCM MPEG PHONES STOP PLAY PAUSE MENU MENU REV button FWD button Fast-Forward & Fast-Reverse Play Slow-Forward & Slow-Reverse Play Fast-forwarding Slow-forwarding Press the FWD button during playback or fast-reverse play... -
Page 61: Synchronous Recording
Synchronous Recording Recording Playback Signals From a VCR with RS-422A RS-422A control can be used to record playback signals from a VCR with an RS-422A terminal to a disc in your BD-X200.It will also be possible to control that VCR using this DVD recorder’s REMOTE CONTROL screen. Signal Connections VIDEO OUT VIDEO IN... - Page 62 Synchronous Recording Recording Playback Signals From a VCR with RS-422A (continued) Editing Via the REMOTE CONTROL (9PIN MASTER/DV MASTER) Screen A keyboard and mouse can be used as an alternative to the DVD recorder’s buttons when using the REMOTE CONTROL (9PIN MASTER/DV MASTER) screen.
- Page 63 1. Registering the In Point, Out Point, and Chapter Marks The following two methods can be used to register the In Point, Out Point, and chapter marks. Recording of time codes corresponding to tape positions. Direct entry using a keyboard. Registering chapter marks : In order to register chapter marks using the REMOTE CONTROL screen, it will first of all be necessary to set CHAPTER CREATION from the RECORDER MENU (2/2) screen to MANUAL.
- Page 64 Synchronous Recording Recording Playback Signals From a VCR with RS-422A (continued) 2. Deleting the In Point, Out Point, and Chapter Marks q Use the cursor buttons (t, 8, 7, and 6) to select the point to be deleted (i.e., In Point, Out Point, or a chapter mark from the chapter list), and then press the SET button.
-
Page 65: Recording Playback Signals From A Dv Camera Or Vcr
DV IN/OUT terminal DV terminal REMOTE DV IN/OUT SIGNAL DC 19V (video, audio, and control signals) VIDEO OUT DV cables: USB terminal VC-VDV204 (2 m, 4P-4P) from JVC VC-VDV206 (2 m, 4P-6P) from JVC Keyboard Print Pause Scroll Screen Lock Sysrq Break... -
Page 66: Recording Video & Audio From A Non-Linear Editor
DV terminal DV cables: Non-linear editor VC-VDV204 (2 m, 4P-4P) from JVC VC-VDV206 (2 m, 4P-6P) from JVC Connect the DV IN/OUT terminal on the rear of your BD-X200 to the DV terminal on the non-linear editor using a DV (IEEE1394) cable. - Page 67 Editing Via the REMOTE CONTROL (DV SLAVE) Screen A keyboard and mouse can be used as an alternative to the DVD recorder’s buttons when using the REMOTE CONTROL (DV SLAVE) screen. Front panel : Select using the cursor buttons (t, 8, 7, and 6), and confirm the selection using the SET button. : Select using the arrow keys (†, ©, √, and ∞), and confirm the selection using the Enter key.
- Page 68 Synchronous Recording Recording Video & Audio From a Non-Linear Editor (continued) 1. Registering the In Point, Out Point, and Chapter Marks Use the keyboard to directly enter the In Point, Out Point, and chapter marks. Registering chapter marks : In order to register chapter marks using the REMOTE CONTROL screen, it will first of all be necessary to set CHAPTER CREATION from the RECORDER MENU (2/2) screen to MANUAL.
- Page 69 3. Starting the Record Process Use the non-linear editor to control the DVD recorder. Each recording will be stored on the disc as a single title. Recording of video and audio to the DVD will be carried out from the In Point to the Out Point with chapters being automatically created as specified.
-
Page 70: In, Out & Chapter Points From External Edit Lists
The In Point, Out Point, and chapter marks are set in accordance with the TC CANCEL EDIT/END EDL. EDL LOAD Example 1: Loading a CSV-format EDL JVC CSV REMOTE CONTROL SCREEN ( 9PIN MASTER ) 00:00:00:00 IN POINT 01:00:00:00 OUT POINT... -
Page 71: Recording Operations Using A Dv Camera Trigger
(video, audio, and control signals) DV cables: VC-VDV204 (2 m, 4P-4P) from JVC VC-VDV206 (2 m, 4P-6P) from JVC Connect the DV IN/OUT terminal on the rear of your BD-X200 to the DV terminal on the GY-DV5000 using a DV (IEEE1394) cable. -
Page 72: Dvd Dubbing
DVD Dubbing Dubbing DVDs Using the LAN Terminal When the LAN terminal is used to join two BD-X200 DVD recorders via an Ethernet connection, audio and video from a sender DVD can be dubbed onto a DVD on the receiver device. Connected devices : One BD-X200 SENDER (used for playback of the master DVD) One BD-X200 RECEIVER (used for DVD recording) Signal Connections... -
Page 73: Network Settings
Network Settings Use the following procedure to carry out network settings on both the sender and receiver devices. Press the SET UP button to display the Setup Menu. BUSY Cursor buttons OPEN/CLOSE (6, 7, t and 8) Select NETWORK from the Setup Menu and then press the SET button. - Page 74 DVD Dubbing Dubbing DVDs Using the LAN Terminal (continued) Dubbing Setup Procedures Sender device : Insert a finalized disc. Receiver device : Insert a blank DVD. Procedure Use the DUBBING screen to carry out the dubbing of DVDs. DUBBING screen Sender and receiver devices 1.
- Page 75 Sender device Sender device The sender device will begin searching for receiver devices. DVD † DVD SENDER When connection has been completed, a dialog box for confirming the start of dubbing will appear. RECEIVER Searching . . . The IP address of the identified receiver device will be displayed in the dialog box for confirming the start of dubbing.
-
Page 76: Setup Menu
Setup Menu Setup Menu Configuration The Setup Menu screen is displayed on both the monitor and LCD display. As shown below, this screen is used to access the BD-X200’s setup menus. DISC MENU Screen DISC MENU INPUT SELECT MENU Screen MENU FINALIZE CANCEL... -
Page 77: Setting The Setup Menu
Setting the Setup Menu Settings made in the setup menus are stored in the BD-X200’s internal memory and will be retained even when the power is turned off. It is also possible to return to default settings whenever so required. In addition to the buttons on the front panel, a keyboard and mouse can also be used to perform operations on these menus. -
Page 78: Setup Menus
Setup Menu Setup Menus The following table identifies and describes the parameters that may be set using the Setup Menus. Top half : Appearance on monitor screen Bottom half : Appearance on LCD display Option Description This button opens a menu that allows settings to be made for finalizing and other similar disc processes. DISC MENU DISC MENU This button opens a menu that allows input audio and video signals to be selected. -
Page 79: Disc Menu Screen
DISC MENU Screen The following table identifies and describes the parameters that may be set using the DISC MENU screen. Top half : Appearance on monitor screen Bottom half : Appearance on LCD display : Default setting Parameter Possible settings Description This parameter indicates whether or not the recorded disc is to be finalized. -
Page 80: System Menu Screen
Setup Menu SYSTEM MENU Screen The following table identifies and describes the parameters that may be set using the SYSTEM MENU screen. Top half : Appearance on monitor screen Bottom half : Appearance on LCD display : Default setting Parameter Possible settings Description This parameter is used to indicate whether or not a setup signal is to be added to... -
Page 81: Preset Style Menu Screen
PRESET STYLE MENU screen The following table identifies and describes the parameters that may be set using the PRESET STYLE MENU screen. Top half : Appearance on monitor screen Bottom half : Appearance on LCD display : Default setting Parameter Possible settings Description STYLE... -
Page 82: Recorder Menu Screen
Setup Menu RECORDER MENU Screen The following table identifies and describes the parameters that may be set using the RECORDER screen. Top half : Appearance on monitor screen Bottom half : Appearance on LCD display : Default setting RECORDER MENU (1/2) screen Parameter Possible settings Description... - Page 83 RECORDER MENU (2/2) screen Parameter Possible settings Description Y/C TERMINAL This parameter is used to set the specification for the DVD recorder’s VIDEO Y/C INPUT terminal in order to enable the recording of wide-screen discrimination signals. MODE [S2] S1 : S1 terminal mode is to be adopted. A discrimination signal for normal video with a 4:3 aspect ratio and squeezed video is to be recorded.
-
Page 84: Remote Menu Screen
Setup Menu REMOTE MENU screen The following table identifies and describes the parameters that may be set using the REMOTE MENU screen. Top half : Appearance on monitor screen Bottom half : Appearance on LCD display : Default setting Parameter Possible settings Description REMOTE SELECT... -
Page 85: Display Menu Screen
DISPLAY MENU screen The following table identifies and describes the parameters that may be set using the DISPLAY screen. Top half : Appearance on monitor screen Bottom half : Appearance on LCD display : Default setting Parameter Possible settings Description DISPLAY This parameter is used to indicate whether or not status and alarm information is to [ON]... -
Page 86: Clock Adjust Menu Screen
Setup Menu CLOCK ADJUST MENU screen The following table identifies and describes the parameters that may be set using the CLOCK ADJUST MENU screen. Top half : Appearance on monitor screen Bottom half : Appearance on LCD display : Default setting Parameter Possible settings Description... -
Page 87: Network Menu Screen
This button is used to return to the Setup Menu screen. Others Troubleshooting Before requesting for repair, please check the following URL: http://www.jvc-victor.co.jp/english/pro/prodv/ If problem persists, contact either the store where the BD-X200 was purchased or your nearest JVC authorized dealer. -
Page 88: Specifications
Others Specifications Recording format : DVD Video Version 1.1 General Disc format : ISO9660-compatible UDF Network terminal : RJ-45 (Category5), Recordable media : DVD-R For General Version 2.0 100 BASE-Tx DVD-RW Version 1.1 USB terminal : USB 1.1 × 2 Recording signals : Must conform to DVD Video Format Power supply : 19 V DC... - Page 89 This product uses partial third-party software. For information concerning the software used, login via FTP by inputting the following into the unit and view the readme.txt file: User: anonymous Password: None (If the IP address of the unit is set to 192.168.0.2, FTP connection can be established by entering ftp://196.168.0.2 in the address bar of Internet Explorer.)
- Page 90 VICTOR COMPANY OF JAPAN, LIMITED is a registered trademark owned by VICTOR COMPANY OF JAPAN, LTD. is a registered trademark in Japan, the U.S.A., the U.K. and other countries. Printed in Japan © 2004 VICTOR COMPANY OF JAPAN, LIMITED LLT0060-001A...
Need help?
Do you have a question about the BD-X200U - Dvd Authoring Recorder and is the answer not in the manual?
Questions and answers