Powerfix Profi 278296 Operation And Safety Notes
Ultrasonic distance meter
Hide thumbs
Also See for 278296:
- Operation and safety notes (94 pages) ,
- Operation and safety notes (69 pages) ,
- Operation and safety notes (86 pages)
Table of Contents
Advertisement
Available languages
Available languages
Quick Links
ULTRASCHALL-ENTFERNUNGS-
MESSER / ULTRASONIC DISTANCE
METER / TÉLÉMÈTRE À ULTRASONS
ULTRASCHALL-ENTFERNUNGSMESSER
Bedienungs- und Sicherheitshinweise
ULTRASONIC DISTANCE METER
Operation and Safety Notes
TÉLÉMÈTRE À ULTRASONS
Instructions d'utilisation et consignes de sécurité
ULTRASONE AFSTANDMETER
Bedienings- en veiligheidsinstructies
ULTRAZVUKOVÝ MĚŘIČ VZDÁLENOSTÍ
Pokyny pro obsluhu a bezpečnostní pokyny
MEDIDOR POR ULTRASONIDOS
Instrucciones de utilización y de seguridad
MEDIDOR DE DISTÂNCIAS POR ULTRA-SONS
Instruções de utilização e de segurança
IAN 278296
Advertisement
Chapters
Table of Contents

Related Manuals for Powerfix Profi 278296


Summary of Contents for Powerfix Profi 278296
- Page 1 Instructions d‘utilisation et consignes de sécurité ULTRASONE AFSTANDMETER Bedienings- en veiligheidsinstructies ULTRAZVUKOVÝ MĚŘIČ VZDÁLENOSTÍ Pokyny pro obsluhu a bezpečnostní pokyny MEDIDOR POR ULTRASONIDOS Instrucciones de utilización y de seguridad MEDIDOR DE DISTÂNCIAS POR ULTRA-SONS Instruções de utilização e de segurança IAN 278296...
- Page 2 DE / AT / CH Bedienungs- und Sicherheitshinweise Seite GB / IE Operation and Safety Notes Page FR / BE Instructions d‘utilisation et consignes de sécurité Page NL / BE Bedienings- en veiligheidsinstructies Pagina Pokyny pro obsluhu a bezpečnostní pokyny Strana Instrucciones de utilización y de seguridad...
- Page 4 Min. 0.6 m Max. 16 m Wall Wall...
-
Page 5: Table Of Contents
Einleitung ...........Seite Bestimmungsgemäße Verwendung ..Seite Teilebeschreibung .........Seite Technische Daten ........Seite Lieferumfang ..........Seite Allgemeine Sicherheitshinweise ....Seite Sicherheitshinweise zu Batterien ........Seite Vor der Inbetriebnahme ..Seite 10 Batterie einlegen / wechseln ....Seite 10 Inbetriebnahme ......Seite 11 Länge messen ........Seite 11 Messfehler vermeiden ......Seite 12 Längen addieren ........Seite 13 Fläche messen ........Seite 14 Volumen messen........Seite 14... -
Page 6: Einleitung
Ultraschall-Entfernungsmesser Einleitung Wir beglückwünschen Sie zum Kauf Ihres neuen Produkts. Sie haben sich damit für ein hochwertiges Produkt entschieden. Die Bedienungsanleitung ist Teil dieses Produkts. Sie enthält wichtige Hinweise für Sicherheit, Gebrauch und Entsorgung. Machen Sie sich vor der Benutzung des Produkts mit allen Bedien- und Sicherheitshinweisen vertraut. -
Page 7: Technische Daten
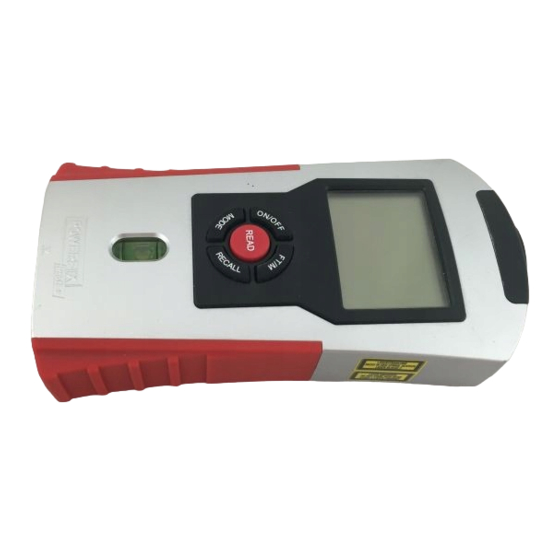
Libelle MODE-Taste ON / OFF-Taste (EIN / AUS) Display Laserdiode Batteriefachdeckel Technische Daten Betriebsspannung: max. 9 V Batterietyp: 6LR61 (9 V–Block) Messbereich: 0,6 m – 16 m Messgenauigkeit: +/- 1% Anzeige Kapazität: bis 9999,99 Wellenlänge Laser: 635–660 nm, 1 mW Laser-Klasse: Ultraschall-Frequenz: 40 kHz... - Page 8 Kontrollieren Sie das Produkt vor der Inbe- triebnahme auf Beschädigungen! Nehmen Sie ein beschädigtes Produkt nicht in Betrieb! Setzen Sie das Gerät keiner Feuchtigkeit aus! Es kann hierdurch beschädigt werden. Dieses Gerät kann von Kindern ab 8 Jahren und darüber sowie von Personen mit verringer- ten physischen, sensorischen oder mentalen Fähigkeiten oder Mangel an Erfahrung und Wissen benutzt werden, wenn sie beaufsichtigt...
-
Page 9: Sicherheitshinweise Zu Batterien
Sicherheitshinweise zu Batterien LEBENSGEFAHR! Batterien gehören nicht in Kinderhände. Suchen Sie im Falle eines Verschluckens sofort einen Arzt auf! VORSICHT! EXPLOSIONSGE- FAHR! Laden Sie nicht aufladbare Batterien niemals wieder auf, schließen Sie sie nicht kurz und / oder öffnen Sie sie nicht! Werfen Sie Batterien niemals in Feuer oder Wasser! Setzen Sie Batterien keiner mechanischen... -
Page 10: Vor Der Inbetriebnahme
Gefahr der Gerätebeschädigung Ausschließlich den angegebenen Batterietyp verwenden! Achten Sie beim Einlegen auf die richtige Po- larität! Diese wird im Batteriefach angezeigt! Reinigen Sie Batterie- und Gerätekontakt vor dem Einlegen falls erforderlich! Entfernen Sie verbrauchte Batterien umge- hend aus dem Gerät! Vor der Inbetriebnahme E ntfernen Sie vor der Inbetriebnahme die Schutzfolie vom Display... -
Page 11: Inbetriebnahme
durch die Profilform der Kontakte vorgege- ben. Achten Sie auch unbedingt darauf, dass der Stoffstreifen sich unterhalb der Batterie befindet. L egen Sie die Batterie in das Batteriefach und schließen Sie den Deckel wieder, so dass er hörbar einrastet. Inbetriebnahme Länge messen D rücken Sie die ON / OFF-Taste , um das... -
Page 12: Messfehler Vermeiden
Leuchtpunkt hilft Ihnen, den Ultraschall-Entfer- nungsmesser korrekt auszurichten. Nach erfolgreicher Messung wird die gemessene Länge im Display angezeigt. Messfehler vermeiden Um Messfehler zu vermeiden, beachten Sie die folgenden Hinweise: D ie Messung erfolgt mit Ultraschall, der sich kegelförmig vom Ultraschallsender fortbe- wegt. -
Page 13: Längen Addieren
W enn eine eindeutige Messung nicht möglich ist, zeigt das Display die Angabe „Err“. Die Messung muss dann wiederholt werden. Längen addieren M essen Sie eine Länge wie im Kapitel „Länge messen“ beschrieben. Der Betrag der Länge erscheint in der oberen Zeile des Displays D rücken Sie nun die RECALL-Taste . -
Page 14: Fläche Messen
Fläche messen Hinweis: Um methodische Messfehler zu ver- meiden, machen Sie sich bitte zunächst mit den Hinweisen zur Messung von Längen vertraut. D rücken Sie die ON / OFF-Taste , um das Gerät einzuschalten. D rücken Sie die MODE-Taste so oft, bis im Display das Symbol für Flächenmes- sung „... -
Page 15: Flächen Bzw. Volumina Addieren
D rücken Sie die ON / OFF-Taste , um das Gerät einzuschalten. D rücken Sie die MODE-Taste so oft, bis im Diplay das Symbol „ “ für Volumen- messung sowie die Anzeige 0.00 m (bzw. 0‘00‘‘) erscheint. Das Symbol „ “... -
Page 16: Die Letzten Messwerte Anzeigen
Fläche / des Volumens erscheint in der unte- ren Zeile des Displays. D rücken Sie die RECALL-Taste , um das Messergebnis zu speichern. Im Display erscheint das Symbol M+ und zeigt an, dass das unten im Display angezeigte Messergeb- nis im Gerät gespeichert ist. D rücken Sie kurz die MODE-Taste . -
Page 17: Temperaturanzeige
Temperaturanzeige H alten Sie die FT/M-Taste für ca. 3 Se- kunden gedrückt. Im Display wird die ak- tuelle Raumtemperatur in der amtlichen Temperatureinheit °C angezeigt. U m in die Temperatureinheit °F umzuschal- ten, drücken Sie kurz die FT/M-Taste. D rücken Sie kurz die MODE-Taste , um den Temperaturanzeigemodus zu verlassen. -
Page 18: Reinigung Und Pflege
Reinigung und Pflege R einigen Sie das Gerät nur äußerlich mit einem weichen trockenen Tuch. Entsorgung Die Verpackung besteht aus umweltfreundlichen Materialien, die Sie über die örtlichen Recycling- stellen entsorgen können. Möglichkeiten zur Entsorgung des aus- gedienten Gerät erfahren Sie bei Ihrer Gemeinde- oder Stadtverwaltung. -
Page 19: Garantie
Garantie Das Produkt wurde nach strengen Qualitätsrichtli- nien sorgfältig produziert und vor Anlieferung ge- wissenhaft geprüft. Im Falle von Mängeln dieses Produkts stehen Ihnen gegen den Verkäufer des Produkts gesetzliche Rechte zu. Diese gesetzli- chen Rechte werden durch unsere im Folgenden dargestellte Garantie nicht eingeschränkt. - Page 20 Introduction ........Page 21 Intended use ..........Page 21 Parts description ........Page 21 Technical Data ........Page 22 Scope of delivery ........Page 22 General safety instructions ........Page 22 Safety Instructions for Batteries ........Page 23 Before using ........Page 25 Inserting / changing the battery ...Page 25 Start-up ..........Page 26 Measuring length ........Page 26...
-
Page 21: Introduction
Ultrasonic Distance Meter Introduction We congratulate you on the purchase of your new product. You have chosen a high quality product. The instructions for use are part of the product. They contain important information con- cerning safety, use and disposal. Before using the product, please familiarise yourself with all of the safety information and instructions for use. -
Page 22: Technical Data
ON / OFF button Display Laser diode Battery compartment cover Technical Data Operating voltage: max. 9 V Battery type: 6LR61 (9 V block) Measuring range: 0.6 m – 16 m Measuring accuracy: +/- 1% Capacity display: up to 9999.99 Laser wave length: 635–660 nm, 1 mW Laser class: Ultrasonic frequency:... -
Page 23: Safety Instructions For Batteries
Check the product for damage before use! Never use a damaged product! Do not expose the device to moisture! This may damage it. This appliance can be used by children aged from 8 years and above and persons with reduced physical, sensory or mental capabili- ties or lack of experience and knowledge if they have been given supervision or instruction concerning use of the appliance in a safe way... - Page 24 CAUTION! EXPLOSION HAZARD! Never recharge non- rechargeable batteries, do not short-circuit and / or open batteries! Never throw batteries into fire or water! Do not subject batteries to any mechanical load! Risk of battery leakage In the event of a battery leak, immediately remove it from the device to prevent damage! Avoid contact with the skin, eyes and mucous membranes! In the event of contact with bat-...
-
Page 25: Before Using
Before using B efore initial use, remove the protective film from the device display and insert the enclosed battery. Inserting / changing the battery If the battery symbol appears in the display , the inserted battery is almost drained and must be replaced. Empty batteries can falsify the measured result. -
Page 26: Start-Up
Start-up Measuring length P ress the ON/OFF button to switch the device on. If you do not press any button for 60 s, the display shuts down. T o switch the device off manually, hold the ON/OFF button pressed down for 3 sec- onds, until the display goes out and a double tone signal sounds. -
Page 27: Avoiding Measuring Errors
Avoiding measuring errors In order to avoid measuring errors, please note the following information: T he measurement is performed by ultrasound, which travels from the ultrasonic transmitter in a conical manner. The ultrasound is reflected from the target area and received by the ul- trasonic receiver. -
Page 28: Adding Lengths Together
Adding lengths together M easure a length as described in the section „Measuring length“. The length appears in the top line of the display N ow press the RECALL button . The length is transferred to the bottom line. This means that it has been saved in the aggregate memory. -
Page 29: Measuring Volume
P ress the MODE button repeatedly until the symbol for surface area measurement „ “, as well as the designation 0.00 m (or 0‘00“), appear in the display . The symbol „ “ for length measurement flashes. The device displays in this way, that it is ready for the first measurement. -
Page 30: Adding Surface Areas Or Volumes Together
displays in this way, that it is ready for the first measurement. A lign the device and press the READ button If the measurement is successful, the length will appear at the top of the display. The symbol for width measurement „ “... -
Page 31: Displaying The Last Measured Values
result, which is shown at the bottom of the display, is saved in the device P ress the MODE button briefly. The de- vice is now ready to measure the next surface area or volume. M easure the next surface area or volume in the same way as you performed the first measurement. -
Page 32: Changing The Unit Of Measurement
I n order to switch over to the °F temperature unit, press the FT/M button briefly. P ress the MODE button briefly in order to leave the temperature display mode. Changing the unit of measurement P ress the FT/M button in order to switch over from the official metric unit of measure- ment to the imperial unit of measurement... -
Page 33: Disposal
Disposal The packaging is made of environmentally friendly materials, which may be disposed of through your local recycling facilities. Contact your local or municipal author- ity for information on how to dispose of the device at the end of its opera- tional life. - Page 34 fault in materials or manufacture within 3 years from the date of purchase, we will repair or replace it – at our choice – free of charge to you. The warranty period begins on the date of pur- chase. Please keep the original sales receipt in a safe location.
- Page 35 Introduction ........Page 36 Utilisation conforme ......Page 36 Descriptif des pièces ......Page 36 Caractéristiques techniques ....Page 37 Contenu de la livraison ......Page 37 Instructions générales de sécurité ........Page 37 Consignes de sécurité sur les piles ........Page 39 Avant la mise en service ..Page 40 Mise en place / remplacement de la pile ..........Page 40...
-
Page 36: Introduction
Télémètre à ultrasons Introduction Nous vous félicitons pour l‘achat de votre nouveau produit. Vous avez opté pour un produit de grande qualité. Le mode d‘emploi fait partie intégrante de ce produit. Il contient des indications impor- tantes pour la sécurité, l’utilisation et la mise au rebut. -
Page 37: Caractéristiques Techniques
Touche ON/OFF (allumé/éteint) Écran Diode laser Couvercle du compartiment à piles Caractéristiques techniques Tension de service : max. 9 V Type de piles : 6LR61 (bloc 9 V) Plage de mesure : 0,6 m–16 m Précision de mesure : +/- 1% Capacité d‘affichage : jusqu‘à 9999,99 Longueur d‘ondes du laser : 635–660 nm, 1 mW Catégorie du laser : Fréquence des ultrasons :... - Page 38 Avant la mise en service, vérifiez si le produit présente des dommages ! Ne pas mettre un appareil endommagé en service ! N‘exposez l‘appareil à aucune humidité ! Il risque d‘être endommagé. Cet appareil peut être utilisé par des enfants de 8 ans et plus ainsi que par des personnes avec des capacités physiques, psychiques ou sensorielles limitées ou manquant d‘expérience ou de connaissance s‘ils sont surveillés ou...
-
Page 39: Consignes De Sécurité Sur Les Piles
Consignes de sécurité sur les piles DANGER DE MORT ! Ne pas laisser les piles à la portée des enfants. En cas d´ingestion, consultez immédiatement un médecin ! ATTENTION ! RISQUES D‘EX- PLOSION ! Ne jamais recharger les piles à usage unique, ni les court-circuiter et / ou les ouvrir ! Ne jamais jeter les piles au feu ou dans l‘eau ! -
Page 40: Avant La Mise En Service
Veiller à insérer la pile en respectant la pola- rité correcte ! Celle-ci est indiquée dans le compartiment à piles ! Au besoin, nettoyer les contacts des piles et de l’appareil avant l’insertion ! Retirez immédiatement les piles usagées de l‘appareil ! Avant la mise en service A vant la mise en service, retirez le film de protection de l‘écran de l‘appareil et... -
Page 41: Mise En Service
contacts. Veillez impérativement à ce que la bande de tissu ne se trouve pas en-dessous de la pile. P lacez la pile dans le compartiment à piles et refermez le couvercle, jusqu‘à ce qu‘il s‘enclenche de façon audible. Mise en service Mesurer des longueurs A ppuyez sur la touche ON / OFF pour... -
Page 42: Évitez Les Erreurs De Mesure
vous aide à orienter correctement le télémètre à ultrasons. Si la mesure est effectuée avec succès, la longueur mesurée s‘affiche dans la partie supérieure de l‘écran. Évitez les erreurs de mesure Afin d‘éviter les erreurs de mesure, veuillez respecter les indications sui- vantes : L a mesure est effectuée par ultrasons, qui se déplacent de façon conique à... -
Page 43: Ajouter Des Longueurs
L a pile ne doit pas être vide. Le symbole de batterie affiché à l‘écran indique que la pile est vide. S i la mesure ne peut pas être effectuée de façon indiscutable, l‘écran affiche le message « Err ». La mesure est ensuite renouvelée. Ajouter des longueurs M esurez une longueur tel que décrit dans le chapitre « Mesurer des longueurs ». -
Page 44: Mesurer Des Surfaces
Mesurer des surfaces Remarque : afin d‘éviter les erreurs de mesure méthodiques, veuillez d‘abord prendre connais- sance des indications concernant les mesures des longueurs. A ppuyez sur la touche ON / OFF pour allumer l‘appareil. A ppuyez sur la touche MODE jusqu‘à... -
Page 45: Mesurer Des Volumes
Mesurer des volumes Remarque : afin d‘éviter les erreurs de mesure méthodiques, veuillez d‘abord prendre connais- sance des indications concernant les mesures des longueurs. A ppuyez sur la touche ON / OFF pour allumer l‘appareil. A ppuyez sur la touche MODE jusqu‘à... -
Page 46: Additionner Des Surfaces Ou Des Volumes
P our mesurer un nouveau volume, appuyez brièvement sur la touche MODE. L‘affichage à l‘écran est réinitialisé et l‘appareil est prêt pour mesurer un nouveau volume. Additionner des surfaces ou des volumes M esurez une surface ou un volume comme décrit dans le chapitre « Mesurer des surfaces ... -
Page 47: Afficher La Dernière Valeur De Mesure
Afficher la dernière valeur de mesure A près avoir mesuré une surface ou un volume, appuyez à nouveau sur la touche READ pour afficher les valeurs de mesure individuelles de la mesure. Le symbole de la valeur de mesure corres- pondante clignote et le résultat de la mesure est affiché... -
Page 48: Arrêt/Mise Hors Service Automatique
vides risquent de fausser les résultats des mesures. La procédure de changement des piles est décrite dans le chapitre « Mise en place/remplacement de la pile ». Arrêt/Mise hors service automatique É teignez l‘appareil en appuyant sur la touche ON/OFF pendant 3 secondes. Nettoyage et entretien N ettoyez uniquement l’extérieur du boîtier à... -
Page 49: Garantie
Les piles ne doivent pas être mises au rebut dans les ordures ménagères. Elles peuvent contenir des métaux lourds toxiques et doivent être considé- rées comme des déchets spéciaux. Les symboles chimiques des métaux lourds sont les suivants : Cd = cadmium, Hg = mercure, Pb = plomb. - Page 50 considérées comme des pièces d’usure, ni aux dommages sur des composants fragiles, comme des interrupteurs, des batteries et des éléments fabriqués en verre. 50 FR/BE...
- Page 51 Inleiding ......... Pagina 52 Correct gebruik ......... Pagina 52 Beschrijving van de onderdelen ..Pagina 52 Technische gegevens ......Pagina 53 Omvang van de levering ....Pagina 53 Algemene veiligheidsinstructies ... Pagina 53 Veiligheidsinstructies voor het gebruik van batterijen ......Pagina 55 Vóór de ingebruikname ...
-
Page 52: Inleiding
Ultrasone afstandmeter Inleiding Hartelijk gefeliciteerd met de aankoop van uw nieuwe product. U heeft voor een hoogwaardig product gekozen. De gebruiksaanwijzing is een deel van het product. Deze bevat belangrijke aanwijzingen voor veiligheid, gebruik en verwij- dering. Maakt U zich voor de ingebruikname van het product met alle bedienings- en veiligheids- voorschriften vertrouwd. -
Page 53: Technische Gegevens
MODE-toets ON / OFF-toets (AAN / UIT) Display Laserdiode Batterijvakdeksel Technische gegevens Voedingsspanning: max. 9 V Batterijtype: 6LR61 (9 V–blok) Meetbereik: 0,6 m – 16 m Meetnauwkeurigheid: +/- 1% Weergave capaciteit: tot 9999,99 Golflengte laser: 635–660 nm, 1 mW Laserklasse: Ultrasone frequentie: 40 kHz Meetbereik thermometer:... - Page 54 Controleer het product voor de ingebruikname op beschadigingen! Neem een beschadigd product niet in gebruik! Stel het apparaat niet bloot aan vocht! Het apparaat kan hierdoor worden beschadigd. Dit apparaat kan door kinderen vanaf 8 als- ook personen met verminderde psychische, sensorische of mentale vaardigheden of een gebrek aan ervaring en/of kennis worden gebruikt, als zij onder toezicht staan of geïn-...
-
Page 55: Veiligheidsinstructies Voor Het Gebruik Van Batterijen
Veiligheidsinstructies voor het gebruik van batterijen LEVENSGEVAAR! Houd batterijen uit de buurt van kinderen. Raadpleeg bij inslikken onmiddellijk een arts! VOORZICHTIG! EXPLOSIE- GEVAAR! Laad niet-oplaadbare batterijen nooit op, sluit ze niet kort en/of open ze niet! Gooi batterijen nooit in vuur of water! Stel de batterijen nooit aan mechanische belastingen bloot! Gevaar dat de batterijen lekken... -
Page 56: Vóór De Ingebruikname
Gevaar voor beschadiging van het apparaat Gebruik uitsluitend het aangegeven batterijtype! Let bij het plaatsen van de batterijen op de juiste polariteit! Deze wordt aangegeven in het batterijvakje! Reinig de contacten van het product en van de batterijen zo nodig voordat u de batterijen plaatst! Verwijder verbruikte batterijen direct uit het apparaat! -
Page 57: Ingebruikname
op de juiste polariteit. Deze wordt door de profielvorm van de contacten weergegeven. Let erop dat de stofstrip zich onder de batterij bevindt. P laats de batterij in het batterijvak en sluit het deksel weer, zodat deze hoorbaar vastklikt. Ingebruikname Lengte meten D ruk op de ON/OFF-toets om het appa-... -
Page 58: Meetfouten Vermijden
uit te lijnen. De gemeten lengte wordt weer- gegeven op het scherm na een juiste meting. Meetfouten vermijden Om meetfouten te vermijden, moet u letten op de volgende aanwijzingen: D e meting gebeurt door middel van ultrasoon geluid dat conisch vanaf de ultrasone zender beweegt. -
Page 59: Lengtes Toevoegen
Lengtes toevoegen M eet een lengte zoals wordt beschreven in het hoofdstuk ‚Lengte meten‘. De lengte ver- schijnt in de bovenste regel van het display D ruk nu op de RECALL-toets . De lengte wordt nu overgedragen op de onderste re- gel. -
Page 60: Volume Meten
D ruk zo vaak op de MODE-toets totdat op het display het symbool voor opper- vlaktemeting ‚ ‘ en de weergave 0.00 m (resp. 0‘00‘‘) verschijnt. Het symbool ‚ ‘ voor lengtemeting knippert. Het apparaat laat zo zien dat het gereed is voor een eerste meting. -
Page 61: Optellen Van Oppervlaktes Resp. Volumes
0‘00‘‘) verschijnt. Het symbool ‚ ‘ voor lengtemeting knippert. Het apparaat laat zo zien dat het gereed is voor een eerste meting. R icht het apparaat en druk op de READ-toets . Bij een juiste meting wordt bovenaan op het display de gemeten lengte weergegeven. Bovendien knippert het symbool voor breed- temeting ‚... -
Page 62: De Laatste Meetwaarden Weergeven
verschijnt het symbool M+ wat aangeeft dat de onderaan in het display weergegeven meetresultaat is opgeslagen in het apparaat. D ruk kort op de MODE-toets . Het appa- raat is nu gereed voor een meting van de vol- gende oppervlaktes/de volgende volumes. M eet de volgende oppervlakte/het volgende volume zoals u dit bij de eerste meting hebt gedaan. -
Page 63: Maateenheid Wijzigen
wordt de huidige kamertemperatuur in de of- ficiële temperatuureenheid °C weergegeven. O m over te schakelen naar de tempera- tuureenheid °F drukt u kort op de FT/M-toets. D ruk kort op de MODE-toets om de temperatuurweergavemodus te verlaten. Maateenheid wijzigen D ruk op de FT/M-toets om van de officiële maateenheid meter over te schakelen naar... -
Page 64: Verwijdering
Verwijdering De verpakking bestaat uit milieuvriendelijke grond- stoffen die u via de plaatselijke recyclingcontai- ners kunt afvoeren. Mogelijkheden voor de verwijdering van het apparaat dat u niet meer wilt gebrui- ken, vindt u bij uw gemeente- of stads- beheer. Defecte of verbruikte batterijen moeten volgens de richtlijn 2006 / 66 / EG en diens veranderingen wor- den gerecycled. - Page 65 Op dit product verlenen wij 3 jaar garantie vanaf aankoopdatum. De garantieperiode start op de dag van aankoop. Bewaar de originele kassabon alstublieft. Dit document is nodig als bewijs voor aankoop. Wanneer binnen 3 jaar na de aankoopdatum van dit product een materiaal- of productiefout optreedt, dan wordt het product door ons –...
- Page 66 Úvod ...........Strana 67 Použití ke stanovenému účelu....Strana 67 Popis dílů ..........Strana 67 Technické údaje .........Strana 68 Obsah dodávky .........Strana 68 Všeobecná bezpečnostní upozornění ........Strana 68 Bezpečnostní upozornění k bateriím ..Strana 69 Před uvedením do provozu ........Strana 70 Vložení / výměna baterie ....Strana 71 Uvedení...
-
Page 67: Úvod
Ultrazvukový měřič vzdáleností Úvod Blahopřejeme Vám ke koupi nového výrobku. Rozhodli jste se pro kvalitní produkt. Návod k ob- sluze je součástí tohoto výrobku. Obsahuje důle- žité pokyny pro bezpečnost, použití a likvidaci. Před použitím výrobku se seznamte se všemi po- kyny k obsluze a bezpečnostními pokyny. -
Page 68: Technické Údaje
Laserová dioda Víko schránky na baterie Technické údaje Provozní napětí: max. 9 V Typ baterie: 6LR61 (blok 9 V) Rozsah měření: 0,6 m – 16 m Přesnost měření: +/- 1 % Indikace kapacity: do 9999,99 Vlnová délka laseru 635 – 660 nm, 1 mW Třída laseru: Ultrazvuková... -
Page 69: Bezpečnostní Upozornění K Bateriím
Nevystavujte přístroj vlhkosti! Může se tím poškodit. Tento přístroj mohou používat děti starší než 8 let, osoby se sníženými fyzickými, sen- zorickými nebo duševními schopnosti nebo s nedostatečnými zkušenostmi a znalostmi o používání přístroje jen tehdy, jestliže byly poučeny o jeho bezpečném používání a porozuměly možným ohrožením. -
Page 70: Před Uvedením Do Provozu
Nikdy neházejte baterie do ohně nebo do vody! Nevystavujte baterie mechanickému zatížení! Nebezpečí vytečení baterií V případě vytečení baterií je ihned vyjměte z výrobku, abyste zamezili jeho poškození! Vyhýbejte se kontaktu baterií nebo uniklé kyseliny s pokožkou, očima a sliznicemi! Po kontaktu s kyselinou baterií... -
Page 71: Vložení/ Výměna Baterie
Vložení/ výměna baterie Když se na displeji zobrazí symbol baterie je vložená baterie téměř vybitá a musí se vyměnit. Vybité baterie mohou zkreslit výsledek měření. Při vkládání baterie postupujte následovně: O tevřete víko schránky na baterie zadní straně přístroje. S pomocí proužku látky, který... -
Page 72: Zabránění Chybám Měření
S tiskněte tolikrát tlačítko MODE , dokud se nezobrazí symbol pro měření délky „ “ a údaj délky 0.00 m (popř. 0‘00‘‘). P održte referenční plochu ultrazvukového měřiče vzdálenosti u počátečního bodu mě- ření. Držte přístroj tak, aby referenční plocha byla vyrovnána paralelně k cílové ploše měření. -
Page 73: Sčítání Délek
V e zvukovém kuželu se nesmí nacházet žádné předměty, které by zvuk předčasně odrazily. Zvukový kužel má při délce 16 m šířku asi 6 m. C ílová plocha musí mít hladký povrch, aby se zvuk mohl dobře odrazit. P růhledné plochy jako např. sklo zvuk zpravidla odrážejí. -
Page 74: Měření Plochy
T ento postup můžete opakovat libovolně často, dokud nebude překročena délka 9999,99 m. Měření plochy Upozornění: Za účelem zabránění metodickým chybám měření se nejprve seznamte s pokyny pro měření délek. P ro zapnutí přístroje stiskněte tlačítko ON / OFF S tiskněte tolikrát tlačítko MODE , dokud se na displeji neobjeví... -
Page 75: Sčítání Ploch, Popř. Objemů
P ro zapnutí přístroje stiskněte tlačítko ON / OFF S tiskněte tolikrát tlačítko MODE , dokud se na displeji neobjeví symbol pro měření objemu „ “ a údaj 0.00 m (popř. 0‘00‘‘). Symbol „ “ pro měření plochy bliká. Přístroj tak ukazuje, že je připraven na první měření. V yrovnejte přístroj a stiskněte tlačítko READ . -
Page 76: Zobrazení Posledních Naměřených Hodnot
symbol M+ a znázorní, že výsledek měření zobrazený dole na displeji je uložen v přístroji. S tiskněte krátce tlačítko MODE . Přístroj je nyní připraven na měření další plochy / dal- šího objemu. Z měřte další plochu / další objem tak, jak jste provedli první... -
Page 77: Změna Měrné Jednotky
Změna měrné jednotky P ro přepnutí z úřední měrné jednotky metrů na měrnou jednotku stop (indikace stopy‘, palce‘‘) stiskněte tlačítko FT / M Zobrazení kapacity baterie V případě nízkého stavu nabití baterie se na displeji objeví symbol baterie . Pokud se tento symbol zobrazí, vyměňte co nejrychleji baterii. -
Page 78: Záruka
O možnostech likvidace vysloužilého přístroje se informujte u správy vaší obce nebo města. Vadné nebo vybité baterie se musí, podle směrnice 2006 / 66 / ES a příslušných změn této směrnice, recyklovat. Baterie a výrobek odevzdejte zpět do nabízených sběren. Baterie se nesmějí... - Page 79 Záruka platí na vady materiálu a výrobní vady. Tato záruka se nevztahuje na díly výrobku podlé- hající opotřebení (např. na baterie), dále na po- škození křehkých, choulostivých dílů, např. vypínačů, akumulátorů nebo dílů zhotovených ze skla.
- Page 80 Introducción ........ Página 81 Uso adecuado ........Página 81 Descripción de las piezas ....Página 81 Características técnicas ....Página 82 Contenido .......... Página 82 Indicaciones generales de seguridad ......Página 82 Indicaciones de seguridad acerca de las pilas ....Página 84 Antes de la puesta en funcionamiento ......
-
Page 81: Introducción
Medidor por ultrasonidos Introducción Enhorabuena por la adquisición de su nuevo producto. Ha optado por un producto de alta calidad. El manual de instrucciones forma parte de este producto. Contiene importantes indicacio- nes sobre seguridad, uso y eliminación. Antes de usar el producto, familiarícese con todas las indi- caciones de manejo y de seguridad. -
Page 82: Características Técnicas
Botón ON / OFF (encendido / apagado) Pantalla Diodo láser Tapa del compartimento para pilas Características técnicas Tensión de servicio: máx. 9 V Tipo de pila: 6LR61 (bloque de 9 V) Rango de medición: 0,6 m – 16 m Precisión de medición: +/- 1% Indicador de capacidad: hasta 9999,99 Longitud de onda láser:... - Page 83 Compruebe que el producto se encuentra en perfectas condiciones antes de ponerlo en funcionamiento! ¡Si el aparato está averiado, no lo utilice en ningún caso! ¡No exponga el aparato a la humedad! O podría resultar dañado. Este producto puede ser utilizado por niños mayores de 8 años, así...
-
Page 84: Indicaciones De Seguridad Acerca De Las Pilas
Indicaciones de seguridad acerca de las pilas ¡PELIGRO DE MUERTE! No deje las pilas al alcance de los niños. ¡En caso de ingesta, acuda inme- diatamente a un médico! ¡CUIDADO! ¡PELIGRO DE EX- PLOSIÓN! ¡No recargar nunca pilas no recargables, no poner en cortocircuito ni abrirlas! ¡No arrojarlas nunca al fuego o al agua! ¡No someter las pilas a esfuerzos mecánicos! -
Page 85: Antes De La Puesta En Funcionamiento
¡Si fuera necesario, limpie los contactos de las pilas y del aparato antes de introducirlas! ¡Extraiga inmediatamente las pilas agotadas del aparato! Antes de la puesta en funcionamiento A ntes de poner en funcionamiento el aparato, retire la lámina de plástico de la pantalla e inserte la pila. -
Page 86: Medir Una Longitud
I nserte la pila en el compartimento de las pilas y cierre la tapa de modo que encaje haciendo clic. Puesta en funcionamiento Medir una longitud P ulse el botón ON / OFF para encender el aparato. Si durante 60 s no se pulsa nin- gún botón, la pantalla se apaga. -
Page 87: Evitar Errores De Medición
medición se ha realizado con éxito, la longi- tud medida se mostrará en la pantalla. Evitar errores de medición Para evitar errores de medición, observe las siguientes indicaciones: L a medición se efectúa con ultrasonido, que se desplaza en forma de cono desde el emi- sor de ultrasonido . -
Page 88: Cómo Sumar Longitudes
Cómo sumar longitudes M ida una longitud como se describe en el capítulo “Medir una longitud”. La cifra de la longitud aparecerá en la parte superior de la pantalla A hora, pulse el botón RECALL . La cifra de la longitud pasará a la parte inferior de la pantalla. -
Page 89: Medir Un Volumen
P ulse el botón ON / OFF para encender el aparato. P ulse el botón MODE repetidamente hasta que aparezca en la pantalla símbolo de medición de superficie “ ” así como la indicación 0.00 m (o bien 0‘00‘‘). El símbolo “ ”... - Page 90 P ulse el botón ON / OFF para encender el aparato. P ulse el botón MODE repetidamente hasta que aparezca en la pantalla símbolo de medición de volumen “ ” así como la indicación 0.00 m (o bien 0‘00‘‘). El símbolo “...
-
Page 91: Cómo Sumar Superficies O Volúmenes
Cómo sumar superficies o volúmenes M ida una superficie o un volumen como se describe en los capítulos “Medir una superfi- cie” o “Medir un volumen”. La cifra de la superficie / del volumen aparece en la parte inferior de la pantalla. P ulse el botón RECALL para almacenar el resultado de la medición. -
Page 92: Indicación De Temperatura
El símbolo del valor de medición correspon- diente estará intermitente y el resultado de medición se mostrará en la parte superior de la pantalla. Indicación de temperatura M antenga pulsado el botón FT/M rante unos 3 segundos. En la pantalla se mostrará... -
Page 93: Desconexión Automática
Apagado / Desconexión automática A pague el aparato manteniendo pulsado el botón ON/OFF durante 3 segundos. Limpieza y cuidado L impie el aparato sólo por fuera con un paño suave y seco. Eliminación El embalaje está compuesto por materiales no con- taminantes que pueden ser eliminados en el centro de reciclaje local. -
Page 94: Garantía
los metales pesados son: Cd = cad- mio, Hg = mercurio, Pb = plomo. Las pilas usadas deben reciclarse en un punto de recogida local. Garantía El aparato ha sido fabricado cuidadosamente siguiendo exigentes normas de calidad y ha sido probado antes de su entrega. - Page 95 Introdução ........Página 96 Utilização adequada ......Página 96 Descrição das peças ......Página 96 Dados técnicos ........Página 97 Material fornecido ......Página 97 Indicações gerais de segurança ......Página 97 Indicações de segurança relativas às pilhas ....Página 99 Antes da colocação em funcionamento ......Página 100 Inserir / substituir a pilha ....Página 100 Colocação em funcionamento...
-
Page 96: Introdução
Medidor de distâncias por ultra-sons Introdução Damos-lhe os parabéns pela aquisição do seu novo produto. Acabou de adquirir um produto de grande qualidade. O manual de instruções é parte integrante deste produto. Contém indica- ções importantes referentes à segurança, utiliza- ção e eliminação. -
Page 97: Dados Técnicos
Nível de bolha de ar Botão MODE Botão ON / OFF (LIGADO / DESLIGADO) Visor Díodo laser Tampa do compartimento das pilhas Dados técnicos Tensão de serviço: máx. 9 V Tipo de pilha: 6LR61 (bloco 9 V) Amplitude de medição: 0,6 m –... - Page 98 produto a terceiros, entregue também os respeti- vos documentos! Antes da colocação em funcionamento, verifique o produto quanto a danos! Nunca coloque um produto danificado em funciona- mento! Não exponha o aparelho a humidades! Ele poderá ficar danificado. Ente aparelho pode ser utilizado por crianças a partir dos 8 anos, assim como por pessoas com capacidades físicas, sensoriais ou men- tais reduzidas ou deficiências na experiência...
-
Page 99: Indicações De Segurança Relativas Às Pilhas
Indicações de segurança relativas às pilhas PERIGO DE MORTE! As pilhas não devem ser manuseadas por crianças. Se a pilha for ingerida, contacte imediatamente um médico! CUIDADO! PERIGO DE EXPLOSÃO! Nunca recarregue pilhas não recarregáveis, não provoque curto-circuito nem as abra! Nunca atire pilhas para o fogo ou água! Não exponha as pilhas a uma carga mecâ- nica demasiado elevada! -
Page 100: Antes Da Colocação Em Funcionamento
Se necessário, limpe os contactos das pilhas e do aparelho antes da sua colocação! Remova de imediato as pilhas usadas do aparelho! Antes da colocação em funcionamento A ntes da colocação em funcionamento, re- mova a película de proteção do visor aparelho e insira a pilha incluída no forneci- mento. -
Page 101: Colocação Em Funcionamento
I nsira a pilha no compartimento das pilhas e volte a fechar a tampa até ouvir o som de encaixe. Colocação em funcionamento Medição de comprimentos P rima o botão ON / OFF para ligar o aparelho. Se não premir qualquer botão durante 60 s, o visor desliga-se P ara desligar o aparelho manualmente, prima o botão ON / OFF durante 3 segundos... -
Page 102: Evitar Erros De Medição
Evitar erros de medição Para evitar erros de medição, tenha em atenção as seguintes indicações: A medição é feita por ultrassom; o ultrassom é impelido do emissor de ultrassom para a frente, em forma de cone. O som é refletido a partir da área-alvo e recebido pelo recetor de ultrassons. -
Page 103: Adicionar Comprimentos
Adicionar comprimentos M eça um comprimento tal como descrito no capítulo „Medição de comprimentos“. O valor do comprimento aparece na linha superior do visor P rima agora o botão RECALL . O valor do comprimento é transferido para a linha infe- rior. -
Page 104: Medição De Volumes
P rima o botão ON / OFF para ligar o aparelho. P rima o botão MODE repetidamente até o símbolo para a medição de áreas „ “ bem como a indicação 0.00 m (ou 0‘00‘‘) surgirem no visor . O símbolo „ “... -
Page 105: Adicionar Áreas Ou Volumes
a medição de comprimento pisca. O apare- lho indica, assim, que está preparado para a primeira medição. A linhe o aparelho e prima o botão READ Numa medição bem-sucedida, o comprimento medido é indicado em cima, no visor. Além disso, o símbolo para a medição da largura „... -
Page 106: Visualizar Os Últimos Valores De Medição
P rima brevemente o botão MODE aparelho está agora pronto para a medição da área / do volume seguinte. M eça a área / o volume seguinte tal como fez para a primeira medição. P rima novamente o botão RECALL para assu- mir também o novo resultado na memória do total. -
Page 107: Trocar De Unidade De Medida
Trocar de unidade de medida P rima o botão FT / M para mudar da uni- dade de medida oficial metro para a unidade de medida pé (indicação pé‘ polegada‘‘). Indicação das pilhas Com um estado de pilha fraco, surge no visor o símbolo da pilha . -
Page 108: Garantia
Pode obter informações sobre a eliminação do aparelho já gasto através dos responsáveis legais e locais pela reciclagem. As pilhas avariadas ou gastas têm de ser recicla- das de acordo com a diretiva 2006 / 66 /CE e as suas alterações. Entregue as pilhas e / ou o aparelho nos locais específicos destinados à... - Page 109 de material ou de fabrico, o aparelho será repa- rado ou substituído por nós – segundo a nossa escolha – e sem qualquer custo. Esta garantia ex- pira se o aparelho estiver danificado, se não for devidamente utilizado ou se não for efectuada a devida manutenção.
- Page 110 D-74167 Neckarsulm Model-No.: HG01701A Version: 09 / 2016 Stand der Informationen · Last Information Update · Version des informations · Stand van de informatie · Stav informací Estado de las informaciones Estado das informações: 08 / 2016 Ident.-No.: HG01701A082016-8 IAN 278296...
Need help?
Do you have a question about the 278296 and is the answer not in the manual?
Questions and answers