Table of Contents

Related Manuals for Craftsman CMXETAX69434502


Summary of Contents for Craftsman CMXETAX69434502
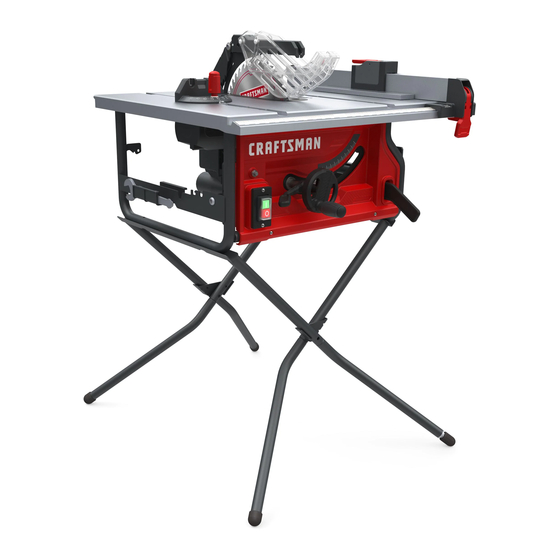
- Page 1 INSTRUCTION MANUAL | MANUAL DE INSTRUCTIONES 10" Table Saw Sierra de Mesa de 254 mm (10 pulgados) CMXETAX69434502 IF YOU HAVE QUESTIONS OR COMMENTS, CONTACT US. SI TIENE DUDAS O COMENTARIOS, CONTÁCTENOS. 1-888-331-4569 WWW.CRAFTSMAN.COM...
- Page 2 ENGLISH De nitions: Safety Alert Symbols and Words This instruction manual uses the following safety alert symbols and words to alert you to hazardous situations and your risk of personal injury or property damage. DANGER: Indicates an imminently hazardous situation which, if not avoided, will result in death or serious injury. WARNING: Indicates a potentially hazardous situation which, if not avoided, could result in death or serious injury.
- Page 3 WARNING: Never modify the product or any part of it. Damage or personal injury could result. WARNING: To reduce the risk of injury, read the instruction manual. If you have any questions or comments about this or any product, call CRAFTSMAN toll free at: 1-888-331-4569.
-
Page 4: Important Safety Information
NEVER use this power tool in a manner that has not been Save all warnings and instructions for future reference. speci cally recommended by CRAFTSMAN. The term “power tool” in the warnings refers to your mains- operated (corded) power tool or battery operated (cordless) SAFETY SYMBOLS power tool. -
Page 5: Safety Instructions For Table Saws
ENGLISH protected supply. Use of an GFCI reduces the risk of power tool’s operation. If damaged, have the power tool electric shock. repaired before use. Many accidents are caused by 3) Personal safety poorly maintained power tools. a) Stay alert, watch what you are doing and use common f) Keep cutting tools sharp and clean. - Page 6 ENGLISH the riving knife to function properly, the saw blade removing material. diameter must match the appropriate riving knife and l) Use an auxiliary fence in contact with the table top the body of the saw blade must be thinner than the when ripping workpieces less than 2 mm thick.
-
Page 7: General Safety Information
ENGLISH WARNING: Read warnings and conditions about Never use warped saw blades or saw blades with your carbide tipped saw blade. cracked or broken teeth. Sharp and properly set saw blades minimize binding, stalling and kickback. WARNING: Do not operate the saw without the 4) Table saw operating procedure warnings proper blade guard in place for all through cut a) Turn o the table saw and disconnect the power cord... -
Page 8: Specific Safety Rules
ENGLISH • SECURE WORK. Use a clamp or vice to hold workpiece remove all nails from lumber before cutting. when practical. It’s safer than using your hand and frees • NEVER TOUCH BLADE or other moving parts during use. both hands to operate tool. •... -
Page 9: Electrical Connection
Contact a CRAFTSMAN factory service center, a CRAFTSMAN authorized service center or other quali ed CAUTION: Servicing of a product with double service personnel if the problem can not be found. -
Page 10: Glossary Of Terms
ENGLISH Blade: For maximum performance, it is recommended that The table below shows the correct size to use, depending on the cord length and nameplate amperage rating. If in doubt, you use the 10 in. (254 mm) carbide tipped combination blade use the next heavier gauge. - Page 11 ENGLISH Compound Cut: A crosscut made with both a miter angle and a bevel angle. Crosscut: A cutting or shaping operation made across the grain or width of the workpiece. Miter Cut: A cutting operation made with the workpiece at any angle other than 90°...
-
Page 12: You Will Need
ENGLISH Assembly the stand (Fig. 4a-4f) WARNING: The use of attachments or accessories not listed in this manual might be hazardous and WARNING: Do not use this leg stand with other could cause serious personal injury. equipment or for other purposes. WARNING: Do not attempt to modify this tool or •... - Page 13 ENGLISH Fig. 4c Fig. 4f • Place front angle plate between leg assembly on right side. Repeat with back angle plate on left side. Carefully align holes in legs and angle plate. Fig. 4d Mounting the table saw to the stand (Fig.
- Page 14 ENGLISH Fig. 5 Fig. 6b To remove/replace/align the table insert Riving knife installation and position (Fig. 6a-6b) (Fig.7a-7b) WARNING: The table insert must be level with the saw table. If the table insert is too high or too low, the CAUTION: This saw is shipped with riving knife in workpiece can catch on the uneven edges, resulting in “MIDDLE”...
-
Page 15: Removing And Installing The Blade
ENGLISH Fig. 7a WARNING: Be extremely careful when loosening arbor nut. Keep rm grasp on both wrenches. Do not allow hands to slip and contact blade. Install the blade: • Place one new blade on arbor . Make sure saw blade teeth point down at the front side of saw table. - Page 16 ENGLISH • Turn saw off and unplug saw. Fig. 10a • Set the blade angle to 0°. • Raise the saw blade to maximum height by turning height adjustment handle clockwise. • Lock the blade by turning bevel locking lever clockwise. •...
- Page 17 ENGLISH Ensure the locking handle secures the rip fence in place. If Fig. 13a adjustment are needed, see “To check the tightness of the rip fence locking handle” in the adjustment section. Fig. 11 Fig. 13b Miter gauge installation (Fig. 12) The miter gauge can be installed on each miter gauge groove...
-
Page 18: Operation
ENGLISH OPERATION Applications WARNING: To reduce the risk of serious personal You can use this tool for the purposes listed below: injury, turn unit o and unplug the tool before making • Straight-line cutting operations, such as crosscutting, any adjustments or removing/installing attachments ripping, mitering, and compound cutting. - Page 19 ENGLISH Fig. 15 into the saw blade. Workpiece 1/8” (3 mm) -1/4” (6 mm) • Never hold and press the workpiece that is being cut 1/8” (3 mm) -1/4” (6 mm) 1/8” (3 mm) -1/4” (6 mm) o against the rotating saw blade. Pressing the workpiece being cut o against the saw blade will create a binding condition and kickback.
- Page 20 ENGLISH Changing blade depth (Fig. 15, 17) Fig. 18 Blade depth should be set so that outer points of blade are higher than workpiece by approximately 1/8 in. (3 mm) to 1/4 in. (6 mm) and bottom of gullets are below top surface of workpiece.
-
Page 21: Push Sticks
ENGLISH Push sticks Fig. 19b Push stick can be purchased or made to securely hold down the workpiece against the table when making non-through cuts or ripping narrow stock. The stick must be narrower than the workpiece, with a 90° notch in one end and shaped for a grip on the other end. - Page 22 ENGLISH Push blocks • Mark the center width on one end of stock. Miter width to 70° ( See miter cut section for information on miter Push blocks are blocks used to securely hold down the cuts). workpiece against the table. They include some gripping •...
-
Page 23: Auxiliary Fence
ENGLISH Auxiliary fence WARNING: DO NOT attempt compound miter cuts, with blade beveled and miter fence angled, until you An auxiliary fence is a device used to close the gap between are thoroughly familiar with the basic cuts and rip fence and working table. ALWAYS make and use an understand how to avoid kickback. - Page 24 ENGLISH before connecting saw to power source. Stand slightly Fig. 26 to the side of the blade path to reduce the chance of injury should kickback occur. WARNING: Do not use blades rated less than the Cross cut speed of this tool. Failure to heed this warning could Rip cut result in personal injury.
- Page 25 ENGLISH Making a rip cut (Fig. 28) • Make sure the wood is clear of the blade before turning on the saw. WARNING: Make sure the blade guard assembly is • Turn the saw on. installed and working properly to avoid possible •...
-
Page 26: Making A Compound (Bevel) Miter Cut
ENGLISH • When cut is complete, turn saw o . Wait for blade to Fig. 31 come to a complete stop before removing workpiece. Fig. 30 Making a compound (bevel) miter cut (Fig. 32) Making a bevel rip cut (Fig. 31) WARNING: Make sure the blade guard assembly is WARNING: Make sure the blade guard assembly is installed and working properly to avoid possible... - Page 27 ENGLISH Fig. 32 Fig. 33 Support Making a non-through cut (Fig. 34) Making a large panel cut (Fig. 33) Non-through cuts (made with a standard 10 in. blade) can be made with the grain (ripping) or across the grain (cross Make sure the saw is properly secured to a work surface to cut).
- Page 28 (Dado table insert is sold separately, check cuts. www.craftsman.com). All blades and dado sets must not be • When the cut is made, turn the saw o . Wait for the rated less than the speed of this tool. This saw is designed blade to come to a complete stop before removing the for use with a 8 in.
- Page 29 ENGLISH Dust collection (Fig. 36) To set the blade at 0° and 45° (Fig. 37a-37d) This saw features a dust chute for convenience in discharging sawdust. A standard utility vacuum can be This saw has positive stops that will quickly position the saw attached to the dust extraction port on dust chute , blade at 90°...
- Page 30 ENGLISH • Turn saw o and unplug saw. If the blade is not an exact 45° (Fig. 37c-37d): • Remove the blade guard and anti-kickback pawls. • Unlock the bevel locking lever . • Place the riving knife in “down” position. •...
- Page 31 ENGLISH • Turn the blade so the marked tooth is at the back. If the distances are di erent: • Move the ruler to the rear and again measure the • Remove the blade guard and riving knife. Raise the distance from the inside face of the blade tooth to the blade by turning the height adjusting handle.
-
Page 32: General Maintenance
ENGLISH Fig. 40 Fig. 42 MAINTENANCE WARNING: When servicing, use only identical replacement parts. Use of any other part may create a hazard or cause product damage. To adjust bevel indicator (Fig. 41) WARNING: Always wear eye protection with side shields marked to comply with ANSI Z87.1 during If the red line on the bevel indicator is not at zero when the product operation. -
Page 33: Troubleshooting
• Blade not proper for rip • Change blade; rip blade CRAFTSMAN Authorized Service Center. rip cut. cut. typically has fewer teeth. Consult CRAFTSMAN Authorized Service Center if for any reason the motor will not run. REPLACEMENT PARTS LIST PROBLEM CAUSE SOLUTION FREE WARNING LABEL REPLACEMENT: If your warning labels Excess vibration. -
Page 34: Register Online
FOR YOUR SAFETY: Registering your product will allow us • to contact you in the unlikely event a safety noti cation is required under the Federal Consumer Safety Act. Register online at www.craftsman.com/registration THREE-YEAR LIMITED WARRANTY • This table saw is warranted to the original purchaser from the original purchase date for three (3) years subject to the warranty coverage described herein.
Need help?
Do you have a question about the CMXETAX69434502 and is the answer not in the manual?
Questions and answers
Where can I get brushes for the 15 amp Craftsman table saw motor
You can buy brushes for the 15-amp Craftsman table saw motor CMXETAX69434502 from PicClick, where they are listed for sale with USA shipping included.
This answer is automatically generated
Is there any way to increase the rip capacity on this model, attachment possibly?