Table of Contents
Advertisement
Advertisement
Table of Contents

Related Manuals for Craftsman CMXEMAR120


Summary of Contents for Craftsman CMXEMAR120
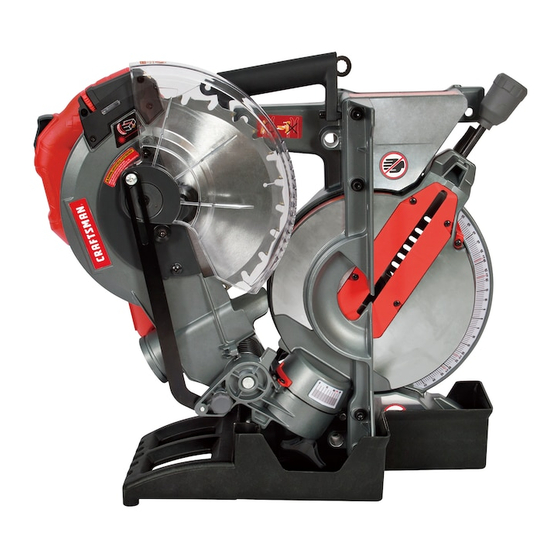
- Page 1 INSTRUCTION MANUAL | MANUAL DE INSTRUCTIONES 10 in. (254 mm) Folding Compound Miter Saw Sierra de inglete compuesta plegadiza de 254 mm (10 pulgadas) CMXEMAR120 IF YOU HAVE QUESTIONS OR COMMENTS, CONTACT US. SI TIENE DUDAS O COMENTARIOS, CONTÁCTENOS. 1-888-398-7737...
- Page 2 English (original instructions) Español (traducido de las instrucciones originales)
- Page 3 WARNING: To reduce the risk of injury, read the Mounting hole Laser guide instruction manual. Miter handle Safety lock pin if you have any questions or comments about this Positive stop locking lever Carrying handle product, call CRAFTsMAn toll free at: 1-888-398-7737. Table insert...
-
Page 4: General Power Tool Safety Warnings
English 10 in. (254 mm) Folding Compound Miter Saw CMXEMAR120 GENERAL POWER TOOL SAFETY WARNINGS 3) Personal Safety a ) Stay alert, watch what you are doing and use WARNING: Read all safety warnings, common sense when operating a power tool. Do... - Page 5 English d ) Store idle power tools out of the reach of children Cutting on the pull stroke is likely to cause the saw blade and do not allow persons unfamiliar with the to climb on top of the workpiece and violently throw the power tool or these instructions to operate the blade assembly towards the operator.
-
Page 6: Proposition 65 Warning
English • Always use a clamp or a fixture designed to properly Your risk from these exposures varies, depending on support round material such as rods or tubing. Rods how often you do this type of work. To reduce your have a tendency to roll while being cut, causing the blade exposure to these chemicals: work in a well ventilated to "bite"... -
Page 7: Tools Needed For Adjustment
English TOOLS NEEDED TO REMOVE OR INSTALL Minimum gauge for Cord sets Total length of Cord in Feet BLADE Volts (meters) 120 V 25 (7.6) 50 (15.2) 100 (30.5) 150 (45.7) supplied 240 V 50 (15.2) 100 (30.5) 200 (61.0) 300 (91.4) Ampere Rating More American Wire gauge... -
Page 8: Unpacking Your Folding Miter Saw
English UNPACKING YOUR FOLDING MITER SAW ASSEMBLY AND ADJUSTMENTS WARNING: To reduce the risk of serious personal injury, turn unit off and disconnect it from power source before making any adjustments or removing/installing attachments or accessories. An accidental start-up can cause injury. Assembly Instructions To Raise The Cutter Head (Fig. - Page 9 English WARNING: To reduce the risk of injury, turn unit off Fig. C and disconnect it from power source before installing and removing accessories, before adjusting or when making repairs. An accidental start-up can cause injury. WARNING: Make sure blade has stopped rotating before folding the saw.
-
Page 10: Mounting Instructions
English 1. Place the hold-down clamp assembly into the Fig. H mounting hole located behind the fence. The clamp should be facing toward the back of the miter saw as shown in Fig. F. 2. The groove on the clamp rod should be fully inserted into the mounting hole of the base without being visible. -
Page 11: Removing And Installing The Blade
English Transporting The Saw (Fig. L) nOTE: Mounting hardware is not included with this tool. Bolts, nuts, washers, and screws must be purchased WARNING: To reduce the risk of serious personal separately. injury, ALWAYS lock the miter lock handle, bevel lock 2. - Page 12 English 6. Place the provided blade wrench over the arbor Installing the Blade (Fig. M, N, O) bolt WARNING: Un-plug the miter saw before changing/ installing the blade. 7. Locate the arbor lock button below the trigger switch handle. (Fig. N) 1.
-
Page 13: Bevel Stop Adjustment
English • Do not start the miter saw without checking for Fig. R interference between the blade and table insert. Damage could result to the blade, table insert or turntable if blade strike occurs during the cutting operation. 1. To remove, loosen and remove the four screws on the table insert with a Phillips screwdriver and remove the table inserts. - Page 14 English Miter Scale (Fig. U) Fig. V The miter saw scale can be easily read, showing miter angles from 0° to 48° to the left, and 0° to 55° to the right. The miter saw table has positive stops at most common angle settings at 0°, 15°, 22.5°, 31.6°, 45°...
- Page 15 English Laser Guide Adjustment (Fig. Y, Z, AA) nOTE: All the adjustments for the operation of this machine have been completed at the factory. Due to normal wear and use, some occasional readjustments may be necessary. WARNING: To prevent serious injury, insert a padlock (not provided) or chain with padlock through the hole in the ON/OFF Trigger Switch prior to making any •...
-
Page 16: Operation
English nOTE: • To avoid injury or possible death from electrical shock: Make sure your fingers do not touch the plug’s metal • Laser line is calibrated and set up at the factory to prongs when plugging or unplugging your miter saw. project to the left of the blade. -
Page 17: Plan Your Work
English Inspect Your Workpiece • Make sure the blade and arbor collars are clean. • Make sure all clamps and locks are tight and there is no • Make sure there are no nails or foreign objects in the excessive play in any parts. part of the workpiece being cut. -
Page 18: Basic Saw Operations
English WARNING: To avoid injury, follow all applicable • With the power switch OFF, bring the saw blade down safety instructions, when cutting non-ferrous metals: to the workpiece to see the cutting path of the blade. Raise the saw blade back up before turning the saw on. •... -
Page 19: Before Leaving The Saw
English • The miter saw is equipped with an electric blade brake. Fig. EE When the trigger switch is released, the blade brake will stop the blade within approximately 10 seconds. Fig. DD Bevel Cut (Fig. FF) WARNING: NEVER BEVEL to the right, this saw is designed to only be used for cutting left bevel cuts. - Page 20 English Workpiece Support (Fig. II) WARNING: As the right miter angle is greater than 48°, do not combine with any bevel angle to Long pieces need extra support. The support should be prevent interference with the fence. placed under the workpiece. Keep your hand holding the workpiece positioned 7-5/16 inches or more away from the Fig. GG blade.
- Page 21 English Cutting Crown Molding (Fig. MM, NN) Attach the wood fence securely and make a full depth cut to make a blade slot. Your compound miter saw is suited for the difficult task of cutting crown molding. To fit properly, crown molding Check for interference between the wood fence and the must be compound-mitered with extreme accuracy.
-
Page 22: Bevel/Miter Settings
English Bevel/Miter Settings nOTE: The chart below references a compound cut for crown molding OnlY WhEn ThE AnglE BETWEEn ThE WAlls EQUAls EXACTlY 90°. BEVEl AnglE MiTER AnglE TYPE OF CUT sETTing sETTing inside Corner - left side 1. Position top of molding against fence. 33.9°... - Page 23 English CROWn MOlDing ChART Compound Miter saw Miter and Bevel Angle settings Wall to Crown Molding Angle 52/38° Crown Molding 45/45° Crown Molding 52/38° Crown Molding 45/45° Crown Molding Angle Angle Miter Bevel Miter Bevel Miter Bevel Miter Bevel Between Between Setting Setting...
-
Page 24: Maintenance
English MAINTENANCE Lower Blade Guard WARNING: To reduce the risk of injury, turn unit Do not use the saw without the lower blade guard. off and disconnect it from power source before The lower blade guard is attached to the saw for your installing and removing accessories, before protection. -
Page 25: Free Warning Label Replacement
English Free Warning Label Replacement If your warning labels become illegible or are missing, call 1-888-398-7737 for a free replacement. -
Page 26: Troubleshooting Guide
English TROUBLESHOOTING GUIDE BE sURE TO FOllOW sAFETY RUlEs AnD insTRUCTiOns For assistance with your product, visit our website at www.craftsman.com for a list of service centers, or call CRAFTSMAN at 1-888-398-7737. MOTOR PROBlEM CAUsE CORRECTiOn Brake does not stop the 1. -
Page 27: Register Online
90 DAY MOnEY BACK gUARAnTEE If you are not completely satisfied with the performance of your CRAFTSMAN Power Tool, Laser, or Nailer for any reason, you can return it within 90 days from the date of purchase with a receipt for a full refund – no questions asked. -
Page 28: Parts List
English PARTS LIST 10 in. (254 mm) Folding Compound Miter saw Parts list for folding compound miter saw - A i.D. no. Description size Q'ty i.D. no. Description size Q'ty X7WJ POWER CABLE ASS’Y 1 X7XW CR. RE. TRUSS HD. ROUND NECK SCREW M6*14 X7WK ROCKER SWITCH ASS’Y 1 X7XX CR. - Page 29 English 10 in. (254 mm) Folding Compound Miter saw Parts list for folding compound miter saw - B i.D. no. Description size Q'ty i.D. no. Description size Q'ty X7Z7 WARNING LABEL 1 X805 TORSION SPRING X7Z8 CAUTION LABEL 1 X806 SHAFT SLEEVE X7Z9 WARNING LABEL...
- Page 30 English 10 in. (254 mm) Folding Compound Miter saw schematic for folding compound miter saw X7WL X7WJ X7WR X7XE X7XY X7YP X7ZG X7WK X7Y5 X7WT X7YN X7Z4 X7Y9 X7Z9 X7YF X7XB X7Y2 X7XF X7ZA X7WS X7ZK X7Y3 X7X1 X7WV X7WX X7WW X7WZ X7XM...
- Page 31 English 10 in. (254 mm) Folding Compound Miter saw Parts list & schematic for motor i.D. no. Description size Q'ty i.D. no. Description size Q'ty X815 BRUSH COVER 2 X82M O-RING ROD X816 BRUSH ASS'Y 2 X82N PARALLEL KEY X817 BRUSH HOLDER ASS'Y 2 X82P C-RING X818 MOTOR COVER 1 X82Q C-RING...
- Page 32 English NOTES...
Need help?
Do you have a question about the CMXEMAR120 and is the answer not in the manual?
Questions and answers
Blade stops on my CMXEMAR120 table saw. Checked blade for tightness and blade still won’t cut.
If the blade on your Craftsman CMXEMAR120 table saw stops despite being tight, it may be due to the blade brake. The brake is designed to stop the blade within approximately 10 seconds. If it does not, unplug the saw and contact a qualified service dealer, as this may indicate a malfunction.
This answer is automatically generated
craftsman cmxemar120 powers on but blade doesn't turn when touches wood. It appears gear not locked onto shaft.
The Craftsman CMXEMAR120 may power on but the blade does not turn when it touches wood due to the following possible causes:
1. Motor brake overheated – This can happen from using a defective or wrong-sized blade or rapid ON/OFF cycling. Let the motor cool down and use a recommended blade.
2. Arbor bolt loose – If the arbor bolt is not tight, the blade may not spin properly. Retighten the bolt.
3. Worn or damaged brushes – Inspect and replace the brushes if necessary.
If the issue persists, contact a Service Center or Authorized Service Station.
This answer is automatically generated
I have a stuck blade lock how do I get it to unlock?
I HAVE A CRAFTSMAN CMXEMAR120 MITRE SAW. I NEED TO ORDER A NEW FENCE PART # X80Y IN THE INSTRUCTION MANUAL. I CANNOT SEEM TO FIND A SOURCE TO PURCHASE THIS REPLACEMENT PART FROM. ANY HELP WOULD BE APPRECIATED
Is blade removal bolt, right or left hand threads?