Table of Contents
Advertisement
Quick Links
Advertisement
Table of Contents

Summary of Contents for Braillo 300 S2.1
- Page 1 BRAILLO 300 S2.1 User’s Guide BRAILLO Rev. June 2020...
- Page 2 © - 2020 Braillo Norway AS...
- Page 3 BRAILLO Dear Valued Customer, Thank you for purchasing a Braillo Braille embosser and placing your trust in our company and products. I know that the purchase of a production Braille embosser is a big one, and we are proud that you have chosen us.
- Page 4 BRAILLO B 300 S2.1...
-
Page 5: Table Of Contents
The Braillo S2 Stand option ........ - Page 6 BRAILLO B 300 S2.1 5.16 Paper feed assembly - removing ......... . 81 5.17...
-
Page 7: Printer Basic
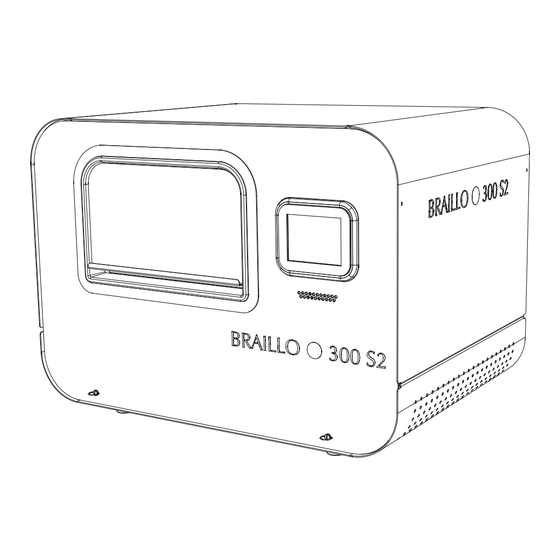
BRAILLO B 300 S2.1 PRINTER BASIC Thank you for your purchase of the Braillo 300 S2.1. Please read this manual carefully before installing and operating this printer. Key features • Prints interpoint, both sides of the sheet are printed simultaneously • Prints 300 characters per second • Prints 900 pages per hour (on a 12-inch sheet) •... - Page 8 BRAILLO B 300 S2.1 Printer overview Please see the figure below: Note that the right-hand and left-hand side are referred to as if you were standing behind the printer facing the opening where the paper is inserted into the printer. Paper direction Control panel...
-
Page 9: Installation
The printer should be placed on a sturdy table. Please note that this printer weighs 105 kg. Space: The minimum space required for the Braillo 300 S2.1 is approximately 1.25m x 1.5m (4 x 5 feet). How- ever, it will be more space required both behind and around the printer so that one can easily replace the boxes of paper and perform regular maintenance without moving the printer. -
Page 10: Unpacking
Unpacking Unpacking and installation can be done by the user. Any kind of lifting of the printer must always be done from the base at the bottom of the printer, and should be done with extreme care. Make sure that your Braillo printer has not been damaged in transport. Check if the packing is dam- aged; If so, it is possible that the printer has also been damaged or scratched. If any damages are found, please contact your distributor or Braillo Norway AS immediately. Also check that the printer is accompanied with the following items: •... -
Page 11: The Braillo S2 Stand Option
BRAILLO B 300 S2.1 The Braillo S2 Stand option The B300 S2.1 can optionally be delivered with the Braillo S2 Stand. If that is the case, you have to add the wheels under the Stand. Place the wheels under the printer, one in each corner. This can be done simplest by carefully sliding the printer on the pallet so just one corner comes outside the pallet. Fasten the wheel. Then slide the printer so the next corner comes outside the pallet etc. Make sure you are at least two persons while... -
Page 12: Removal Of The Side Panels
BRAILLO B 300 S2.1 Removal of the side panels The side panels can be removed by turning the quarter revolution fasteners counter-clockwise. Turn counter-clockwise 1/4 of a revolution Pull the panel out, then a little down... -
Page 13: Removal Of The Top
BRAILLO B 300 S2.1 Removal of the top If you are going to do maintenance, it can be more convenient to remove the top. Remove both side panels as described in section 2.3 ‘Removal of the side panels’ on page 12. Loose the four bolts one revolution, then slide the top a little towards the operator panel side. Then lift it straight up. Loosen the four bolts one revolution Slide the top a little towards the display side, then lift it straight up... -
Page 14: Connecting The Printer To The Mains
BRAILLO B 300 S2.1 Connecting the printer to the mains The connection for the mains inlet is placed on the electric unit inside the printer. It can be reached by removing the side panel on the opposite side from the operator panel. Put the mains cable through the oval opening in the bottom plate just below the inlet on the electric unit. Connect the enclosed mains power cable to the Mains inlet. -
Page 15: Connecting The Printer To The Computer
BRAILLO B 300 S2.1 Connecting the printer to the computer This can be done in three ways, either by Ethernet, USB, or WLAN. For USB and Ethernet, the connections are placed behind and above the operator panel inside the printer. They can be reached by removing the panel on the operator panel side. Put the cable(s) through the oval opening in the bottom plate just below the electric unit. The ethernet input is a regular RJ45 connector, and the USB input is a regular USB type B connector. The WLAN is transmitting/receiving via a small antenna placed close to the operator panel. When connecting with the USB or the ethernet cable, make sure the end with the ferrite bead is con- nected to the printer. Ferrite bead If you connect to the computer with cable, there is no need to select between USB or Ethernet. The printer will connect to the input who receives data first. Meaning, if data comes on the ethernet, the... -
Page 16: Connecting The Printer When Mounted On The S2 Stand
BRAILLO B 300 S2.1 Connecting the printer when mounted on the S2 Stand The B300 S2.1 can optionally be delivered with the Braillo S2 Stand. In that case, the connections to the printer is done on the outside of the stand. See the figures below: Ethernet Mains inlet Not in use... -
Page 17: Power On
BRAILLO B 300 S2.1 Power on The On/Off switch is placed behind the back panel, and can be reached through an opening in the panel. When the mains cable has been connected, and the power has been switched on, the printer will do it’s start up sequence. The display will stay black for a moment, then it will show a progress bar for the start up sequence. When it’s done, the display will show “Welcome, press the accept button to continue”. Press the button and the display will change to “Ready to emboss”. For safety reasons, there are mechanical switches on the cover. These switches will disable the possibility to run the printer if the side plates are removed. Then the paper feed tractor will move a little back and forth to position the paper correctly. If there is no paper inserted, the printer will start an alarm, and the display reads “Printer halted - Out of pa- per”. This is normal, and the sound can be silenced by pressing the mute button. Note that the printer will go into sleep mode when it has been inactive for 15 minutes. If that hap- pens, the printer will wake up if you touch the operating panel or send a file from the computer. It is also possible to manually put it in sleep mode by entering the main menu, and select the “Enter sleep mode” choice. The printer is now ready. Before continuing, please read chapter 4 ‘OPERATING THE PRINTER’ on page carefully. On/Off switch... -
Page 18: Setting Up The Computer
BRAILLO B 300 S2.1 SETTING UP THE COMPUTER Note! When connecting multiple Braillo printers with USB to the same computer, all printers MUST have unique ID’s configured. ‘Printer ID:’ on page 41 for more information on how to set the printer ID. USB on Windows Make sure the printer is powered on and connected to the Windows computer via an USB device cable (Type A to Type B). -
Page 19: Usb On Apple Mac
BRAILLO B 300 S2.1 Select it and click ‘Manage’, then ‘Printer properties’ Here you can change the printer Name and Location to your liking, for example ‘Braillo <model number>’ Click ‘OK’ and your printer is now configured and ready to use. USB on Apple Mac Note! A postscript printer driver (PPD) file is crucial in the following steps. Without it, the local Apple computer will be unable to successfully communicate with the printer. The PPD file has been modified to work correctly with an Apple computer so any modifications to this file before set up might cause unexpected or erroneous results. Contact Braillo Norway or your distributor to get the ‘braillo.pdd’ file. The PPD file must be copied onto the Apple machine prior to performing the printer setup! - Page 20 BRAILLO B 300 S2.1 Make sure the printer is powered on and connected to the Apple computer via an USB device cable (Type A to Type B). 1. Open ‘System Preferences’ 2. Go to ‘Printers & Scanners’ 3. Click the plus sign (+) button to add new printer 4. In the new dialogue select the ‘Generic_/_Text_Only’ USB printer (under Default tab) 5.
-
Page 21: Usb On Linux
BRAILLO B 300 S2.1 10. Your printer is now configured and ready to use USB on Linux Linux distributions can use one of many different graphical interfaces. Due to this the following guide is kept as generic as possible, and you might need to consult your distribution’s help. Make sure the printer is powered on and connected to the Linux computer via an USB device cable (Type A to Type B). 1. Find your distro’s Control Panel and find the dialogue to add a printer 2. The printer should show up as USB printer named ‘Generic_/_Text_Only (<serial number>)’... -
Page 22: Ethernet On Windows
BRAILLO B 300 S2.1 4. If you can choose any settings for the new printer, just leave everything as default 5. Give the printer a identifiable Name and Location, for example ‘Braillo_<model number>’ 6. Your new printer is now configured and ready to use Note! If you use the default ‘Generic Text-only printer’ driver for USB printing on Linux you might run into issues where the driver will strip certain control characters and just print the text. It could also refuse to print certain documents which contain more than just printable text characters. - Page 23 BRAILLO B 300 S2.1 6. Click ‘Next’ 7. In the driver selection dialogue select ‘Generic’ and ‘Generic / Text Only’ 8. Click ‘OK’ 9. Click ‘Next’ and ‘Finish’ to close the dialogue 10. Your printer is now configured and ready to use Note! If you print a file with Notepad or another text editor, chances are high that the editor will try to format the text before sending it to the printer. If you have a preformatted file created for the Braillo printer containing control characters, it might not end up printing like it should. To print a file verba- tim on Windows, you could share the printer in the Windows network (‘Sharing’ under Printer prop- erties), and use the following command in a Command-line prompt: copy /b <filename.txt> \\<Name-of-computer\<name-of-shared-printer>...
-
Page 24: Ethernet On Apple Mac
2. Go to ‘Printers & Scanners’ 3. Click the plus sign (+) button to add new printer 4. In the new dialogue click the ‘IP’ tab 5. Fill in: Address: ‘<IP-address>:631’ Protocol: IPP Queue: ‘/printers/Braillo’ 6. In the ‘Use’ drop-down menu choose ‘Other’ and select the provided PPD file 7. Verify that the ‘Use’ field now says ‘Generic text-only printer’ You can also modify the Name and Location fields to your liking, for example ‘Braillo <model number>’ 8. Click ‘Add’ 9. Your printer is now configured and ready to use If you want to configure the network printing another way the full connection string is: ipp://<IP-address>:631/printers/Braillo... -
Page 25: Ethernet On Linux
You will need the printer’s IP address which can be found in menu Main Menu - Warning - Service/ diagnostic - Status / Software upgrade. See ‘Status / Software upgrade:’ on page 39 for more information. The printer broadcasts itself using dnssd/bonjour. If you only have one Braillo printer on your network you can use this if your computer detects it. If you have multiple Braillo printers it is better to add them by their IP address to be sure you are configuring the correct one. -
Page 26: Wireless Network (Wlan)
BRAILLO B 300 S2.1 Wireless network (WLAN) The configuring of the wireless network connection is handled through a special configuration mode where the printer creates a temporary Access Point. When connected to this AP the rest of the config- uration is handled trough a standard web page. To enter the WLAN configuration mode, navigate to: Main Menu - Printer setup - Network configuration - Conf. WLAN. See section ‘- Wireless configuration’ on page 43 for more information. A screen now shows up with the credentials needed to log on to the temporary configuration access point. The network name (SSID) is unique for this printer, but the password is generated and will differ every time you start configuration mode. Leave the printer in this state while you continue the configuration. Using a laptop, tablet, smart phone or other Wireless enabled unit with a web browser: 1. Connect to the temporary Access Point using the credentials in the printer display 2. Open a web browser and navigate to http://192.168.45.1/ Some devices will detect the need to ‘sign-in’ or ‘authorization needed’. Clicking this notification will lead you to the same web page. - Page 27 BRAILLO B 300 S2.1 6. Click the ‘Activate & exit setup’ button If your wireless network is not discovered by the printer you can also configure it manually: 1. Follow step 1 and 2 above 2. Click the ‘Manual setup’ tab 3. Enter the SSID, choose security and enter the password (if needed) 4. Click the ‘Save network’ button 5. Click ‘Activate & exit setup’ button...
- Page 28 BRAILLO B 300 S2.1 To remove an already configured wireless network without activating a new: 1. Follow step 1 and 2 in the start of this section 2. Click the ‘Forget network’ tab 3. Click the ‘Forget network’ button 4. Click the ‘Activate & exit setup’ button After clicking the ‘Activate & exit setup’ button, you will get a confirmation message and the configu- ration mode shuts down and the printer returns to normal with the new configuration. To exit the WLAN configuration mode: To exit configuration mode you need to either: • Save and activate a new configuration • Click the ‘Exit setup’ button on configuration web page •...
-
Page 29: Operating The Printer
BRAILLO B 300 S2.1 OPERATING THE PRINTER Inserting paper Paper should be inserted into the printer in the following manner: Place a box of paper at the back of the printer. (Opposite side from the operating panel). Insert the paper between the two paper guides, and then through the slit in the paper guide. Insert about the length of one sheet. Go to the front of the printer. The tractors might have to be adjusted sideways to fit to the paper width in use. This is done by opening a little lever on the outer side of the tractors, then move the tractors so it will fit to the paper width, then close the lever again. Lock the paper into the tractor-feed. By using the FINE ADJUST button, adjust the paper with respect to the starting mark (notch) corresponding to the chosen sheet length. (See figure... -
Page 30: Basic Operating Panel Functions
BRAILLO B 300 S2.1 Basic operating panel functions When the printer is powered up, you have to press the Accept button to make the printer ready. Accept button After pressing Accept the window below appears. Please see the explanation on the figure below: Time Date WLAN indicator Sheet counters, will count upwards as the printing goes on Status information Moves the paper 0.5 inch forwards Moves the paper 0.5 inch backwards Enters the Advances Reset for the sheet... - Page 31 BRAILLO B 300 S2.1 Navigating in the menus. Move the cursor to the desired sub menu, and then press the Accept button. Select this to enter sleep mode Move the Move the Accept or Jump back to the cursor up cursor down select button previous menu without saving To change a variable setting. If a setting can have more than two values, the display will look like below.
- Page 32 BRAILLO B 300 S2.1 To change a setting with just two alternatives. If a setting can have just two alternatives, the display will look similar to this. Active button Inactive button, press to activate, and then press Accept Accept or Jump back to the select button previous menu without saving Select printer model The printer model is always set correctly when the printer is shipped, but if for some reason the main board has to be replaced, you have to select the correct printer model. Note! The settings set by the operator panel are the default values. However, when sending a text file from the computer, some parameters for this specific job is sent along with the file. The parameters that comes with the file will be active during the print job. When the job is finished, the settings will return...
- Page 33 BRAILLO B 300 S2.1 Operator panel during printing. Please see the figure below: Embossing Sheet 1 / 5 means that the printer is now printing sheet 1 of a print job with 5 sheets in total. If you would like to pause a print job, press the Pause button. When the printer is paused, the button will change to Continue. Press Continue to continue with the printing. If you would like to cancel the rest of the print job, press Reset. The printer will then position the paper correctly for the next print job. Pause the print job. Continue the print job. Cancel the rest of the print job.
-
Page 34: Main Menu
BRAILLO B 300 S2.1 Main menu The Main menu options: 4.4 ‘Paper layout menu’ on page 35 Settings for the braille output layout on paper 4.5 ‘Service/diagnostic menu’ on page 37 Choices for test print patterns, view the log, checking status etc. 4.6 ‘Date and time menu’ on page 40 Settings for date and time 4.7 ‘Sound menu’ on page 40 Settings for the sound 4.8 ‘Printer setup menu’ on page 41 Choose printer model, ASCII tables etc. 4.9 ‘Counters menu’ on page 44... -
Page 35: Paper Layout Menu
BRAILLO B 300 S2.1 Paper layout menu Main Menu - Paper Layout Sheet length: Main Menu - Paper Layout - Sheet Length The sheet length is the length of the sheet in inches. The range is from 4 to 14 inches. - Page 36 BRAILLO B 300 S2.1 Braille type: Main Menu - Paper Layout - Braille type Selects between 6 and 8 dot mode. Line spacing: Main Menu - Paper Layout - Line spacing Selects the Line spacing. The range is from 0 to 16.
-
Page 37: Service/Diagnostic Menu
BRAILLO B 300 S2.1 Service/diagnostic menu Main Menu - Warning - Service/diagnostic When entering this menu choice, a warning window will appear. The purpose of this warning is make the user aware that the safety switches on the cover are now disabled. This is done to make it possi- ble to run smaller tests during service. - Page 38 BRAILLO B 300 S2.1 Manual running: Main Menu - Warning - Service/diagnostic - Warning - Manual running When entering this menu choice, a warning window will appear. This is to make the user aware that print jobs from the computer will not be printed as long as you are in this sub-menu.
- Page 39 Sensor to check if there is paper in the printer. Status / Software upgrade: Main Menu - Warning - Service/diagnostic - Status / Software upgrade Will show the printers current IP addresses, the MAC addresses and the current software version. (Eth. = Ethernet) - Software update: It is possible to update the printers internal software. You will need a file with the newer software version, which you can get from Braillo Norway or a Braillo distributor. The file must then be copied to a USB memory stick. Place the memory stick in the USB type A connector on the main board. See section 7.4 ‘Main board - connections’ on page 100 for info about where to find it. The printer will only look for other available software versions when the ‘Status/Software upgrade’ window is opened, so if the upgrade doesn’t appear in the display, go one step back to the Service menu and then back into the ‘Status/Software upgrade’ window.
-
Page 40: Date And Time Menu
BRAILLO B 300 S2.1 Date and time menu Main Menu - Date and time Used to change the date and time setting Date Main Menu - Date and time - Date Used to change the date. Time Main Menu - Date and time - Time Used to change the time. Sound menu... -
Page 41: Printer Setup Menu
BRAILLO B 300 S2.1 Printer setup menu Main Menu - Printer setup In this menu the basic settings regarding the printer is set. Printer model: Main Menu - Printer setup - Warning - Printer model When entering this menu choice, a warning window will appear. Braillo Norway has a number of different printer models that can use the same electronics. But the different printer models have different settings and different functions. This menu choice is where you select the specific printer model. The software will then be adapted to the printer in use. This setting is fixed at the factory, and should under normal conditions never need to be changed. - Page 42 BRAILLO B 300 S2.1 ASCII tables: Main Menu - Printer setup - ASCII tables An ASCII table is the same as a character set. When the printer receives a character from the computer, it goes to an ASCII table to find out which dot pattern is corresponding to this character. This printer has a number of ASCII tables, and they are listed like shown in the figure to the right. To select another table, use the up or down arrow and press the green Accept button. Now this has become the current table.
- Page 43 BRAILLO B 300 S2.1 Network configuration: Main Menu - Printer setup - Network configuration This menu choice gives you the possibility to choose between: - Regular DHCP IP address (default setting) - Static IP address Note with static IP you have to set all the three network parameters manually, and all three has to be set. The three different settings for the static IP is set using the buttons as shown in the figure to the right. Type the numbers into the first text cell, then tap the next cell to move to it. When all four numbers are set, press the green Accept button to go back to the Network configu- ration menu.
-
Page 44: Counters Menu
BRAILLO B 300 S2.1 Lock screen delay: Main Menu - Printer setup - Lock screen delay Setting the delay in minutes after the operator panel has been used before the screen get locked. 0 is screen lock off. The Lock screen function is to avoid that buttons are accidental pressed. To unlock the locked screen, press first button 1, then button 2. Counters menu Main Menu - Counters Will show two different counters, the first one will show the total number of sheets printed. The second shows the total number of hours the main motor has been running. -
Page 45: Display Messages
BRAILLO B 300 S2.1 4.10 Display messages When there is a problem, the display will show what has happened e.g. “Printer halted, Printer cover open”. And it will stay like that until the error is fixed. Then the display will change to “Printer halted, Press continue to resume”. By pressing Continue the printer will resume the printing from where it was before the error. - Press continue to resume - Out of paper The printer has run out of paper and is waiting for paper. When paper is detected, the display will change to “Press continue to resume”. - Printer cover open This occurs when one or more panels on the printer cover are open. -
Page 46: Unrecoverable Errors
BRAILLO B 300 S2.1 4.11 Unrecoverable errors: When there is an unrecoverable error, the display will show what has happened e. g. “General failure, Beam wheel failure”. When this kind of errors occurs, the printer must be reset or switched off and then switched back on again. The job currently being printed has to be sent once more from the computer. The different unrecoverable errors are: - Magnet failure A defect magnet has been detected during printing. The display will say “General failure, Magnet rack failure” and the magnet symbol will appear in the upper right hand corner of the display. The printer will stop. - Page 47 BRAILLO B 300 S2.1 - Beam wheel failure This means that the pulses from the Beam wheel sensor is not reg- istered in the electronics. This can be caused by e.g. defect sensor, disconnected sensor, broken main belt, or defect main motor. If you can hear the main motor start, it is probably something wrong with the sensor. But if you cannot hear the motor start, it is probably some- thing wrong with the main motor. Press Reset to continue. The sensor can be tested manually on Main Menu - Warning - Service/diagnostic - Test Sensors.
-
Page 48: Overview Of The Menu Structure
BRAILLO B 300 S2.1 4.12 Overview of the menu structure. Welcome Ready to Locked screen Emboss Main Menu Warning! Sleep Paper Service Date Printer Counters Sound Layout diagn Time Setup Sheet Print Date Volume Printer Warning! demo text length model... -
Page 49: Test Print
BRAILLO B 300 S2.1 4.13 Test Print The test print program is designed to ensure that the 168 printing mechanisms functions properly. This printer will do an electronic test on all of it’s printing mechanisms continuously during printing. However, this electrical test will not tell if something is wrong mechanically, and therefore it is recom- mended to print a few pages of test print before beginning the day’s production. By doing so, it’s quite easy to see if all printing mechanisms are functioning mechanically. This printer has both single-sided and double-sided (interpoint) test print patterns. The test print consists of four different patterns. See the description below: How to use the test print: Print Test Pattern: Main Menu - Warning - Service/Diagnostic - Warning - Print Test Pattern When entering this menu choice, a warning window will appear. This is to make the user aware that print jobs from the computer will not be printed as long as you are in this sub-menu. -
Page 50: Service And Maintenance
BRAILLO B 300 S2.1 SERVICE AND MAINTENANCE When doing some lighter service or maintenance tasks, it can be enough to remove the side plates on the cover. But for bigger operations we recommend to also remove the top cover. Please see section 2.4 ‘Removal of the top’ on page 13 on how to do this. Printing principle The figure below is a very simplified version of the printing mechanism in this printer. The four bars across the paper indicates the magnet racks. The magnet racks are named from A to D. - Page 51 BRAILLO B 300 S2.1 The figure below is a “theoretical” figure showing the parts inside the printing mechanism. The print- er has been “sliced” to show more detailed of how it is constructed. t t o o p p v v i i e e w w p p a a p p e e r r p p r r i i n n t t i i n n g g p p i i n n s s...
- Page 52 BRAILLO B 300 S2.1 Please see the figure on the previous page. The two shafts, one at the top and one at the bottom, are rotating synchronized. On each shaft there are eccentrics that are moving the beams and paper shoes up and down. This movement is used both to hold the paper and to make the dots. A row of dots is printed for each revolution of the shafts. The shafts must rotate three times to form a complete row of characters. Please see figure below: First revolution Second revolution Third revolution To be able to print interpoint (where both sides of paper are printed simultaneously), the back page is offset a little to the right and a little down to fit in between the dots on the front page. Please see figure below: Front page Back page (dashed lines) Dimensions on the 6 and 8 dot Braille cell, measured in mm.
- Page 53 BRAILLO B 300 S2.1 The drawing on this page is meant to help to understand the basic principle of how the dots are print- ed. Please also see the drawings on the next page. The parts in the upper left of this drawing is one of the magnet racks. The parts in the lower right, are the beam and paper shoes. The magnet racks itself do not move, but the beams and the paper shoes are moving up and down for every revolution of the eccentric shafts. Inside each magnet rack there are 42 electrical magnets. The magnets are controlling the long pivot arms.
- Page 54 BRAILLO B 300 S2.1 Figure A Figure B Figure C Shows the position on the pivot Now the magnet is engaged, The long pivot arm’s hook arm when the printer is not and the long pivot arm has been catch the short pivot arm. printing, and the magnet is not pulled against the magnet. The As the short pivot arm moves engaged.
- Page 55 BRAILLO B 300 S2.1 General overview (Protection covers are removed) Magnet rack B Operator panel Main Belt Electric unit Magnet rack D Main Motor Main board Magnet rack A Magnet rack C On/Off switch...
-
Page 56: Troubleshooting, Incorrect Braille
BRAILLO B 300 S2.1 Troubleshooting, incorrect Braille If any errors have been found in some of the characters in the printed text during proofreading, the first thing to do is: Check the characters in the text-file in the computer to find out if the error could come from the text- file and not from the printer. If your text-file is OK, the problem is caused by the printer. The errors could be caused by either an electrical or a mechanical problem. On the electrical side, there is integrated a self-diagnostic system that is continuously checking the magnets during printing, and will trig an alarm if it detects some electrical problems with the magnets. So, if no alarm is trigged, the errors found are most likely caused by some faulty mechanical parts or maybe dirt clogging the moving mechanisms. Inside the printer there are four identical magnet racks, named from A to D. Each magnet rack con- tains 42 printing mechanisms. There are totally 168 printing mechanisms to choose from when the error search begins. See section 5.1 ‘Printing principle’ on page 50 for more information. If the printer has been printing a lot (a lot could be after a year, or after 1000 printing hours, depend- ing on what comes first) errors in the characters could occur. If this happens, it could just be that the printer needs regular maintenance. See section 5.6 ‘Magnet rack - cleaning’... - Page 57 BRAILLO B 300 S2.1 Possible reasons for errors: See figures on the next page. If a dot from a certain printing pin is missing regularly, the reason might be one of the following: Defect magnet (The self-diagnostic system should find this one first). Broken short pivot arm. The long pivot arm cannot move because of dirt. The printing pin is stuck because of dirt, causing the short pivot arm to miss the long pivot arm. Errors in the magnet rack board. If dots from several printing pins are missing now and then, the reason might be one of the following: The sponge list is pushing too hard on the long pivot arm.
- Page 58 BRAILLO B 300 S2.1 Magnet rack Magnet Sponge list Long pivot arm board Support list Magnet poles Short pivot arm Pin guide Gap between pivot arms Sponge list short pivot arm Printing pin...
-
Page 59: Magnet Rack - Removal
BRAILLO B 300 S2.1 Magnet rack - removal Please see figure below: Disconnect the two cables for the magnet rack. Remove the magnet rack by unscrewing the four screws like shown in the figure. It can be convenient to remove the input paper guide and the paper feed tractor first to get more room. See section 5.16 ‘Paper feed assembly - re- moving’... -
Page 60: Magnet Rack - Disassembly, Step By Step
BRAILLO B 300 S2.1 Magnet rack - disassembly, step by step There are two main reasons for disassembling the magnet rack. It could be to replace some parts, i.e. defect magnet or worn pivot arm, or it could be for regular maintenance. The magnet racks can be considered as the part of the printer that will have the greatest influence on the dot quality, so it is very important to know how to deal with them. - Page 61 BRAILLO B 300 S2.1 Step 2. Remove the two nuts holding the support list, and then remove the support list. Support list Step 3. Remove the two bolts holding the pivot arm fastener and then carefully remove the pivot arm fastener. The magnet rack is now disassembled. Pivot arm fastener...
-
Page 62: Magnet - Replacement
BRAILLO B 300 S2.1 Magnet - replacement Please observe that the numbering on the magnets in a magnet rack, always starts at “one” at the end where the connections are. (It does not refer to dot number, character number or column num- ber!). Disassemble the magnet rack like described in section 5.4 ‘Magnet rack - disassembly, step by step’ on page Next, follow the instructions below. Step 1. Remove the five screws holding the list, and the list. List... - Page 63 BRAILLO B 300 S2.1 Step 2. Pull out the defect magnet with, e.g. a narrow needle nose pliers. Magnet Step 3. Check the magnets internal resistance if you have an ohm-meter available. The resist- ance should be from 185 ohm to 240 ohm. Any value outside this range indicates a defect magnet.
- Page 64 BRAILLO B 300 S2.1 Step 4. Replace the defective magnet with a new magnet. Note the spikes on one of the sides on the magnet. These spikes must be oriented the same direction as the rest of the spikes in the mag- net rack. Note the direction on these spikes...
-
Page 65: Magnet Rack - Cleaning
BRAILLO B 300 S2.1 Magnet rack - cleaning Remove the magnet rack as described in section 5.3 ‘Magnet rack - removal’ on page Then disassemble the magnet rack as described in section 5.4 ‘Magnet rack - disassembly, step by step’ on page Now use a damp cloth moistened with cleaning alcohol to wipe off the surfaces as described in the figure below: Note! Never oil, grease or lubricate any of the moving parts on a magnet rack! This will only attract paper dust and cause clogging. The support list Magnet poles on the magnets The iron pieces in the long pivot arms At the back of the long... -
Page 66: Magnet Rack - Adjustment
BRAILLO B 300 S2.1 Magnet Rack - adjustment Before placing the magnet rack in the printer, two adjustments must be checked. The first is the distance between the support list and the pivot arms. This is the travelling distance for the pivot arm. And it should be adjusted to about 0.8 mm using a feeler gauge. Adjust the nuts on both ends of the magnet rack. If the 0.8 mm feeler gauge goes half way in, and the 0.9 mm feeler gauge does not go in at all, consid- er the adjustment OK. -
Page 67: Magnet Rack - Refitting And Adjusting
BRAILLO B 300 S2.1 Magnet rack - refitting and adjusting Before putting the magnet rack back on the printer, make sure that the magnet rack itself is adjusted as described in the previous section. When placing the magnet rack in the printer: Put in the four fastening screws, but do not tighten them. Slide the magnet rack horizontally away from the printer, so that the magnet rack is touching the horizontal adjustment screws. This will en- sure that the magnet rack is in the exact same position as before it was taken off the printer. See next section regarding correct adjustment of the magnet racks. Note! All explanations refer to one magnet rack, but these adjustments must be done on all four magnet racks. Pull back against these positioning screws on both ends... - Page 68 BRAILLO B 300 S2.1 The magnet rack must be adjusted in two directions, horizontal and vertical. The horizontal adjustment is done first. This adjustment positions the magnet rack correctly in rela- tion to the short pivot arms. If the printer prints too many or too few dots, the horizontal adjustment could be the problem. Then the vertical adjustment is done. This adjustment will affect the pressure the pivot arms put on the printing pins. This directly affects the shape of the printed dots. Vertical Horizontal adjustment adjustment To be able to adjust the magnet rack correctly, it is necessary to put the printer in “printing position”. This is done by rotating the main belt by hand until the arrows at the ends of the shaft are pointing exactly 180 degrees away from each other. It is possible to get the mechanism to balance in this position, but you can also lock the shafts with e.g. a self locking wrench (vice-grip pliers).
- Page 69 BRAILLO B 300 S2.1 When the arrows at the end of the shafts are pointing in the opposite direction of each other, the short pivot arms will be approximately positioned like in the figure below: Approx. 0.2 mm (As close as possible without touching when the short pivot arm is moving up and down). The gap between the long and the short pivot arm should be approximately 0.2 mm.
- Page 70 BRAILLO B 300 S2.1 Next is vertical adjustment. Note! The printer must be in the “printing position” when checking this distance. Vertical adjustment approx. 1 mm (will be affected by i.e. paper quality). The vertical adjustment of the magnet rack sets the pressure of the printing pins when making dots. The amount of pressure needed depend on several things. The first (and most important) is the paper quality. The second, is the personal preference the of dot quality. So the best way to find the correct level of vertical adjustment, is to first decrease the pressure so the dots will be very faded and weak. Then readjust the pressure up in small steps until the dot quality is satisfactory. By doing this you can make sure that you are running the printer with just enough pressure to make good dots, but not so much pressure that the printer will be worn/damaged. From our experience we have found that the vertical adjustment should be approximately 1 mm, but if the Braille dots are too weak, you may adjust the magnet rack tighter in small steps (increase the 1 mm distance). Please see figure on next page:...
- Page 71 BRAILLO B 300 S2.1 Adjust upwards by loosening the upper nut and then tighten the lower. Do this on both ends, so the magnet rack stays levelled. Note! Adjust in small steps, only 1/4 of a revolution at a time. Then test the Braille quality.
- Page 72 BRAILLO B 300 S2.1 Note! When adjusting the magnet racks vertically, observe that magnet rack A and B must be moved upwards to increase the pressure, and magnet rack C and D must be moved down- wards to increase the pressure. (Moving away from the paper increases pressure). PAPER...
-
Page 73: Beam And Paper Shoes - Overview
BRAILLO B 300 S2.1 Beam and Paper shoes - overview Please see the figures below: Upper Beam Upper Paper shoe Adiprene springs Lower Paper shoe Plastic shims Paper moves in this direction Return spring (blue) Lower Beam Return spring (green) -
Page 74: Beam And Paper Shoes - Removal And Refitting
BRAILLO B 300 S2.1 5.10 Beam and Paper shoes - removal and refitting To remove the beam and paper shoes, some other parts must be removed first. It must be done in this order: 1. Remove the belt 2. Remove the inside paper guide 3. Remove the paper feed tractor 4. Remove the top frame 5. Remove magnet rack A and B 1. - Page 75 BRAILLO B 300 S2.1 Beam and paper shoes - removal and refitting (continued) 3. Remove the paper feed tractor Please see section 5.16 ‘Paper feed assembly - removing’ on page 81 for a description on how to remove the tractor. 4. Remove the top frame Unscrew the bolts as indicated on the figure below, and then lift the frame carefully upwards and place it aside.
-
Page 76: Beam - Replacement Of Short Pivot Arm
BRAILLO B 300 S2.1 5.11 Beam - replacement of short pivot arm See the figures below: 1. Remove the four screws as indicated in the figure. Pull out the short pivot arms, there are 42 pcs. on each side. 2. Pull out the shaft, and replace the short pivot arm(s). Assembly is done in re- verse order. -
Page 77: Beam - Replacement Of Printing Pin
BRAILLO B 300 S2.1 5.12 Beam - replacement of printing pin See the figures below: Remove the six screws as indicated on the figure. Note! Before the parts are separated, make sure that the beam is held with the printing pins hanging down. Place the pin guide with the pins on a table. Do not turn it upside down or all the pins... -
Page 78: Return Spring Adjustment
BRAILLO B 300 S2.1 5.13 Return spring adjustment Before performing this adjustment, make sure that the shafts are turned to the correct position. See the marks at the end of the shafts, the arrows must point directly towards each other, like in the figure below. Then the springs can be adjusted to the correct length, i.e. 68 mm. Note! It is critically that the length of these two return springs are 68 mm! 68mm 68mm... -
Page 79: Eccentrics Adjustment, Belt Tension
BRAILLO B 300 S2.1 5.14 Eccentrics adjustment, belt tension After removing the belt, it is necessary to align the eccentrics. Put the belt back on, tighten it with the belt tightening wheel (2), and check that the arrows at the end of the shafts (1) are pointing towards each other. See figure below. If the marks are not aligned like in the figure, it might be necessary to move the belt a notch or two on one of the wheels. This is done by loosening the belt tightening wheel (2) again, and then lift the belt up from the big wheel and move it a notch on the wheel. Then tighten the belt. When pushing or pulling by hand, the distance should be approx. 10 - 12 mm Direction of rotation... -
Page 80: Main Sensor Wheel - Adjustment
BRAILLO B 300 S2.1 5.15 Main sensor wheel - adjustment The main sensor wheel is placed on the lower shaft, on the opposite end from the belt. The shafts must be in the position indicated to the left in the figure below. The timing wheel should now be placed exactly like position (A) in the figure below, i.e. the mark in the middle of the opening in the wheel is placed just opposite the sensor. If the timing wheel is not in it’s correct position, it must be adjusted. Keep the shafts in this position while loosen the screw (B) holding the timing wheel. Turn the tim- ing wheel until the inductive sensor is placed just opposite the mark in the middle of the opening in wheel. Then fasten the screw again. Keep the shafts in this position Sensor The notch must be in the... -
Page 81: Paper Feed Assembly - Removing
BRAILLO B 300 S2.1 5.16 Paper feed assembly - removing To remove the paper feed assembly, disconnect the stepping motor cable connector near the step- ping motor. The sensors must be disconnected from the board. The paper feed assembly can then be removed by loosening four nuts. There is no need to remove the nuts completely, just loosen them, and then lift the assembly up and pull out. -
Page 82: Paper Feed Assembly - Adjustment
BRAILLO B 300 S2.1 5.17 Paper feed assembly - adjustment If for some reason the paper feed mechanism has been disassembled it could be that the paper will not stop correctly by the marks on the paper guide. Therefore, it is necessary to adjust the relation between the paper parking position and where the stepping motor is parking. -
Page 83: Inductive Sensors - Adjustment
BRAILLO B 300 S2.1 5.18 Inductive sensors - adjustment This printer uses inductive sensors in three places. One for the main timing wheel on the lower shaft, and two are controlling the movement on the paper feed mechanism. It is possible to check if the inductive sensors are functioning by looking at the rear end where the cable enters the sensor. Inside the sensor is a little LED lamp that will be lit if a magnetic object is in front of the sensor. So by having the power turned on, and at the same time turning the shafts, the light should go on and off. When replacing/adjusting the sensors, the gap between the timing wheel and the sensors can be maximum 0.6 mm. Check this for the whole revolution of the timing See figure below. Timing wheel Inductive sensor Max. gap 0.6mm... -
Page 84: Input Paper Guide - Removing
BRAILLO B 300 S2.1 5.19 Input paper guide - removing To remove the Input paper guide, you must loosen the four nuts like shown in the figure below. There is no need to remove the nuts completely, just loosen them, and then lift the assembly up and pull out. Loosen these four nuts... -
Page 85: Paper Sensor - Replacing
BRAILLO B 300 S2.1 5.20 Paper sensor - replacing This printer has a sensor to detect if paper is present in the printer. This sensor is situated on the paper guide where the paper enters the printer. The sensor is an infrared reflective type, and it works by an infrared lamp is sending light downward, if there is paper present, the light will be reflected back and detected by a photo transistor. If the sensor needs to be replaced, it can be done like this: Take the paper guide out of the printer. -
Page 86: Maintenance
BRAILLO B 300 S2.1 5.21 Maintenance Weekly (without taking the cover off). Does the printer print correct Braille? How is the Braille dot quality? Check for any damages on the outside of the cover. Is the operator panel functioning? Do the fans work? Are the fans clean? If there is a lot of dust from the paper on the paper guides, use a vacuum cleaner. - Page 87 BRAILLO B 300 S2.1 Lubrication This should be done every 1000 running hours, or approximately once a year. Lubricate all items marked “1” on the figure below. (These are the only locations in the printer grease may be applied!). Use a universal grease with molybdensulfid.
-
Page 88: Parts - Exploded Views
BRAILLO B 300 S2.1 PARTS - EXPLODED VIEWS Magnet rack 30-64661, Magnet rack assembly Pos. Part no. Name Quantity per. rack 10-60372 Magnet rack board 42 2.1 B3985-30180 Magnet B3985-4029C Magnet rack B3985-40660 Support list, magnet rack B3985-40680 Sponge list B3985-40690 Pivot arm, long, green B3985-4109E Guide list, magnet rack SW985-40815... -
Page 89: Beam
BRAILLO B 300 S2.1 Beam B3985-40101, Beam upper assembly B3985-40091, Beam lower assembly Pos. Part no. Name Quantity per. beam MA500-50001 Stroke ball bearing Ø20 B3985-40100 Beam, upper B3985-40090 Beam, lower B3985-40102 Fastener for short pivot arm shaft B3985-40670 Sponge list for short pivot arm B3985-4011C Pin guide B3985-4016E... -
Page 90: Paper Shoe
BRAILLO B 300 S2.1 Paper shoe 30-64640, Paper shoe, upper assembly 30-64630, Paper shoe, lower assembly Pos. Part no. Name Quantity per. shoe MA510-10003 Retaining ring MA500-50001 Stroke ball bearing Ø20 B3985-40913 Spacer B3985-4095C Paper shoe upper B3985-4094C Paper shoe lower B3985-40722... -
Page 91: Paper Feed
BRAILLO B 300 S2.1 Paper feed 30-64646, Paper feed tractor assembly Pos. Part no. Name Quantity MA540-20400 Paper feed tractors (a pair with left and right) 10-61966 Paper feed sensor no. 1 10-61967 Paper feed sensor no. 2 B3975-30854 Timing wheel with hub EA185-00025 Stepper motor... -
Page 92: Shafts, Belt
BRAILLO B 300 S2.1 Shafts, belt Direction of rotation To get the cog wheel off the shaft Unscrew the two screws. Place one of the screws in the third hole, and screw it in- wards until the wheel is loose. Parts shaft, belt Pos. Part no. Name Quantity 30-64606 Shaft, complete with bearings MA505-20003 Belt 540 L... - Page 93 BRAILLO B 300 S2.1 Shaft, exploded view 30-64606, Shaft assembly Pos. Part no. Name Quantity per. shaft MA500-20002 Main bearing with housing (not part of 30-64606) MA443-30001 Nut KM5 MA500-10002 Bearing outer eccentric 6205 2Z 15-69000 Main shaft...
-
Page 94: Top And Bottom Frame
BRAILLO B 300 S2.1 Top and bottom frame 30-64665, Top and bottom frame assembly Pos. Part no. Name Quantity per. frame MA510-10002 Locking ring Ø22 MA500-50002 Stroke ball bearing Ø12 B3985-42000 Frame B3985-40912 Spacer Ø22 B3985-40130 Push rod steel Ø12x56 (not part of 30-64665) - Page 95 BRAILLO B 300 S2.1 Frame, complete...
-
Page 96: Technical Specifications
BRAILLO B 300 S2.1 TECHNICAL SPECIFICATIONS Technical specifications Format: Characters per line: 10-42 char. Sheet length: 4-14 inches Sheet width: 140-330 mm Page layout: Normal/Z-fold Page 1: Up/down Printing type: Single sided/interpoint Line spacing: Adjustable, from 0.3175 mm to 10.16 mm. Standard is 5.08 mm Dot: Page length: No form feed/normal/normal-1 to -9 lines Braille cell: Standard medium 6 or 8 dot. -
Page 97: Electric Unit - Overview
BRAILLO B 300 S2.1 Electric unit - overview The electric unit contains connections, fuses and power supply. Note! Disconnect the mains when working on this unit! Mains inlet Fans outlet External equipment outlet Alarm output On/off switch 24V Spare output 24V Step motor driver 24V Magnet racks 24V Main board... -
Page 98: How To Replace Fuses
BRAILLO B 300 S2.1 How to replace fuses The fuses are placed on a PCB inside the electric unit. See figures below for how to open the box. Remember to disconnect the mains cable first! Unscrew all screws To get more room to inspect and replace the fuses, it is best to move the power supply a little out of the way. This can be done without disconnection the wires. See figure below: Power supply To release the power supply, place a screw driver here and pull the latch downwards... - Page 99 BRAILLO B 300 S2.1 The fuses. Note that the two mains fuses is placed under transparent lids. All the fuses are 5 x 20 mm and can be of glass or ceramic type. Mains - 10 AT Board - 3.15 AT Magnet rack A - 3.15 AT...
-
Page 100: Main Board - Connections
BRAILLO B 300 S2.1 Main board - connections The main board is placed just behind the operator panel Ethernet RJ45 USB Type B USB Type A for software updating Magnet rack Magnet rack Data for Magnet racks Magnet rack Magnet rack... -
Page 101: Escape-Sequences
BRAILLO B 300 S2.1 Escape-sequences What is an escape-sequence? An escape-sequence is the name for a code which is sent to the printer from the computer to change the parameters which control the way the printer works. All parameters that can be set via the opera- tor panel, can also be changed with escape-sequences. - Page 102 BRAILLO B 300 S2.1 Note! The escape-sequences will be executed immediately if the printer is not running. How- ever, if the printer is running, the escape-sequences will keep their place in the document, and will be executed when this particular page is printed. Also keep in mind that any page format- ting command must be kept on the front page of a sheet. Then the command will affect both the front and back page, i.e. one sheet. If there are page formatting commands on the back page of a sheet, these commands will be skipped. Please see the following explanations on how to combine different values to get the different es- cape-sequences. Sheet length: Line length: ESC A nn - Sheet length. ESC B nn - Line length.
- Page 103 BRAILLO B 300 S2.1 Print Format: Line spacing: ESC C n - Print Format. ESC M nn - Line Spacing. n can be 0 (single-sided) or 1 (interpoint). nn can be from 0 to 16 step. Print Format ASCII Step mm...
- Page 104 BRAILLO B 300 S2.1 Page Adjust: Page Margin: ESC R n - Page adjust. ESC T nn - Page margin. n can be from 0 to 9 lines. nn can be from 0 to 20 step. Please keep in mind that there is a difference Step mm ASCII in the terms “page length” and “sheet length”.
- Page 105 BRAILLO B 300 S2.1 Software Reset: Print Printer ID: ESC 0 - Soft Reset ESC 4 - Adding the Printer ID This command is used to reset the printer. It When you have several Braille printers producing is used from the computer and has the same the same Braille material, it is not always easy to effect as pushing the key RESET PRINTER.
-
Page 106: Warranty
• The printer model and serial number • The hour and sheet counter • Contact person with email and phone number When Braillo receives your email, we will get back to you and the parts will be shipped as soon as possible. What to do with the defective part(s): If a communication has been made to our service department, and an approval has been given, it will not be necessary to return the part(s) to Braillo Norway A/S. In all other cases, the part(s) must be re- turned to Braillo Norway A/S as soon as possible. If the part(s) has/have not been received by Braillo Norway A/S within 2 months from the date of issuing the “Warranty request form”, this is no longer regarded as a warranty matter and an invoice will be issued and sent. -
Page 107: Legal Notices
BRAILLO B 300 S2.1 Legal notices Liability disclaimer Braillo Norway AS reserves the right to make changes without further notice to the product to im- prove reliability, function or design. Braillo Norway AS does not assume any liability arising out of use of the product described herein. All information contained in this document represents information on the product at the time of pub- lication. Braillo Norway AS reserves the right to make corrections, enhancements and other changes to this document without notice. While Braillo Norway AS has used reasonable care in preparing the information included in this document, it may contain technical or other inaccuracies, omissions and typographical errors. Please contact us should you find something that you feel needs correction or explanation. RoHS and REACH statement Braillo Norway AS products meet the requirements of Directive 2011/65/EU of the European Parlia- ment and of the Council on the Restriction of Hazardous Substances (RoHS 2) and the requirements of the REACH regulation (EC 1907/2006) on Registration, Evaluation, Authorization and Restriction of Chemicals. Copyright notice © 2020 Braillo Norway AS. All rights are reserved. Reproduction in whole or in part is prohibited with- out the prior written permission of the copyright holder. - Page 108 BRAILLO B 300 S2.1...
-
Page 109: Address And Phone Number
BRAILLO B 300 S2.1 Address and phone number Braillo Norway AS Wessels veg 100 7502 Stjørdal Norway Phone: +47 74 84 04 40 Email service: service@braillo.com Email sales: sales@braillo.com Web: www.braillo.com...
Need help?
Do you have a question about the 300 S2.1 and is the answer not in the manual?
Questions and answers