
Subscribe to Our Youtube Channel
Related Manuals for Allsteel Harvest Rustic Standing Height Table


Summary of Contents for Allsteel Harvest Rustic Standing Height Table
- Page 1 Harvest Rustic Table: Non-Powered Installation Instructions Standing Height Table Seated Height Table Pour des instructions en francias, appelar le 800-822-7653 Para instrucciones en enspanol, llame al 800-822-7653 3430399500 03/22/2019...
- Page 2 Harvest Rustic Table: Non-Powered Installation Packet W A R N I N G Failure to install product as instructed, use of hardware other than that which is provided, or failure to comply with instructions can result in product failure, personal injury, or property damage. Hardware - Total Quantities Shown 1/4”...
-
Page 3: Hardware Bags
Harvest Rustic Table: Non-Powered Installation Packet Hardware Bags 1/4-20 x 1/2” Pan Head Machine Screw - Bag #1 1/4-20 x 3/4” Truss Head Screw - Bag #2 (Standing Height Only) #8 x 1/2” Wafer Head Screw - Bag #3 5/16 x 2” Pan Head Screw - Bag #4 #12 x 1”... -
Page 4: Leg Assembly
Harvest Rustic Table: Non-Powered Installation Packet Build staging 1. Protect worksurface by clearing the build area of any debris that can cause damage. 2. Place worksurafce upside down (as shown) on packing blankets or equivalent to protect upward facing show surface during the installation process. 3. - Page 5 Harvest Rustic Table: Non-Powered Installation Packet Leg Assembly continued... 1. Attach Corner Brace to Leg with (4) 5/16 x 2” Lag Screws. Corner Brace Lag Screw 2. Align leg assembly with corner pilot hole shown, leaving a 1/4” reveal between leg and edge of worksurface.
- Page 6 Harvest Rustic Table: Non-Powered Installation Packet Aprons 1. Align aprons with holes of corner braces, ensuring proper edge is resting on the worksurface. Incorrect orientation of apron is shown below. 2. Loosely attach aprons to each corner brace using (4) 1/4-20 x 1/2” machine screws. 3.
- Page 7 Harvest Rustic Table: Non-Powered Installation Packet Center Support Channels 1. Place center support channels across the length of the table with the flat surface facing upwards, as shown below. 2. Align support brackets with holes of support channel, and attach on each end with (3) #8 x 3/4” wafer head screws.
- Page 8 Harvest Rustic Table: Non-Powered Installation Packet Anti-Bow Brackets continued... Note: If bow exists within aprons running lengthwise along table, correct with provided L-brackets. 1. Attach L-bracket to apron with (2) #10 Phillips head screws. 2. Push against apron in direction of bow; attach L-bracket to surface with (2) #12 wood screws. #10 Phillips screws #12 Wood...
- Page 9 Harvest Rustic Table: Non-Powered Installation Packet Foot Rest & Foot Rail (standing height only) 1. Install leveling glides into threaded insert on each leg. 2. Attach foot rest to legs with (8) 1/4-20 x 3/4” machine screws. Repeat for opposite end. 3.
-
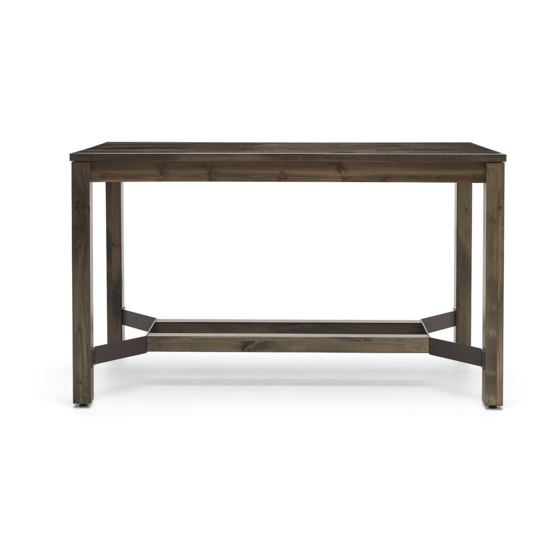
Page 10: Exploded View
Harvest Rustic Table: Non-Powered Installation Packet Exploded View Final assembled table Page 10 of 10 3430399500...
Need help?
Do you have a question about the Harvest Rustic Standing Height Table and is the answer not in the manual?
Questions and answers