
Related Manuals for Riello Touchscreen N


Summary of Contents for Riello Touchscreen N
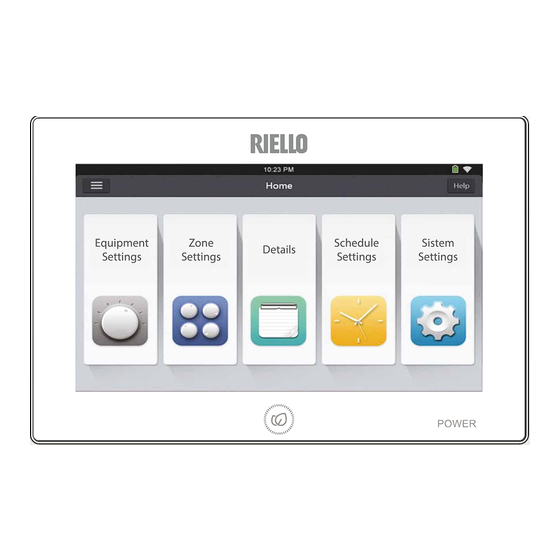
- Page 1 Equipment Zone Schedule Sistem Details Settings Settings Settings Settings Touchscreen N CENTRALISED CONTROL USER INSTRUCTIONS...
- Page 2 R shall bear no responsibility, whether of a contrac- tual or non-contractual nature, for any damage caused to people, animals, or property due to incorrect installation, adjustments, or maintenance, or improper use. RANGE Model Code Touchscreen N centralised control 20133642...
-
Page 3: Table Of Contents
TAbLE OF CONTENTS GENERAL INFORMATION Displaying details..... . Hourly programming ... . . General Notices . -
Page 4: General Information
GENERAL INfORMATION GENERAL INFORMATION Any repair and maintenance inter- General Notices ventions must be carried out by R Technical Support Service, in accordance with the provisions contained in this publication. Do not modify or tamper When you get the product, check imme- with the unit as dangerous situations diately that the contents are all present may arise and the unit manufacturer will... -
Page 5: Energy Saving Tips
GENERAL INfORMATION Energy saving tips • Monitoring other parameters: — Indoor temperature — Piping temperature Cover windows with shutters or curtains — etc... to stop sunlight coming through and hence increase the cooling effect. Maintaining moderate temperature set- tings will help save energy. Recommended temperature settings: —... -
Page 6: Layout
GENERAL INfORMATION Layout Display Screensaver key Touch panel Ignition indicator light Terminal blocks On-Off key Control base Reset button Transformer module... -
Page 7: Installation
The document envelope must be kept in a safe place. Any duplicate must be requested from Riello S.p.A. which re- serves to charge the cost. Dimensions and weight Storage The product must be stored of according to the regulations in force. -
Page 8: Positioning
INSTALLATION The control should be installed indoors and Check that: placed on a wall. — the position is about 1.5 m off the ground — installed taking into consideration the maximum length of the connecting cable.see the chapter "Electrical con- nection"... - Page 9 INSTALLATION — insert the flush-mounted box in the wall — fix the transformer to the bottom of the base Fixing screws Hooks for touch panel — fix the base onto the box Touch panel base — separate the touch Panel from the base Fastening holes...
-
Page 10: Wiring Diagrams
The indoor units can be managed individu- ..Max 32 Max 80 Touchscreen N centralised control AARIA MULTI range outdoor unit AARIA range outdoor unit For the maximum number of indoor units that can be linked to each outdoor... -
Page 11: Aaria Pro Multi S
…… …… 64 max …… …… 64 max 256 max Touchscreen N centralised control AARIA PRO MULTI S range outdoor unit Interface for centralised control (acces- branch box sory) AARIA range outdoor unit For the maximum number of indoor units that can be linked to each outdoor... -
Page 12: Electrical Connection
INSTALLATION Electrical connection The terminal board of the control is posi- tioned on the rear side of the base: The appliance only needs to be connected to the mains power supply using the trans- former and to the air conditioning system devices that are being used. - Page 13 INSTALLATION Connection of the electrical power supply to the diagrams below — make electrical connections according Power cable Transformer module Control base Flush mounted box The power cable should be chased in. 230V-50Hz Transformer module Control base Touch panel...
- Page 14 — make electrical connections according to the diagrams below The connection is polarised, respect the correct sequence. Outdoor unit Touchscreen N centralised control The connection is polarised, respect the correct sequence. AARIA PRO MULTI S — make electrical connections according...
- Page 15 INSTALLATION BUS D BUS C Outdoor unit branch box Centralised control interface Indoor unit Touchscreen N centralised control...
- Page 16 INSTALLATION 230V- 50Hz 230V- 50Hz Centralised control interface Touchscreen N centralised control terminal board The connection is polarised, respect the Avoid placing the connection cables less correct sequence. than 3 metres away from radio and vid- eo systems. Mandatory items: —...
-
Page 17: Use
Keys The touch surface allows you to manage all the Display functions Screensaver key Allows you to switch the display of and on again Ignition indicator light Signals the appliance’s ignition On-Off key It switches the device on and off Allows the appliance to be reset in the event of a Reset button operating system lockout... -
Page 18: Display
Display Equipment Zone Schedule Sistem Details Settings Settings Settings Settings Displays: number of units activated number of units deactivated number of units with active scheduling periods number of units in error Permits the setting of the unit's operating parameters and the simultaneous activation or deactivation of all the units Permits the setting of the parameters of the zones Permits the display of all the unit's operating details, the error codes, the... -
Page 19: Switching On The Command
Switching on the command To activate: Single O F F — touch the areas of the display that you want to select — set the system's main switch to “ON” — touch to select — slide keeping the finger on the side bar to move around the screen —... -
Page 20: Extra
— Type select: the type of system con- — No limit: heating and cooling (factory nected setting) • MRV: AARIA PRO MULTI S • To access • Single: AARIA MULTI — Language: the language used in the display — Date set: the current date —... -
Page 21: Password
— press Energy • To save — touch • To activate Alternatively — set to On — change screens The system confirms with update password The factory setting is on On. • To change repeat the operation if update password —... -
Page 22: Unit Settings
Unit settings The unit settings menu allows you to make the settings for a singe unit: — the operating mode — the desired temperature — the purging speed — the control mode — the simultaneous activation or deacti- vation of all the units •... -
Page 23: Changing The Settings
Changing the settings Purging speed Maximum • To access Average Minimum Automatic Speed control type Available only for AARIA PRO MULTI S systems. Last selected / First activated Complete control is possible from the centralised command that gives local controls (remote control and wired control the system renders the last command received active. -
Page 24: Changing Name Of Indoor Unit
• To apply the selection to all the units of a zone — touch — choose a new name that is 10 to 16 characters long — enter the new name — confirm with OK — select the zone concerned Activation and deactivation Changing name of indoor unit Using the centralised control it is possible to... -
Page 25: Zone Settings
• To act on all the units of a zone — choose the name of the zone with up to 6 characters — touch — enter the name of the zone — select the desired zone — confirm with OK —... -
Page 26: Changing A Zone
new zone • To change the name — touch Edit group name • To change the composition — touch Edit group's dev • To delete the zone — touch Remove this group Displaying details The Details menu provides an overview of all the parameters of all the indoor units con- nected to the system: —... -
Page 27: Hourly Programming
Hourly programming The hourly Programming menu allows you to set the periods of time during which the in- door units are activated. For each period it is possible to set: — the desired temperature — the operating modes — the purging speed The period is applicable to: —... -
Page 28: Activation And Deactivation
— touch User select — select the desired days — select the desired units Mon: monday Tue: tuesday • To link a period to the zones Wed: wednesday Thur: thursday Fri: friday Schedule Settings Sat: saturday Sun: sunday • To confirm —... -
Page 29: Changing A Period
• To reset Equipment Zone Schedule Sistem Details Settings Settings Settings Settings Changing a period Reset button — use a pointed object • To change — press the Reset button The display switches off and then restarts af- ter a few seconds. Schedule Settings The reset keeps the settings that were previously made. -
Page 30: 3.12 Switching Off The Control
• To switch on the display — touch the screensaver key The display switches on. 3.12 Switching off the control To deactivate: Equipment Zone Schedule Sistem Details Settings Settings Settings Settings On-Off key — keep the key On-Off pressed for about 3 seconds —... -
Page 31: Disposal
RECyCLING AND DISPOSAL DISPOSAL Packing materials must be disposed of sepa- rately, in order to be recovered and recycled. Equipment at end of life and flat batteries must be disposed of as required by prevail- ing law and regulations. - Page 32 RIELLO S.p.A. - 37045 Legnago (VR) tel. +39 0442 630111 - fax +39 0442 630371 www.riello.it As the manufacturer is constantly improving its products, the aesthetic or dimen- sional features, the technical data, the equipment and accessories indicated could be subject to variations.
Need help?
Do you have a question about the Touchscreen N and is the answer not in the manual?
Questions and answers