
Related Manuals for Landoll 5210


Summary of Contents for Landoll 5210
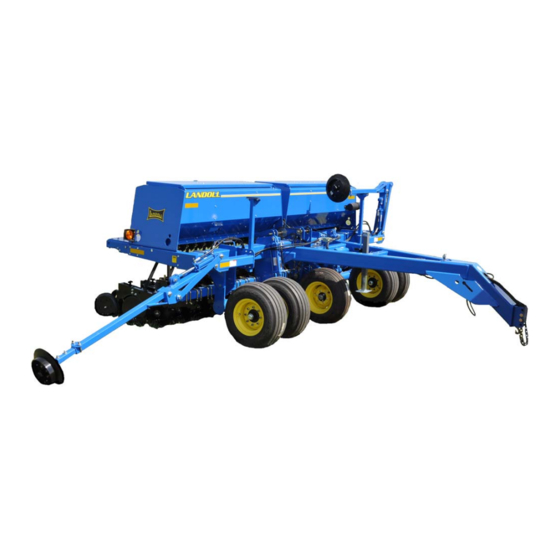
- Page 1 Model 5210 Grain Drill Operator’s Manual LANDOLL CORPORATION 1900 North Street Marysville, Kansas 66508 (785) 562-5381 800-428-5655 ~ WWW.LANDOLL.COM F-558-0910 09/2010...
-
Page 3: Table Of Contents
Table of Contents Introduction Understanding Safety Statements ..........1-2 Standard Specifications Assembly Instructions Press Wheel Assembly . - Page 4 Opener Scraper Adjustment ........... . 4-30 Opener Soil Strip Adjustment .
-
Page 5: Introduction
Chapter 1 Introduction The Landoll Model 5210 Grain Drill is a quality product designed to give years of trouble free performance. By following each section of this manual, your system will perform as designed for you and your operation CHAPTER 1 gives basic instructions on the use of this manual. -
Page 6: Understanding Safety Statements
Make sure you read and understand the information contained in this manual and on the machine signs (decals) before you attempt to operate or maintain this vehicle. The safety statements contained in this manual relate to the operation of the Model 5210 Grain Drill. F-558-0910 Edition... -
Page 7: Standard Specifications
5210-20 20’-0” 7-1/2” 20’-0” 7,724 5210-20 20’-0” 10” 20’-0” 6,752 Specifications are subject to change without prior notification. 5210 SERIES GRAIN DRILL W/ SMALL GRASS SEED ATTACHMENT MODEL WORKING NO. OF TRANSPORT ESTIMATED WIDTH SPACING OPENERS WIDTH WEIGHT (LBS.) 5210-12 12’-6”’... - Page 8 STANDARD SPECIFICATIONS TIRE INFLATION TIRE TIRE PLY/LOAD INFLATION PRESSURE SIZE MANUFACTURER RATING (psi) (max.) 11L x 15 Goodyear 12 Ply/3860 lbs 52 psi 11L - 15 FI Goodyear F Load 4750 lbs. (30 mph) 90 psi Farm Highway Service IMPORTANT Check tire pressure often.
- Page 9 STANDARD SPECIFICATIONS LANDOLL CORPORATION GENERAL TORQUE SPECIFICATIONS (REV. 4/97) THIS CHART PROVIDES TIGHTENING TORQUES FOR GENERAL PURPOSE APPLICATIONS WHEN SPECIAL TORQUES ARE NOT SPECIFIED ON PROCESS OR DRAWING. ASSEMBLY TORQUES APPLY TO PLATED NUTS AND CAPSCREWS ASSEMBLED WITHOUT SUPPLEMENTAL LUBRICATION (AS RECEIVED CONDITION).
- Page 10 STANDARD SPECIFICATIONS LANDOLL CORPORATION HYDRAULIC FITTING TORQUE SPECIFICATIONS JIC, ORS, & ORB (REV. 10/97) THIS CHART PROVIDES TIGHTENING TORQUES FOR HYDRAULIC FITTING APPLICATIONS WHEN SPECIAL TORQUES ARE NOT SPECIFIED ON PROCESS OR DRAWING. ASSEMBLY TORQUES APPLY TO PLATED CARBON STEEL AND STAINLESS STEEL FITTINGS ASSEMBLED WITHOUT SUPPLEMENTAL LUBRICATION (AS RECEIVED CONDITION) THEY DO NOT APPLY IF SPECIAL GRAPHITE MOLY-DISULFIDE OR OTHER EXTREME PRESSURE LUBRICANTS ARE USED.
- Page 11 STANDARD SPECIFICATIONS 1/2” 1/2” MARKER MARKER 4-9/16” GRASS 5-3/8” FERTILIZER 4-1/4” 10-3/4” 3-15/16” DRIVE WHEEL 5210-12_5_x_7_5_opener_placement Figure 2-1: 5210-12-1/2 x 7.5 Placement...
- Page 12 STANDARD SPECIFICATIONS 1/2” 1/2” MARKER MARKER 4-9/16” GRASS 5-3/8” FERTILIZER 4-1/4” 9-1/2” 4-15/16” DRIVE WHEEL 5210-12_5_x_10_opener_placement Figure 2-2: 5210-12-1/2 x 10 Placement F-558-0910 Edition...
- Page 13 STANDARD SPECIFICATIONS 17-13/16” 17-13/16” 12-5/8” 5210-12_5-3pt-placement Figure 2-3: 5210-12-1/2 Placement (3 Point Hitch)
- Page 14 STANDARD SPECIFICATIONS 12-7/8” 19-9/16” 19-9/16” FERTILIZER GRASS SEED GRASS SEED 15-1/2” 14-1/2” 15-1/2” MARKER DRIVE WHEEL MARKER 25-3/4” 4-3/4” 5210-15_x_7_5_opener_placement Figure 2-4: 5210-15 x 7.5 Placement F-558-0910 Edition...
- Page 15 STANDARD SPECIFICATIONS 12-7/8” 19-9/16” 19-9/16” FERTILIZER GRASS SEED GRASS SEED 15-1/2” 14-1/2” 15-1/2” MARKER DRIVE WHEEL MARKER 24-1/2” 1-3/4” 5210-15_x_10_opener_placement Figure 2-5: 5210-15 x 10 Placement...
- Page 16 STANDARD SPECIFICATIONS 7-13/16” 7-13/16” 1-3/8” 5210-15-3pt-placement Figure 2-6: 5210-15 Placement (3 Point Hitch) 2-10 F-558-0910 Edition...
- Page 17 STANDARD SPECIFICATIONS 25-3/4” 12-3/4” 1/4” 1/4” 12-3/4” 12-7/8” 10-5/8” 5210-20_x_7_5_opener_placement Figure 2-7: 5210-20 x 7.5 Placement 2-11...
- Page 18 STANDARD SPECIFICATIONS 24-1/2” 12-3/4” 1/4” 1/4” 12-3/4” 16” 7-1/2” 5210-20_x_10_opener_placement Figure 2-8: 5210-20 x 10 Placement 2-12 F-558-0910 Edition...
- Page 19 STANDARD SPECIFICATIONS 3-3/16” 3-3/16” 1-3/8” Figure 2-9: 5210-20 Placement (3 Point Hitch) 2-13...
- Page 20 STANDARD SPECIFICATIONS 2-14 F-558-0910 Edition...
-
Page 21: Assembly Instructions
Chapter 3 Assembly Instructions Your new 5210 Grain Drill comes nearly completely WARNING assembled from the factory and ready to go to the field. This section includes press wheel and option assembly Do not attempt to lift heavy parts (such as the procedures . -
Page 22: Press Wheel Assembly
ASSEMBLY INSTRUCTIONS AIR OPENER ASSEMBLY 3/4-10 HEX LOCK NUT PRESS WHEEL ASSEMBLY PRESS WHEEL ARM press wheel assembly Figure 3-1: Press Wheel Assembly Press Wheel Assembly DANGER 1. Attach each press wheel assembly to each air Opener blades are extremely sharp. Exercise opener assembly on the Grain Drill using press extreme care when working on or near opener wheel arm pin and 3/4-10 hex lock nut (See... - Page 23 ASSEMBLY INSTRUCTIONS Notes:...
- Page 24 ASSEMBLY INSTRUCTIONS Page Intentionally Blank F-558-0910 Edition...
-
Page 25: Operation And Maintenance
DANGER DANGER Never allow anyone to ride on the 5210 Grain Drill Always lock the tractor drawbar in the center at any time. Allowing a person to ride on the position when transporting the unit. Failure to do... -
Page 26: Tractor Preparation
OPERATION AND MAINTENANCE Tractor Preparation Grain Drill Preparation The Landoll 5210 Grain Drill is designed to be pulled by 1. Prior to operating the 5210 Grain Drill, read and tractor equipped with a double lip or clevis type hitch. If understand the operator's manual and all decals. -
Page 27: Attaching Grain Drill To The Tractor
OPERATION AND MAINTENANCE Attaching Grain Drill To The 4. Back the tractor into final position, and install the hitch pin. Tractor 5. Lower and remove the jack. Place jack in the storage location in the middle of the hitch. WARNING 6. -
Page 28: Transport Locks
POSITION TRANSPORT LOCK INSTALLED FOR TRANSPORT 5210 transport lock locations Figure 4-2: Storage and Transport Position of Transport Locks Transport Locks 2. The transport locks are installed on the holders located on the hitch when not in use. To install the 1. -
Page 29: Leveling The Hitch Clevis
OPERATION AND MAINTENANCE HITCH CLEVIS HEIGHT ADJUSTMENT 5210-hitch clevis Figure 4-3: Hitch Clevis Height Leveling the Hitch Clevis 2. On a level surface, measure from the ground to the top side of the tractor drawbar. For drawbar heights 1. The hitch clevis height should be adjusted to match 18”... -
Page 30: Transporting The Grain Drill
SPEED IDENTIFICATION SYMBOL (SIS) DECAL HITCH WELDMENT SAFETY CHAIN 5210 hitch and safety chain Figure 4-4: Hitch and Safety Chain Transporting the Grain Drill CAUTION 1. Check and follow all federal, state, and local Excessive speed may result in loss of control of requirements before transporting the Grain Drill. - Page 31 OPERATION AND MAINTENANCE 5. Slow down when driving on rough roads. Reduce DANGER speed when turning, or on curves and slopes to avoid tipping. Equipment altered other than the place Stay away from power lines when transporting, of manufacture may reduce the maximum transport extending or folding implement.
-
Page 32: Compressor Operation
The compressor filter is not sufficient to operate in the dirty field conditions. The compressor also has a 5210-air-compressor connection limited duty cycle. Maximum run time for the Figure 4-5: Air Compressor Connection compressor is 20 minutes on followed by a 20 minute off cool down period (50% duty cycle) before additional operation. -
Page 33: Air System Pressure
This will provide maximum down pressure for the row units. A system relief valve 5210-air-system pressure is installed at the front of the hitch to protect the Figure 4-6: Air System Pressure system from excessive pressure. -
Page 34: Hydraulic Lift System
OPERATION AND MAINTENANCE Hydraulic Lift System 1. The hydraulic lift system contains cylinders plumbed together. The Grain Drill is equipped with a hydraulic lift system to 2. Before transporting make sure both lift cylinders and raise and lower the unit from transport to planting hitch cylinders are fully extended for maximum position. -
Page 35: Battery Operated Acre Counter Operation
OPERATION AND MAINTENANCE Battery Operated Acre Counter Operation The battery operated acre counter operates in one of two modes. In sleep mode, the display is blank, and the counter is accumulating acres. Sleep mode will be 0000.0 entered if a button is not pressed for 20 seconds. In entry mode, the display is on, and the operator can enter values. - Page 36 OPERATION AND MAINTENANCE 2. Total Acres a. Press the FUNC button until the "TOTAL" icon appears in the display. The digits indicate the acres covered since the total acre counter was cleared (See Figure 4-10.) b. To clear the total acre count, press and hold the TOTAL UP and DOWN buttons for 2 seconds.
- Page 37 OPERATION AND MAINTENANCE 3. Pulses per mile: a. Press the FUNC button until the "PULSES" icon appears in the display. The number in the display indicates how many times the shaft rotates for every mile driven. PULSES Using the UP and DOWN buttons, adjust the display to "222".
- Page 38 OPERATION AND MAINTENANCE 4. Width: 5. Password: a. Press the FUNC button until the "WIDTH" icon a. The password function allows you to protect the appears in the display. The number displayed is total acre count, pulses per mile, and width the width of your implement in feet (See settings with a password.
- Page 39 OPERATION AND MAINTENANCE d. If the display shows "Ent": You must enter your password using the UP and DOWN buttons. When your password is displayed, press the FUNC button to test the password. If the password is correct, you will be PASS able to change the acre counter settings.
-
Page 40: Seed Rate Adjustment
2. Do not force the handle or damage may occur to the meter assemblies. The meter will not be able to be fully closed if there is seed in the box. SEED RATE ADJUSTMENT HANDLE 5210-seedrateadj Figure 4-16: Seed Rate Adjustment 4-16 F-558-0910 Edition... -
Page 41: Meter/Seed Rate Handle Adjustment
OPERATION AND MAINTENANCE Meter/Seed Rate Handle 3. When all collars have been set, release the clamp, and slide the meter shaft assembly to the left to fully Adjustment close the seed meters. a. Clamp the shaft in place to hold the meters 1. -
Page 42: Seed Rate Calibration
OPERATION AND MAINTENANCE SEED RATE = (AVG SEED WEIGHT) X 65896 (NO. OF ROTATIONS) X (ROW SPACING) # SEEDS per ROW = (SEED RATE) X (SEEDS/LB) x (NO. OF ROTATIONS) x (ROW SPACING) 65896 m153836 Figure 4-18: Seed Rate Chart and Calibration Formulas Seed Rate Calibration 3. -
Page 43: Dry Fertilizer Combination Box
OPERATION AND MAINTENANCE Dry Fertilizer Combination Box 1. If the Grain Drill is equipped with the dry fertilizer option, it will have a combination seed/fertilizer box. FRONT OF SEED BOX The seed/fertilizer box is split for approximately 60% (2 bu/ft) seed and 40% (1.25 bu/ft) fertilizer. The box may be used for applying both seed and fertilizer, or converted to use both compartments entirely for seed. - Page 44 OPERATION AND MAINTENANCE 3. When using both seed and dry fertilizer, fill the seed 5. When both compartments are being used for seed, box keeping fill shield in closed position over fertilizer open seed box lids and lift and rotate the fill shield box (See Figure 4-21.) over the rear of the seed box.
-
Page 45: Fertilizer Box - Clean Out
OPERATION AND MAINTENANCE SEED BOX DOOR LATCH FERTILIZER WHEEL METER SEED METER FERTILIZER DOOR fertbox cleanout Figure 4-24: Fertilizer Box Clean Out Fertilizer Box – Clean Out 3. Dry fertilizer is very corrosive and absorbs moisture. Clean out any fertilizer as soon as possible after 1. -
Page 46: Fertilizer - Rate Adjustment
OPERATION AND MAINTENANCE m153837 Figure 4-25: Fertilizer Box Chart Fertilizer – Rate Adjustment 2. The fertilizer chart is based upon average size dry fertilizer with a density of 65 lbs per cubic foot. If 1. The dry fertilizer rate is adjusted by changing using a fertilizer with a different density, apply the sprocket ratios for each section. -
Page 47: Fertilizer - Rate Calibration
OPERATION AND MAINTENANCE Fertilizer – Rate Calibration 3. Compare the actual fertilizer rate with the starting rate and compensate for any variation. Repeat the 1. Dry fertilizer can be affected by type, density, size, calibration until the desired fertilizer rate is achieved. humidity, and field conditions. -
Page 48: Grass Seed Rate Adjustment
LOCKING NUT 4. To set the seeding rate: 5210-grass-adj-handle2 a. First determine from the grass seeding rate chart Figure 4-27: Seed Rate Locking Nut the meter opening for the desired seed rate (See Figure 4-26.) -
Page 49: Grass Seed Meter/Rate Handle Adjustment
Move the handle to the right and left to make sure the shaft slides freely. Rotate the shaft sprocket by hand to verify the 5210-grass-adj-handle-zero shaft is not binding and rotates freely. Figure 4-29: Seed Meter/Rate Handle Adjustment k. -
Page 50: Seed / Grass Seed Box
2. INSERT COVER NOTCHES INTO MAIN SEED HOPPER. FRONT OF BOX SEED AND GRASS SEED CONFIGURATION 1. COVERS INSTALLED OVER MAIN SEED HOPPER. 2. COVER NOTCHES INSTALLED TO THE TOP 5210-grass-box Figure 4-30: Seed/Grass Seed Box Configuration 4-26 F-558-0910 Edition... -
Page 51: Air Spring Adjustment
OPERATION AND MAINTENANCE 3/4-16 HEX JAM NUT HEAVY SETTING AIR SPRING SPRING PIVOT 1/2-13 X 1 NORMAL HEX HEAD SETTING CAP SCREW AIR OPENER ASSEMBLY air spring adjustment Figure 4-31: Air Spring Adjustment Air Spring Adjustment 2. To adjust the air spring location, first relieve the system air pressure. -
Page 52: Opener Blade Adjustment
OPERATION AND MAINTENANCE Opener Blade Adjustment 2. With a proper pinch point, you should be able to rotate the blades in opposite directions and maintain 1. To insure peak performance of the opener assembly contact at the pinch point with a slight drag. The and maximum bearing life a proper opener blade blades should slide past each other without binding. -
Page 53: Opener - Press Wheel Adjustment
OPERATION AND MAINTENANCE Opener – Press Wheel Adjustment AIR OPENER ASSEMBLY 1. The seeding depth of each individual opener is controlled by the press wheel depth adjustment (See Figure 4-33.) To change the depth of each press wheel, raise the openers so there is not any weight on the press wheel. -
Page 54: Opener Scraper Adjustment
OPERATION AND MAINTENANCE AIR OPENER ASSEMBLY OPENER SCRAPER DISC BLADE ASSEMBLY 1/2-13 HEX FLANGE SPIRALOCK NUT 5530scraper Figure 4-34: Opener Scraper Adjustment Opener Scraper Adjustment 2. To adjust the scraper blade, loosen the 1/2-13 hex flange spiralock nut holding the blade, and slide the 1. -
Page 55: Opener Soil Strip Adjustment
OPERATION AND MAINTENANCE AIR OPENER ASSEMBLY 1/2-13 HEX FLANGE SPIRALOCK NUT SOIL STRIP DISC BLADE BRACKET ASSEMBLY PRESS WHEEL ASSEMBLY 1/2-13 X 1-1/4 RD HEAD SQ NECK SCREW SOIL STRIP 5530scraper2 Figure 4-35: Opener Soil Strip Adjustment Opener Soil Strip Adjustment 3. -
Page 56: Walkboard
OPERATION AND MAINTENANCE WALKBOARD IN RAISED POSITION SEED BOX WALKBOARD LATCH AIR OPENER ASSEMBLY PRESS WHEEL ASSEMBLY 5210walkboard Figure 4-36: Walkboard Adjustment Walkboard 2. The walkboard may be raised to allow easier service access to the openers. To raise the walkboard, lift at 1. -
Page 57: Ladder Use And Transport Requirements
OPERATION AND MAINTENANCE Ladder Use and Transport Requirements WALKBOARD 1. When transporting the 5210 Grain Drill: a. The ladder should be in the raised position (laying across the top of the walkboard) and secured with the pin (See Figure 4-37.) LADDER b. -
Page 58: Hydraulic Row Markers (Option)
OPERATION AND MAINTENANCE Hydraulic Row Markers (Option) 3. With both markers in the raised position, slowly engage the marker hydraulics. One marker will 1. The Grain Drill may be equipped with optional extend. Reversing the hydraulic lever will raise that hydraulic row markers. -
Page 59: Hydraulic Row Marker Disc Adjustment (Option)
OPERATION AND MAINTENANCE PUSH EXTENSION TUBE MARKER WELDMENT PULL SPINDLE ASSEMBLY MARKER BLADE 1/2-13 HEX NUT ASSEMBLY OUTER ARM ROW MARKER WELDMENT 1/2-13 X 3-1/2 RD HEAD SQ NECK SCREW AND HEX LOCK NUT U-BOLT Figure 4-39: Hydraulic Row Marker Adjustment Hydraulic Row Marker Disc 2. -
Page 60: Coulter Hitch (Option)
Excessive coulter down pressure in dry/hard conditions can raise or limit the travel of the openers creating inconsistent planting depths. COULTER DEPTH GAUGE COULTER HITCH (OPTION) 5210-15 coulter hitch2 Figure 4-40: Coulter Hitch 4-36 F-558-0910 Edition... - Page 61 OPERATION AND MAINTENANCE LEFT DRIVE WHEEL ASSEMBLY 3 POINT HITCH RATCHET JACK RIGHT DRIVE WHEEL ASSEMBLY 5210-3pt Figure 4-41: 3 Point Hitch 4-37...
-
Page 62: Point Hitch (Option)
OPERATION AND MAINTENANCE 3 Point Hitch (Option) The 5210 may be equipped with a 3 point hitch versus a pull hitch. The 3 point hitch is a standard width CAT III hitch and will attach to any tractor with a CAT III hitch or quick hitch. -
Page 63: Wheel Bearing Maintenance
2. Remove the tire. replace all seals. Seal kits are available from your 3. Remove the hub cap, cotter pin, slotted nut and Landoll dealer. washer. 3. Check all hydraulic hoses weekly. Look for binding or 4. Remove the hub. Clean and inspect the bearings and cracking. - Page 64 OPERATION AND MAINTENANCE 5210 hose color designations Figure 4-42: Hitch Hose Clamps and Color Designations JACK STORAGE POSITION JACK PARKING POSITION 5210 jack parking-storage positions Figure 4-43: Jack Parking and Storage Position 4-40 F-558-0910 Edition...
-
Page 65: Hose Identification
PARKING STAND place in the parking position at the front of the hitch (See Figure 4-43.) If storing on soft 5210-jackstand raised transport ground, place board/plate under the jack for a Figure 4-44: Parking Stand Location During wider foot print. - Page 66 OPERATION AND MAINTENANCE 5210 lube Figure 4-46: Lubrication Points 4-42 F-558-0910 Edition...
-
Page 67: Lubrication Maintenance
1. Table 4-2 specifies the lubrication points and Preparing the Grain Drill for storage during extended intervals on the 5210 Grain Drill. Proper maintenance periods of time will not only help protect the drill, but of your machine will, under normal operating... - Page 68 OPERATION AND MAINTENANCE Notes 4-44 F-558-0910 Edition...
-
Page 69: Troubleshooting Guide
Troubleshooting Guide The Troubleshooting Guide, shown below, is included to help you quickly locate problems that can happen using your 5210 Grain Drill. Follow all safety precautions stated in the previous sections when making any adjustments to your machine. PROBLEM... - Page 70 TROUBLESHOOTING GUIDE PROBLEM PROBABLE CAUSE SOLUTION SECTIONS PLANTING AT DIFFERENT Seed rate adjustment not the same on all Adjust seed rate. RATES sections Drive types (sprocket ratio) not the same Change to same drive type on all sections. on all sections Seed meter out of adjustment Reset seed meters.
- Page 72 Equipment from Landoll Corporation is built to exacting standards ensured by ISO 9001:2008 registration at all Landoll manufacturing facilities. Model 5210 Grain Drill Operator’s Manual Re-Order Part Number F-558-0910 LANDOLL CORPORATION 1900 North Street Marysville, Kansas 66508 (785) 562-5381 800-428-5655 ~ WWW.LANDOLL.COM Copyright 2010.
Need help?
Do you have a question about the 5210 and is the answer not in the manual?
Questions and answers