
Related Manuals for Diamond Products CORE CUT CC110-SS


Summary of Contents for Diamond Products CORE CUT CC110-SS
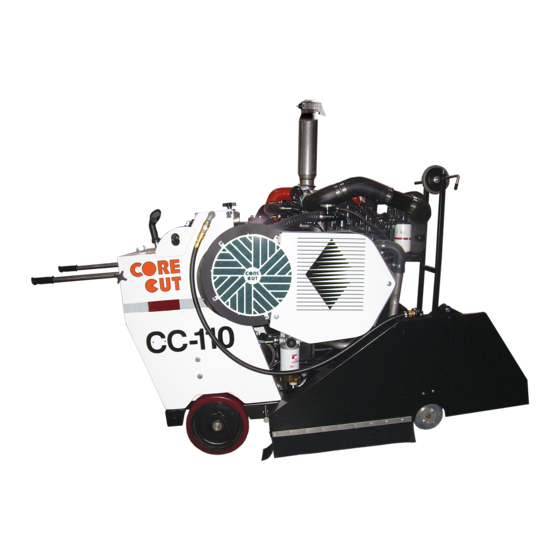
- Page 1 ‘Whatever It Takes’ Operator’s Manual CC110-SS Concrete Saw CC110D-DC Deep Cut Concrete Saw Part Number: 1801463 (800) 321-5336 www.diamondproducts.com...
-
Page 3: Table Of Contents
Table of Contents Continuing a Partial-Cut ..........16 Safety Precautions ..........1 Finishing a Cut .............. 16 Safety Alerts ..............1 Maintaining the CC110-SS and CC110D-DC ..17 Proposition 65 ............. 1 Maintenance Overview ..........17 Spark Arrester Requirement ........1 Daily ................ -
Page 5: Safety Precautions
4442 or 4443 to use or operate the engine on any made by the owner(s) are not the responsibility of forest-covered, brush-covered, or grass-covered Diamond Products and void all saw warranties if a land unless the engine is equipped with a spark problem arises as a result of the modification. -
Page 6: General Safety
General Safety DO NOT (cont.): • Operate the saw around combustible materials or • Read and understand all safety, operations, and fumes to prevent fires/explosions. maintenance instructions provided in this manual • Operate the saw with anyone near the work area or prior to operating or servicing the saw. -
Page 7: Blade Safety
Attempting to pivot the front of the guard when the Blade Safety guard is raised higher makes the guard very heavy • Always use reinforced abrasive blades or steel- and difficult to lift and/or lower. centered diamond blades. • Always pivot the front of the blade •... -
Page 8: Cutting Safety
• Belt Safety DO NOT allow dust to enter the air intake tube when cleaning/replacing air filter(s). • Turn off the engine and let the belts cool down prior • Replace damaged components immediately that to servicing them. may allow dust to enter the engine. •... -
Page 9: Introducing The Cc110-Ss And Cc110D-Dc
Introducing the CC110-SS and CC110D-DC Controls Figure 1: CC110-SS/CC110D-DC Controls 1. Fuel Tank Cap–Fuel port; indicates fuel level. 9. AUX Switch–Raises or lowers fifth wheel 2. Speed Control Lever–Forward/neutral/reverse (CC110D-DC only). control for the saw. 10. Ignition Switch–Starts the engine. 3. -
Page 10: Dimensions
Dimensions Figure 2: CC110-SS/CC110D-DC Dimensions Table 1: CC110-SS Dimensions Saw Height 74” Minimum Length, Handles In 72” Maximum Length, Handles Out 126” Handle Extension 22” Frame Width (Rear) 30” Frame Width (Front) 30” Frame Length 55” Saw Width 37 1/2” Front Axle Center Length 24”... -
Page 11: Specifications
Specifications Table 3: CC110-SS Specifications Maximum Cutting Depth 14-7/8” with 36” blade Blade Shaft Diameter 2” Arbor Diameter 1” with four lock pins Blade Shaft Bearings Two-bolt pillow block mounted roller bearings Blade Shaft Drive Polychain belt Blade Mounting Right or left Blade Raise/Lower Electro-hydraulic pump Blade Coolant... - Page 12 Table 5: Engine Specifications Manufacturer Cummins Model QSB3.3 Maximum Horsepower (HP) 110 @ 2,400 RPM Fuel Type Low sulfur/ultra-low sulfur diesel fuel Air Filter Three-stage Low Oil and Fuel Alert Warning lights Engine Data CANtrak Generic Engine Monitor (GEM) Note: Refer to the engine and CANtrak manuals and the manufacturers for additional engine information and specifications.
-
Page 13: Operating The Cc110-Ss And Cc110D-Dc
Operating the CC110-SS and CC110D-DC Adjusting the Handlebars Spotlight (Optional) 1. Loosen the handlebar lock knob. 1. Loosen the light bar lock knob and slide the light bar 2. The handlebar can be positioned on an angle or in or out of the frame to adjust the length of the bar. straight on. -
Page 14: Fuel System
Always use a guard size that matches the blade size. Fuel System Refer to the parts list for more information Installing the Blade Guard WARNING • Note: Always install the blade guard with the blade off Always use caution when refueling. the saw . -
Page 15: Flange Guard
1. Disconnect the water supply hose from the blade Diamond Blades guard. 2. Raise the saw slightly for access under the frame WARNING base. • 3. To ensure safety, have a second trained operator DO NOT exceed the blade’s hold the front of the blade guard in place. Remove maximum recommended speed the pivot bolt securing the front and back of the when cutting. -
Page 16: Installing The Blade
Installing the Blade CC110D-DC : Fit the six blade screws through the blade and into the inner flange, and tighten to secure. WARNING CC110-SS: Align and fit the outer flange through the • DO NOT install a blade with the blade and into the inner flange. -
Page 17: Removing The Blade
9. Align and fit the outer flange through the blade and inside finished cut) and place in an appropriate into the blade shaft. Note: The outer flange should fit storage location. snug with the blade, inner flange, and blade shaft 7. -
Page 18: Tasks Prior To Starting The Engine
greater for proper transmission efficiency when Speed Control Lever maneuvering the saw with power 3. Turn the Hold/Release knob clockwise to tighten the knob and secure the engine rpm speed. Tasks Prior to Starting the Engine Complete the tasks listed below prior to starting the engine to ensure a safe start: •... -
Page 19: Cutting Guide
Use the cutting guides as needed to help follow the cutting line. Always check the cutting guides for proper • Refer to the Diamond Products’ Pro Cutters Guide alignment with the blade prior to cutting. for additional cutting tips and information. -
Page 20: Making A Cut
• Turn off all electricity, gas, and water around the direct work area prior to cutting. Making a Cut 1. Align the blade and guide with the cutting line. 2. Turn on the water valve and adjust the water flow. 3. -
Page 21: Maintaining The Cc110-Ss And Cc110D-Dc
Maintaining the CC110-SS and CC110D-DC 25-40 Hours Failure to read and comply with the maintenance • instructions provided in this manual prior to performing Lubricate the undercarriage pivot bearing grease maintenance may result in serious injuries and/or death, fittings (2). and may harm the saws. -
Page 22: Inner Blade Flange
2. Place the flange onto the blade shaft. 3. Apply Loctite 262 (red) or an equivalent to the setscrew threads. 4. Tighten the setscrew(s) into the back of the inner flange to secure. Removing the Inner Blade Flange 1. Remove both setscrews from the back of the inner flange using an Allen wrench. -
Page 23: Replacing The Rear Wheels
Replacing the Rear Wheels 2. Remove the old wheel and align the center of the new wheel with the screw hole near the end of the Replace the rear wheels when damaged and/or affecting wheel lever. saw performance. 3. Place the screw through the center of the wheel and through the wheel lever, and tighten the lock nut to 1. -
Page 24: Battery
5. Pump the knob in and out until fuel sprays out from Battery Type the bleeder screw on the secondary fuel filter. 12 Volt, Group 26 6. Tighten the primer pump knob to secure. Servicing the Battery 7. Tighten the bleeder screw to secure. 8. -
Page 25: Tightening The Transmission Drive Chain
2. Add Mobil #30 oil or an equivalent to the Full Level Radiator (Cold) line. DO NOT fill the oil above this line to Clean the radiator daily. leave room for expansion. 3. Replace the oil reservoir cap and tighten to secure. Tightening the Transmission Drive Chain Inspect the transmission drive chain regularly. -
Page 26: Hydraulic System
Hydraulic System Belt System WARNING WARNING • • Always place a piece of Turn off the engine prior to servicing cardboard or paper up against the belts. • hydraulic components, or use a Use extreme caution when working leak detection fluid to check for hydraulic fluid with belts and rotating machine parts to avoid leaks. - Page 27 Figure 26: 2 of 4 Jackshaft Bearing Bolts Figure 27: Jackshaft Belt Tension Bolts 5. To ensure safety, carefully remove the jackshaft from the saw with the help of a second trained 15. Retighten all four jackshaft mount bolts. operator. DO NOT try lifting the jackshaft off the saw 16.
-
Page 28: Replacing The Polychain Belt (Cc110D-Dc)
20. Retighten all loose jackshaft bearing bolts. 21. Turn off the engine. 22. Turn both engine belt tension bolts (two large bolts at front of engine mount) clockwise to fully tighten the engine belts. Both bolts must be at the same height once the belts are tightened. -
Page 29: Tensioning The Engine Belts
at the same height/length once the belts are tightened. Test the belt tension and readjust as necessary. Refer to Appendix C for additional information on belt tension settings. 3. Retighten all four engine mount bolts. Replacing the Engine Belts 1. Remove the outboard housing from the engine (seven bolts). -
Page 30: Replacing The Transmission Drive Belt
3. Retighten the tensioner bolt to secure Replacing the Transmission Drive Belt Note: It is most convenient to replace the transmission drive belt when replacing the engine belts . Figure 34: Tensioner Hold 3. Turn the breaker bar counterclockwise to push the Figure 33: CC110-SS Transmission Drive Belt tensioner down and loosen the belts. -
Page 31: Engine
Engine WARNING • Let the engine cool down prior to servicing the saw. • DO NOT service the saw with the engine running (unless stated otherwise). Refer to the engine and CANtrak manuals and the manufacturers for a full maintenance schedule and all additional maintenance information. -
Page 33: References
References Appendix A Serial Tags Record the saw’s serial number below for future reference and customer service purposes. Serial Number Record the engine’s model and serial numbers below for future reference and customer service purposes. Model Number Serial Number CC110-SS and CC110D-DC Concrete Saw Manual... -
Page 34: Daily Maintenance Task Chart
Appendix B Daily Maintenance Task Chart Table 6: Daily Maintenance Task Chart Date Lubricate blade shaft bearing grease fittings (2). Lubricate jackshaft bearing grease fittings (2). Lubricate rear axle bearing grease fittings (2). Lubricate hydraulic lift cylinder grease fitting (1). -
Page 35: Belt Tension Settings
Appendix C Belt Tension Settings Table 7: Belt Tension Settings Model Engine Type Belt Deflection Force Deflection 5VX560 50lb 1/4” CC110-SS Cummins QSB3.3 Polychain 14 mm 50lb 3/8” 5VX1000 50 lb 1/4” CC110D-DC Cummins QSB3.3 Polychain 14 mm 50 lb 1/2”... -
Page 36: Troubleshooting
Appendix D Troubleshooting Table 8: Troubleshooting Symptom Problem Solution Out of fuel? Fill fuel tank. Emergency stop button down? Pull up emergency stop button. Fuel/water separator or fuel lines Clean fuel/water separator, or clogged? unclog/replace fuel lines. 1. Engine will not start. Air in fuel lines? Bleed fuel lines. -
Page 37: Additional Resources
Appendix E Additional Resources 1. Cummins ( www.cummins.com • Operation and Maintenance Manual QSB3.3, CM2150, and B3.3; Indiana, 2008 2. Diamond Products ( www.diamondproducts.com • CC110-SS Concrete Saw Parts List; Ohio, 2010 • CC110D-DC Deep Cut Saw Parts List; Ohio, 2010 •... - Page 38 Notes:...
- Page 39 Notes: CC110-SS and CC110D-DC Concrete Saw Manual...
- Page 40 Diamond Products Limited, 2010...
Need help?
Do you have a question about the CORE CUT CC110-SS and is the answer not in the manual?
Questions and answers