
Subscribe to Our Youtube Channel
Related Manuals for Diamond Products CC7574DK Series


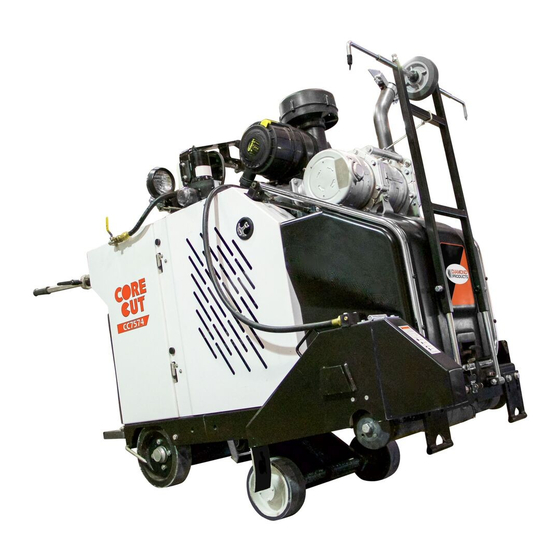
Summary of Contents for Diamond Products CC7574DK Series
- Page 1 CONCRETE SAW OPERATOR’S MANUAL MODELS CC7574DK Series CC7574DD Series June 2018 Part # 1802461...
-
Page 3: Table Of Contents
TABLE OF CONTENTS Safety Precautions ........5 Diamond Blades........ 33 Introducing the CC7574 ......10 Inspecting the Blade ....33 CC7574DK Controls ......10 Blade Speed ........ 34 CC7574DK Dimensions .....12 Wrench ........34 CC7574DK Specifications ....13 Installing the Blade ...... 34 CC7574DD Controls ......14 Removing the Blade .... - Page 4 TABLE OF CONTENTS Inner Blade Flange ......43 Lower Gearbox ......... 50 Installing the Inner Blade Changing the Lower Gearbox Flange .........43 Fluid ..........50 Removing the Inner Blade Cleaning the In-Line Oil Suction Flange .........43 Strainer ..........50 Drive Alignment .........43 Belt Sheaves ........
-
Page 5: Safety Precautions
Products to ensure safety and design. Any modifications WARNING made by the owner(s) are not the responsibility of Diamond Products and void all saw warranties if a In the State of California i t is a violation of section problem arises as a result of the modification. - Page 6 SAFETY PRECAUTIONS • General Safety Operate the saw without using the appropriate safety equipment required for the work task. • Read and understand all safety, operations, and maintenance instructions provided in this manual prior to operating or servicing the saw. •...
- Page 7 SAFETY PRECAUTIONS • Immediately rinse your clothing, skin, or eyes with Blade Guard Safety water if exposed to battery acid. Seek medical • DO NOT operate the saw with the blade guard attention immediately! raised or removed. • Disconnect the battery prior to servicing all saw •...
- Page 8 SAFETY PRECAUTIONS • Drain the fuel tank and fuel lines when storing the Hydraulic Safety saw for longer periods of time. Refer to the engine • Turn off the engine prior to servicing hydraulic manual for additional recommendations. components. • Lower the saw completely prior to servicing to Engine Safety decrease the hydraulic pressure in the lines.
- Page 9 SAFETY PRECAUTIONS Lifting Safety • Use extreme caution when guiding the • saw up and down ramps. Slowly drive Move yourself and all others away from the saw forward down the ramp. the lifting area when hoisting the saw to Slowly back the saw in reverse up the prevent being crushed.
-
Page 10: Introducing The Cc7574
INTRODUCING THE CC7574 CC7574DK Controls CC7574DK Controls 1. Ignition Switch – Starts the engine and provides 8. Blade Gearbox Temperature Light – Indicates high power to certain components. oil temperature in blade gearbox. 2. Engine Display Panel – Monitors and displays 9. - Page 11 INTRODUCING THE CC7574 14. Spotlight Switch – Activates spotlight. 23. Water Pump (Optional) – Transfers water from the 15. Water Pump Switch (Optional) – Activates water water source to the saw blade. pump. 24. Spot Light – Illuminates the work area. 16.
-
Page 12: Cc7574Dk Dimensions
INTRODUCING THE CC7574 CC7574DK Dimensions CC7475DK Dimensions Inches Millimeters Saw Height 58-1/2 1486 Saw Length – Minimum 1651 Saw Length – Maximum 3632 Handle Extension – Maximum Frame Length 53-3/4 1365 Wheel Base Length 24-1/4 Saw Width 36-1/2 Frame Width Front Wheels Inside Width 20-1/2 Rear Wheels Outside Width... -
Page 13: Cc7574Dk Specifications
INTRODUCING THE CC7574 CC7574DK Specifications CC7574DK Specifications Maximum Cutting Depth 19-3/4” with 48” blade Blade Shaft Diameter 2” Arbor Diameter 1” with single drive pin Blade Shaft Bearings Multiple ball bearings in oil bath Blade Shaft Drive 20 V-belts (four power bands) Blade Mounting Right or left Blade Raise/Lower... -
Page 14: Cc7574Dd Controls
INTRODUCING THE CC7574 CC7574DD Controls CC7574DD Controls 1. Ignition Switch – Starts the engine and 9. Low Blade Water Light – Indicates low water provides power to certain components. pressure to blade. 2. Diagnosis Port – Used by service personnel to 10. - Page 15 INTRODUCING THE CC7574 15. Water Pump Switch (Optional) – Activates 23. Spot Light Adjustment Knob – Locks the spot water pump. light bar in place. 16. Blade Clutch Switch (DDC Model) – Allows for 24. Fuel Filler Cap – Fill Port. engaging/disengaging blade rotation.
-
Page 16: Cc7574Dd Dimensions
INTRODUCING THE CC7574 CC7574DD Dimensions CC7475DD Dimensions Inches Millimeters Saw Height 58-1/2 1486 Saw Length – Minimum 1651 Saw Length – Maximum 3632 Handle Extension – Maximum Frame Length 53-3/4 1365 Wheel Base Length 24-1/4 Saw Width 36-1/2 Frame Width Front Wheels Inside Width 20-1/2 Rear Wheels Outside Width... -
Page 17: Cc7574Dd Specifications
INTRODUCING THE CC7574 CC7574DD Specifications CC7574DD Specifications Maximum Cutting Depth 19-3/4” with 48” blade Blade Shaft Diameter 2” Arbor Diameter 1” with single drive pin Blade Shaft Bearings Multiple ball bearings in oil bath Blade Shaft Drive 20 V-belts (four power bands) Blade Mounting Right or left Blade Raise/Lower... -
Page 18: Display Panel
Turning the ignition switch to run or start will activate the display panel. A sequence of screens will display on the control panel. First you will see a notation in the upper left corner, “Booting”, followed by Diamond Products logo and then the gauge screen. If one or more of the emergency stop triggers are activated, the E-stop switch is active, coolant level is low, or back panel is open (on certain models) an emergency shutdown window will be displayed. -
Page 19: Soft Keys
DISPLAY PANEL Soft Keys (Buttons) The Soft Key choices are associated with the throttle source. These will appear on the bottom of the display screen and can be selected by pushing the button directly below the soft key. Soft Key Description DPF Commands –... -
Page 20: Status Icons
DISPLAY PANEL Status Icons The Status Icons are color coded and light up when communicating to the operator. Pay close attention to any Status Icons and color if it appears. Status Icon Description Check Engine – Yellow icon is visible if the controller receives a DM1 (Active Diagnostic Trouble Code) message with an amber lamp command. -
Page 21: Main Menu
DISPLAY PANEL Main Menu To return to Main Menu select the soft key below the Arrow or the soft key below Main Menu then The Main Menu is the default gauge screen using the up and down arrows place cursor on (Home). -
Page 22: Main Menu Action Items
DISPLAY PANEL A yellow warning window will display letting you know you are temporarily inhibiting the DPF regeneration. Select the soft key X to close the window. DPF Regeneration Inhibited Main Menu Action Items Press the Main Menu ( ) soft key to view the menu action list. -
Page 23: System Information
DISPLAY PANEL Active Diagnostics Use the UP/DOWN soft keys and stop the cursor next to the action item Active Diagnostics. Press to select ( ) soft key .The screen displays active warnings or faults from the ECU. Each diagnostic is shown with the appropriate Suspect Parameter Number (SPN) and Failure Mode Indicator (FMI), Text Description (if available) and the ID/Name of... -
Page 24: User Settings
DISPLAY PANEL User Settings Scroll through the Menu list using the UP/DOWN soft keys, and stop the cursor next to the action item User Settings - Press to select ( ) soft key. The screen displays the following action items: •... -
Page 25: Automatic Shutdown
DISPLAY PANEL Language Units Using the UP/DOWN soft keys stop the cursor next Using the UP/DOWN soft keys stop the cursor next to the action item, Language. Set your language to the action item, Units. Set your unit preference preference using the +/– soft keys. using the +/–... -
Page 26: Regeneration (Cc7574Dk Only)
DISPLAY PANEL Regeneration (Note: This section pertains to CC7574DK only) Passive Regeneration Occurs when the temperature of the exhaust is high enough to naturally burn off at least some of the particulates (soot) captured by the DPF. Most normal use of the saw where the engine is operated under full load will cause exhaust temperatures high enough to produce passive regen, preventing soot buildup. -
Page 27: Regeneration Screen Examples
DISPLAY PANEL Regeneration Screen Examples The operator may experience a pop-up Regen Caution message on the controller screen. Messages require an active response by the Operator so it is important the Operator reads the entire pop-up message. Some messages require using the UP/DOWN soft keys to maneuver through the entire message. -
Page 28: Request Parked Regeneration
DISPLAY PANEL CAUTION - Exhaust temperatures will be extremely high. Ensure exhaust will not come into contact with combustible materials. Request Parked Regeneration: 1. Move the machine to a safe location. 2. Put the machine in park/disengage. 3. Return the engine to low idle speed. 4. - Page 29 DISPLAY PANEL Once the Parked Regeneration has started it can Parked Regeneration is complete when the controller screen shows the following green pop-up be shutdown by pressing the Stop Regen ( soft key. message. Click on the ( ) soft key to remove the pop-up message.
-
Page 30: Regeneration Message Levels
DISPLAY PANEL Regeneration Message Levels Please pay attention to all messages on the controller for the safety of personnel and to prevent engine and property damage if DPF regeneration is needed. Regen Level 1 (Yellow) Regen Level 3 (Red) Regen Level 2 (Orange) Regen Level 4 (Red) Regen Complete (Green) Regen Level 5 (Red) -
Page 31: Operating The Cc7574
OPERATING THE CC7574 For additional information and detailed diagrams on 4. Place a fender washer onto each screw individual saw components, refer to the CC7574 underneath the footrest and secure with a lock Parts List in conjunction with this manual. nut. -
Page 32: Control Grip Pushbuttons
OPERATING THE CC7574 Control Grip Pushbuttons Adding Fuel 1. Lower the saw to level the frame. The control grip pushbuttons only work with the 2. Turn off the engine and let the saw cool down. ignition key at Run or with the engine running. 3. -
Page 33: Removing The Blade Guard
OPERATING THE CC7574 Frame Base Mount Flange Guard Installed Removing the Flange Guard 2. Insert the lock pin through the hole on the tapered frame mount to secure the guard. 1. Remove the lock pin from the tapered frame 3. For guards 36” and up, raise the saw slightly. mount. -
Page 34: Blade Speed
OPERATING THE CC7574 Blade Speed 1. Select a blade size and type. Remember to check the blade for damages and discard as Refer to the CC7574 RPM Chart, the blade, or the necessary. Note: If changing the blade size, blade packaging information for the recommended adjust and/or change all necessary saw blade speeds when cutting. -
Page 35: Removing The Blade
OPERATING THE CC7574 7. Align and fit the outer flange and flange pin 1. Remove the detent pin (guards 26” and up) through the blade and into the inner flange and from the guard hinge and pivot the front of the blade shaft. -
Page 36: Engine
OPERATING THE CC7574 for troubleshooting recommendations after Engine several failed attempts. WARNING • Operate the saw in well-ventilated areas. Concentrated engine exhaust can cause loss of consciousness and/or death. • DO NOT touch the engine/muffler with the engine running, and always let them cool down prior to touching or servicing the saw. -
Page 37: Blade Lowering Speed
OPERATING THE CC7574 Blade Lowering Speed Valve - CC7574DK Speed Control Lever 1. Slowly push the lever toward Forward to move the saw forward and release when at the desired traveling speed. 2. Slowly pull the lever toward Reverse to move the saw backward and release when at the Blade Lowering Speed Valve - CC7574DD desired traveling speed. -
Page 38: Cutting Guides
OPERATING THE CC7574 Water Source Hose Tensioned String Line 4. Connect water supply hose from the discharge 7. Adjust the pointer rod to place the tip between of the gearbox to the water manifold on the the tensioned string lines. blade guard. -
Page 39: Tasks Prior To Cutting
• coming up out of the cut, decrease travel speed Refer to the Diamond Products’ Guide for and/or feed depth. DO NOT CUT FULL Professional Concrete Cutters for additional DEPTH IN ONE PASS. Always use the step-cut cutting tips and information. -
Page 40: Continuing A Partial Cut
OPERATING THE CC7574 7. Push the Blade Depth Stop button to the “Set Hood Operation Blade Depth” position. The Blade Depth Set 1. Pull up and out on rubber latch located on lower light will turn on, which means the cutting depth front of hood. -
Page 41: Maintaining The Cc7574
MAINTANING THE CC7574 Failure to read and comply with the maintenance After First 50 Hours of service instructions provided in this manual prior to • Replace hydraulic oil filter. performing maintenance may result in serious Note: This is completed only after the first 50 injuries and/or death, and may harm the saw. -
Page 42: Fuel/Water Separator
MAINTAINING THE CC7574 Fuel/Water Separator Speed Control Lever Inspect the fuel/water separator daily and drain as Adjusting the Lever Tension necessary. The unit is located on the left side of the Adjust the tension felt in the speed control lever, saw near the alternator on the CC7574DK and on when moving the lever forward and backward, to the left side attached to the inside of the fuel door... -
Page 43: Adjusting The Spring Plungers
MAINTANING THE CC7574 Adjusting the Spring Plungers Drive Alignment Adjust the spring plungers if the speed control lever Adjusting the Drive Alignment feels floppy or loose when moving the lever forward Adjust the rear axle when the saw’s drive alignment and backward, or when the lever is hard to place is off (saw will not cut in a straight line). -
Page 44: Replacing The Front Wheel
MAINTAINING THE CC7574 Replacing the Front Wheels 6. Replace the hubcap and secure in place using a rubber mallet. Replace the front wheels when they are damaged 7. Replace the second rear wheel as directed. and/or affecting saw performance. Slowly lower the jack and remove the jack stand when the wheels are firmly touching the 1. -
Page 45: Handlebar Cylinder Rod
7. Readjust the depth bolts as necessary. Handlebar Cylinder Rod The handlebar cylinder rod must be serviced by Diamond Products if the handlebars can be moved Clevis Pin up or down in excess amounts when locked in place (movement may feel sluggish). Send the 4. -
Page 46: Battery Type
MAINTAINING THE CC7574 5. When replacing the battery, carefully place a new battery into the battery box. Bring the old battery to a recycling facility; many battery retailers also accept old batteries. 6. When cleaning the battery, inspect the terminals, clamps, and cables for damages and corrosion. -
Page 47: Adding Radiator Fluid - Cc7574Dk
MAINTANING THE CC7574 • Changing the Radiator Fluid – CC7574DK Turn off the saw and inspect the cooling system when the coolant temperature light turns on, or Change the radiator fluid every 500 hours of when the coolant temperature gauge passes operation, or every two years (whichever comes the red mark. -
Page 48: Changing The Radiator Fluid - Cc7574Dd
MAINTAINING THE CC7574 8. Close the air bleed valve wing nut. 6. Add additional radiator fluid through the fill 9. Add more radiator fluid through the fill port until port until the fluid reaches the overflow hole the fluid reaches the overflow hole inside the inside the filler neck. -
Page 49: Adding Hydraulic Fluid To The Hydro Pump Reservoir Tank
MAINTANING THE CC7574 4. Add SAE15W-40 oil or an equivalent to just 4. Fill new filter with SAE15W-40 oil. Remove below where the fill port extends into the bracket to allow attachment of filter in vertical hydraulic pump. Do not overfill, as this will position. -
Page 50: Draining The Upper Gearbox Heat Sink
MAINTAINING THE CC7574 Draining the Upper Gearbox Heat Sink 2. Remove the gearbox drain plug and drain the fluid completely. Dispose of the used fluid according to city, state, and federal regulations. 3. Replace the drain plug and retighten to secure. 4. -
Page 51: Belt Sheaves
MAINTANING THE CC7574 Adjust either sheave to align the outside edge Belt Sheaves of both sheaves. The upper and lower belt sheaves may need to be 3. Place two setscrews into the setscrew holes (in changed when changing the blade size. Refer to line with each other) on both sheaves and the CC7574 Parts List for additional information. -
Page 52: Tensioning/Replacing The Blade Drive Belts
MAINTAINING THE CC7574 Tensioning/Replacing the Blade Drive Belts Note: Make sure the belts are fitted against each other, and are aligned on the sheaves. 7. Turn both blade drive tension bolts (large threaded bolt on engine foot) clockwise equally to tighten the belts. Test the belt tension and readjust the bolts as necessary. -
Page 53: Engine
MAINTANING THE CC7574 Engine WARNING • Let the engine cool down prior to servicing the saw. • DO NOT service the saw with the engine running (unless stated otherwise). Refer to the engine manual and manufacturer for a full engine maintenance schedule and additional engine maintenance information. -
Page 54: Rubber Dust Ejector Boot
MAINTAINING THE CC7574 Rubber Dust Ejector Boot 3. Pull the outer primary filter out of the air cleaner and inspect it for damages. Replace as The rubber dust ejector boot valve ejects debris necessary. and water when operating the saw. Occasionally 4. -
Page 55: Storing
MAINTANING THE CC7574 • 3. Pull the outer primary filter and the inner safety Refer to the engine manual for all engine and filter out of the air cleaner housing. Inspect the fuel recommendations prior to storing. • outer primary filter for damages and replace as Store the saw in a dry area, protected from necessary. -
Page 56: References
REFERENCES Appendix A Model and Serial Numbers Record the saw’s serial number below for future reference and customer service purposes. Serial Number Record the engine’s model and serial numbers below for future reference and customer service purposes. Model Number Serial Number... -
Page 57: Daily Maintenance Task Chart
REFERENCES Appendix B Daily Maintenance Task Chart Daily Maintenance Task Chart Date Inspect all belts for tension and wear. Replace or tension as necessary. Inspect the saw for damages, Tighten loose nuts, screws, and bolts. -
Page 58: Troubleshooting
REFERENCES Appendix C Troubleshooting Troubleshooting the CC7574DK Symptom Problem Solution Out of Fuel? Fill fuel tank. Fuel lines clogged? Unclog or replace fuel lines. Air in fuel lines? Bleed fuel lines. 1. Engine will not start. Worn out battery? Charge or replace battery. Faulty battery connection? Inspect, clean, and tighten battery cables. -
Page 59: Cc7574Dd
REFERENCES Troubleshooting the CC7574DD Symptom Problem Solution Out of Fuel? Fill fuel tank. Fuel lines clogged? Unclog or replace fuel lines. Air in fuel lines? Bleed fuel lines. 1. Engine will not start. Worn out battery? Charge or replace battery. Faulty battery connection? Inspect, clean, and tighten battery cables. - Page 60 REFERENCES Troubleshooting the CC7574DD Symptom Problem Solution Drive alignment off? Adjust rear axle adjustment bolt. 8. Blade does not cut Excessive force used when Reduce forward speed. DO NOT twist straight. sawing? blade from side to side. Wrong blade? Contact dealer/manufacturer of blade. Loose belts causing slippage? Check and adjust belt tension.
-
Page 61: Additional Resources
Additional Resources 1. Kubota ( www.kubota.com • Operator’s Manual Kubota Engine, V3307-CR-T-E4-B • Operator’s Manual Deutz Engine, TD-2.9-L4 2. Diamond Products ( www.diamondproducts.com • CC7574 Concrete Saw Parts List; Ohio, 2010 • A Guide for Professional Concrete Cutters • Training Manual – Introduction to Diamond Blades, Bits, and Equipment •... - Page 62 NOTES ____________________________________________________ ____________________________________________________ ____________________________________________________ ____________________________________________________ ____________________________________________________ ____________________________________________________ ____________________________________________________ ____________________________________________________ ____________________________________________________ ____________________________________________________ ____________________________________________________ ____________________________________________________ ____________________________________________________ ____________________________________________________ ____________________________________________________ ____________________________________________________ ____________________________________________________ ____________________________________________________ ____________________________________________________ ____________________________________________________ ____________________________________________________ ____________________________________________________ ____________________________________________________ ____________________________________________________ ____________________________________________________ ____________________________________________________ ____________________________________________________ ____________________________________________________ ____________________________________________________...
- Page 63 NOTES ____________________________________________________ ____________________________________________________ ____________________________________________________ ____________________________________________________ ____________________________________________________ ____________________________________________________ ____________________________________________________ ____________________________________________________ ____________________________________________________ ____________________________________________________ ____________________________________________________ ____________________________________________________ ____________________________________________________ ____________________________________________________ ____________________________________________________ ____________________________________________________ ____________________________________________________ ____________________________________________________ ____________________________________________________ ____________________________________________________ ____________________________________________________ ____________________________________________________ ____________________________________________________ ____________________________________________________ ____________________________________________________ ____________________________________________________ ____________________________________________________ ____________________________________________________ ____________________________________________________...
- Page 64 (1) year from the date of shipment to Customer. The responsibility of Diamond Products under this Warranty is limited to replacement or repair of defective parts at Diamond Products’ Elyria, Ohio...
Need help?
Do you have a question about the CC7574DK Series and is the answer not in the manual?
Questions and answers