Advertisement
Table of Contents
- 1 Table of Contents
- 2 Tools Required for Disassembly
- 3 Reassembly
- 4 Reassembly
- 5 Wheel Motor
- 6 Standard/Wheel Motor with Seal Guard
- 7 Standard/Wheel Motor with Extreme
- 8 Duty Seal Guard
- 9 Bearingless Motor
- 10 Disassembly Reassembly
- 11 Shuttle Valve Option
- 12 Reassembly - Speed Sensor
- 13 Product Identification
- Download this manual
Advertisement
Table of Contents

Related Manuals for Eaton Char-Lynn 2000 Series


Summary of Contents for Eaton Char-Lynn 2000 Series
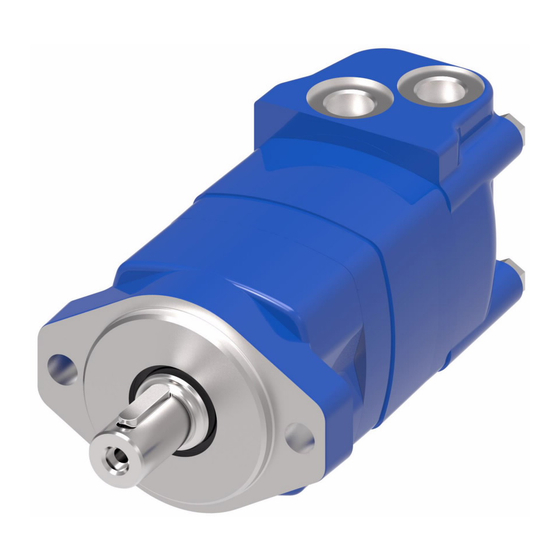
- Page 1 Char-Lynn 2000 Series disc valve geroler motor Parts and repair manual...
-
Page 2: Table Of Contents
PARTS NUMBERS & EXPLODED VIEWS . . . . . . . . . . . . . . . . . . . . . . . . . . . . . . . . . . . . . . . . . . . . . . . . . . . . . . 13 2000 SerieS diSc valve geroler motor C-MOLO-TM010-E1 June 2018 www.eaton.com... - Page 3 Seal ring Piston Valve Poppet Spring Dash Pot O-ring/ O-ring/ plug S/A plug S/A Inner Shuttle valve option face seal Exploded view applicable for displacement codes 021, 025 and 040 2000 SerieS diSc valve geroler motor C-MOLO-TM010-E1 June 2018 www.eaton.com...
-
Page 4: Tools Required For Disassembly
Alignment studs (2) Press Alignment studs (2) 200,0 [8.00] Approx. 13,0 [.50] 25,0 [1.00] 9,5 [.375] Dia. Steel Rod 8,0 [.312] 3/8-24 UNF thread Grind at spots on each side 2000 SerieS diSc valve geroler motor C-MOLO-TM010-E1 June 2018 www.eaton.com... - Page 5 Valve Balance Ring 2. Remove 4 bolts from motor. Figure 5 7. Remove balance ring assembly. 8. Remove inner and outer face seals from balance ring. 9. Remove the valve. 2000 SerieS diSc valve geroler motor C-MOLO-TM010-E1 June 2018 www.eaton.com...
- Page 6 13. Remove the Geroler. Be sure to retain the rollers in the outer ring if they are loose. Noee: Individual parts of shaft and bearing assembly are not sold separately. Replace as a unit. 14. Remove the drive. 2000 SerieS diSc valve geroler motor C-MOLO-TM010-E1 June 2018 www.eaton.com...
-
Page 7: Reassembly
Install seal into the bearing housing. 26. Alignment studs can be very helpful in reassembly of the motor. See special tool listing page 2. If you use studs, install 2 studs diagonally opposed in the 2000 SerieS diSc valve geroler motor C-MOLO-TM010-E1 June 2018 www.eaton.com... -
Page 8: Reassembly
After installing the valve housing on the valve plate check for proper placement. Push down on the valve housing. You should get a slight spring action.get a slight spring action. 2000 SerieS diSc valve geroler motor C-MOLO-TM010-E1 June 2018 www.eaton.com... -
Page 9: Wheel Motor
This tool must bottom out against the bearing housing and provide a 4,5 mm [.177 inch] stop for the seal guard. Applicable for standard and wheel mount motors. Figure 20 . 2000 SerieS diSc valve geroler motor C-MOLO-TM010-E1 June 2018 www.eaton.com... -
Page 10: Standard/Wheel Motor With Extreme
Shuttle Location 8-11 Nm [75-100 lb-in]. when Applicable Dash Pot Spring Poppet Piston Poppet Spring Dash Pot O-ring/Plug S/A Torque to 8-11 Nm [75-100 lb-in] Shuttle Valve Option Figure 23 . 2000 SerieS diSc valve geroler motor C-MOLO-TM010-E1 June 2018 www.eaton.com... -
Page 11: Reassembly - Speed Sensor
Alignment Notchs Perpendicular to Alignment Notch Centerline of Motor Alignment Nut 9/16 inch Hex Head Back out Lock Nut 11/16 inch Hex Head Alignment Notch Figure 26 . Figure 27 . 2000 SerieS diSc valve geroler motor C-MOLO-TM010-E1 June 2018 www.eaton.com... -
Page 12: Product Identification
2000 Series Disc Valve Motors Product identification Date Code For Additional Literature Contact Eaton Corp. Hydraulics Char-Lynn ® 00 00 Division 15151 Highway 5 Eden Prairie, MN 55344. Product number Speci cations and performance data, Catalog No. 11-878 Week of Last Replacement part numbers and kit information —... - Page 13 21371-012 147,9 [5.82] 21625-010 89,4 [3.52] 14384-019 199,6 [7.86] 14384-014 182,4 [7.18] Speed Sensor Shuttle (Two Included in Ref. No.s 13, 19, 39 Way) Shuttle Valve Location (see insert above) 2000 SerieS diSc valve geroler motor C-MOLO-TM010-E1 June 2018 www.eaton.com...
- Page 14 21564-008 Housing, Valve (Manifold Mount — G 1/4 (BSP) Case Drain Port) 21564-006 Housing, Valve (7/8-14 Str. Thrd. O-ring End Ports — 7/16-20 Case Drain Port) Continued on Page 16 2000 SerieS diSc valve geroler motor C-MOLO-TM010-E1 June 2018 www.eaton.com...
- Page 15 Ref. No.s 13, 19, 39 Way) Components speci c to displacements codes 021, 025 and 040 Shuttle Valve Location (see insert above) Exploded view applicable for displacement codes 021, 025 and 040 2000 SerieS diSc valve geroler motor C-MOLO-TM010-E1 June 2018 www.eaton.com...
- Page 16 * —See Chart on Opposite Page. ** —Viton Seal Part Numbers Differ from Part Numbers Shown above. Note: Backup Ring Item 5 is not used with Viton Shaft Seal Item 4. 2000 SerieS diSc valve geroler motor C-MOLO-TM010-E1 June 2018 www.eaton.com...
- Page 17 2000 Series Disc Valve Motors Notes: 2000 SerieS diSc valve geroler motor C-MOLO-TM010-E1 June 2018 www.eaton.com...
- Page 18 Fax: (+86 21) 2230 7240 EaoNn 1000 Eaton Boulevard Cleveland, OH 44122 United States Eaton.com © 2018 Eaton All Rights Reserved Eaton is a registered trademark. Printed in USA Publication No. C-MOLO-TM010-E1 All trademarks are property June 2018 of their respective owners.
Need help?
Do you have a question about the Char-Lynn 2000 Series and is the answer not in the manual?
Questions and answers
What should be done if rollers fall out and it is not possible to tell of the exact areas they fell out of?
If rollers fall out of an Eaton 2000 Series product and the exact areas are unknown, follow these steps:
1. Work in a clean area to prevent contamination.
2. Carefully inspect the outer ring of the Geroler, as the rollers are retained there.
3. Make sure all rollers are accounted for and properly reinstalled in the outer ring before continuing.
4. Align the notch on the Geroler with the notch on the wear plate during reassembly.
5. Retain the rollers securely in the outer ring when installing the Geroler against the wear plate.
These steps help ensure proper function and prevent damage during reassembly.
This answer is automatically generated