Eaton 1 Series Repair Information
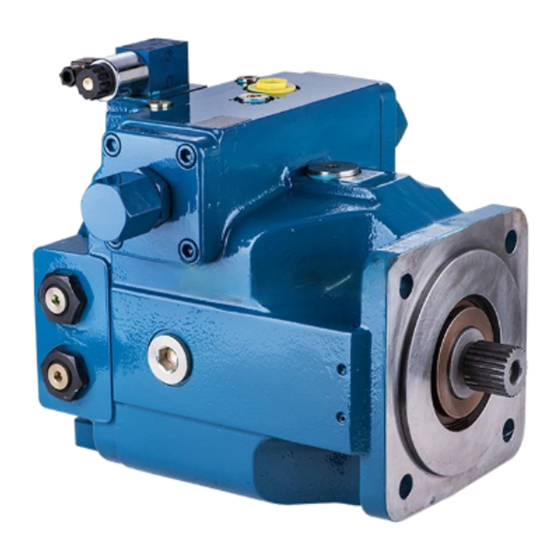
Hydrostatic variable motors
Hide thumbs
Also See for 1 Series:
- Parts and service (32 pages) ,
- Repair information (21 pages) ,
- Repair information (28 pages)

Related Manuals for Eaton 1 Series


Summary of Contents for Eaton 1 Series
- Page 1 Eaton ® January, 1990 Hydrostatic Variable Motors Repair Information Series 1 Models 33-64 Hydrostatic Variable Motors...
-
Page 2: Table Of Contents
Table of Contents page ID Tag ................................3 Required Tools .............................. 3 Introduction and Part Names ........................4 Exploded View Drawing ..........................5 Minor Repairs: ............................. 6 Control Valve Inspection ......................... 6 Orifice Installation ........................... 7 Shaft Seal Replacement ......................... 8 Valve Block Inspection ........................... -
Page 3: Id Tag
21 = Variable Displacement Pump Serial No. 31 = Fixed Displacement Motor Rotation 41 = Variable Displacement Motor Eaton Corporation C - Identifies Specific Unit Configuration Hydraulics Division D - Month of Manufactur Spencer, Iowa 51301 E - Year of Manufacture... -
Page 4: Introduction And Part Names
Introduction and Part Names Introduction This manual provides service information for Eaton Models 33 thru 64 Variable Motors. It’s divided into two main sections: the first covers minor repairs and the second gives instructions for the complete disassembly, inspection and reassembly of the motor. -
Page 5: Exploded View Drawing
Exploded View Drawing Mounting Bolts Control Valve/ Port Plate for Slave Control Gasket(s) Seals Valve Block Mounting Bolts Valve Block Seals © Copyright 1990 Eaton Corporation... -
Page 6: Minor Repairs
Minor Repair: Control Valve Inspection Feedback Linkage Control Valve Gasket Figure 2 This section describes the removal, inspection, and 5 Inspect the control valve: Start by thoroughly flushing installation of the control valve. the control valve with clean solvent. Then blow it dry with compressed air. -
Page 7: Orifice Installation
Minor Repair: Control Valve Inspection Note: There are two types of control valve orifices: Control Valve Control Valve .180 in. .058 in. Deep Orifice Pocket Shallow Orifice Pocket Stake in 3 Places The plate orifice is used in control valves that have a 6 Place a new control valve gasket on the motor. -
Page 8: Shaft Seal Replacement
7 Remove the o-ring; it will either be in the rotating seal 14 Install the stationary seal. or on the shaft. 15 Using the retaining ring pliers install the retaining ring Note: Eaton recommends replacing the entire shaft with the beveled side out. seal. Use Shaft Seal Kit P/N 990231. -
Page 9: Valve Block Inspection
Minor Repair: Valve Block Inspection 7 Remove the two o-rings and back-up rings, and the This section describes the removal, inspection, and square cut seal from between the valve block and motor, installation of the valve block. see figure 3. 1 Clean the valve block and the area around where it 8 Remove the low pressure relief valve (also called the attaches to the motor. - Page 10 Minor Repair: Valve Block Inspection Gauge Port Valve Bolt (4) Plugs Block Hose Fitting Valve Block Sq. Cut Seal High Pressure Relief Valve Low Pressure Relief Valve O-ring Figure 5 Back-up Ring 13 Remove the gauge port plugs and o-rings. Shuttle Valves Spool Shuttle Valve...
-
Page 11: Major Repairs: Disassembly
Major Repairs: Shaft Seal and Control Valve Disassembly 6 Remove the o-ring; it will either be in the rotating seal or on the shaft. This section describes the complete disassembly, inspection,and reassembly of the motor. Due to the complexity of the heavy duty motor certain subassemblies are disassembled, inspected, and reassembled upon removal from the motor. -
Page 12: Valve Block
Major Repairs: Valve Block Note: The low pressure relief valve can be identified by Bolt (4) the notches machined into its large hex head, see figure Hose Fitting Valve Block 18 Mark the high pressure relief valves so they can be reinstalled in the same ports. - Page 13 Major Repairs: Valve Block Shuttle Valves Gauge Port Valve Plugs Block Spool Shuttle Valve Shuttle Valve Spring Plug High Pressure Low Pressure Relief Valve Relief Valve Valve Block Figure 12 Figure 13 22 Remove the gauge port plugs and o-rings. 26 Install the relief valves, shuttle valve, and plugs.
-
Page 14: End Cover And Servo Pistons
Major Repairs: End Cover and Servo Sleeves 27 Remove the end cover. Caution: The cylinder barrel spring pre-load will damage the motor’s internal parts if the end cover is removed incorrectly. Start by removing six of the eight bolts that hold the end cover to the motor. - Page 15 Major Repairs: End Cover and Servo Sleeves Servo Sleeve Servo Sleeve Retainer O-rings Scribe Marks Figure 16 35 Mark the motor housing and servo sleeves so they can reinstalled in the same locations. 36 Remove the servo sleeve retainers. 37 Scribe position marks on each servo sleeve; Make a Low Clearance horizontal line where the servo sleeve and motor Bearing Puller...
-
Page 16: Mounting Flange, Servo Pistons And Trunnions
Major Repairs: Mounting Flange, Servo Pistons and Trunnions Mounting Flange Bolt (12) Bearing Cup Gasket Dowel Retaining Rings Figure 17 Servo Pistons 40 Reposition the motor so the control valve mount is on top. Be careful; do not let the cylinder barrel slide out of the motor. - Page 17 Major Repairs: Mounting Flange, Servo Pistons and Trunnions O-ring Shims Trunnion Bearing Cone Mark Trunnion and Housing Shims O-ring Sliding Hammer Puller Figure 19 47 Mark the motor housing and the trunnions so they Remove the trunnions and shims. can be reinstalled in the same locations. Important: Keep the shims with each trunnion;...
-
Page 18: Swashplate, Shaft And Cylinder Block
Major Repairs: Swashplate, Shaft and Cylinder Barrel Retaining Strap Critical Sealing Area Cylinder Barrel Spacer Trunnion Swashplate Figure 20 Bearing Cup Figure 21 51 Remove the shaft and bearing assembly from the swashplate and cylinder barrel. Keep the cylinder barrel 54 Set the swashplate and cylinder barrel assembly on and pistons together. -
Page 19: Major Repairs: Reassembly
Major Repairs: Swashplate, Shaft and Cylinder Barrel Reassembly Bearing Cup Swashplate Inspect the cylinder barrel, pistons, piston slippers, and thrust plate. Replace any worn or damaged parts. Check all mating surfaces; replace any parts with Thrust Plate scratches or burrs that could cause leakage. Inspect parts for excessive wear and replace as necessary. -
Page 20: Trunnions And Servo Pistons
Major Repairs: Trunnions and Servo Pistons 72 Install the trunnion bolts and tighten them to the specified torque given below: Control Valve Mount Model Number Trunnion Bolt Torque O-ring 33, 39 28 lb-ft [38 Nm] Shims 46, 54, 64 44 lb-ft [60 Nm] Trunnion 73 After the bolts are torqued strike one of the trunnions to free up the swashplate’s movement. -
Page 21: Minimum Displacement Setting
Major Repairs: Trunnions and Servo Pistons Note: If the motor’s minimum displacement needs to be checked or adjusted do steps 78 through 83. If not skip Retaining I.D. Tag ahead to step 84. Ring Servo Piston With Spacer Figure 26 75 Install the servo pistons. - Page 22 Major Repairs: Trunnions and Servo Pistons Measure Depth Gauge Position Dowel Swashplate Stop Pad Hole Adjust for Desired Minimum Displacement Figure 29 79 Position the motor so the mounting flange end is on top. Stand it on wooden blocks so the other servo sleeve can be adjusted.
- Page 23 Minimum Displacement Setting length for each minimum swashplate angle. Theoretical 83 If the motor’s minimum displacement is being displacements are also given for each swashplate angle. changed the number of shims under the servo piston spacer may need to be adjusted. The following table Important: Verifying the motor’s minimum displacement shows the required number of shims and the spacer bolt on an authorized test stand is essential.
-
Page 24: Mounting Flange, End Cover Bearing And Shaft End Play
Mounting Flange, End Cover Bearing and Shaft End Play Bolt (12) Shipping Strap Bearing Cone Driver Gasket Dowel Pin Shaft Support Figure 32 88 Turn the motor over so the shaft is vertical and the mounting flange is down. Figure 31 89 Install and stake the servo sleeve retainers. - Page 25 Mounting Flange, End Cover Bearing and Shaft End Play Magnetic Base Dial Gauge Temporarily Assembly Without Bearing Valve or Bearing Plates to Check Shims Shaft End Play Pliers Figure 33 92 Install two dowel pins in the holes in the end cover Figure 34 surface of the motor housing.
-
Page 26: End Cover, Valve Block And Control Valve
End Cover, Valve Block and Control Valve End Cover Valve Plate Bearing Dowel Pins Plate Figure 35 96 Install two dowel pins in the holes in the cylinder barrel face. 97 Place the bearing plate on the cylinder barrel and Figure 36 engage it with the dowel pins. - Page 27 End Cover, Valve Block and Control Valve Bolt (4) Valve Block Hose Ass'y Feedback Linkage Sq. Cut Seal Hose Fittings O-ring Back-up Ring Control Valve Gasket Figure 37 Figure 38 104 Install new o-rings and back-up rings in the grooves 108 Reposition the motor so the control valve mount is around the high pressure ports as shown in figure 37.
-
Page 28: Shaft Seal
122 Using the retaining ring pliers install the retaining installed. ring with the beveled side out. Note: Eaton recommends replacing the entire shaft Caution: Verifying the accuracy of repairs on an seal. Use Shaft Seal Kit P/N 990231. authorized test stand is essential. - Page 29 Special Tools Stop Limit Tool Bearing Cone Driver Knurl 2.00 from end .12 X 45° Shaft Dia. Bearing Dia. Model 33, 39, 46 1.01 1.25 54, 64 1.30 1.48 Tool Material / Heat Treatment; C.R.S. / 50-55 Rc Rotating Seal Puller Dia.
-
Page 30: Hydraulic Fluid Recommendations
Hydraulic Fluid Recommendations A reputable supplier can help you make the best selection of hydraulic fluid for use in Eaton hydrostatic products. For satisfactory operation the following recommendations apply: 1. The filter system used in the hydraulic circuit should be capable of cleaning and maintaining the hydraulic fluid to meet ISO Cleanliness Code 18/13 per SAE J1165. - Page 31 Notes...
- Page 32 Shanghai 200021 Tel: +41 (0) 21 811 4600 China Tel: 952-937-9800 Tel: 86-21-6387-9988 Fax: 952-294-7722 Fax: +41 (0) 21 811 4601 Fax: 86-21-6335-3912 www.eaton.com/hydraulics © 2008 Eaton Corporation All Rights Reserved Printed in USA Document No. E-MOPI-TS007-E Supersedes 07-140 November 2008...
Need help?
Do you have a question about the 1 Series and is the answer not in the manual?
Questions and answers