Table of Contents
Advertisement
Quick Links
®
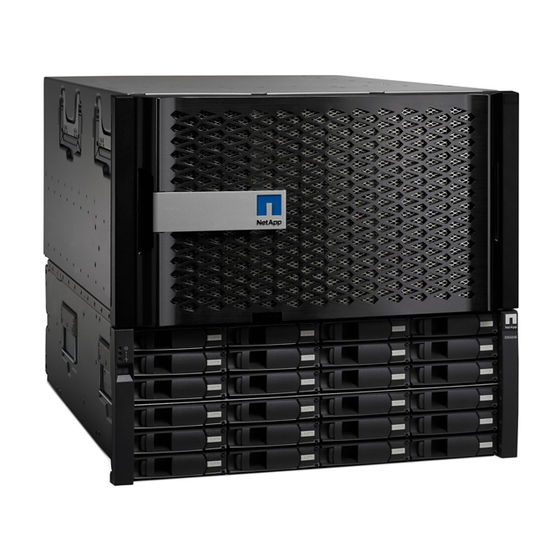
NetApp
AltaVault Cloud Integrated Storage 4.1
Installation and Service Guide for Physical Appliances
NetApp, Inc.
495 East Java Drive
Sunnyvale, CA 94089
U.S.
Telephone: +1 (408) 822-6000
Fax: + 1 (408) 822-4501
Support telephone: +1(888) 463-8277
Web: www.netapp.com
Feedback: doccomments@netapp.com
Part number: 215-10477_B0
June 2017
Advertisement
Table of Contents

Related Manuals for NetApp AltaVault Cloud Integrated Storage 4.1


Summary of Contents for NetApp AltaVault Cloud Integrated Storage 4.1
- Page 1 ® NetApp AltaVault Cloud Integrated Storage 4.1 Installation and Service Guide for Physical Appliances NetApp, Inc. Telephone: +1 (408) 822-6000 Part number: 215-10477_B0 495 East Java Drive Fax: + 1 (408) 822-4501 June 2017 Sunnyvale, CA 94089 Support telephone: +1(888) 463-8277 U.S.
-
Page 3: Table Of Contents
Running the AltaVault appliance CLI configuration wizard ................33 Setting the Service Processor password ......................34 Configuring the Service Processor for remote management ................35 Validating remote access via the Service Processor ..................36 Next steps ...............................37 NetApp AltaVault Cloud Integrated Storage Installation and Service Guide for Physical Appliances... - Page 4 Adding an additional RAID group to a configured appliance................73 Replacing internal FRUs ..........................74 Replacing a boot device in a controller ......................75 Removing the boot device from the controller..................76 Installing a boot device..........................77 Replacing system DIMMs ..........................79 NetApp AltaVault Cloud Integrated Storage Installation and Service Guide for Physical Appliances...
- Page 5 Replacing disk shelf power supplies and other FRUs ..................86 Returning failed parts .............................86 Disposing of batteries .............................86 Copyright information..........................87 Trademark information..........................89 How to send your comments........................91 Index ................................93 NetApp AltaVault Cloud Integrated Storage Installation and Service Guide for Physical Appliances...
- Page 6 Contents NetApp AltaVault Cloud Integrated Storage Installation and Service Guide for Physical Appliances...
-
Page 7: Chapter 1 - Netapp Altavault Appliance Setup Preparation
NetApp AltaVault appliance setup CHAPTER 1 preparation This section provides a list of prerequisites for successfully installing the NetApp AltaVault appliance. It includes the following sections: “Workflow diagram” on page 8 “Site clearance requirements” on page 8 “Environmental site system requirements” on page 9 ... -
Page 8: Workflow Diagram
Airflow and cooling System front 6 inches (15.2 cm) System rear 12 inches (30.5 cm) Maintenance System front 30 inches (76.2 cm) System rear 36 inches (91.4 cm) NetApp AltaVault Cloud Integrated Storage Installation and Service Guide for Physical Appliances... -
Page 9: Environmental Site System Requirements
“Appliance information” on page 39 “Cloud provider credentials and storage configuration” on page 39 “Network connectivity” on page 40 “Advance features” on page 41 NetApp AltaVault Cloud Integrated Storage Installation and Service Guide for Physical Appliances... -
Page 10: Obtaining Documentation And Release Notes
Obtaining documentation and release notes Obtaining documentation and release notes To obtain the most current versions of all NetApp documentation, including Release Notes, perform a search from the NetApp Support site at https://mysupport.netapp.com. The AltaVault documentation set includes the following: NetApp AltaVault Cloud Integrated Storage Installation and Service Guide for Physical Appliances ... -
Page 11: Chapter 2 - Installing The Controller Chassis And Shelves
Important considerations for successful installations If you are installing the controller chassis in an equipment rack or NetApp cabinet, use a 4-post system. Do not use a Telco mounting kit in this cabinet. The cabinet has custom equipment mounting rails for this application. -
Page 12: Installing An Altavault Controller Chassis In A Two-Post Rack
The SSN label is on the metal lip just below port e0l and the maintenance port (wrench icon) on the controller as shown in the illustration below. This number is used to uniquely identify the controller in the AltaVault Setup Wizard during initial system setup. NetApp AltaVault Cloud Integrated Storage Installation and Service Guide for Physical Appliances... - Page 13 Secure the bracket to the chassis with M5 screws and star washers. Note: Do not over-tighten the screws when securing the equipment to the rack. Over-tightening screws can cause the mounting tabs on the chassis to bend. NetApp AltaVault Cloud Integrated Storage Installation and Service Guide for Physical Appliances...
-
Page 14: Installations Of Controller Chassis In Four-Post Racks
Installations of controller chassis in four-post racks Use the four-post rail kit that ships with the controller to mount the controller chassis in a four-post rack. NetApp recommends that you use the NetApp equipment rails in this application to be consistent with how AltaVault systems are treated. -
Page 15: Installing An Altavault Controller Chassis In A Four-Post Rack
“Site clearance requirements” on page Note: If you are installing the equipment in a non-NetApp system cabinet, you must calculate the thermal output of your equipment and compare the results against the target system cabinet’s thermal rating. You may need to remove the system cabinet doors to improve airflow through the system cabinet. - Page 16 7. Secure the rail to the rear post, using the appropriate size and type mounting screws matching the threading of your equipment rack. NetApp AltaVault Cloud Integrated Storage Installation and Service Guide for Physical Appliances...
- Page 17 14. If you are adding multiple AltaVault systems and disk shelves, repeat this procedure for each controller chassis you are installing. If you are installing multiple AltaVaults, NetApp recommends grouping each controller with its corresponding shelves to maintain consistent cable lengths.
-
Page 18: Installing Disk Shelves And Disk Drives
5. Reissue the command below to verify the RAID group was imported successfully: show raidgroups For information on replacing a faulty disk drive, see “Replacing a faulty hard disk drive on an AltaVault AVA400 or AVA800 appliance” on page NetApp AltaVault Cloud Integrated Storage Installation and Service Guide for Physical Appliances... -
Page 19: Chapter 3 - Connecting The System
QSFP ports on the back of an AVA10S shelf. Note: AltaVault systems have a unique cabling configuration; you must cable the system in the supported configuration for optimal system performance. NetApp AltaVault Cloud Integrated Storage Installation and Service Guide for Physical Appliances... - Page 20 Altavault systems support controller to shelf cables (with mini SAS/QSFP connectors) in 1, 2, and 3 meter lengths. Shelf to shelf cables (QSFP/QSFP connectors) are supported in 0.5, 1, 2, 3, and 5 meter lengths. NetApp AltaVault Cloud Integrated Storage Installation and Service Guide for Physical Appliances...
- Page 21 HD ports used to connect the mini-SAS connector end of a cable. The image below displays the QSFP ports on the rear of the disk shelf used to connect the QSFP connector end of a cable. NetApp AltaVault Cloud Integrated Storage Installation and Service Guide for Physical Appliances...
-
Page 22: Supported Cable Configurations
Cable, storage, mini-SAS HD, QSFP, X66020A-R6 MegaRAID HBAs (Passive) 12G, 1m (PCIe slots 1 and Cable, storage, mini-SAS HD, QSFP, X66021A-R6 12G, 2m Cable, Storage, MiniSAS X66022A-R6 HD,QSFP,12G,5m NetApp AltaVault Cloud Integrated Storage Installation and Service Guide for Physical Appliances... - Page 23 The following diagram displays the supported cable configuration for one AltaVault controller (AVA400 or AVA800) and one AVA10S shelf. Cabling diagram for an AltaVault controller and one shelf Controller Shelf #1 NetApp AltaVault Cloud Integrated Storage Installation and Service Guide for Physical Appliances...
- Page 24 The following diagram displays the supported cable configuration for one AltaVault controller (AVA400 or AVA800) and two AVA10S shelves. Cabling diagram for an AltaVault controller and two shelves Controller Shelf #2 Shelf #1 NetApp AltaVault Cloud Integrated Storage Installation and Service Guide for Physical Appliances...
- Page 25 The following diagram displays the supported cable configuration for one AltaVault controller (AVA400 or AVA800) and three AVA10S shelves. Cabling diagram for an AltaVault controller and three shelves Controller Shelf #3 Shelf #2 Shelf #1 NetApp AltaVault Cloud Integrated Storage Installation and Service Guide for Physical Appliances...
- Page 26 The following diagram displays the supported cable configuration for one AltaVault controller (AVA800) and four AVA10S shelves. Cabling diagram for the AVA800 controller and four shelves Shelf #4 Shelf #3 Controller Shelf #2 Shelf #1 NetApp AltaVault Cloud Integrated Storage Installation and Service Guide for Physical Appliances...
-
Page 27: Cabling The Controller To The Ava10S Shelf
Note: When oriented correctly into a Mini-SAS HD port, the Mini-SAS cable connector clicks into place and the Mini-SAS HD port link LED, LNK, illuminates green. Do not force a connector into a port. 6. Locate the QSFP port on the rear of the disk shelf. NetApp AltaVault Cloud Integrated Storage Installation and Service Guide for Physical Appliances... -
Page 28: Connecting The Controller To The Networks
Windows client. Afterward, further AltaVault configuration can be done using a Web browser and connecting to the management IP address. To connect the controller to a computer 1. Connect the network cable to the primary (wrench icon) port. NetApp AltaVault Cloud Integrated Storage Installation and Service Guide for Physical Appliances... -
Page 29: Connecting The Power And Starting The System
Important: You must power on the disk shelf before powering on the controller. Powering on the controller before the disk shelf prevents the AltaVault OS from operating normally. Additionally, you must power off the controller before powering off the shelf. NetApp AltaVault Cloud Integrated Storage Installation and Service Guide for Physical Appliances... - Page 30 Press and hold the shelf ID button until the first digit on the digital display blinks. d. Press the button until a number between 0 and 9 displays. This number continues to blink. e. Repeat steps b and c for the second digit. NetApp AltaVault Cloud Integrated Storage Installation and Service Guide for Physical Appliances...
- Page 31 8. Log in to the AltaVault virtual appliance using the default login ( ) and default password ( admin password The initial configuration wizard appears. You can now configure the system using the CLI configuration wizard. NetApp AltaVault Cloud Integrated Storage Installation and Service Guide for Physical Appliances...
- Page 32 Connecting the system Connecting the power and starting the system NetApp AltaVault Cloud Integrated Storage Installation and Service Guide for Physical Appliances...
-
Page 33: Chapter 4 - Deploying Altavault
Step 2: Host name? Enter the host name for the AltaVault appliance. Hostname? amnesiac NetApp AltaVault Cloud Integrated Storage Installation and Service Guide for Physical Appliances... -
Page 34: Setting The Service Processor Password
CLI configuration wizard steps. For more information, see “Running the AltaVault appliance CLI configuration wizard” on page 2. Enter configuration mode and set the Service Processor password in the controller using the following CLI commands: NetApp AltaVault Cloud Integrated Storage Installation and Service Guide for Physical Appliances... -
Page 35: Configuring The Service Processor For Remote Management
, to setup the IP address for the Service Processor. sp setup LOADER-A> sp setup 4. Based on your setup, choose one of the following: To enable DHCP, enter the following: NetApp AltaVault Cloud Integrated Storage Installation and Service Guide for Physical Appliances... -
Page 36: Validating Remote Access Via The Service Processor
Connect to the serial console port and log in to the AltaVault. Press Ctrl+G to get into Service Processor mode. To exit service processor mode, press Ctrl+D. SSH to the IP address of the Service Processor. Log in using the password set previously. NetApp AltaVault Cloud Integrated Storage Installation and Service Guide for Physical Appliances... -
Page 37: Next Steps
Export the Virtual AltaVault configuration for safe keeping in the event of a disaster. To manage Virtual AltaVault using the command-line interface, see the NetApp AltaVault Cloud Integrated Storage Command-Line Interface Reference Guide. NetApp AltaVault Cloud Integrated Storage Installation and Service Guide for Physical Appliances... - Page 38 Deploying AltaVault Next steps NetApp AltaVault Cloud Integrated Storage Installation and Service Guide for Physical Appliances...
-
Page 39: Appendix A - Administrator's Configuration Worksheet
Credentials to Cloud Object Storage: For example, Amazon S3 access and secret key. Bucket name: The bucket name must be unique (across all of AWS). NetApp AltaVault Cloud Integrated Storage Installation and Service Guide for Physical Appliances... - Page 40 1. Provide up to 4 x IP address / Netmask / Gateway for each 4x1Gbe port. 2. Provide up to 4 x IP addresses / NetMask/Gateway for each 4x10Gbe port. Specify the type of SFP for 10Gbe Optical NICs. NetApp AltaVault Cloud Integrated Storage Installation and Service Guide for Physical Appliances...
- Page 41 Configuration worksheet Administrator’s configuration worksheet Beta Draft Advance features Notes Bandwidth throttling for replication to cloud Alarms, Announcements, Logging, Scheduled Reports SNMP NetApp AltaVault Cloud Integrated Storage Installation and Service Guide for Physical Appliances...
- Page 42 Administrator’s configuration worksheet Configuration worksheet Beta Draft NetApp AltaVault Cloud Integrated Storage Installation and Service Guide for Physical Appliances...
-
Page 43: Appendix B - System Components
Beta Draft System components APPENDIX B This section provides system specifications for the NetApp AltaVault appliance. It includes the following sections: “AltaVault appliance components” on page 43 “Using LEDs to check the status of the system” on page 45 ... -
Page 44: System Chassis Specifications
Maximum cloud appliance (AVA10S) capacity in TB capacity in TB AVA400 AVA400 AVA400 AVA400 AVA400 AVA400 AVA800 AVA800 AVA800 AVA800 AVA800 1200 AVA800 1440 AVA800 1680 AVA800 1920 NetApp AltaVault Cloud Integrated Storage Installation and Service Guide for Physical Appliances... -
Page 45: Using Leds To Check The Status Of The System
You can hot-swap failed hard drives on an AltaVault expansion shelf, but you must run a CLI command to add it to the RAID array. For more information see, NetApp AltaVault Cloud Integrated Storage User’s Guide. You must add a drive to the RAID controller using the Management Console or the command-line interface. New ... - Page 46 The chassis has two handles on each side that assist with lifting the system. The handles are integrated into the chassis and fold flush when not in use. NetApp AltaVault Cloud Integrated Storage Installation and Service Guide for Physical Appliances...
- Page 47 The AltaVault OS is running. The length of time that the light remains on is proportional to the controller’s activity. Clear (off) There is no activity on the controller. NetApp AltaVault Cloud Integrated Storage Installation and Service Guide for Physical Appliances...
- Page 48 Displays green when the port is linked and displays white when there is no link. Activity LED Displays orange when the port is active and displays white when there is no activity. Note: Private management ports are unused on the AltaVault controller. NetApp AltaVault Cloud Integrated Storage Installation and Service Guide for Physical Appliances...
-
Page 49: Field Replaceable Units
The fan modules in these slots are controlled by the controller module installed in slot A on the chassis rear. Note: A blank is installed in Slots B1, B2, and NetApp AltaVault Cloud Integrated Storage Installation and Service Guide for Physical Appliances... -
Page 50: Fan Modules And Their Leds
The image below displays the fan module component locations. The following table displays the fan module components and descriptions: Component Description Cam handle Fan module Cam handle release latch Fan module attention LED NetApp AltaVault Cloud Integrated Storage Installation and Service Guide for Physical Appliances... - Page 51 The following events indicate fan failure: The fans speed has fallen below the critical low threshold. One or both fans in the fan module have stopped spinning. NetApp AltaVault Cloud Integrated Storage Installation and Service Guide for Physical Appliances...
-
Page 52: Power Supplies And Their Leds
This section describes the AltaVault system LEDs, their behavior, and information about the power supplies used in the system. You must power off the controller before powering off the AVA10S shelves. NetApp AltaVault Cloud Integrated Storage Installation and Service Guide for Physical Appliances... - Page 53 AC input power frequency 50 to 60 Hz AC input power voltage/operating range (auto-ranging) 100 to 120 VAC 200 to 240 VAC AC output power 1300 W PSU output power 1050W NetApp AltaVault Cloud Integrated Storage Installation and Service Guide for Physical Appliances...
-
Page 54: Controller Components And Their Leds
To aid in understanding, the controller faceplate information is divided into two sections, the left and right side of the controller faceplate. NetApp AltaVault Cloud Integrated Storage Installation and Service Guide for Physical Appliances... -
Page 55: Controller Left Side Ports And Leds
CNA port LEDS (not used) CNA ports (not used) NVRAM LED (not used) Note: The NVRAM is physically present, but not used in the AltaVault software. Controller attention LED NetApp AltaVault Cloud Integrated Storage Installation and Service Guide for Physical Appliances... -
Page 56: Controller Right Side Ports And Leds
Component Description 1GbE port LEDs 1GbE ports Management Ethernet port (wrench icon) LEDs Management Ethernet port (wrench icon) Private management Ethernet port (wrench lock icon) LEDs (not used) NetApp AltaVault Cloud Integrated Storage Installation and Service Guide for Physical Appliances... - Page 57 CLI. NetApp AltaVault Cloud Integrated Storage Installation and Service Guide for Physical Appliances...
-
Page 58: Internal Frus
The attention LED is next to the battery on Riser-R. For more information on replacing specific internal FRUs, see “Replacing internal FRUs” on page NetApp AltaVault Cloud Integrated Storage Installation and Service Guide for Physical Appliances... -
Page 59: Appendix C - System Maintenance
“Disposing of batteries” on page 86 Note: Best practices calls for allowing the replication queue to drain fully to the cloud prior to engaging in maintenance activities. NetApp AltaVault Cloud Integrated Storage Installation and Service Guide for Physical Appliances... -
Page 60: Migrating Data From A Steelstore Appliance To An Altavault Appliance
Migrating data from a SteelStore appliance to an AltaVault appliance For information on migrating data from an older physical appliance to the latest AltaVault appliance, see NetApp AltaVault Cloud Integrated Storage User’s Guide, Chapter 11 Migrating data from a SteelStore appliance to an AltaVault appliance. -
Page 61: Shutting Down And Removing The Controller From The Chassis
System maintenance Beta Draft Caution: In most cases, replacing an AltaVault controller is performed by NetApp Support. Only experienced technicians should attempt to replace a controller because of the risk of loosing data. If you are replacing your AltaVault Controller because of a faulty appliance, NetApp recommends that you preserve the existing disk cache so that you do not need to download large amounts of data from the cloud, which can be expensive in terms of time, bandwidth, and costs. -
Page 62: Moving Working Frus From The Controller
3. Move the boot device to the replacement controller module a. For instructions on removing the boot media from the impaired module, see “Replacing a boot device in a controller” on page NetApp AltaVault Cloud Integrated Storage Installation and Service Guide for Physical Appliances... -
Page 63: Reinstalling And Connecting The Controller In The Chassis
The last command generates a new megastore GUID based on the serial number of the target AltaVault appliance. It is important to perform this step before restarting the storage optimization service. NetApp AltaVault Cloud Integrated Storage Installation and Service Guide for Physical Appliances... -
Page 64: Installing A Controller In A Chassis
4. Close the cam handle so that the latch clicks into the locked position and the controller module is fully seated in the chassis. Tighten the thumbscrew. NetApp AltaVault Cloud Integrated Storage Installation and Service Guide for Physical Appliances... -
Page 65: Replacing A Controller Chassis
Power off the system and disconnect power from it. For detailed instructions on powering off the system and disconnecting the power as described in “Shutting down controllers” on page To remove a chassis 1. If you are not properly grounded, properly ground yourself. NetApp AltaVault Cloud Integrated Storage Installation and Service Guide for Physical Appliances... -
Page 66: Installing The Chassis
9. With the help of two or three people, slide the empty chassis off the rails and set it aside. Installing the chassis Before you begin, verify that the replacement chassis you are installing is an approved part from NetApp. To install the chassis 1. -
Page 67: Hot-Swapping Controller Fan Modules
Note: If the fan attention LED is lit solid amber, the fan module has failed. 4. Press down the release latch on the fan module cam handle and pull the cam handle downward to unseat the fan module from the chassis. NetApp AltaVault Cloud Integrated Storage Installation and Service Guide for Physical Appliances... -
Page 68: Installing Fan Modules
Before you begin, verify that the controller fan module that you are installing is supported by your controller model. To install a fan module 1. If you are not already grounded, properly ground yourself. NetApp AltaVault Cloud Integrated Storage Installation and Service Guide for Physical Appliances... - Page 69 6. Repeat the procedure for the remaining fan modules, if any. 7. After all fan modules have been replaced, align the bezel with the ball studs on the chassis and gently push it onto the ball studs. NetApp AltaVault Cloud Integrated Storage Installation and Service Guide for Physical Appliances...
-
Page 70: Hot-Swapping Controller Power Supplies
Unplug the power cord from the power supply and the power source. 5. Press down the release latch on the power supply cam handle to unseat the power supply. NetApp AltaVault Cloud Integrated Storage Installation and Service Guide for Physical Appliances... -
Page 71: Installing Power Supplies On A Controller
3. With the cam handle in the open position, align the edges of the power supply with the opening in the system chassis and gently push the power supply into the chassis until it is almost flush with the chassis, as shown below. NetApp AltaVault Cloud Integrated Storage Installation and Service Guide for Physical Appliances... - Page 72 LED is lit green and the fault LED is not lit. 9. Repeat these steps for the remaining power supplies, if any. NetApp AltaVault Cloud Integrated Storage Installation and Service Guide for Physical Appliances...
-
Page 73: Adding An Additional Raid Group To A Configured Appliance
5. Use the following command to import the newly added RAID Group into the AltaVault system and make it available for use. CLI> raidgroup import <vd_id> 6. Confirm that the RAID group has been imported by running the following command: show raidgroups NetApp AltaVault Cloud Integrated Storage Installation and Service Guide for Physical Appliances... -
Page 74: Replacing Internal Frus
7. Place the controller module on a clean, flat surface. NetApp AltaVault Cloud Integrated Storage Installation and Service Guide for Physical Appliances... -
Page 75: Replacing A Boot Device In A Controller
Contact technical support to help you determine if you need to replace this field- replaceable unit (FRU) and to assist you during the replacement procedure. NetApp AltaVault Cloud Integrated Storage Installation and Service Guide for Physical Appliances... -
Page 76: Removing The Boot Device From The Controller
6. Locate the boot device holder using the FRU map on the CPU cover in the controller. The attention LED next to the boot device holder is lit. The image below shows the boot device and holder. NetApp AltaVault Cloud Integrated Storage Installation and Service Guide for Physical Appliances... -
Page 77: Installing A Boot Device
2. Locate the boot device holder in the controller. Use the FRU map on the controller module to help you locate the boot device holder. 3. Open the boot device cover, if applicable. NetApp AltaVault Cloud Integrated Storage Installation and Service Guide for Physical Appliances... - Page 78 Contact technical support to assist you in copying the system files and OS version to the boot media and bringing your system back up to a healthy state, after the boot media replacement procedure. NetApp AltaVault Cloud Integrated Storage Installation and Service Guide for Physical Appliances...
-
Page 79: Replacing System Dimms
Loosen the thumbscrew on the appropriate side panel and remove the side panel to access DIMMs 3, 4, 7, and 8; left side panel for DIMMs 3 and 4, and right side panel for DIMMs 7 and 8. NetApp AltaVault Cloud Integrated Storage Installation and Service Guide for Physical Appliances... - Page 80 6. Press down simultaneously on the two DIMM ejector tabs on either side of the DIMM to eject the DIMM from its slot, and then carefully lift it out of the slot. All system DIMMS have white ejector latches, shown in the image below. NetApp AltaVault Cloud Integrated Storage Installation and Service Guide for Physical Appliances...
-
Page 81: Installing System Dimms
8; left side panel for DIMMs 3 and 4, and right side panel for DIMMs 7 and 8. 3. Locate the slot where you will be installing the new DIMM. 4. Ensure that the latches are in the open position. NetApp AltaVault Cloud Integrated Storage Installation and Service Guide for Physical Appliances... - Page 82 12. To ensure that the system has booted correctly, verify that the System attention LED on the chassis front and Controller attention LED on chassis rear are not lit after the system has finished booting. NetApp AltaVault Cloud Integrated Storage Installation and Service Guide for Physical Appliances...
-
Page 83: Replacing Raid Controllers
RAID Controllers are assigned to slots 1 and 3 in the controller. The BBU cards are located in brackets that are attached to the existing controller shelves behind the installed cards. For information on replacing a RAID controller, contact NetApp support. The procedure is complex and should only be done by field support. -
Page 84: Installing An Rtc Battery
Before you begin, verify that the RTC battery you are installing is supported by your controller model. To install an RTC battery 1. If you are not already grounded, properly ground yourself. 2. Remove the replacement battery from the anti-static shipping bag. NetApp AltaVault Cloud Integrated Storage Installation and Service Guide for Physical Appliances... -
Page 85: Disposing Of Batteries
Dispose of batteries according to local regulations regarding battery recycling or disposal. If you cannot properly dispose of the battery, return it to NetApp, as described in the RMA instructions shipped with the kit. NetApp AltaVault Cloud Integrated Storage Installation and Service Guide for Physical Appliances... -
Page 86: Replacing A Faulty Hard Disk Drive On An Altavault Ava400 Or Ava800 Appliance
Dispose of batteries according to local regulations regarding battery recycling or disposal. If you cannot properly dispose of the battery, return it to NetApp, as described in the RMA instructions shipped with the kit. NetApp AltaVault Cloud Integrated Storage Installation and Service Guide for Physical Appliances... -
Page 87: Copyright Information
NetApp. The use or purchase of this product does not convey a license under any patent rights, trademark rights, or any other intellectual property rights of NetApp. - Page 88 Copyright information NetApp AltaVault Cloud Integrated Storage Installation and Service Guide for Physical Appliances...
-
Page 89: Trademark Information
United States, and/or other countries. All other brands or products are trademarks or registered trademarks of their respective holders and should be treated as such. A current list of NetApp trademarks is available on the web at http://www.netapp.com/us/legal/netapptmlist.aspx. - Page 90 Trademark information NetApp AltaVault Cloud Integrated Storage Installation and Service Guide for Physical Appliances...
-
Page 91: How To Send Your Comments
Your feedback is important in helping us to provide the most accurate and high-quality information. If you have suggestions for improving this document, send us your comments by email to doccomments@netapp.com. To help us direct your comments to the correct division, include in the subject line the product name, version, and operating system. - Page 92 How to send your comments NetApp NetApp AltaVault Cloud Integrated Storage Installation and Service Guide for Physical Appliances...
-
Page 93: Index
FRUs connecting three shelves 25, 26 internal 74 connecting two shelves 24 module installation in chassis 64 moving FRUs 62 hot-swap re-installation 63 fan module 67 removal 61 NetApp AltaVault Cloud Integrated Storage Installation and Service Guide for Physical Appliances... - Page 94 Index PSUs 70 password 34 validating remote access 36 shelves install maximum cloud capacity 44 AVA10S Shelves 18 SNMP chassis 66 MIB, accessing 59 controller chassis 11 specifications controller in chassis 64 AltaVault chassis 44 fan module 68 SSN label 16 four-post rack 15 system rack space requirements 11...
Need help?
Do you have a question about the AltaVault Cloud Integrated Storage 4.1 and is the answer not in the manual?
Questions and answers