Advertisement
Advertisement
Table of Contents

Subscribe to Our Youtube Channel
Related Manuals for Sunny Health & Fitness EVO-FIT SF-RB4954


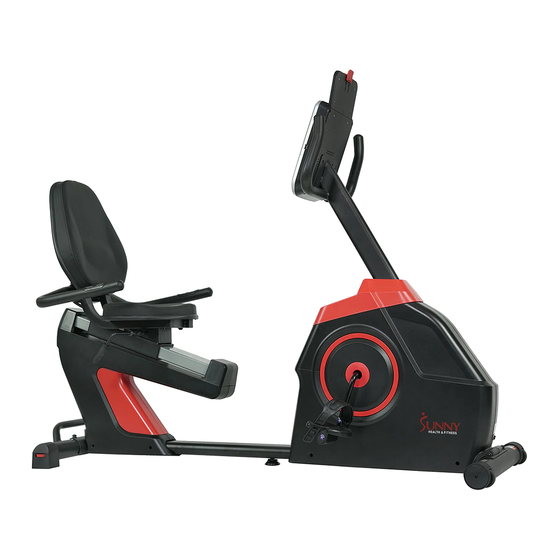
Summary of Contents for Sunny Health & Fitness EVO-FIT SF-RB4954
- Page 1 EVO-FIT CARDIO RECUMBENT BIKE SF-RB4954 USER MANUAL IMPORTANT! Please retain owner’s manual for maintenance and adjustment instructions. Your satisfaction is very important to us, PLEASE DO NOT RETURN UNTIL YOU HAVE CONTACTED US: support@sunnyhealthfitness.com or 1-877-90SUNNY (877-907-8669).
-
Page 2: Important Safety Information
IMPORTANT SAFETY INFORMATION We thank you for choosing our product. To ensure your safety and health, please use this equipment correctly. It is important to read this entire manual before assembling and using the equipment. Safe and effective use can only be achieved if the equipment is assembled, maintained and used properly. -
Page 3: Exploded Diagram
EXPLODED DIAGRAM... -
Page 4: Parts List
PARTS LIST Description Spec. Qty. Description Spec. Qty. Ф5.5xФ12x2T Console Flat Washer Screw M5x12L Hex Screw M5xP0.8x12L Ф1xФ8.5x48L Round Cap Spring Foam Grip Hex Screw M8xP1.25x55LxS17 Handlebar Post Magnetic Board Sensor Wire 1 Screw M5x10L Gear Case Sensor Wire 2 Support Sensor Wire 3 Screw... - Page 5 Description Spec. Qty. Description Spec. Qty. Slide Track Cover 2 Handlebar 68L/ Slide Track L/R Screw ST3.5x20L Cover Fixed Bar Pulse Wire Handlebar Screw M8x25L Cover Seat Post Ф8.5xФ13.5x2.5T Washer Bushing Pull Rod M8x18L Seat Post Plug Rear Stabilizer Slip Tube Seat Post Washer ST4.2x19L...
-
Page 6: Hardware Package
HARDWARE PACKAGE Ordering Replacement Parts (U.S. and Canadian Customers only) Please provide the following information in order for us to accurately identify the part(s) needed: ✓ The model number (found on cover of manual) ✓ The product name (found on cover of manual) ✓... - Page 7 ASSEMBLY INSTRUCTIONS We value your experience using Sunny Health and Fitness products. For assistance with parts or troubleshooting, please contact us at support@sunnyhealthfitness.com or 1-877-90SUNNY (877-907-8669). STEP 1: Remove the preassembled 4 Screws (No. 70), 4 Washers (No. 71) and 4 Washers (No.
- Page 8 We value your experience using Sunny Health and Fitness products. For assistance with parts or troubleshooting, please contact us at support@sunnyhealthfitness.com or 1-877-90SUNNY (877-907-8669). STEP 3: 3-1: Remove the preassembled 4 Screws (No. 114) and 4 Flat Washers (No. 89) from the Slip Tube (No.
- Page 9 We value your experience using Sunny Health and Fitness products. For assistance with parts or troubleshooting, please contact us at support@sunnyhealthfitness.com or 1-877-90SUNNY (877-907-8669). STEP 5: NOTE: Do not pinch or cut any wires when inserting the Handlebar Post (No. 5) into the Main Frame (No.
- Page 10 We value your experience using Sunny Health and Fitness products. For assistance with parts or troubleshooting, please contact us at support@sunnyhealthfitness.com or 1-877-90SUNNY (877-907-8669). STEP 7: 7-1: Put the pedal straps into the 2 Pedals (No. 45L/R). Attach the 2 Pedals (No.
-
Page 11: Adjustment Guide
ADJUSTMENT GUIDE ADJUSTING THE LEVEL If the bike is not level, turn the dials on the End Caps (No. 75) to adjust. Turn counter-clockwise to raise and turn clockwise to lower. ADJUSTING THE SEAT To move the Seat (No. 87) forward or backward, sit on the bike and place your feet on the Pedals (No. - Page 12 IMPORTANT BIKE INFORMATION WARNING: The Upright Bike requires a power source of 2.5 amps (100-240V) in order to properly operate. For your safety, as well as the safety of others, please verify that the power source is correct before plugging in the equipment. Any power source above or below this level could cause significant damage to the equipment and or user.
- Page 13 FUNCTION BUTTONS Heart rate recovery key After exercising, the console will go into Recovery Mode and display the user’s heart rate value. Recovery displays F1-F6. F6 is poor heart rate recovery while F1 is excellent heart rate recovery. Confirm key During workout, use this key to switch and confirm each function.
- Page 14 CALORIES: Records total calories burned from 0 ~ 999 CAL. Counts down the calories to 0. The setting range for this feature is from 0 ~ 990 CAL. The value increases or decreases in increments of 10 CAL. TEMPERATURE: Displays current temperature between 32~99℉(0 ~ 60℃) when the console is in sleep mode.
- Page 15 2. Press confirm key to enter Distance Countdown Mode. The initial distance is 0.00 MI. Set the distance by pressing the increase/decrease buttons. Press the START button to start the exercise. If you do not press the START button and press the confirm button again, the bike will go into calorie setting.
- Page 16 PERSONAL PROGRAM The personal programs allow the user to set their own program that can be used immediately. Each program is divided into 16 segments. Each segment is the same amount of time. To begin, select the PERSONAL MODE then press the confirm key to enter. Press the increase/decrease keys to set the resistance value for the 16 segments.
Need help?
Do you have a question about the EVO-FIT SF-RB4954 and is the answer not in the manual?
Questions and answers