Table of Contents
Advertisement
Advertisement
Table of Contents

Summary of Contents for Sunny Health & Fitness SF-RB4850
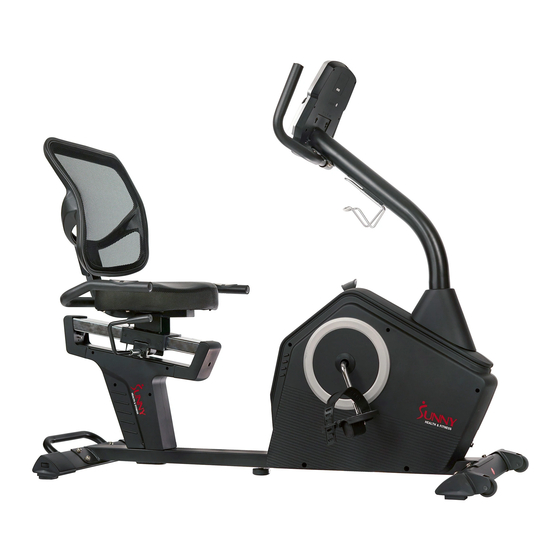
- Page 1 PROGRAMMABLE RECUMBENT BIKE SF-RB4850 USER MANUAL IMPORTANT! Please retain owner’s manual for maintenance and adjustment instructions. Your satisfaction is very important to us, PLEASE DO NOT RETURN UNTIL YOU HAVE CONTACTED US: support@sunnyhealthfitness.com or 1-877-90SUNNY (877-907-8669).
- Page 2 IMPORTANT SAFETY INFORMATION We thank you for choosing our product. To ensure your safety and health, please use this equipment correctly. It is important to read this entire manual before assembling and using the equipment. Safe and effective use can only be achieved if the equipment is assembled, maintained and used properly.
- Page 3 EXPLODED DIAGRAM 1...
- Page 4 EXPLODED DIAGRAM 2...
- Page 5 PARTS LIST Description Spec. Qty. Description Spec. Qty. Sensor Extension Main Frame Wire Handlebar Post Wheel Seat Tube Screw M5X10 Handlebar Plate Front Stabilizer Screw M6X20 Rear Stabilizer Axle D12Xd5X1 Armrest Flat Washer Adjustment Handle Bottle Holder M8XL45 Carriage Bolt Adaptor M8X20 Screw...
- Page 6 Belt Allen Wrench M6X15 Hex Screw Allen Wrench S13,14,15 Spanner HARDWARE PACKAGE #41 M6x40 4PCS #21 ST4.2x18 1PC #11 D8XФ16X1.5 4PCS #20 M8x16 4PCS #15 1PC #42 D6xΦ16x1.2 4PCS #95 S13,14,15 1PC #16 M10 1PC #97 S6 1PC #96 S5 1PC Ordering Replacement Parts (U.S.
- Page 7 ASSEMBLY INSTRUCTIONS We value your experience using Sunny Health and Fitness products. For assistance with parts or troubleshooting, please contact us at support@sunnyhealthfitness.com or 1-877-90SUNNY (877-907-8669). STEP 1: Remove 2 shipping tubes (A), 8 Screws (No. 20), 8 Spring Washers (No. 12) and 8 Flat Washers (No.
- Page 8 We value your experience using Sunny Health and Fitness products. For assistance with parts or troubleshooting, please contact us at support@sunnyhealthfitness.com or 1-877-90SUNNY (877-907-8669). STEP 3: Remove 4 Screws (No. 20), 4 Spring Washers (No. 12) and 4 Arc Washers (No. 22) from the Main Frame (No.
- Page 9 We value your experience using Sunny Health and Fitness products. For assistance with parts or troubleshooting, please contact us at support@sunnyhealthfitness.com or 1-877-90SUNNY (877-907-8669). STEP 5: Remove 4 Screws (No. 10), 4 Spring Washers (No. 12) and 4 Flat Washers (No. 11) from the Rail (No.
- Page 10 We value your experience using Sunny Health and Fitness products. For assistance with parts or troubleshooting, please contact us at support@sunnyhealthfitness.com or 1-877-90SUNNY (877-907-8669). STEP 6: Remove 2 Screws (No. 19) from the Main Frame (No. 1) using Spanner (No. 95). Then attach 2 Rail Covers (No.
- Page 11 ADJUSTMENT GUIDE ADJUSTING THE LEVEL If the bike is not level, turn the dials on the Rear End Caps (No. 32L/R) to adjust. Turn counterclockwise to raise and turn clockwise to lower. ADJUSTING THE SEAT To move the Seat (No. 38) forward or backward, while seated on the bike, put your feet on the floor.
- Page 12 IMPORTANT RECUMBENT BIKE INFORMATION WARNING: This recumbent bike requires a power source of 1 amp (100-240V) in order to properly operate. For your safety, as well as the safety of others, please verify that the power source is correct before plugging in the equipment. Any power source above or below this level could cause significant damage to the equipment and or user.
- Page 13 DIST: Accumulates the workout distance from 0.00 to 999.9 miles. Users can preset the target distance they want to reach. ODO: Displays the total accumulated distance from 0 to 9999 miles. CAL: Accumulates the calories burned from 0 to 9999. Users can preset the target Calories they want to burn.
- Page 14 User can set watt value only in Watt 50~250 ±5 the Watt Control Program. Target HR will be based on Age. When Heart Rate exceeds Target 10~99 ±1 HR, the Heart Rate number will flash. Setting Parameters for Target Pulse 60~220 ±1 heart rate.
- Page 15 There are 12 pre-set programs ready for use. All program profiles have 16 levels of resistance. SETTING PARAMETERS FOR PRE- SET PROGRAMS 1. Select one of the Pre-set Programs using the UP or DOWN button, then press ENTER. TIME will flash so the value can be adjusted using the UP or DOWN key. 2.
- Page 16 Note: If you set up the target time for workout, then the next parameter of Distance cannot be adjusted. 4. Continue through all desired parameters, pressing the START/STOP button to start the workout. Note: Once the workout parameters count down to zero, it will beep and stop the workout automatically.
- Page 17 TARGET HEART RATE Program (P16) Program profile SETTING PARAMETERS FOR TARGET HEART RATE PROGRAM 1. Select TARGET HR (P16) using the UP or DOWN button, then press ENTER. 2. TIME will flash. The value can be adjusted using the UP or DOWN button. 3.
- Page 18 User Program Program profile (P21-P24) The 4 user programs allow the user to set their own program that can be used immediately. SETTING PARAMETERS FOR USER PROGRAM 1. Select the User Program using the UP or DOWN button then press ENTER. 2.
- Page 19 TROUBLESHOOTING PROBLEM POSSIBLE CAUSE CHECK SOLUTION Check if the motor wires are Plug in the cable again doesn’t motor plugged in or check if the or change the motor. work. motor is stuck. Check if the cables are Change the cables or There something damaged.


Need help?
Do you have a question about the SF-RB4850 and is the answer not in the manual?
Questions and answers
Where does the power cord plug into the bike
The power cord plugs into the adapter input on the back of the Main Frame (No. 1) of the Sunny Health & Fitness SF-RB4850 bike.
This answer is automatically generated
Where is the USB connection physical location
Lost power cord