
Related Manuals for Diamond Products CC6561


Summary of Contents for Diamond Products CC6561
- Page 1 CONCRETE SAW OPERATOR’S MANUAL MODELS CC6561 and CC6561-3 September 11, 2017 Part # 1804006...
-
Page 2: Table Of Contents
Dimensions ..............13 Concrete Cutting ............34 Specifications ..............14 Adjusting the Depth Stop .......... 34 Operating the CC6561 and CC6561-3 ......15 Lighting ................. 35 Handlebars ..............15 Spot Light ..............35 ... - Page 3 Model and Serial Numbers ........52 Appendix B ..............53 Daily Maintenance Task Chart ......53 Appendix C ............... 54 Troubleshooting ............ 54 Appendix D ............... 56 Additional Resources ..........56 Warranty...………………………………………………...60 CC6561 – CC6561-3 Concrete Saw Manual...
-
Page 4: Safety Precautions
Mild d and/or mo derate injuri es could occ cur if operatio ns, and mai ntenance ins structions se instructio ons are not fo ollowed. CC65 561 – CC6561- -3 Concrete Sa aw Manual... - Page 5 Service the saw until it h has cooled d down. center. Service the saw with the e engine run nning (unless stated otherw rwise). DO N NOT: CC65 561 – CC6561- -3 Concrete Sa aw Manual...
-
Page 6: Battery And Electrical Safety
Keep all bod dy parts away y from rotati ng blades. raise/lower i it cautiously and slowly t to avoid serious injur ries. CC65 561 – CC6561- -3 Concrete Sa aw Manual... -
Page 7: Fuel Safety
Always know w how to turn n off the eng gine quickly for emergenc cy purposes CC65 561 – CC6561- -3 Concrete Sa aw Manual... -
Page 8: Cutting Safety
(PTO ). Under-ten nsioning the belts may y cause slip page, shorte er belt life, and/or po oor saw perf formance. CC65 561 – CC6561- -3 Concrete Sa aw Manual... -
Page 9: Lifting Safety
’s designated lift points prio or to hoist ting. DO N NOT attempt t to lift the saw w irresponsibly y and/or impro operly. CC65 561 – CC6561- -3 Concrete Sa aw Manual... -
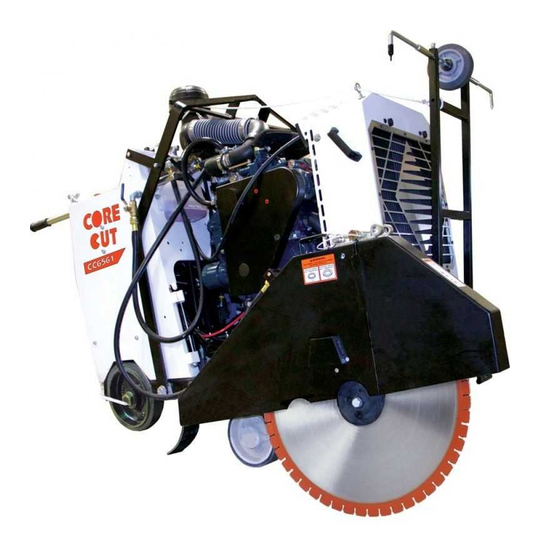
Page 10: Introducing The Cc6561
32. Dual Front Pointe 2. Belt Guar 10. D Depth Stop As ssembly 33. Blade e Guard 3. Belt Drive e Assembly 11. A Air Cleaner 4. Engine 12. A Air Intake CC65 561 – CC6561- -3 Concrete Sa aw Manual... -
Page 11: Introducing The Cc6561-3
32. Dual F Front Pointer 22. Belt Guard 10. De epth Stop Ass sembly 33. Blade Guard 23. Belt Drive 11. Air r Cleaner 24. Engine A Assembly 12. Air r Intake CC65 561 – CC6561- -3 Concrete Sa aw Manual... -
Page 12: Controls
19. W Water Pump p Switch (Op ptional Item m)–Pumps wa ater to blade 20. L Lowering Sp peed Valve ( (Optional It em) – Chan nges saw’s lo owering spe CC65 561 – CC6561- -3 Concrete Sa aw Manual... - Page 13 Figure 4: Side an n d Bottom View CC6561 – CC6561-3 Con n crete Saw Ma a nual...
-
Page 14: Dimensions
(add 100 lb. for crated weight) Table 2: Engine/Motor Specifications Manufacturer Kubota Model WG2503 H.P. (SAEJ1349) (HP / rpm) 2700 RPM Fuel Type Gasoline Cylinders Note: Refer to the engine manual for additional engine information and specifications. CC6561 – CC6561-3 Concrete Saw Manual... -
Page 15: Operating The Cc6561 And Cc6561-3
Place one st tring line up against the backside of he blade an d one string line up aga inst the CC65 561 – CC6561- -3 Concrete Sa aw Manual... -
Page 16: Rear Pointers
CC65 561 – CC6561- -3 Concrete Sa aw Manual... -
Page 17: Blade Speed
This asurement c an be verifie ed with a torq que wrench Figure 11: W Wrench ure 9: CC6561 1 RPM Chart Insta all the blade e on either th he right or le ft side of the w;... - Page 18 2 hi inge knuckle Figure e 16: Blade Fl anges Togeth Remove the e blade shaft t bolt using t the wrench. Turn the bol lt clockwise (left-hand th hreads) on CC65 561 – CC6561- -3 Concrete Sa aw Manual...
-
Page 19: Removing The Blade
Place the bl lade in the appropriate storage loca ation. 5. I Inspect the b bolt, outer fla ange, inner flange, and inner flange alignment p pin hole for v visible CC65 561 – CC6561- -3 Concrete Sa aw Manual... -
Page 20: Blade Guard
Use the han ndle on the b blade guard t to rock the guard back a and forth wh hile lifting the e guard off of the tapere ed blade gua ard mount. CC65 561 – CC6561- -3 Concrete Sa aw Manual... -
Page 21: Flange Guard
25: Left W Water Valve Figure 24: Fl lange Guard Reinsert the lock pin into the tap ered blade guard mo ount hole. CC65 561 – CC6561- -3 Concrete Sa aw Manual... -
Page 22: Water Safety Switch
No ote: Raise the e blade when n maneuver ring the saw to provide p proper clear rance betwe een the blade e and the gr round. CC65 561 – CC6561- -3 Concrete Sa aw Manual... -
Page 23: Forward Control
1. S Stop engine 2. D Disengage t the transmis ssion. 3. O Open acces ss door to ex xpose transm mission lever. CC65 561 – CC6561- -3 Concrete Sa aw Manual... -
Page 24: Fuel System
1. Lower th e saw to the e ground so it is level. 2. Stop the engine and let it cool do own. 3. Remove the fuel tank k cap. CC65 561 – CC6561- -3 Concrete Sa aw Manual... -
Page 25: Display Panel
Level – La mp Only gine Total Ho ours of Elec ctrical Poten ntial Voltage eration Serv rvice – Engin ne Hours gged since L Last Service Date CC65 561 – CC6561- -3 Concrete Sa aw Manual... -
Page 26: Soft Keys (Buttons)
Also used with the Main nu soft key to o get back to t the Main Men nu from any s screen. select – Close es pop-up me essages. CC65 561 – CC6561- -3 Concrete Sa aw Manual... -
Page 27: Status Icons
C – Diagnost ic Trouble C Code U – Engine C Control Unit – Failure Mo ode Identifie N – Paramete er Group Nu umber N – Suspect Parameter N Number CC65 561 – CC6561- -3 Concrete Sa aw Manual... -
Page 28: Main Menu
( to m make the sele ection. Gauges (Main Menu u default scre een) Diagnos stics System Information User Set ttings Panel Co onfiguration (Password Required) Service (Password R Required) CC65 561 – CC6561- -3 Concrete Sa aw Manual... - Page 29 2 uges Retu urns screen to Main Me Diag gnostics screen disp lays the follo owing items: Active Diagno ostics ogged Diagn nostics Figure 39: Active Dia agnostics Scre CC65 561 – CC6561- -3 Concrete Sa aw Manual...
- Page 30 40: Logged d Diagnostics Note e: Select the Freeze Fra me Button to o request the f freeze frame e data from t he ECU whe en faults are e pres ent. CC65 561 – CC6561- -3 Concrete Sa aw Manual...
-
Page 31: User Settings
Main Men nu ( ) soft key and then n select ( ) soft key. Figure 42: Night Setting Preference S Screen gure 44: Scree en Brightness CC65 561 – CC6561- -3 Concrete Sa aw Manual... -
Page 32: Automatic Shutdown
P009 93 and P1274 4 to the ope erator. The engi ine is shut d down for safe ety reasons. Contact a qual lified service e facility if th is occurs. CC65 561 – CC6561- -3 Concrete Sa aw Manual... -
Page 33: Engine
Speed s section in this s manual for r correct Turn off w water pump switch. RPM.) Place sp eed control lever at Neu utral. CC65 561 – CC6561- -3 Concrete Sa aw Manual... -
Page 34: Stopping The Engine
Turn n the depth s stop knob co ounterclockw wise to maneuve ering the saw incre ease the cut tting depth, o or turn the d depth stop CC65 561 – CC6561- -3 Concrete Sa aw Manual... -
Page 35: Lighting
DO NOT as ssume at any t time that the e transmissio on will act as s a brake when n at Neutral. CC65 561 – CC6561- -3 Concrete Sa aw Manual... -
Page 36: Maintaining The Cc6561 And Cc6561-3
40 hours o of operation. 50 H Hours Change e engine oil, o only use SAE E 10W-30. CC65 561 – CC6561- -3 Concrete Sa aw Manual... -
Page 37: Rear Axle
Wheels Batt tery Type Insp ect the rear wheels regu ularly for dam mages or 12 V Volt, Group 2 wear r and replac e as necess sary. CC65 561 – CC6561- -3 Concrete Sa aw Manual... -
Page 38: Servicing The Battery
9. F Fit the batter ry support br race over the e battery retighten the e nuts to sec cure the brac Figure 55: Circuit Bre eaker and Rel lays CC65 561 – CC6561- -3 Concrete Sa aw Manual... -
Page 39: Magnetic Sensor
/8th of a secondary e element in se ervicing the primary urn. element. 4. R Retighten the e jam nut do own to the fra ame base o secure the e sensor. CC65 561 – CC6561- -3 Concrete Sa aw Manual... -
Page 40: Restriction Indicator
Replace e the filter annu ually. DO NO OT over-serv vice or unde r-service CC65 561 – CC6561- -3 Concrete Sa aw Manual... -
Page 41: Replacing The Inner Safety Filter
Figure 63: Link kage Assemb CC65 561 – CC6561- -3 Concrete Sa aw Manual... -
Page 42: Drive Alignment
DO N NOT force a adjustments. CC65 561 – CC6561- -3 Concrete Sa aw Manual... -
Page 43: Changing Oil - Three Speed
1/2” 6. R Replace the e ½ʺ casing d drain plug. casing drain plug located d on the low er right rear of the 3-spee ed casing. CC65 561 – CC6561- -3 Concrete Sa aw Manual... -
Page 44: Draining Heat Exchanger - Freezing Temps
Fill the o oil to just bel low where th he pipe CC65 561 – CC6561- -3 Concrete Sa aw Manual... -
Page 45: Rear Drive Transmission
Adju ust the belt t ension as ne ecessary. CC65 561 – CC6561- -3 Concrete Sa aw Manual... -
Page 46: Adjusting The Blade Drive Belts
DO NOT T exceed the manufactur rer’s belt Figure 7 78: Belt Guard d Bolts – Fron t (4) tension s setting. CC65 561 – CC6561- -3 Concrete Sa aw Manual... -
Page 47: Replacing The Blade Drive Belts
DO N NOT exceed head cap scr rew and bolt the manufac cturer’s belt tension setti ing. CC65 561 – CC6561- -3 Concrete Sa aw Manual... -
Page 48: Primary Transmission V-Belt
4. Turn the e rotary tensi ioner knob there e are damag ges. counterc clockwise un ntil a light sp ring pressure e is felt. Usin ng a marker, , draw a line CC65 561 – CC6561- -3 Concrete Sa aw Manual... -
Page 49: Replacing The Rotary Tensioner
7. 10. Retighten n the lock nu ut and repea at step 6. Repeat s steps 7–9 to readjust the e tensioner as neces ssary. CC65 561 – CC6561- -3 Concrete Sa aw Manual... -
Page 50: Engine
3. Refer r to your eng gine manual for radiator maint tenance. CC65 561 – CC6561- -3 Concrete Sa aw Manual... -
Page 51: In-Line Fuel Filter
Oil a and Fuel Lin Regu ularly check the oil and f fuel lines for r damages and/ /or leaks and d service as necessary. Refer to engi ne operator’ ’s manual. CC65 561 – CC6561- -3 Concrete Sa aw Manual... -
Page 52: References
Record the saw’s serial number below for future reference and customer service purposes. Serial Number Record the engine’s model and serial numbers below for future reference and customer service purposes. Model Number Serial Number CC6561 – CC6561-3 Concrete Saw Manual... -
Page 53: Daily Maintenance Task Chart
Look for fluid leaks. Re-tension rear drive chain as necessary. Check oil level in oil expansion tank and fill as necessary. Check radiator coolant level and fill as necessary. Check air filter indicator. CC6561 – CC6561-3 Concrete Saw Manual... -
Page 54: Troubleshooting
Use bottom set of holes with 4-1/2" Skid plates in wrong set of holes? e. Saw will not completely lower. blade flanges. Front axle maximum cutting depth Adjust front axle maximum depth set wrong? stop bolt. CC6561 – CC6561-3 Concrete Saw Manual... - Page 55 Belts contacting pavement? stop bolt for belt clearance. Replace with new set of matched Mismatched belt set? belts. DO NOT mix old and new belts. Check belt tension. Lubricate PTO Overheating of PTO? every 25 hours. CC6561 – CC6561-3 Concrete Saw Manual...
-
Page 56: Additional Resources
Appendix D Additional Resources 1. Diamond Products (www.diamondproducts.com) CC6561 Concrete Saw Parts List, Ohio 2017 CC6561-3 Concrete Saw Parts List, Ohio, 2017 A Guide for Professional Concrete Cutters Training Manual – Introduction to Diamond Blades, Bits, and Equipment ... - Page 57 Intentionally Blank...
- Page 58 Intentionally Blank...
- Page 59 Intentionally Blank...
-
Page 60: Warranty
UIPMEN NT AND D PART RRANT Diamond P Products war rrants all equ uipment man nufactured b by it against defects in workma anship or mat terials for a period of on ne (1) year fr rom the date e of shipment to o Customer.
Need help?
Do you have a question about the CC6561 and is the answer not in the manual?
Questions and answers