Table of Contents
Advertisement
Quick Links
Advertisement
Table of Contents

Related Manuals for Diamond Products CC3725E3-36


Summary of Contents for Diamond Products CC3725E3-36
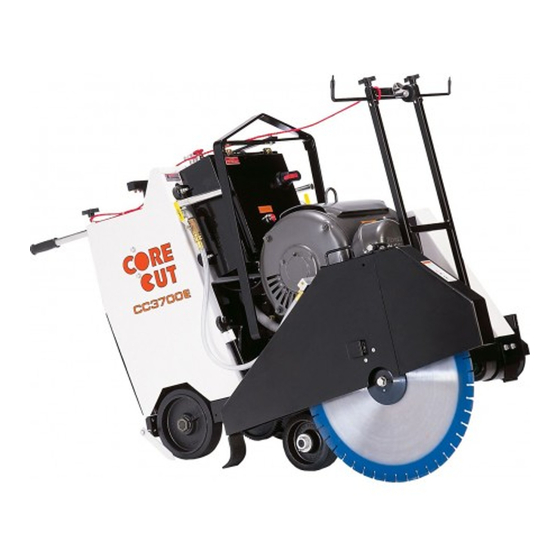
- Page 1 CONCRETE SAW OPERATOR’S MANUAL CC3700E Series May 2019 Part #: 1802695...
- Page 2 Select an option below to find your Equipment We sell worldwide for the brands: Genie, Terex, JLG, MultiQuip, Mikasa, Essick, Whiteman, Mayco, Toro Stone, Diamond Products, Generac Magnum, Airman, Haulotte, Barreto, Power Blanket, Nifty Lift, Atlas Copco, Chicago Pneumatic, Allmand, Miller Curber, Skyjack, Lull,...
- Page 3 CC3700E Recommended Power Cord Gauge - 3 Phase Horsepower Phase Voltage Amps 50ft Cord 100ft Cord 150ft Cord 200ft Cord 300ft Cord CC3700E Minimum Recommended Generator Sizes H.P. Phase Soft Start CC3725E 30kw CC3730E 40kw CC3740E 60kw NOTE: Electric saws do not ship with electric cord or pigtails NOTE: 3-Phase powered saws do not include male electric connector for control box.
-
Page 4: Table Of Contents
TABLE OF CONTENTS Table of Contents Introduction ............................. 6 CC3700E Controls ..........................7 CC3700E Dimensions ..........................8 CC3700E Single Speed Specifications ....................9 CC3725E ............................. 9 CC3730E ............................10 CC3740E ............................11 CC3700E 3-Speed Specifications ......................12 CC3730E-3 ............................12 CC3740E-3 ............................ - Page 5 TABLE OF CONTENTS Optional Soft Start Box Assembly ....................25 DC Travel Drive Starter Box Assembly ..................26 Overload Protection ........................26 Tasks Prior to Starting the Motor ....................26 Starting the Motor .......................... 26 Stopping the Motor ........................26 Transmission Lever ...........................
- Page 6 TABLE OF CONTENTS Inspect Belts ............................35 50 Hour Service ............................ 36 Lubricate Front Axle Bearings ......................36 Regular Maintenance ..........................36 Belt Tensioning ..........................36 Tensioning the Drive Belts......................36 Replacing the Drive Belts ......................36 Drive Belt Sheaves ..........................36 Removing the Set Screw Style Sheave ..................
-
Page 7: Introduction
Welcome to the Diamond Products family and thank you for choosing Diamond Products equipment. At Diamond Products we are driven to ensure you are completely satisfied with your product and continually strive to improve our product line so that we can offer you the best possible equipment in the industry. -
Page 8: Cc3700E Controls
INTRODUCTION CC3700E Controls 1. Hour Meter – Analog gauge displays the 12. Water Valve – Turns water flow on and off blade shaft speed (RPM). Digital gauge to the blade guard. lade owering peed alve (Optional) – displays the motor’s accumulated operational hours. -
Page 9: Cc3700E Dimensions
INTRODUCTION CC3700E Dimensions CC3700E Dimensions Inches Millimeters Saw Height 47-1/4 1200 Saw Length - Min. 48-7/8 1241 Saw Length - Max. 2946 Handle Extension - Max. Frame Length 1168 Wheel Base Length 21-3/8 Saw Width 32-3/4 Rear Frame Width 25-3/4 Front Wheels Inside Width Rear Wheels Outside Width 25-1/4... -
Page 10: Cc3700E Single Speed Specifications
INTRODUCTION CC3700E Single Speed Specifications CC3725E CC3725E Specifications Saw Model CC3725E-14 CC3725E-20 CC3725E-26 CC3725E-30 CC3725E-36 Blade Guard Capacity 14" (350mm) 20" (500mm) 26" (700mm) 30" (800mm) 36" (900mm) Blade Cutting Depth Max 4.75" 7.75" 10.75" 12" 15" Blade Shaft Speed 3050 rpm 2350 rpm 1800 rpm... -
Page 11: Cc3730E
INTRODUCTION CC3730E CC3730E Specifications Saw Model CC3730E-14 CC3730E-20 CC3730E-26 CC3730E-30 CC3730E-36 Blade Guard Capacity 14" (350mm) 20" (500mm) 26" (700mm) 30" (800mm) 36" (900mm) Blade Cutting Depth Max 4.75" 7.75" 10.75" 12" 15" Blade Shaft Speed 3050 rpm 2350 rpm 1800 rpm 1550 rpm 1375 rpm... -
Page 12: Cc3740E
INTRODUCTION CC3740E CC3740E Specifications Saw Model CC3740E-20 CC3740E-26 CC3740E-30 CC3740E-36 Blade Guard Capacity 20" (500mm) 26" (700mm) 30" (800mm) 36" (900mm) Blade Cutting Depth Max 7.75" 10.75" 12" 15" Blade Shaft Speed 2500 rpm 2000 rpm 1700 rpm 1350 rpm Blade Flange Size 4.5"... -
Page 13: Cc3700E 3-Speed Specifications
INTRODUCTION CC3700E 3-Speed Specifications CC3730E-3 Saw Model CC3730E-3-14 CC3730E-3-20 CC3730E-3-26 CC3730E-3-30 CC3730E-3-36 C C 3 7 3 0 E - 3 - 4 2 14" 20" 26" 30" 36" 42” Blade Guard Capacity (350mm) (500mm) (700mm) (800mm) (900mm) (1100mm) Blade Cutting Depth 4"... -
Page 14: Cc3740E-3
INTRODUCTION CC3740E-3 Saw Model CC3740E-3-14 CC3740E-3-20 CC3740E-3-26 CC3740E-3-30 CC3740E-3-36 CC3740E-3-42 14" 20" 26" 30" 36" 42” Blade Guard Capacity (350mm) (500mm) (700mm) (800mm) (900mm) (1100mm) Blade Cutting Depth 4" 7" 10" 12" 15" 18” Blade Shaft Speed 2925 rpm 2520 rpm 1950 rpm 1680 rpm 1300 rpm... -
Page 15: Safety
Safety protection Refer to the Diamond Products Parts List for techniques include, but are not limited to: additional information and part diagrams. Refer to the motor manufacturer as the primary Wearing gloves. -
Page 16: General Safety
SAFETY PRECAUTIONS DO NOT: General Safety Assume the equipment will remain still Read and understand all safety, • • when in neutral or when parking/stopping operations, and maintenance instructions the equipment on a slope. Chock the provided in this manual prior to operating or wheels to help prevent unnecessary servicing the saw. -
Page 17: Battery And Electrical Safety
SAFETY PRECAUTIONS DO NOT expose yourself or Battery and Electrical Safety • anyone else to the direct line of Ignitable explosive gases are the blade when operating the • emitted from the battery. DO equipment. NOT expose the battery to Always use an appropriate size blade and sparks or open flames. -
Page 18: Cutting Safety
SAFETY PRECAUTIONS Always pivot the front of the Hydraulic Safety • blade guard 180° (fully upward) Turn off the motor prior to servicing so the guard does not swing • hydraulic components. down unexpectedly, causing Lower the equipment completely prior to serious injuries. -
Page 19: Transporting Safety
SAFETY PRECAUTIONS Place the equipment in neutral and turn off Transporting Safety • the motor once the equipment is loaded in Remove the blade prior to transporting the the truck/trailer. • equipment. Chock the wheels and secure the saw in the •... -
Page 20: Operating
OPERATING Operating General Operating Precautions Prior to operating the machine, read the • operator’s manual thoroughly and ensure that you understand the safe and proper operation of the machine. Use approved personal protective • equipment at all times while operating the machine. -
Page 21: Blade Lowering Speed
OPERATING 1. Press the Raise (left) pushbutton to raise NOTE: The valve does not adjust the blade’s the saw and blade, and release to stop. raising speed which is not adjustable. NOTE: Always raise the blade when maneuvering the saw to provide proper clearance between the blade and the ground. -
Page 22: Speed Control Lever
OPERATING Speed Control Lever Blade Guard The speed control lever moves the saw WARNING forward and backward at up to 200 ft/min. DO NOT operate the saw with the blade guard raised or removed. DO NOT remove the blade guard with the motor running. -
Page 23: Removing The Blade Guard
OPERATING Flange Guard Install the flange guard over the blade flange that is not in use. Installing the Flange Guard 1. Fit the tapered mount on the back of the flange guard onto the tapered mount on the frame. 2. Insert the lock pin through the hole on the tapered frame mount to secure the guard. -
Page 24: Inspecting The Blade
OPERATING Using the proper blade (size and type) Shifting 3-Speed Gearbox Transmission preserves the blade and improves efficiency, Refer to the RPM Chart located in Appendix B resulting in lower costs. Refer to the at the end of this manual for the proper gear Association of Equipment Manufacturers position of the 3-speed gearbox transmission (AEM) safety brochure for diamond blades and... -
Page 25: Installing The Blade
OPERATING Installing the Blade WARNING DO NOT install a blade with the motor running. Failure to properly secure the outer flange and blade may cause parts to loosen or fall off the saw, resulting in serious injuries or death! DO NOT pivot the front of the blade guard up or down when installing very large blades. - Page 26 Select an option below to find your Equipment We sell worldwide for the brands: Genie, Terex, JLG, MultiQuip, Mikasa, Essick, Whiteman, Mayco, Toro Stone, Diamond Products, Generac Magnum, Airman, Haulotte, Barreto, Power Blanket, Nifty Lift, Atlas Copco, Chicago Pneumatic, Allmand, Miller Curber, Skyjack, Lull,...
-
Page 27: Removing The Blade
OPERATING 9. Slightly rotate the outer flange and blade in 3. Slowly lower the saw, if necessary, until the the opposite direction of the blade rotation blade just touches the ground. to eliminate backlash (looseness) between 4. Remove the blade shaft bolt using the parts. -
Page 28: Dc Travel Drive Starter Box Assembly
OPERATING DC Travel Drive Starter Box Assembly Starting the Motor An optional starter box is available for the DC 1. Press the START button locate on the top travel drive option that provides the same of the motor control box. controls as the standard with a few additional. -
Page 29: Disengaging The Transmission
OPERATING 3. Move the transmission lever out of the Water Supply DISENGAGE slot. The water supply directs cooling water to the 4. Push the lever forward and place it in the blade and minimizes dust when cutting. ENGAGE slot. NOTE: Always test the water supply for Disengaging the Transmission adequate pressure and flow prior to cutting. -
Page 30: Three Speed Operation
OPERATING NOTE: If cutting on the right side of the saw, attach the hose to the right side water flow control valve. If cutting on the left side of the saw, attach the hose to the left side water flow control valve. -
Page 31: Water Pump (Optional)
OPERATING 7. Adjust the pointer rod to place the tip Water Pump (Optional) between the tensioned string lines. The water pump directs cooling water to the 8. Retighten both front pointer frame screws. blade and minimizes dust when cutting. 9. Lift the frame off the ground when finished. 1. -
Page 32: Tasks Prior To Cutting
9. Continue the step-cut process to reach the will make the slurry look thick and pasty. maximum depth. DO NOT cut any deeper than required. Refer to the Diamond Products’ Guide for • Professional Concrete Cutters for Making a Cut Using the Blade Depth Stop additional cutting tips and information. -
Page 33: Continuing A Partial-Cut
OPERATING 3. Turn the adjustment bolt clockwise to Continuing a Partial-Cut adjust the drive alignment toward the left, 1. Maneuver the saw to the desired location. or counterclockwise to adjust the drive 2. Align the blade with the previous cut and alignment toward the right. -
Page 34: Maintenance
MAINTENANCE Prior to any maintenance being performed, Maintenance • know the locations of all safety equipment General such as fire extinguishers, first aid kits, etc. Failure to read and comply with the All maintenance shall be performed by • maintenance instructions provided in this qualified personnel only. -
Page 35: Part Lubrication
MAINTENANCE Part Lubrication Post Cleaning Lubricate the machine as required. • WARNING Dry all electrical components using • DO NOT grease parts with the compressed air. motor running. Do not start the machine until it has had • time to thoroughly dry. Lubricate all necessary parts on schedule for maximum saw efficiency. -
Page 36: Service Schedule
MAINTENANCE Service Schedule The service schedule is based primarily on the standard operating time of the machine. The frequency of the maintenance tasks can be increased based on the working environments of the machine. Cycle Task Daily 25 Hrs. 50 Hrs. Visually inspect saw for damage and repair as necessary Wipe down and clean all components for dust,... -
Page 37: Daily Service
MAINTENANCE 3. Turn the water supply on and verify that Daily Service water is spraying from all spray tube holes. Hydraulic System 4. If any clogged holes are detected, shut off water source and dislodge any debris that WARNING is clogging the hole(s). 5. -
Page 38: 50 Hour Service
MAINTENANCE 3. Turn both blade drive belt tension bolts 50 Hour Service (large threaded bolts on motor base) Lubricate Front Axle Bearings clockwise equally to tighten the belts (if tensioning belts only. Test the belt tension 1. Raise the saw to the full up position. and readjust the bolts as necessary. -
Page 39: Removing The Set Screw Style Sheave
MAINTENANCE 2. Place a straight edge against the blade WARNING shaft sheave and the motor sheave to align Disconnect power to the motor prior the two sheaves. to servicing any belts and sheaves. Use 3. On the set screw style sheave, tighten the extreme caution when working with rotating four set screws. -
Page 40: Disconnecting The Power To The Motor
MAINTENANCE The saw contains a charged battery with one Disconnecting the Power to the Motor positive cable lead and one negative cable Whenever maintenance is being conducted on lead. To power the hydraulic lift pump. The the saw, disconnect the power to the motor. battery can be accessed by removing the There is a power disconnect switch located on rear cover screen. -
Page 41: Inner Blade Flange
MAINTENANCE 7. Reconnect the positive cable lead to the 1. Ensure the work area is clear of any obstructions and all personnel are at a safe positive battery terminal. distance prior to lifting the machine. NOTE: Always reconnect the positive cable 2. -
Page 42: Troubleshooting
REFERENCES Appendix A Troubleshooting Troubleshooting the CC9074 Deep Cut Symptom Problem Solution Motor controller disconnect Switch disconnect lever to ON. lever is OFF. 1. Motor will not start. Power source Connect power source. disconnected. E-Stop is active. Pull up emergency stop button. Worn out battery? Charge or replace battery. -
Page 43: Cc3700E Single Speed Rpm Charts
REFERENCES Appendix B CC3700E Single Speed RPM Charts WARNING: Do not exceed blade speed (RPM) shown for each blade size. Excessive blade speed could result in blade breakage and serious personal injury. -
Page 44: Cc3700E Single Speed Blade Size Conversion Charts
REFERENCES CC3700E Single Speed Blade Size Conversion Charts WARNING: When changing blade size, use the chart below for selecting the correct items for the different configurations. CC3725E & CC3730E 14" 20" 26" 30" 36" Blade Guard Assembly 6010950 6010952 6010954 6010956 6010958 6012024... -
Page 45: Cc3700E 3-Speed Rpm Charts
REFERENCES CC3700E 3-Speed RPM Charts WARNING: Do not exceed blade speed (RPM) shown for each blade size. Excessive blade speed could result in blade breakage and serious personal injury. CC3700E 3-Speed Blade Size Conversion Charts WARNING: When changing blade size, use the chart below for selecting the correct items for the different configurations. - Page 46 REFERENCES CC3740E-3 14" 20" 26" 30" 36" 42" Blade Guard 6010950 6010952 6010954 6010956 6010958 6010960 Assembly Motor Sheave 2501902 2500209 2501902 2500209 2501902 2500209 (Sheave Size) (6.5") (5.6") (6.5") (5.6") (6.5") (5.6") Motor Sheave 2500934 2500934 2500934 2500934 2500934 2500934 Bushing (Bushing (2.13")
-
Page 47: Additional Resources
CC3700E-3 Saw Parts List; Ohio; #1801948 • A Guide for Professional Concrete Cutters • Training Manual – Introduction to Diamond Blades, Bits, and Equipment • Diamond Products’ Equipment Catalog • Discount-equipment’ Website ( www.discount-equipment.com • 2. Concrete Sawing and Drilling Association ( www.csda.org... -
Page 48: Model And Serial Numbers
REFERENCES Appendix D Model and Serial Numbers Record the saw’s serial number below for future reference and customer service purposes. Serial Number Record the motor’s model and serial numbers below for future reference and customer service purposes. Model Number Serial Number... - Page 49 EQUIPMENT AND PARTS WARRANTY Discount-equipment warrants all equipment sold by it against defects in workmanship or materials for a period of one (1) year from the date of shipment to Customer. The responsibility of Discount-equipment under this Warranty is limited to replacement or repair of defective parts, of such parts as shall appear to us upon inspection at such parts, to have been defective in material or workmanship, with expense for transportation and labor borne by Customer.
- Page 50 Select an option below to find your Equipment We sell worldwide for the brands: Genie, Terex, JLG, MultiQuip, Mikasa, Essick, Whiteman, Mayco, Toro Stone, Diamond Products, Generac Magnum, Airman, Haulotte, Barreto, Power Blanket, Nifty Lift, Atlas Copco, Chicago Pneumatic, Allmand, Miller Curber, Skyjack, Lull,...
Need help?
Do you have a question about the CC3725E3-36 and is the answer not in the manual?
Questions and answers