Table of Contents
Advertisement
Advertisement
Table of Contents

Related Manuals for Maico easyScreen


Summary of Contents for Maico easyScreen
- Page 1 Operation Manual...
- Page 2 Blank Page...
-
Page 3: Table Of Contents
4.4 System Assembly .......................31 4.5 Using the Label Printer ....................38 4.6 Storage ........................39 5 Operating the Device ......................40 5.1 Getting Started with easyScreen .................40 5.2 The easyScreen Screen Format .................41 5.3 Common Function Buttons ..................41 5.4 Entering Special Characters ..................42 5.5 Selecting the User (Optional) ..................42... - Page 4 5.16 Pass-Checker (Optional Use for ABR Hardware Testing) .........71 5.17 Infant Ear Simulator (Optional Use for OAE Probe Testing) ........73 6 Technical Data ........................74 6.1 easyScreen Hardware ....................74 6.2 Pin Assignment ......................80 6.3 Calibration Values .......................81 6.4 Coupler Types Used for Calibration ................81 6.5 Electromagnetic Compatibility (EMC) ................82...
- Page 5 Internet: www.maico.biz Copyright © 2019 MAICO Diagnostics. All rights reserved. No part of this publication may be reproduced or transmitted in any form or by any means without the prior written permission of MAICO. The information in this publication is proprietary to MAICO.
-
Page 6: Introduction
This user manual is meant to make it as easy as possible for the operator to become familiar with the operation and functions of the easyScreen. If you have questions or suggestions for further improvements, please, do not hesitate to contact MAICO. -
Page 7: Contraindications
Refer outcome. Clinical Use of the Measurement and Clinical Outcome The easyScreen is a screening device used for audiologic evaluation and documentation of ear and nerve disorders. In case of a positive result the patient shall be referred for follow-up diagnostic examination. Infants who have risk factors for hearing loss should be referred for follow-up and periodic re-screening of hearing even if the result of the hearing screening is a Pass. - Page 8 • DPOAE NOTE: Each license key is specific for the serial number of your device. In case you want to purchase another license, please, contact MAICO or your local distributor to determine eligibility. Additional licenses are installed by the distributor.
-
Page 9: Description
Operation Manual easyScreen 1.5 Description General easyScreen features a touch-screen display and user-friendly user interface in a compact hardware design. easyScreen can be purchased with various licenses allowing you to perform different hearing screening tests. easyScreen uses fast rate auditory brainstem response (ABR) technology to screen patients for hearing loss. -
Page 10: Warnings And Cautions
2.1 Reading this Operation Manual This operation manual contains information pertinent to the use of the easyScreen system including safety information as well as maintenance and cleaning recommendations. -
Page 11: Customer Responsibility
(see sections 3.2 and 3.3). Breach of the customer responsibility can lead to limitations of Manufacturer’s Liability and Warranty (see sections 2.3 and 3.1). NOTE: In the unlikely case of a serious incident, inform MAICO as well as your local distributor. -
Page 12: Regulatory Symbols
Operation Manual easyScreen 2.4 Regulatory Symbols The following Table 1 gives an explanation of the symbols used on the device itself, on the packaging and the accompanying documents including the Operation Manual. Table 1 Regulatory Symbols REGULATORY SYMBOLS SYMBOL DESCRIPTION... -
Page 13: General Precautions
WARNING performed by a qualified service representative only. No modifications of the equipment are allowed by anyone other than a qualified MAICO representative. Modification of the equipment could be hazardous. No parts of the equipment can be serviced or maintained while in use with the patient. - Page 14 Operation Manual easyScreen In case of emergency, disconnect the device from power supply. WARNING Do not position the device in a way that it is difficult to operate the disconnection device. The supply mains and the In Case of Emergency power socket shall be accessible at all times.
-
Page 15: Electromagnetic Compatibility (Emc)
WARNING must uncouple the easyScreen transducers and electrodes from the patient. Do not open the case of the easyScreen device. Refer servicing to qualified personnel. WARNING 2.7 Electromagnetic Compatibility (EMC) The device fulfills the relevant EMC requirements. Avoid unnecessary exposure to electromagnetic fields, e.g. -
Page 16: Use In Home Healthcare Environment
12-18 months. To extend battery capacity, do not allow the battery to fully discharge. Instead, place the easyScreen back in the cradle after use even if the battery has not been fully depleted. Battery Life per Charge •... -
Page 17: Warranty, Maintenance And After-Sales Service
The MAICO device is guaranteed for at least one year. Ask your authorized local distributor for more information. This warranty is extended to the original purchaser of the device by MAICO through the distributor from whom it was purchased and covers defects in material and workmanship for a period of at least one year from date of delivery of the device to the original purchaser. -
Page 18: Cleaning And Disinfection Recommendations
, eartips or electrodes prior to disinfection. • For cleaning use a lightly dampened cloth with soap water solution. • Disinfect the plastic housing of the easyScreen and its accessories by wiping the surfaces with wet disinfection wipes. Follow the instructions on the specific disinfection product. - Page 19 Cleaning and Disinfecting the Case and Cables Use caution while cleaning. CAUTION Before cleaning, remove the easyScreen from the cradle and unplug the cradle from AC power. Use a damp cloth to clean the plastic parts of the easyScreen and cradle.
- Page 20 Operation Manual easyScreen Daily routine periodic inspection inside the electrode gel protectors and beneath the ear cushion is recommended: 1. Remove the electrodes from the fixed electrode posts by pulling them straight out. 2. Inspect the inside of the gel protectors looking for residual electrode gel.
- Page 21 Operation Manual easyScreen Cleaning the OAE Probe Tip In order to achieve accurate measurements it is important to make sure that the probe system is kept clean at all times. Therefore check the probe for debris in the channels after each use and clean them as needed. It is critical to remove cerumen from the probe tip’s small acoustic channels.
- Page 22 (Figure 11). Figure 11 If the inside of the probe, beyond the removable probe tip, is clogged or damaged, only a MAICO authorized distributor can repair the parts. For further information ask your authorized local distributor or MAICO. Disposables Use only the Sanibel Supply disposable supplies that are supplied with your easyScreen system.
-
Page 23: Troubleshooting - Abr Issues
Electrical interference is If easyScreen is being used in the cradle with interfering due to AC AC attached, unplug the cradle power supply connection from the outlet to run on battery only. - Page 24 Operation Manual easyScreen SYMPTOM POSSIBLE CAUSE SUGGESTED TROUBLESHOOTING Screening babies within Wait to screen until at least 12 hours after birth a few hours after birth when it is more likely that the ear canals are when the ear canals are clear.
-
Page 25: Recycling And Disposal
Within the European Union it is illegal to dispose of electric and electronic waste as unsorted municipal waste. According to this, all MAICO products sold after August 13, 2005, are marked with a crossed-out wheeled bin. Within the limits of Article (9) of DIRECTIVE 2002/96/EC on waste electrical and electronic equipment (WEEE), MAICO has changed their sales policy. -
Page 26: Unpacking And Hardware Orientation
4.1 Unpacking the System Check Box and Contents for Damage • It is recommended that you unpack your easyScreen carefully making sure that all components are removed from the packing materials. • Verify that all components are included as shown on the packing slip included with your shipment. - Page 27 Operation Manual easyScreen The easyScreen comes with different components (see Table 3). The availability of configurations with the following components are country-specific. Contact your local distributor for more information. Table 3 List of Components List of Components Components – General easyScreen Cradle Cradle Power supply –...
-
Page 28: Use Of Equipment After Transport And Storage
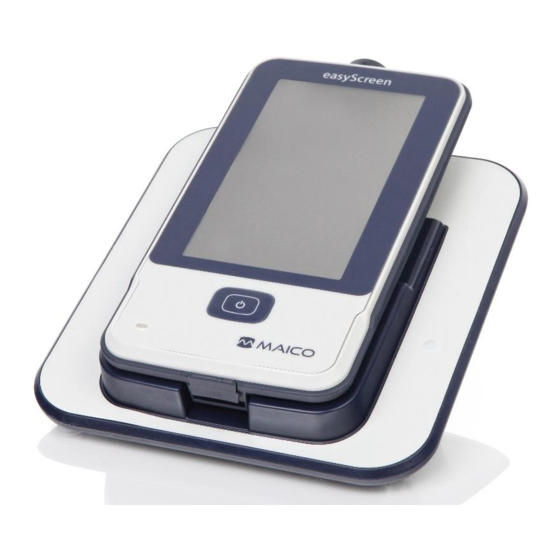
4.3 easyScreen Hardware Display, Switch and Charging Light Indicator on the easyScreen Viewing your easyScreen from the front side, you will see the touch screen display, the On/Off/Home switch, and a charging light indicator (Figure 12). For detailed information on the light modes in different conditions see section 4.4.11.4. - Page 29 Figure 15 Display and Further Components Display The display on the easyScreen is a resistive touch screen that allows operation with gloves (Figure 17). It responds to the pressure of touching the icons. This can be accomplished with a finger or a pointing device. Care should be taken not to scratch the surface of the touch screen overlay.
- Page 30 Operation Manual easyScreen Preamplifier Cable (for ABR Only) The preamplifier cable connects to the top of the easyScreen when using some of the available transducers. It is not used ® with the BERAphone . Electrode lead wires and the acoustic transducer connect to the jacks at the top of the preamplifier cable for performing ABR screenings (Figure 19).
-
Page 31: System Assembly
Operation Manual easyScreen 4.4 System Assembly General The easyScreen will require some assembly before use including one of the following depending on your system purchase and test method: • Connecting the BERAphone ® for ABR • Connecting the ABR preamplifier cable, ABR transducer and electrode lead wires •... - Page 32 Operation Manual easyScreen Connecting the Insert Earphone Cable or OAE Probe to the Preamplifier Align the plug at the end of the insert earphone cable or OAE probe with the socket at the top of the preamplifier cable marked with the graphic .
- Page 33 “pass” within 30 seconds. Handling of easyScreen and Cradle Place the easyScreen into the cradle so that it sets within the U-shaped placement guides (Figure 33). Proper placement in the cradle is needed to ensure charging of the battery.
- Page 34 Operation Manual easyScreen ® Handling of BERAphone and Cradle ® Place the BERAphone into the cradle so that top part is inserted first between the insertion guides. Then lower the ear cushion portion into the cradle (Figure 35). Figure 35 The left and right insertion guides hold the BERAphone®...
- Page 35 To transfer data to a PC, establishing a PC-connection via USB is required. If the easyScreen is used with office equipment that is not a medical device itself (see Table 5, PC-Connection 1), make sure to establish the PC-connection in one of the following ways (see Table 5, PC Connection 2, 3 or 4).
- Page 36 Charging this way will be slower than charging with the cradle. • Connecting the device to mains using the power supply from the cradle directly plugged into the micro-USB port of the easyscreen. WARNING USE ONLY UE08WCP- 050160SPA- POWER SUPPLY.
- Page 37 4.4.11.4 Charging the Battery Keep the battery fully charged for the longest battery life. With the cradle plugged into AC, insert the easyScreen into the cradle. This begins the battery charging process. Charging time from under 10% to above 90 % is approximately 6 hours.
-
Page 38: Using The Label Printer
USB to a powered PC or into mains power is not recommended. 4.5 Using the Label Printer Connecting the label printer to easyScreen The connection of the easyScreen and the label printer is made via wireless pairing. See section 5.13.2. Powering the Label Printer The label printer is powered by a Lithium-ion battery. -
Page 39: Storage
Figure 43 4.6 Storage When the easyScreen is not in use, store it in the carry case or in a location where it will be safe from damage to the touchscreen or other sensitive components such as the acoustic transducers and cables. Store according to the recommended temperature conditions described in section 6. -
Page 40: Operating The Device
The easyScreen can be operated in or out of the cradle. Briefly press the Home button on the front of the easyScreen to turn on the device. The boot-up process will take a few seconds. During this time the display will show the splash screen. -
Page 41: The Easyscreen Screen Format
Operation Manual easyScreen 5.2 The easyScreen Screen Format The general easyScreen screen format (Figure 44) includes: 1 – Screen title 2 – Status/subheader 3 – Main screen 4 – Battery charge & Function buttons 5 – Bottom control bar with common function buttons Figure 44 5.3 Common Function Buttons... -
Page 42: Entering Special Characters
Special characters character character 5.5 Selecting the User (Optional) The easyScreen can be set to require screener login via the HearSIM PC application. This is disabled by default. When login is enabled, a list of screeners that you created in... -
Page 43: The Home Screen
(Figure 47). Figure 47 5.6 The Home Screen General The Home screen displays the buttons controlling entry into the major functions of the easyScreen: New Patient , Select Patient and Quick Test (Figure 48). It is also possible... -
Page 44: Entering Or Choosing A Patient For Testing
5.7 Entering or Choosing a Patient for Testing Adding a New Patient Patient information can be entered manually into the easyScreen via the Enter Details screen. Select the New Patient button on the Home screen. In the Enter Details screen, select a field for data entry by touching the desired field. - Page 45 The Risk Factors item in the Enter Details or Edit Details screens may require setup to display your desired list. To set your risk factors list, connect easyScreen to a PC with the HearSIM™ application installed. Refer to section 5.3 of the HearSIM Instructions for Use regarding configuring the risk factors list.
-
Page 46: Preparing For Testing
Figure 55 You must transfer the tests to the HearSIM PC application which will delete the patients and tests saved on easyScreen. Only then can you transfer or enter this patient’s ID again to the device and perform more tests. - Page 47 Operation Manual easyScreen 5.8.1.2 Acoustic Noise Acoustic noise in the screening environment can be so loud that the low-level stimulus delivered by the hearing screening system is overwhelmed by the background noise. Acoustic noise can also awaken the baby causing less than optimal recording conditions and artifacts that prolong the test time.
- Page 48 Always keep eartips and similar small pieces out of reach of the baby. IMPORTANT NOTE: All disposable supplies included with easyScreen are produced by Sanibel Supply. The system has only been tested using disposables supplied by Sanibel Supply. Use of other supplies could alter the behavior and results obtained with the device and is not recommended.
- Page 49 Operation Manual easyScreen IMPORTANT NOTE: If any lotion has been applied to the baby's skin in the area of the electrodes then this should be removed with soap and water or other electrode skin .The “ground” electrode is positioned above the ®...
- Page 50 Operation Manual easyScreen • The easyScreen BERAphone ® does not require pressure to hold it in place. You ® are supporting the BERAphone only to maintain the position of the electrodes and ear cushion on the baby’s head. The ear cushion must be placed so that it is surrounding the ear.
- Page 51 Operation Manual easyScreen Connect the white, black and yellow pinch clip electrode lead wires to a snap electrode (Figure 58). Figure 58 Peel the electrodes from the backing card and place them on the electrode positions following this color scheme. A graphic near the electrode jacks on the...
- Page 52 Operation Manual easyScreen Insert the EarCup adapter at the end of each of the insert earphone tubes into the hole in the foam at the top of the EarCup so that it is fully inserted (Figure 61). Figure 61 Peel the EarCup attached to the red tubing from the backing card.
- Page 53 Operation Manual easyScreen Insert the eartip attached to the red tubing into the baby’s right ear. Do this by pulling gently down and out on the baby’s ear lobe to open the ear canal. Hold the adapter and twist (gently) the eartip into the ear canal (Figure 64).
-
Page 54: Testing
Select Test screen may appear for you to select which screening protocol to use (Figure 66). This screen will only appear if the cables attached to your easyScreen support more than one protocol present on your device. - Page 55 Operation Manual easyScreen Test-Related Field Entry Using the HearSIM PC application, your easyScreen can be configured to save information with each test (Figure 67) regarding: • Screening Facility name • Hospital Status • Screener name When this function is enabled, an Edit Test Fields screen will appear so you can complete these fields correctly for the current patient.
-
Page 56: Abr Test Screens
Operation Manual easyScreen 5.10 ABR Test Screens General During the ABR process the screens will change to reflect the processes taking place and the options available to the screener. ABR Initial Test Screen The initial ABR screen displays some setup instructions (Table 12). - Page 57 Operation Manual easyScreen Impedance Check Screen During the impedance check, the electrode symbols on the graphic of the baby’s head will display in green or yellow with the kΩ impedance value shown toward the bottom of the screen (Table 13). Once the impedance values at all locations remain “green”...
- Page 58 Operation Manual easyScreen ABR Measurement Screen During the ABR measurement, a bar graph shows the progress toward a Pass result. A red bar reflects the test progress for the right ear. A blue bar reflects the test progress for the left ear (see Table 14). At the end of the test, the screening result symbol appears at the top of the bar graph (see Table 11).
-
Page 59: Oae Test Screens
Operation Manual easyScreen Time Bar During measurement, an Elapsed time bar will fill in as good samples of data are processed. When 180 seconds of acceptable EEG samples have been acquired, the bar will be filled in completely and the test will terminate automatically. - Page 60 Operation Manual easyScreen OAE Initial Test Screen The initial OAE screen displays instructions for preparation of the patient (Table 16). Table 16 OAE Initial Test Screen Screen Area/ Screen Function Name Description Graphic Patient Shows current patient information name Ear selection...
- Page 61 Operation Manual easyScreen If either the fit or the noise level is not acceptable you need to improve the situation before the screening begins: • Make sure the probe tip is inserted securely into the ear canal. • Quiet the baby or attend to any acoustic noise in the test environment.
- Page 62 Operation Manual easyScreen 5.11.4.2 Status Bar During measurement, the Status area at the top of the screen will show helpful information about the testing status. • Testing…:Test is proceeding. • Done!: Test is complete. • Too noisy: Artifacts are occurring; consider pausing the test to tend to the situation.
-
Page 63: Quick Test
Quick tests can be printed immediately after the test is completed, but no identifying information will appear on the print-out. One Quick Test session is saved temporarily in the Patient List of the easyScreen until the next time that the Quick Test button is selected on the Home screen. When Quick Test is selected, the previous Quick Test session is immediately and permanently deleted from easyScreen. -
Page 64: Managing Test Results
Operation Manual easyScreen 5.13 Managing Test Results General Test results from easyScreen can be printed on the wireless printer. Use of the HearSIM PC application supports transfer, storage and management of easyScreen data and clears the easyScreen database. Refer to the HearSIM Operation Manual that is provided on the USB flash drive or CD delivered with your system. - Page 65 Test Fields option is enabled on the device via the HearSIM PC application. The test fields cannot be edited on the easyScreen. If edits are needed, the test data must be transferred into the HearSIM...
- Page 66 Operation Manual easyScreen Printing Test Results 5.13.3.1 General Use only the recommended label printer from MAICO. It is possible to share one printer with multiple easyScreen devices. Pairing of the wireless printer and the easyScreen is accomplished in the Setup/Printer screen.
- Page 67 NOTE: The print icons will not appear on easyScreen under certain conditions. If label printing or wireless communication is not enabled on the device via the HearSIM PC application or if a label printer has not been paired to the easyScreen, the icons will not appear.
-
Page 68: Setup
5.14 Setup Select the Setup button on the bottom control bar of the Home screen to access a list of the settings that can be made directly on the easyScreen. Setup Language A list of available languages displays. Use the Up and Down arrow buttons in the bottom bar to page through the list. -
Page 69: License Upgrade
• Licenses Figure 89 5.15 License Upgrade License upgrades to a MAICO easyscreen can be added after the original purchase. One example of a license upgrade is adding TEOAE or DPOAE technology to a device that was purchased with ABR only. - Page 70 After receiving the license code, connect the easyScreen device with your computer using the Micro-USB cable. Copy the ErisLicenseManager.exe utility program from the provided USB flash drive onto the PC’s and power on the easyScreen. Open the ErisLicenseManager.exe application. Licenses that already exist on your device will display in the appropriate field.
-
Page 71: Pass-Checker (Optional Use For Abr Hardware Testing)
The Pass-Checker accessory can be optionally used to perform a quality check of the ABR components of the easyScreen. This can be done on a regular basis or can be performed if you suspect a problem with the easyScreen hardware. The Pass-Checker can be purchased from your MAICO representative. - Page 72 BERAphone cable to the preamplifier or BERAphone cable to easyScreen jack is not secure. the easyScreen; remove it and re- insert it verifying that it is securely attached. Excessive artifacts Electrode lead wire has a short Replace the electrode lead wire...
-
Page 73: Infant Ear Simulator (Optional Use For Oae Probe Testing)
Operation Manual easyScreen If these troubleshooting suggestions do not resolve the problem you are experiencing with your easyScreen device, allowing you to pass a screening using the Pass- Checker, contact your local MAICO representative for assistance. It is recommended that you keep replacement cables and accessories for your easyScreen available to perform these troubleshooting procedures (see Table 21). -
Page 74: Technical Data
ISO 389-6 Test Signal IEC 60645-3 IEC 60645-6, Type 2 IEC 60645-7, Type 2 OAE Standard is met by transferring IEC protocols from HearSIM™ to the easyScreen. For detailed information, see section 6.7 of this manual. 8508935 Rev. 4 04/04/2019... - Page 75 Operation Manual easyScreen DEVICE SPECIFICATIONS Operation Temperature +5 °C to +40 °C / + 41 °F to +104 °F environment Relative Humidity 15 % to 93 % (non-condensating) Ambient Pressure 98 kPa to 104 kPa Boot-up time < 5 s...
- Page 76 See section 6.7 for more information about the available protocols with different levels and stimuli. The easyScreen uses an alternative stimulus level control procedure, which is optimized for a large range of ear canal volumes from newborn ears with small ear canal volumes to adult ears with large volume.
- Page 77 Operation Manual easyScreen DPOAE Recording Maximum test time 60 s A/D resolution 24 bit Artifact rejection level 30 dB SPL Probe fit check Frequency response of the ear canal with click stimulus Residual noise RMS measurement in frequency domain, average of frequency components around the DP frequency (26 bins <...
- Page 78 Operation Manual easyScreen TRANSDUCER ABR insert phone (50 Ω) Radioear IP30 Type Versions Calibrated for EarCup or eartips Auto detection by device Supported tests Binaural or monaural ABR Max. input voltage 5.0 V RMS < 2 % (125 Hz - 4 kHz)
- Page 79 Operation Manual easyScreen ABR PREAMPLIFIER Channels Connectors 3 electrode lead wires (black, yellow, white) Transducer (IP30 or OAE Probe) Gain 72 dB Frequency response 0.5 Hz to 5000 Hz <25 nV/√Hz Noise CMR Ratio > 100 dB at 100 Hz Max input offset 2.5 V...
-
Page 80: Pin Assignment
1. VBUS from external host system 2. Ground connection for external supply 3. External power supply, 5V/1.5A DC 4. Not used 5. Ground connection for external supply easyScreen ABR/OAE Connector for ABR Preamplifier ® Probe/Transducer connector, BERAphone and Insert earphones PROBE CONNECTOR... -
Page 81: Calibration Values
[dB re. 20 µPa] [dB re. 20 µPa] Radioear IP30 with eartips 35.0 Radioear IP30 with EarCups 58.5 61.5 Calibration values are defined as MAICO standard values. OAE Probe with Coupler IEC 60318-4 (60711). ® TRANSDUCER CE-CHIRP Click pe RETSPL pe RETSPL [dB re. -
Page 82: Electromagnetic Compatibility (Emc)
Portable RF communications equipment (including peripherals such as antenna cables and external antennas) should be used no closer than 30 cm (12 inches) to any part of the easyScreen, including cables specified by the manufacturer. Otherwise, degradation of the performance of this equipment could result in improper operation. - Page 83 The easyScreen has been tested for EMC emissions and immunity as a standalone easyScreen. Do not use the easyScreen adjacent to or stacked with other electronic equipment. If adjacent or stacked use is necessary, the user should verify normal operation in the configuration.
- Page 84 Electromagnetic environment guidance Portable mobile communications equipment should be used no closer to any parts of the easyScreen, including cables, than the recommended separation distance calculated from the equation applicable to the frequency of the transmitter. Recommended separation distance: Conducted RF...
- Page 85 Operation Manual easyScreen To ensure compliance with the EMC requirements as specified in IEC 60601-1-2, it is essential to use only the following accessories (see Table 22). Table 22 EMC Requirements – Accessories ITEM MANUFACTURER MODEL ABR Preamplifier MAICO OWA Probe...
-
Page 86: Electrical Safety, Emc And Associated Standards
• RoHS (Restriction of the use of certain Hazardous Substance 6.7 Screening Protocols easyScreen is delivered with default screening protocols already present on the instrument as seen in section 6.1. MAICO recommends use of these protocols. If your NHS program requires different screening parameters additional protocols can be installed into the HearSIM™... - Page 87 Operation Manual easyScreen The following table shows the protocols that can be installed in HearSIM™ PROTOCOL FILE NAME PARAMETERS SENSITIVITY stimulus of 35 dB nHL (default) ≥ 99.6% ® ABRIS A00 CE-Chirp 35 dB nHL CE-Chirp ≥ 99.6% ® ABRIS A01 CE-Chirp 30 dB nHL...
- Page 88 4. Select the desired protocol and select Open. The protocol will be added to the Protocols list. 5. Follow the instructions in the HearSIM™ manual sections 6.5 and 6.6 to transfer the desired protocols to your easyScreen. 8508935 Rev. 4 04/04/2019...
- Page 89 Operation Manual easyScreen PROTOCOL FILE NAME PARAMETERS SENSITIVITY ≥ 99.6% DPOAE D03 2-5 kHz, F2 Frequencies: 5k, 4k, 3k, 2kHz 65_55 dB SPL, IEC Level (L1/L2): 65/55 dB SPL F2/F1 ratio: 1.22 Max. test time: 60 s # Freq. for pass: 3 / 4...
- Page 90 Specifications are subject to change without notice. MAICO Diagnostics GmbH Sickingenstr. 70-71 10553 Berlin Germany Tel.: + 49 30 / 70 71 46-50 Fax: + 49 30 / 70 71 46-99 E-mail: sales@maico.biz Internet: www.maico.biz...
Need help?
Do you have a question about the easyScreen and is the answer not in the manual?
Questions and answers