Maico easyTymp Operation Manual
Hide thumbs
Also See for easyTymp:
- Operation manual (62 pages) ,
- Operation manual (66 pages) ,
- Operating manual (38 pages)
Table of Contents
Advertisement
Quick Links
Advertisement
Table of Contents

Related Manuals for Maico easyTymp


Summary of Contents for Maico easyTymp
- Page 1 Operation Manual easyTymp...
-
Page 3: Table Of Contents
4.4 Preparing the Test ..................20 4.5 Operating Panel ................... 23 4.6 Start the Test ....................23 4.7 Probe Status Indication ................23 5 Operating easyTymp ................25 5.1 Test ......................25 5.2 Select Test Screen ..................26 5.3 Done ......................27 8111254 Rev. - Page 4 5.8 Edit Details....................32 5.9 View Results ....................32 5.10 Setup ......................33 5.11 easyTymp Plus and Pro Version: Contra Probe Button ........37 6 Connecting to a PC ................38 7 Cleaning and Disinfection Recommendations ........39 7.1 General Recommondations ................39 7.2 Cleaning the probe tip .................
- Page 5 Copyright © 2016 MAICO Diagnostics All rights reserved. No part of this publication may be reproduced or transmitted in any form or by any means without the prior written permission of MAICO. The information in this publication is proprietary to MAICO.
-
Page 6: Introduction
This user manual is meant to make it as easy as possible for the operator to become familiar with the operation and functions of the easyTymp when performing tympanometry and acoustic reflex tests. If you have questions or suggestions for further improvements, please do not hesitate to contact us. -
Page 7: Intended Use
This could be the loss of power, fuse blow of system halt with error message. 1.4 Description The easyTymp is an automatic middle ear analyzer intended to be used for objective testing the middle ear function and the factors that contribute to the occurrence of the hearing loss in the age range of infants, children and adults It is intended to be used by hearing healthcare professionals (i.e. - Page 8 Rapid tympanometry measurement Ipsilateral acoustic reflexes at several frequencies 1 kHz probe tone (option) easyTymp Plus Version (Contra probe required) Rapid tympanometry measurement Ipsilateral acoustic reflexes at several frequencies Contralateral acoustic reflex measurements at several frequencies ...
-
Page 9: For Your Safety
Operation Manual easyTymp For your Safety 2.1 How to read this Operation Manual This Operation Manual contains information pertinent to the use of the MAICO eayTymp system including safety information as well as maintenance and cleaning recommendations. READ THIS ENTIRE MANUAL BEFORE ATTEMPTING TO USE THIS SYSTEM! Use this device only as described in this manual. -
Page 10: Regulatory Symbols
Operation Manual easyTymp 2.2 Regulatory Symbols Symbol Description Serial number Date of manufacture Manufacturer Caution, consult accompanying documents Return to authorized representative, special disposal required Reference number patient applied part type B according to IEC 60601-1 Refer to instruction manual (mandatory) -
Page 11: General Precautions
Operation Manual easyTymp Symbol Description EC REP EU authorized representative Conforms to European Medical Device Directive 93/42/EEC Non-ionizing electromagnetic radiation Logo 2.3 General Precautions Before measurement make sure, that the device works properly. Do not immerse the unit in any fluids. For cleaning and disinfection see chapter 7 Cleaning and Disinfection Recommendations. -
Page 12: Electrical Safety And Measuring Security
IEC 60601-1 series for medical electrical equipment or IEC 60950 for IT equipment. This is to avoid electrical shock to the user or patient. This complete system consisting of the MAICO device, computer and isolation transformer, is suitable for use in the patient environment. -
Page 13: Device Control
To avoid the risk of electric shock, this equipment must only be connected to the medical power supply originally delivered by MAICO. Using another power supply can also lead to electrical damage on the instrument. In order to maintain a high level of safety and to ensure the... -
Page 14: Impedance Measurements
Operation Manual easyTymp Impedance Measurements 3.1 Tympanometry Tympanometry is the objective measurement of the tympanic membrane (TM) and middle ear mobility (compliance) and pressure within the middle ear system. During the test, a low-pitched probe tone (226 Hz) is presented to the ear canal by means of the hand-held probe. -
Page 15: Contralateral Acoustic Reflex
Operation Manual easyTymp 3.3 Contralateral Acoustic Reflex A Contralateral Acoustic Reflex is available with the easyTymp Plus and Pro Version. When the stimulus presentation and measurement are made in the different ears by means of the Contra Probe. 3.4 Acoustic Reflex Decay Acoustic reflex decay, also known as adaptation, is the measurement of the acoustic reflex response during sustained stimulus presentation. -
Page 16: Getting Started
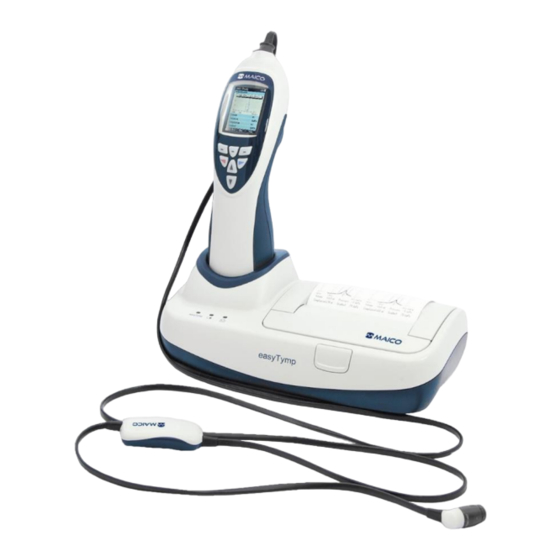
4.2 Unpacking and Inspection Check the packaging and content for damage. Prior to shipping, the easyTymp was carefully packed and inspected. However, it is good practice to thoroughly inspect the outside of the shipping box for signs of damage. If any damage is noted, please notify the carrier immediately. - Page 17 Standard Accessories: easyTymp Handheld Unit Probe Cradle Kit based on configuration Power supply unit for easyTymp handheld unit based on configuration DC USB adapter for easyTymp handheld unit based on configuration Rechargeable Battery Eartip box (configuration see below) Test Cavity...
- Page 18 Optional Accessories for easyTymp: External Probe (35cm) Wall Mount Kit for cradle with integrated eartip box, power supply unit and additional rechargeable battery Additional Accessories for easyTymp Plus and Pro Version: Contra Probe (140 cm) CIR55 (Contralateral Earphone) EARtone 3A (Contralateral Earphone)
-
Page 19: System Installation
Depending on the version (with or without printer) the cradle has up to three indication lights (Figure 2). easyTymp LED shows solid blue when it is placed inside the cradle. The battery will be charged automatically and will be fully charged after approximately three hours. - Page 20 Operation Manual easyTymp Step 2 – Pull the blue lever upwards (Figure 4). Figure 4 Step 3 – Insert paper roll into the compartment with its loose end to the front of the printer. Position the loose end into the printer roll and raise it by rotating the printer roll with your finger (Figure 5).
- Page 21 Figure 10 battery easily (Figure 11). Figure 11 Replace the lid on the easyTymp and push it upwards to close the battery compartment (Figure 12). It is recommended that the battery is removed from the instrument when it is not in use for extended time periods.
- Page 22 The following table gives an estimate of the charging time (CT) in hours for the battery. Be aware that negative numbers mean that the battery is discharging. Charge times are the same for the spare battery in the cradle and the battery in the cradled easyTymp. through...
- Page 23 NOTE: Do not pull on the extension cable as this can damage the tubing connection! Figure 15 Connect the probe to the easyTymp by lining up the red triangles and pushing the probe into the unit (Figure 16). Figure 16...
-
Page 24: Preparing The Test
4.3.1.11 Test cavities The easyTymp comes with a separate test cavity which can be used to quickly check the probe calibration validity. The test cavity includes 0.2 ml, 0.5 ml, 2.0 ml and 5.0 ml cylinders. - Page 25 Within the included eartip box, there are multiple sizes for selection as well as 2 distinct shapes, Umbrella and Mushroom. Maico recommends the use of the Umbrella eartip for screening purposes. The Umbrella eartip is never inserted into the ear canal but the examiner holds the probe/eartip in place at the entrance of the ear canal.
- Page 26 Operation Manual easyTymp 4.4.4 easyTymp Plus and Pro Version: Placing and Using the Contra Probe A clip is located on the back of the Contra Probe which can be attached to the patient’s clothing (Figure 20). For most patients it is easiest to clip the Contra Probe to the patient.
-
Page 27: Operating Panel
To get started, removing the easyTymp from the cradle will turn the device on automatically. If you don’t store the easyTymp in the cradle, press either the red or blue arrow key to switch the device on. To switch easyTymp off, press both red and blue arrow keys together and hold for one second. - Page 28 White – The probe has just been attached. Probe status is unknown. The probe status stays white in hand held use if the easyTymp is not monitoring the probe status. If the probe light stays white in any other situation easyTymp might need to be switched off and on again to regain proper probe status.
-
Page 29: Operating Easytymp
In the upper right corner an icon indicates if the easyTymp is testing the left ear or right ear 8111254 Rev. 7.0... -
Page 30: Select Test Screen
When entering the Test screen, the second line shows the name of the protocol which is in use. As soon as the easyTymp detects that the probe is in the ear, the second line will show which test of the protocol is running. -
Page 31: Done
Operating from this screen: : Top left button will print the test results of the left and right ear. Note that there should be a connection to the printer by placing the easyTymp in the cradle. : Top middle button will save the measurement of both ears. - Page 32 Operation Manual easyTymp 5.3.1 Advanced Testing: easyTymp Plus and Pro Version Acoustic Reflex Testing (Ipsi and Contra) Before performing ipsilateral and contralateral reflex testing tympanometry will be performed (Figure 29). NOTE: Deflection of reflexes can be positive or negative and is selected within the setup menu.
-
Page 33: Select Patient & Save
Operation Manual easyTymp ETF Testing Intact Instructions for testing will be displayed at the top of the screen (Figure 31). or Blue: represents test ear (2) Grey: represents “Valsalvation” (3) Green: represents “Swallow” Figure 31 Perforated Instruct patient to swallow. -
Page 34: Edit New
After saving, all data is deleted and easyTymp returns in the Test screen, ready for testing. buttons will bring you to the top or bottom of the client list respectively. -
Page 35: View Patients
Operation Manual easyTymp 5.6 View Patients This screen shows a list of clients (Figure 35). When one or more sessions are stored, the square in front of the patient’s name is filled. If a session is not stored yet, this square will be empty. -
Page 36: Edit Details
Operation Manual easyTymp 5.8 Edit Details This screen shows the client ID, First Name, Last Name and Birth Date (Figure 37). Operating from this screen: brings you back to the View Details screen. will select the highlighted character and put it where the cursor is placed. Backspace is an arrow in the top right corner. -
Page 37: Setup
Figure 39 are included in the selected session. 5.10 Setup To change the Setup of the easyTymp navigate from Test screen to Select test and then to easyTymp (Figure 40). Operating from this screen: brings you back to the Select test screen. - Page 38 Operation Manual easyTymp 5.10.1 Setup Language Use right and left arrow keys to adjust language (Figure 41). Available languages are English, German, Spanish, French, Italian, Chinese, Japanese and Polish. Figure 41 5.10.2 Setup Date & Time arrow keys will scroll through the options (Figure 42).
- Page 39 Operation Manual easyTymp Figure 43 Reflex Presentation: Negative or Positive deflection in the graphs 5.10.4 Setup Printer buttons will scroll through the options (Figure 44). buttons to adjust selection. Print Options: automatic or manual. Reflex Presentation: table or graph. Printing: enabled or disabled.
- Page 40 Operation Manual easyTymp 5.10.6 Setup License Option licenses unlock further measurements (Figure 46): : By pressing the Top right button you can select the module to view, add or change the license key. NOTE: License should be modified by the licensed distributor only.
-
Page 41: Easytymp Plus And Pro Version: Contra Probe Button
(Figure 49). Figure 49 5.11 easyTymp Plus and Pro Version: Contra Probe Button The Contra Probe button will change ears as long as the probe detects it is not in the ear. When the probe is in an ear it will interrupt the testing and bring you to the Done! Screen, and from there also back to the Test screen with a second press of the button. -
Page 42: Connecting To A Pc
10. In easyTymp handheld device, select “select test””easyTymp””Printer””select.” Make sure this setting is on “Manual” then press “Save.” 11. Connect USB cord to easyTymp cradle and connect the other end of USB to the computer. 12. Follow any prompts on the screen to load drivers. -
Page 43: Cleaning And Disinfection Recommendations
Please disinfect the instrument and its accessories in dependence on the specific existing infection potential. Recommendations for cleaning and disinfection of MAICO device presented in this document are not intended to replace or contradict policies in effect or procedures required for infection control at the facility. -
Page 44: Cleaning The Probe Tip
Operation Manual easyTymp Discard single-use equipment after use! In case of re-use of the WARNING single-use equipment you enhance the risk of cross contamination! 7.2 Cleaning the probe tip In order to secure correct impedance measurements it is important to make sure that the probe system is kept clean at all times. - Page 45 Operation Manual easyTymp Insert the blue end of the floss from back to front through one of the probe channels. Pull the floss along its entire length through the channel (Figure 53). Figure 53 Proceed in the same way with all 4 probe channels.
- Page 46 Operation Manual easyTymp Cleaning alternative: Use the cleaning set from the eartip box (Figure 57): Take the cleaning tool apart to find the thin brush and thin rigid plastic cord (Figure 58). Figure 57 Figure 58 Use the plastic cord or brush to push debris out of the probe tip (Figure 59).
-
Page 47: Warranty, Maintenance And After-Sales Service
8.1 Warranty The MAICO device is guaranteed for 2 years. This warranty is extended to the original purchaser of the instrument by MAICO through the distributor from whom it was purchased and covers defects in material and workmanship for a period of two years from date of delivery of the instrument to the original purchaser. -
Page 48: Technical Specifications
10 of the 93/42/EEC (Appendix IX). 9.2 Technical Data The easyTymp is an active, diagnostic medical product according to the class IIa of the EU medical directive 93/42/EEC. Approval of the quality system is made by TÜV – identification no 0123. - Page 49 Operation Manual easyTymp Dimension and weight Dimension W x D x H: 80 x 300 x 70 mm / 3.15” x 11.81” x 2.76” Weight 427 g / 1 lb Warm-up time less than 10 minutes Impedance Measuring System Probe tone:...
- Page 50 Input/output for computer communication. Memory: Theoretically an infinite amount of test results can be stored on the PC. The easyTymp hand held unit is delivered with a 2 GB memory card, enough for storing more than a quarter of a million tests.
- Page 51 Operation Manual easyTymp Calibration properties Calibrated Probe system: Ipsilateral and Contralateral Earphone: is transducers: integrated in the probe system. Probe frequency transmitter and receiver and pressure transducer is integrated in the probe system. Accuracy: General Generally the instrument is made and...
- Page 52 Operation Manual easyTymp Reflex calibration standards and spectral properties: General Specifications for stimulus signals are made to follow IEC 60645-5 3 dB Ipsi- and Contra- Pure tone: lateral Earphone Broad-band MAICO Standard As “Broad-band noise” specified in IEC 60645- noise (BBN): 5, but with 500 Hz as lower cut-off frequency.
-
Page 53: Connections And Pin Assignment
Operation Manual easyTymp 9.3 Connections and Pin Assignment Inputs Connector Pin Assignment Type USB Type „B“ USB port for communication power Mains cable DC socket 24 V/1 A Outputs Connector Pin Assignment Type USB Type „B“ USB port for communication... -
Page 54: Reference Values For Stimulus Calibration
-10.0 -8.0 Coupler types used by calibration IOW Probe (easyTymp) and CIR55 are calibrated using an IEC 60380-5 (2cc) acoustic coupler made in accordance to IEC 60318-5. DD45 are calibrated using a 6cc acoustic coupler made in accordance to IEC60318-3. -
Page 55: Electromagnetic Compatibility
The use of accessories, transducers and cables other than delivered from MAICO, with the exception of servicing parts sold by MAICO as replacement parts for internal components, may result in increased emissions or decreased immunity of the device. - Page 56 Operation Manual easyTymp Recommended separation distances between portable and mobile RF communications equipment and the easyTymp. The device is intended for use in an electromagnetic environment in which radiated RF disturbances are controlled. The customer or the user of the device can help prevent...
- Page 57 Operation Manual easyTymp Guidance and Manufacturer’s Declaration – Electromagnetic Immunity The easyTymp is intended for use in the electromagnetic environment specified below. The customer or the user of the device is should assure that it is used in such an environment.
- Page 58 Operation Manual easyTymp Guidance and manufacturer’s declaration — electromagnetic immunity The easyTymp is intended for use in the electromagnetic environment specified below. The customer or the user of the device should assure that it is used in such an environment.
-
Page 59: Test Protocols
Operation Manual easyTymp 10 Test Protocols 01 226Hz Tympanometry, Frequency: 226 Hz Earside: Ipsilateral 02 1kHz Tympanometry, Frequency: 1 kHz Earside: Ipsilateral 03 226Hz + Ipsi Reflex Auto Tympanometry, Frequency: 226 Hz Number of Reflexes tested = 4, Frequencies: 0.5, 1.0, 2.0, 4.0... - Page 60 Operation Manual easyTymp 08 226Hz + Ipsi-Contra 90 Tympanometry, Frequency: 226 Hz Number of Reflexes tested = 8, Frequencies: 0.5, 1.0, 2.0, 4.0 Intensity Reflex (Intensity in dB HL) = 90 Earside: Ipsi- and Contralateral 09 1kHz + Ipsi-Contra Auto Tympanometry, Frequency: 1 kHz Number of Reflexes tested = 8, Frequencies: 0.5, 1.0, 2.0, 4.0...
-
Page 61: Troubleshooting
Operation Manual easyTymp 11 Troubleshooting Issue Solution White If the device shows white screen after turning on, make sure battery is Screen fully charged. Frozen If the display freezes try Display o to restart the unit o to shut off the system and change the battery NOTE: Please do not take out the battery before turn off. - Page 62 4. Make sure the easyTymp option is selected in the PC software (for detail contact your distributor). 5. Try to reinstall the PC software. Check the device manager in the PC. If the easyTymp does not appear in the list install the driver again using the installation CD. 8111254 Rev. 7.0...
-
Page 63: Appendix
Operation Manual easyTymp 12 Appendix 1 kHz L. Macedo de Resende; J. dos Santos Ferreira; S. Alves da Silva Carvalho; I. Oliveira; I. Barreto Bassi, „Tympanometry with 226 and 1000 Hertz tone probes in infants” Braz. j. otorhinolaryngol. vol.78 no.1 São Paulo Jan./Feb. 2012 Carvallo RMM, „Medida de imitância acústica em crianças de zero a oito meses de... - Page 64 Operation Manual easyTymp Electrical Safety, EMC and Associated Standards (1) UL 60601-1: Medical Electrical Equipment, Part 1 General Requirements for Safety (2) IEC 60601-1: Medical Electrical Equipment, Part 1 General Requirements for Safety (3) CAN/CSA-C22.2 No. 60601-1: Medical Electrical Equipment, Part 1 General...
- Page 65 Operation Manual easyTymp Specifications are subject to change without notice. MAICO Diagnostics GmbH Sickingenstr. 70-71 10553 Berlin Germany Tel.: + 49 30 / 70 71 46-50 Fax: + 49 30 / 70 71 46-99 E-mail: sales@maico.biz Internet: www.maico.biz 8111254 Rev. 7.0...
Need help?
Do you have a question about the easyTymp and is the answer not in the manual?
Questions and answers