IBM Storwize V5000 Gen2 Quick Installation Manual
Hide thumbs
Also See for Storwize V5000 Gen2:
- Quick installation manual (84 pages) ,
- Quick installation manual (204 pages)
Table of Contents
Advertisement
Advertisement
Table of Contents

Related Manuals for IBM Storwize V5000 Gen2


Summary of Contents for IBM Storwize V5000 Gen2
- Page 1 IBM Storwize V5000 Gen2 Quick Installation Guide...
- Page 2 • The information in the “Safety and environmental notices” on page xv • The information in the IBM Environmental Notices and User Guide (provided on a DVD) This edition applies to version 8, release 2, modification 1 and to all subsequent modifications until otherwise indicated in new editions.
-
Page 3: Table Of Contents
Contents Figures........................ vii Tables........................ xiii Safety and environmental notices................ xv Safety notices and labels........................... xv Caution notices for the system......................xvi Danger notices for the system ......................xix Special caution and safety notices......................xx General safety............................xx Handling static-sensitive devices......................xxi Power and cabling information for NEBS (Network Equipment-Building System) GR-1089- CORE..............................xxi Environmental notices..........................xxii... - Page 4 Powering off the expansion enclosure: 2077-92F ................111 Storwize V5000 2077-92F expansion enclosure LEDs and indicators..........112 Storwize V5000 Gen2 5U expansion enclosure parts ..............117 Connecting Ethernet cables to the node canisters.................120 Connecting Ethernet cables to 1 Gbps iSCSI 4-port host interface adapters........122 Connecting Ethernet cables to 25 Gbps iSCSI 2-port host interface adapters........
- Page 5 Index........................ 149...
-
Page 7: Figures
Figures 1. Storwize V5010 control enclosure........................6 2. Storwize V5020 control enclosure........................6 3. Storwize V5030 and Storwize V5030F control enclosure................6 4. Data ports on the rear of the Storwize V5010 control enclosure..............7 5. Data ports on the rear of the Storwize V5020 control enclosure..............7 6. - Page 8 24. Features on the rear of the 2077-92F expansion enclosure..............37 25. 2077-92F support rails..........................38 26. 2077-92F CMA assemblies........................39 27. Tray containing expansion enclosure parts..................... 40 28. Packaging materials..........................41 29. Packaging for fascia..........................42 30. Releasing the 2077-92F cover ........................ 43 31.
- Page 9 49. Upper and lower cable-management arms....................55 50. Upper and lower cable-management arms....................55 51. Connectors for the cable management arm.....................56 52. Install the inner connector of the upper CMA to the inner member of the support rail......56 53. Install the outer connector of the upper CMA to the outer member of the support rail......56 54.
- Page 10 74. Remove fascia components from the expansion enclosure ..............71 75. Fascia removed from the PSUs ........................ 72 76. Correct orientation for SAS cable connectors..................73 77. Example of SAS cables routed through the cable management arms............ 74 78. SAS cable correctly inserted into the SAS port ..................74 79.
- Page 11 99. Fan module release tab..........................95 100. Remove fan module..........................96 101. Fan module LED ............................. 97 102. Location of the FIB cover........................97 103. Loosen the FIB screws ...........................98 104. Remove the FIB from the chassis......................98 105. FIB parts removed from the chassis...................... 99 106.
- Page 12 133. Example Storwize V5030 configuration with 10 Gbps iSCSI-FCoE 4-port host interface adapters..124 134. Example Storwize V5000 Gen2 configuration with two Fibre Channel cables per canister....125 135. Example Storwize V5020 configuration with four Fibre Channel cables per canister....... 125 136.
- Page 13 1. IBM websites for help, services, and information..................xxiii 2. Storwize V5000 Gen2 library........................xxiv 3. IBM websites for help, services, and information..................xxv 4. Steps for different installation scenarios for Storwize V5000 Gen2 systems..........1 5. Storwize V5000 Gen2 control enclosures....................4 6. Storwize V5000 Gen2 expansion enclosures....................5 7.
- Page 14 24. Expansion canister and SAS port LEDs ....................117 25. Supported expansion enclosure SAS drives..................118 26. Storwize V5000 Gen2 system and warranty summary................. 119 27. Other expansion enclosure parts......................119 28. Default user name and password for the initialization GUI..............133...
-
Page 15: Safety And Environmental Notices
DANGER: A danger notice indicates the presence of a hazard that has the potential of causing death or serious personal injury. (D002) 2. Locate the IBM Systems Safety Notices with the user publications that were provided with your system hardware. -
Page 16: Caution Notices For The System
CAUTION: A caution notice indicates the presence of a hazard that has the potential of causing moderate or minor personal injury. (C001) 2. After you download the IBM System Safety Notices document, open it. 3. Under the language, find the matching identification number. Review the topics about the safety notices to ensure that you are in compliance. - Page 17 CAUTION: CAUTION regarding IBM provided VENDOR LIFT TOOL: • Operation of LIFT TOOL by authorized personnel only • LIFT TOOL intended for use to assist, lift, install, remove units (load) up into rack elevations. It is not to be used loaded transporting over major ramps nor as a replacement for such designated tools like pallet jacks, walkies, fork trucks and such related relocation practices.
- Page 18 • Ensure that there is no stabilizer bracket installed on the rack cabinet during movement. • Do not use a ramp inclined at more than 10 degrees. • When the rack cabinet is in the new location, complete the following steps: xviii Storwize V5000 Gen2: Quick Installation Guide...
-
Page 19: Danger Notices For The System
Electrical voltage and current from power, telephone, and communication cables are hazardous. To avoid a shock hazard: • If IBM supplied a power cord(s), connect power to this unit only with the IBM provided power cord. Do not use the IBM provided power cord for any other product. -
Page 20: Special Caution And Safety Notices
• Place removed covers and other parts in a safe place, away from all personnel, while you are servicing the unit. • Keep your tool case away from walk areas so that other people cannot trip over it. xx Storwize V5000 Gen2: Quick Installation Guide... -
Page 21: Handling Static-Sensitive Devices
Power and cabling information for NEBS (Network Equipment-Building System) GR-1089-CORE The following comments apply to IBM storage devices that have been designated as conforming to NEBS (Network Equipment-Building System) GR-1089-CORE. The equipment is suitable for installation at: •... -
Page 22: Environmental Notices
Environmental notices This information contains all the required environmental notices for IBM Systems products in English and other languages. The IBM Systems Environmental Notices includes statements on limitations, product information, product recycling and disposal, battery information, flat panel display, refrigeration and water-cooling systems, external power supplies, and safety data sheets. -
Page 23: About This Guide
IBM Knowledge Center for Storwize V5000 Gen 2 The information collection in the IBM Knowledge Center contains all of the information that is required to install, configure, and manage the system. The information collection in the IBM Knowledge Center is updated between product releases to provide the most current documentation. -
Page 24: Related Websites
Publications in the Knowledge Center Each PDF publication in the library is available in the IBM Knowledge Center by clicking the title in the "Link to PDF" column: Table 2. Storwize V5000 Gen2 library Title Description Order number IBM Storwize V5000 Gen2 Quick... - Page 25 Help and service Before you call for support, be sure to have your IBM Customer Number available. If you are in the US or Canada, you can call 1 (800) IBM SERV for help and service. From other parts of the world, see http:// www.ibm.com/planetwide for the number that you can call.
- Page 26 Also, some documents are available through the IBM Publications Center. Sign up for the Support Line Offering If you have questions about how to use and configure the machine, sign up for the IBM Support Line offering to get a professional answer.
-
Page 27: Chapter 1. Before You Begin The Installation
• This guide presumes that you have read the planning information regarding your physical environment that is available in the IBM Knowledge Center for Storwize V5000 Gen2. • Ensure that any cables that you are supplying are available for installation. - Page 28 Table 4. Steps for different installation scenarios for Storwize V5000 Gen2 systems (continued) New system Existing system Control enclosure only Control enclosure and Adding expansion Adding a control one or more expansion enclosures enclosure and expansion enclosures enclosures ( Storwize V5030 only) “Connecting Fibre...
-
Page 29: Reviewing Your Packing Slip
Electrical voltage and current from power, telephone, and communication cables are hazardous. To avoid a shock hazard: – If IBM supplied a power cord(s), connect power to this unit only with the IBM provided power cord. Do not use the IBM provided power cord for any other product. -
Page 30: Storwize V5000 Gen2 Control Enclosures
Use the following checklist to check off the items in your order as you verify that they are included in your shipment. __ • Table 5 on page 4 summarizes the machine types and models of the Storwize V5000 Gen2 control enclosures. -
Page 31: Storwize V5000 Gen2 Expansion Enclosures
__ – Two rail springs (if appropriate for the model of rails) __ – Two sets of rail-mount screws and alternative rail-mount pins (large and small) for non-IBM racks __ • Drive bay blanking plates (installed in the enclosure) Options applicable to control enclosures __ •... -
Page 32: Identify The Hardware Components
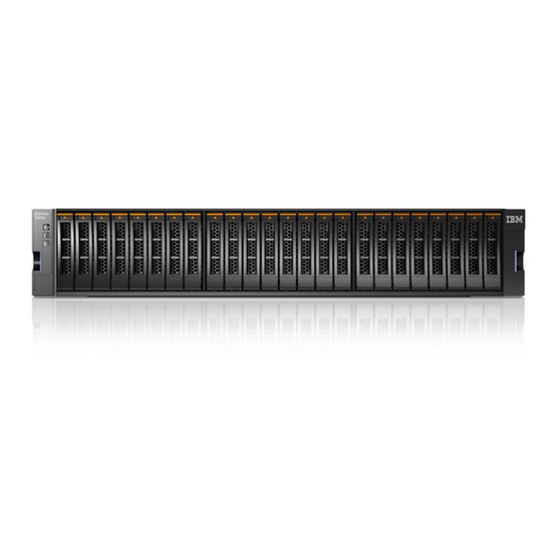
Control enclosure components The following figures show the rear view of the Storwize V5000 Gen2 control enclosures. The location of the power supply units and node canisters are also shown. Figure 1 on page 6 shows the Storwize V5010 control enclosure. -
Page 33: Data Ports On The Rear Of The Storwize V5010 Control Enclosure
The following figures show the location of the ports that are available at the back of the Storwize V5000 Gen2 control enclosures. Note: The figures show an enclosure that is equipped with alternating current (AC) power supplies. Some enclosure models have direct current (DC) power supplies. For more information about DC power supply units, see “Direct current power supply units”... - Page 34 Figure 8. SAS ports and LEDs in rear view of a 2U expansion canister Support rails and enclosures Storwize V5000 Gen2 systems use the same rails and enclosures for both control and expansion enclosures. All Storwize V5000 Gen2 models use the same expansion enclosure.
-
Page 35: Direct Current Power Supply Units
Electrical voltage and current from power, telephone, and communication cables are hazardous. To avoid a shock hazard: • If IBM supplied a power cord(s), connect power to this unit only with the IBM provided power cord. Do not use the IBM provided power cord for any other product. - Page 36 • See the specifications in the product documentation for the required circuit-breaker rating for branch circuit overcurrent protection. • Use copper wire conductors only. See the specifications in the product documentation for the required wire size. 10 Storwize V5000 Gen2: Quick Installation Guide...
-
Page 37: Dc Power Supply Unit Connectors And Indicators
• See the specifications in the product documentation for the required torque values for the wiring-terminal screws. Note: In Statement 34 above: • Replace IEC 60950-1, First Edition with IEC 60950-1, Second Edition Amendment 1. • The required circuit breaker rating is 20 amps. DC power supply unit connectors and indicators Each enclosure can contain two DC power supply units. - Page 38 Use the supplied cables to connect the DC PSUs to the power sources. Use only the IBM supplied DC power cable (IBM part number 00AR087) to connect the unit to a DC power source.
-
Page 39: Verify Environmental Requirements
This guide assumes that you have completed the physical planning for the environment of your system. If you have not done the environmental planning for your system, see the "Storwize V5000 Gen2 physical installation planning" topic in the IBM Knowledge Center for Storwize V5000 Gen2. - Page 40 • Add the second expansion enclosure directly above the control enclosure. • Add the third expansion enclosure directly below the first. • Add the fourth expansion directly above the second, and so on. 14 Storwize V5000 Gen2: Quick Installation Guide...
-
Page 41: Chapter 2. Installing The System Hardware
3. If a Storwize V5000 Gen2 system is clustered with a Storwize V5000 Gen 2 system, NEBS compliance cannot be enabled. NEBS compliance is not supported on Storwize V5000 Gen 2 systems. -
Page 42: Enclosure Support Rails
Push one looped end of a spring over one stud on the inside of the rail. (See Figure 12 on page 17.) b) Stretch the spring slightly and push the other looped end of the spring onto the other stud on the inside of the rail. 16 Storwize V5000 Gen2: Quick Installation Guide... -
Page 43: Installing The Rail Spring
Figure 12. Installing the rail spring 3. Working at the front of the rack cabinet, identify the two standard rack units (2U) of space in the rack into which you want to install the support rails. Figure 13 on page 17 shows two rack units with the front mounting holes identified. Figure 13. - Page 44 7. On the rear of the rail, press the two bracket pins into the holes in the rack flanges. 8. Close the rear hinge bracket to secure the rail to the rack cabinet flange (step 4 in Figure 15 on page 19). 18 Storwize V5000 Gen2: Quick Installation Guide...
-
Page 45: Installing Enclosures
Figure 15. Closing the hinge brackets 9. Secure the rear bracket to the rail with a black M5 screw (step 5 in Figure 15 on page 19). 10. On the front of the rail, press the two bracket pins into the holes in the rack flanges. 11. - Page 46 Fit the slot on the top of the end cap over the tab on the chassis flange. c) Rotate the end cap down until it snaps into place. d) Ensure that the inside surface of the end cap is flush with the chassis. 20 Storwize V5000 Gen2: Quick Installation Guide...
-
Page 47: Connecting Expansion Enclosures To The Control Enclosure
Connecting expansion enclosures to the control enclosure If you have installed expansion enclosures in the rack, you must connect them to the control enclosure. About this task This task applies if you are installing one or more expansion enclosures. Each control enclosure in the system can manage two sets of expansion enclosures. -
Page 48: Connecting The Sas Cables To A Storwize V5010 System
Figure 19. Connecting the SAS cables to a Storwize V5020 system Figure 20 on page 23 shows how to connect SAS cables on a Storwize V5030 or Storwize V5030F system. In this figure, two expansion chains are connected to the Storwize V5030 system. 22 Storwize V5000 Gen2: Quick Installation Guide... -
Page 49: Connecting The Sas Cables To A Storwize V5030 System
Figure 20. Connecting the SAS cables to a Storwize V5030 system 2. To add a second expansion chain to the Storwize V5030 control enclosure, use the supplied SAS cables to connect the control enclosure to the expansion enclosure at rack position 2, as shown in Figure 20 on page 23. -
Page 50: Sas Cabling Guidelines
• No cable can be connected between a port on a left canister and a port on a right canister. • A cable must not be connected between ports in the same enclosure. 24 Storwize V5000 Gen2: Quick Installation Guide... -
Page 51: Installing An Optional 5U Sas Expansion Enclosure
Important: The following topics contain information about the required steps to remove and install parts during the initial installation of a 5U expansion enclosure For information about the procedures for other parts of the 5U expansion enclosure, refer to IBM Knowledge Center. Safety notices and considerations: 2077-92F Before you install, service, or move the expansion enclosure, always read and follow the safety notices and guidelines. - Page 52 It is the responsibility of the customer to ensure that the outlet is correctly wired and grounded to prevent an electrical shock. (R001 part 1 of 2) 26 Storwize V5000 Gen2: Quick Installation Guide...
- Page 53 CAUTION: • Do not install a unit in a rack where the internal rack ambient temperatures will exceed the manufacturer's recommended ambient temperature for all your rack-mounted devices. • Do not install a unit in a rack where the air flow is compromised. Ensure that air flow is not blocked or reduced on any side, front, or back of a unit used for air flow through the unit.
- Page 54 (C011) CAUTION: To avoid personal injury, before lifting this unit, remove all appropriate subassemblies per instructions to reduce the system weight. (C012) 28 Storwize V5000 Gen2: Quick Installation Guide...
- Page 55 CAUTION: CAUTION regarding IBM provided VENDOR LIFT TOOL: • Operation of LIFT TOOL by authorized personnel only • LIFT TOOL intended for use to assist, lift, install, remove units (load) up into rack elevations. It is not to be used loaded transporting over major ramps nor as a replacement for such designated tools like pallet jacks, walkies, fork trucks and such related relocation practices.
-
Page 56: Weight Considerations: 5U Sas Expansion Enclosure
– Removing the expansion enclosure from its packing material – Lifting and installing the expansion enclosure in the rack for the first time – Reinstalling the expansion enclosure after you complete a service task (for example, replacing the enclosure FRU). 30 Storwize V5000 Gen2: Quick Installation Guide... -
Page 57: Weight Of Expansion Enclosure Parts
• At least three persons are required to move the enclosure while it is in the rack (if you are moving the enclosure off the rails). Even after the drives, power supply units, secondary expander modules, canisters, fans, and top cover are removed, the enclosure weighs approximately 43 kg (95 lbs). •... -
Page 58: Weight Of Expansion Enclosure Drives
3.84 TB 2.5-inch tier 01LJ046 For systems with a 0.224 0.494 1 flash drive 1-year warranty (2077-xxx). 3.84 TB 2.5-inch tier For systems with a 0.224 0.494 1 flash drive 3-year warranty (2078-xxx). 32 Storwize V5000 Gen2: Quick Installation Guide... -
Page 59: Storwize V5000 Gen2 System And Warranty Summary
(2078-xxx). Note: The part numbers and feature codes for the tier 1 flash drives vary, depending on the model type and warranty of the Storwize V5000 Gen2 system. Table 15 on page 33 summarizes the warranty values. Table 15. Storwize V5000 Gen2 system and warranty summary... - Page 60 • Enclosure (01LJ607 or • Drives 01LJ112) • Cover • Secondary expansion modules • Fascia (1U and 4U) • PSUs • Expansion canisters • Fan modules • Fan interface board • Display assembly 34 Storwize V5000 Gen2: Quick Installation Guide...
- Page 61 Table 17. Enclosure weight as FRUs are installed (continued) Enclosure assembly Approximate weight FRUs installed FRUs not installed 61.5 135.4 Note: The following FRUs • Fascia (1U and 4U) are installed when the • Drives enclosure is initially shipped. • Enclosure (01LJ607 or 01LJ112) •...
-
Page 62: Identify The Hardware Components: 2077-92F
Figure 22. Features on the front of the 2077-92F expansion enclosure Display panel indicators Rack retention thumb screws Power supply unit indicators Power supply units (PSUs) PSU fascia (1U) 36 Storwize V5000 Gen2: Quick Installation Guide... -
Page 63: Features On The Rear Of The 2077-92F Expansion Enclosure
Front fascia (4U) However, as Figure 23 on page 37 shows, the 4U and 1U fascias are packaged separately. You must attach them to the front of the 2077-92F expansion enclosure as part of the initial installation process. Figure 23. Front fascia of the 2077-92F expansion enclosure Components on the rear of the enclosure Figure 24 on page 37 shows the components on the rear of the 2077-92F expansion enclosure. - Page 64 The cable management arm (CMA), which consists of an upper and lower assembly, are packaged separately from the expansion enclosure. As Figure 26 on page 39 shows, each CMA assembly is attached to the rear end of the support rails. 38 Storwize V5000 Gen2: Quick Installation Guide...
-
Page 65: Unpacking And Installing The Enclosure: 2077-92F
Figure 26. 2077-92F CMA assemblies Unpacking and installing the enclosure: 2077-92F Before you unpack and install the 2077-92F expansion enclosure, ensure that you review and follow the installation checklist and safety notices. Before you begin CAUTION: The weight of this part or unit is more than 55 kg (121.2 lb). It takes specially trained persons, a lifting device, or both to safely lift this part or unit. - Page 66 2. Remove the foam end pieces from the top of the 2077-92F expansion enclosure. 3. Cut the corners of the shipping box and fold them down to uncover the sides and faces of the expansion enclosure, as shown in Figure 28 on page 41. 40 Storwize V5000 Gen2: Quick Installation Guide...
- Page 67 Figure 28. Packaging materials Enclosure Top of shipping box, folded back. Foam protectors 4. Remove the top cover, as described in “Removing the top cover: 2077-92F ” on page 42. 5. With two or more persons, push the expansion enclosure sideways onto an adjacent flat bed lift. Keep the remaining foam block protectors attached to the enclosure.
-
Page 68: Removing The Top Cover: 2077-92F
15 minutes of its removal. When the cover is removed, the reduction in airflow through the enclosure might cause the enclosure or its components to shut down to protect from overheating. 42 Storwize V5000 Gen2: Quick Installation Guide... -
Page 69: Installing Or Replacing The Support Rails: 2077-92F
Procedure 1. Slide the release latch ( ) in the direction that is shown in Figure 30 on page 43. Figure 30. Releasing the 2077-92F cover 2. Slide the cover toward the front of the expansion enclosure ( ), as shown in Figure 30 on page 43. 3. -
Page 70: Support Rails
Figure 33 on page 44. Figure 33. Detaching the inner rail section 4. Use four M4 screws to attach the inner rail to the side of the enclosure. Figure 34 on page 45 shows the screw locations. 44 Storwize V5000 Gen2: Quick Installation Guide... - Page 71 Figure 34. Screw locations to attach the inner rail to the enclosure 5. Install the inner section of the rail onto each side of the expansion enclosure, as shown in Figure 35 on page 45. Figure 35. Attaching the inner rail section to the enclosure 6.
-
Page 72: Installing The Rail Assembly To The Rack Frame
Figure 36. Installing the rail assembly to the rack frame For example, Figure 37 on page 46 shows the front of the rail that is attached to the frame. Figure 37. Example of the required rack space 46 Storwize V5000 Gen2: Quick Installation Guide... -
Page 73: Installing Or Replacing An Expansion Enclosure In A Rack: 2077-92F
7. Repeat steps “5” on page 45 through “6” on page 45 to install the opposite rail. 8. Install the expansion enclosure in the rack, as described in “Installing or replacing an expansion enclosure in a rack: 2077-92F ” on page 47. Installing or replacing an expansion enclosure in a rack: 2077-92F Use the following procedure to place the 2077-92F expansion enclosure in a rack during the installation process. -
Page 74: Installing Or Replacing An Expansion Canister: 2077-92F
An expansion canister provides SAS connectivity between the 2077-92F expansion enclosure and Storwize V5000 Gen2 system. The expansion enclosure contains two expansion canisters. Figure 40 on page 49 shows an example of an expansion canister. If either of the two expansion canisters has a failure, the other expansion canister assumes the full I/O load. -
Page 75: Expansion Canister
Figure 40. Expansion canister Canister fault indicator Canister status Canister power indicator SAS link fault indicators SAS link operational indicators Canister release handles Procedure 1. Disconnect the elbow of the lower cable management arm to swing it out of the way, as shown in Figure 41 on page 49. -
Page 76: Removing Or Moving The Cable-Management Arm: 2077-92F Or 2078-92F
Remove the upper CMA assembly The connectors of the CMA are installed on the rail hooks at the end of the support rails. Figure 43 on page 51 shows the connectors on the upper CMA assembly. 50 Storwize V5000 Gen2: Quick Installation Guide... -
Page 77: Connectors For The Upper Cable Management Arm
Figure 43. Connectors for the upper cable management arm Inner connector on the upper CMA Connector base on inner rail member Outer connector on the upper CMA Connector base on outer rail member Support rail connector on the upper CMA Connector base on outer rail member 1. - Page 78 To complete most service tasks, you can swing the CMA assemblies out of the way. You can move each arm independently or you can move both arms. For example, Figure 45 on page 53 shows that both of the CMA assemblies are swung away from the rear of the enclosure. 52 Storwize V5000 Gen2: Quick Installation Guide...
-
Page 79: Upper And Lower Cma Assemblies Moved Aside
Figure 45. Upper and lower CMA assemblies moved aside Figure 46 on page 53 shows that the lower CMA assembly is swung away from the rear of the enclosure so that the expansion canister is accessible. Figure 46. Lower CMA assembly moved Procedure 1. -
Page 80: Installing Or Replacing The Cable-Management Arm: 2077-92F
CMA with a new one from FRU stock. The cable management arm (CMA) consists of an upper arm and a lower arm assembly, as Figure 49 on page 55 shows. 54 Storwize V5000 Gen2: Quick Installation Guide... -
Page 81: Upper And Lower Cable-Management Arms
Figure 49. Upper and lower cable-management arms As Figure 50 on page 55 shows, the support rail connectors of each CMA assembly are installed on the rail hooks at the end of the support rails. Figure 50. Upper and lower cable-management arms Procedure 1. -
Page 82: Connectors For The Cable Management Arm
) to the outer member of the left support rail ), as shown in Figure 53 on page 56. Figure 53. Install the outer connector of the upper CMA to the outer member of the support rail 56 Storwize V5000 Gen2: Quick Installation Guide... -
Page 83: Attach The Support Rail Connector Of The Upper Cma To The Right Support Rail
4. Attach the support rail connector on the upper CMA assembly ( ) to the connector base on the right support rail ( ), as shown in Figure 54 on page 57. Figure 54. Attach the support rail connector of the upper CMA to the right support rail Ensure the cable-management arm connector attaches securely to the hooks on the rails. -
Page 84: Installing Or Replacing The Top Cover: 2077-92F
) as shown in Figure 57 on page 59. 3. Slide the cover towards the back of the enclosure ( ) back until it stops, as shown in Figure 57 on page 59. 58 Storwize V5000 Gen2: Quick Installation Guide... -
Page 85: Installing Or Replacing A Drive: 2077-92F
Figure 57. Replacing the 2077-92F top cover 4. Verify that the cover correctly engages the cover release latch and all of the inset tabs on the expansion enclosure. 5. Lock the cover into position by sliding the release lever , as shown in Figure 58 on page 59 Figure 58. -
Page 86: Drive Assembly
For example, in Figure 61 on page 61, the drives are installed correctly. Drives are installed in slots 1 -14 of row A and the installation continues in slot 15 in row B. 60 Storwize V5000 Gen2: Quick Installation Guide... - Page 87 Figure 61. Correct drive installation In Figure 62 on page 61, the drives are not installed correctly. Slot 1 (A1) does not contain a drive. In addition, drives are installed in row B even though row A contains empty drive slots. Figure 62.
-
Page 88: Replace The Drive
10. Ensure that the top toe of the latch is also fully engaged ( in Figure 63 on page 62). 11. Repeat steps “4” on page 61 through “10” on page 62 for each drive you are replacing. 62 Storwize V5000 Gen2: Quick Installation Guide... -
Page 89: Installing Or Replacing A Secondary Expander Module: 2077-92F
(L005) CAUTION: • Only an IBM Service Support Representative (SSR) can remove or replace the secondary expander module from an enclosure (FRU P/N 01LJ112) that is powered on. If the 01LJ112 enclosure is powered on, use caution and avoid contact with the connectors on the main board. -
Page 90: Location Of Secondary Expander Modules
Figure 65. LEDs on a secondary expander module Online indicator Fault indicator 3. Rotate both handles on the new secondary expander module to an open position, as shown in Figure 66 on page 65. 64 Storwize V5000 Gen2: Quick Installation Guide... -
Page 91: Replace The Secondary Expander Module
Figure 66. Open the secondary expander module handles 4. Align the edges of the secondary expander module carefully in the guide slot in the enclosure, as shown in Figure 67 on page 65. Figure 67. Replace the secondary expander module 5. -
Page 92: Installing Or Replacing The Fascia: 2077-92F
2. Replace the four screws to reattach the 4U fascia. Secure the screws from the back of the flange and into the rear of the fascia. Each side of the 4U fascia contains two screws. Attach the bottom (1U) fascia 66 Storwize V5000 Gen2: Quick Installation Guide... -
Page 93: Installing Or Replacing A Power Supply: 2077-92F
3. Reattach the bottom 1U fascia that covers the power supply units (PSUs). Align the fascia with the enclosure and gently push it until it clicks into place on the chassis, as shown in Figure 69 on page Align the tab on each side of the 1U fascia with the corresponding slots on the enclosure flange. Pins on each flange must also align with a hole in each side of the 1U fascia. - Page 94 2. Rotate the handles on the PSU outward, as shown in Figure 70 on page 68. Figure 70. Preparing to install the power supply 3. Slide the PSU forward into the chassis until it clicks in to place, as shown in Figure 71 on page 69. 68 Storwize V5000 Gen2: Quick Installation Guide...
- Page 95 Figure 71. Install the power supply 4. Close the handles on the PSU and ensure the handle lock clicks in to place. 5. Verify that the AC input and the DC power indicators are lit on the front of the PSU, as shown in Figure 72 on page 69.
-
Page 96: Removing The Fascia: 2077-92F
Remove the front (4U) fascia 2. Remove the front fascia by removing the two screws that attach the fascia to the flange on each side of the chassis, as shown in Figure 74 on page 71. 70 Storwize V5000 Gen2: Quick Installation Guide... - Page 97 Figure 74. Remove fascia components from the expansion enclosure Remove the bottom (1U) fascia 3. Gently pull on each side of the PSU fascia to remove it from the chassis, as shown in Figure 74 on page 71. The PSU fascia disengages from the slot and pin that connect it to each side of the chassis. You must remove the bottom fascia to access and service either PSU.
-
Page 98: Removing And Installing A Sas Cable: 2077-92F
3. Release the connector and slide it out of the SAS port. 4. Repeat steps “2” on page 72 and “3” on page 72 on the other end of the SAS cable. Replacing a SAS cable 72 Storwize V5000 Gen2: Quick Installation Guide... - Page 99 5. Ensure that the SAS connector is oriented correctly, as shown in Figure 76 on page 73. The blue tab must face towards the top of the enclosure canister. Blue pull tab SAS cable SAS port Figure 76. Correct orientation for SAS cable connectors 6.
- Page 100 For example, Figure 78 on page 74 shows the LEDs of expansion canister 1 on a 2077-92F expansion enclosure. The SAS cable is successfully inserted in to port 1 (input); port 2 (output) does not contain a SAS cable. Figure 78. SAS cable correctly inserted into the SAS port 74 Storwize V5000 Gen2: Quick Installation Guide...
-
Page 101: Installing Or Replacing A Fan Module: 2077-92F
Installing or replacing a fan module: 2077-92F You can reinstall a fan module or replace a faulty fan module in a 2077-92F expansion enclosure. Before you begin Important: You can replace a fan module without powering off the expansion enclosure. However, to maintain operating temperature, replace the fan module within 10 minutes of its removal. -
Page 102: Installing Or Replacing A Fan Interface Board: 2077-92F
Refer to the procedure described in “Replacing an enclosure: 2077-92F ” on page 99. Procedure 1. Assemble the new FIB, cover, and the cover screws (shown in Figure 81 on page 77) in a safe location. 76 Storwize V5000 Gen2: Quick Installation Guide... - Page 103 Figure 81. FIB parts for the chassis 2. Carefully insert the new FIB into the expansion enclosure chassis, as shown in Figure 82 on page Figure 82. Insert the new FIB in the chassis 3. Use a cross head screwdriver to tighten the retaining screws that secure the FIB to the drive board, as shown in Figure 83 on page 78.
- Page 104 5. Replace the narrow metal cover, which is shown in Figure 84 on page 78, over the FIB assemblies. The attachment screws are on each side of the chassis. Figure 84. Replace the FIB cover 78 Storwize V5000 Gen2: Quick Installation Guide...
-
Page 105: Removing An Expansion Enclosure From A Rack: 2077-92F
(L003) Use the reference numbers in parentheses at the end of each notice (for example, D005) to find the matching translated notice in IBM Systems Safety Notices. DANGER: Observe the following precautions when working on or around your IT rack system:... - Page 106 – Ensure that there are no empty U-levels between devices installed in the rack cabinet below the 32U level. • If the rack cabinet you are relocating is part of a suite of rack cabinets, detach the rack cabinet from the suite. 80 Storwize V5000 Gen2: Quick Installation Guide...
- Page 107 • If the rack cabinet you are relocating was supplied with removable outriggers they must be reinstalled before the cabinet is relocated. • Inspect the route that you plan to take to eliminate potential hazards. • Verify that the route that you choose can support the weight of the loaded rack cabinet. Refer to the documentation that comes with your rack cabinet for the weight of a loaded rack cabinet.
- Page 108 CAUTION: To avoid personal injury, before lifting this unit, remove all appropriate subassemblies per instructions to reduce the system weight. (C012) CAUTION: CAUTION regarding IBM provided VENDOR LIFT TOOL: • Operation of LIFT TOOL by authorized personnel only • LIFT TOOL intended for use to assist, lift, install, remove units (load) up into rack elevations. It is not to be used loaded transporting over major ramps nor as a replacement for such designated tools like pallet jacks, walkies, fork trucks and such related relocation practices.
- Page 109 • Do not operate while under the influence of drugs or alcohol. • Do not support ladder against LIFT TOOL. • Tipping hazard. Do not push or lean against load with raised platform. • Do not use as a personnel lifting platform or step. No riders. •...
-
Page 110: Removing The 2077-92F Enclosure From The Rack
Replace the enclosure in the rack 8. To reinstall or return the expansion enclosure in the rack, follow the procedure in “Installing or replacing an expansion enclosure in a rack: 2077-92F ” on page 47. 84 Storwize V5000 Gen2: Quick Installation Guide... -
Page 111: Removing A Power Supply: 2077-92F
Removing a power supply: 2077-92F You can remove either of the redundant power supply units in a 2077-92F expansion enclosure. Redundant power supplies operate in parallel; one continues to provide power to the enclosure if the other fails. Before you begin Important: You can remove a PSU without powering off the expansion enclosure. -
Page 112: Removing A Drive: 2077-92F
Storage in the management GUI. If the drive is a member of an array, follow the fix procedures in the management GUI. The fix procedures minimize the risk of losing data or access to data; the procedures also manage the system's use of the drive. 86 Storwize V5000 Gen2: Quick Installation Guide... -
Page 113: Drive Assembly
Important: You can remove a drive assembly without powering off the expansion enclosure. However, to maintain operating temperature, complete the following tasks. • Do not remove a faulty drive assembly until its replacement is ready to be installed. • Do not keep the cover off an operational enclosure for more than 15 minutes. The reduction in airflow through the enclosure might cause the enclosure or its components to shut down to protect from overheating. -
Page 114: Drive Locations In A 2077-92F Expansion Enclosure
7. Carefully lift the drive carrier up to remove it from the expansion enclosure. 8. Repeat step “4” on page 87 through step “7” on page 88 for each drive you need to remove. Replace the drive 88 Storwize V5000 Gen2: Quick Installation Guide... -
Page 115: Removing A Secondary Expander Module: 2077-92F
(L005) CAUTION: • Only an IBM Service Support Representative (SSR) can remove or replace the secondary expander module from an enclosure (FRU P/N 01LJ112) that is powered on. If the 01LJ112 enclosure is powered on, use caution and avoid contact with the connectors on the main board. -
Page 116: Location Of Secondary Expander Modules
Table 18 on page 90 describes the function and status values of each LED indicator. Table 18. LEDs on the secondary expander modules Color Status Description Power Green The secondary expander module is receiving power. The secondary expander module is not receiving power. 90 Storwize V5000 Gen2: Quick Installation Guide... - Page 117 Table 18. LEDs on the secondary expander modules (continued) Color Status Description Fault Amber Not used. Blink The secondary expander module is being identified. Normal operation. This task assumes that the following conditions were met: • The expansion enclosure is slid out from the rack, as described in “Removing an expansion enclosure from a rack: 2077-92F ”...
-
Page 118: Removing An Expansion Canister: 2077-92F
You can remove the expansion canisters in a 2077-92F expansion enclosure. Before you begin Important: You can remove an expansion canister without powering off the expansion enclosure. However, to maintain operating temperature, perform the following tasks. 92 Storwize V5000 Gen2: Quick Installation Guide... -
Page 119: Expansion Canister
An expansion canister provides SAS connectivity between the 2077-92F expansion enclosure and Storwize V5000 Gen2 system. If either of the two expansion canisters has a failure, the other expansion canister assumes the full I/O load. Figure 96 on page 93 shows the features of an expansion enclosure. -
Page 120: Removing A Fan Module: 2077-92F
Note: If you plan to remove the expansion enclosure from the rack, you must remove all of the fan modules. Procedure 1. Identify the fan module to be replaced. When lit, the amber LED on the front of the fan module ( Figure 98 on page 95) identifies a fault. 94 Storwize V5000 Gen2: Quick Installation Guide... -
Page 121: Fan Module Led
Figure 98. Fan module LED You can also issue the lsenclosurefanmodule command to display the status of the fan modules. 2. Press the release tab on the fan module, as Figure 99 on page 95 shows. Figure 99. Fan module release tab 3. -
Page 122: Removing A Fan Interface Board: 2077-92F
2077-92F ” on page 75 for information about the removal and replacement procedures. Ensure that both fans are installed correctly. Perform the following procedure only if the amber fault LED on each fan remains lit ( in Figure 101 on page 97). 96 Storwize V5000 Gen2: Quick Installation Guide... -
Page 123: Fan Module Led
Figure 101. Fan module LED Procedure 1. Using a cross head screwdriver, remove the narrow metal cover that is over the FIBs, as shown in Figure 102 on page 97. The screws are on each side of the chassis. Place the cover and cover screws in a safe location. - Page 124 3. Use the handle to pull the FIB out of the expansion enclosure chassis, as shown in Figure 104 on page Figure 104. Remove the FIB from the chassis 4. Place the FIB (shown in Figure 105 on page 99) in a safe location. 98 Storwize V5000 Gen2: Quick Installation Guide...
-
Page 125: Replacing An Enclosure: 2077-92F
Figure 105. FIB parts removed from the chassis 5. If needed, repeat steps “2” on page 97 through “3” on page 98 to remove the other FIB. Replace the fan interface board 6. To reinstall a fan interface board, or replace it with one from FRU stock, follow the procedure in “Installing or replacing a fan interface board: 2077-92F ”... - Page 126 (C012) Notes: • Perform the following procedure only if directed to do so by IBM Remote Technical support or by a fix procedure in the management GUI. • An enclosure can have FRU P/N 01LJ112 or FRU P/N 01LJ607. When needed, an enclosure with FRU P/N 01LJ607 is used to replace FRU P/N 01LJ112.
-
Page 127: Removing The Display Panel Assembly: 2077-92F
6. Replace the new enclosure in rack, as described in “Installing or replacing an expansion enclosure in a rack: 2077-92F ” on page 47. 7. Reinstall the remaining parts into the enclosure, as described in the following topics. You can install the parts in any order. -
Page 128: Display Panel Assembly
Replace the display panel assembly 5. To reinstall the display panel assembly, or replace it with one from FRU stock, follow the procedure in “Installing or replacing the display panel assembly: 2077-92F ” on page 103. 102 Storwize V5000 Gen2: Quick Installation Guide... -
Page 129: Installing Or Replacing The Display Panel Assembly: 2077-92F
Installing or replacing the display panel assembly: 2077-92F You can replace the display panel assembly in a 2077-92F expansion enclosure. About this task This task assumes that the following conditions were met: • The expansion enclosure was moved out from the rack on the slide rails, as described in “Removing an expansion enclosure from a rack: 2077-92F ”... - Page 130 2. Carefully align the display panel assembly in the slot at the front of the expansion enclosure, as shown in Figure 109 on page 105. Ensure the display panel assembly, which is shown in Figure 108 on page 104, faces toward the outside of the chassis. 104 Storwize V5000 Gen2: Quick Installation Guide...
-
Page 131: Removing The Support Rails: 2077-92F
Figure 109. Installing the display panel assembly 3. Insert the display panel assembly until it clicks into position. 4. Replace the top cover, as described in “Installing or replacing the top cover: 2077-92F ” on page 58. 5. Ensure the LEDs on the display panel are lit correctly. See “ Storwize V5000 2077-92F expansion enclosure LEDs and indicators”... -
Page 132: Connecting The Optional 5U Expansion Enclosure: 2077-92F
When you insert SAS cables, ensure that the connector is oriented correctly to the node and expansion enclosure. • For Storwize V5000 Gen2 control enclosures (and 2077/2078-12F or 2077/2078-24F 2U expansion enclosures), the blue pull tab must be below the cable ( in Figure 112 on page 106). -
Page 133: Connecting The Sas Cables
Procedure 1. Install the cables, as shown in Figure 113 on page 107. Note: Figure 113 on page 107 shows the cable connections between the SAS enclosures and the Storwize V5030 control enclosure. It does not imply or represent the precise racking order for the enclosures in a rack. -
Page 134: Powering On The 5U Expansion Enclosure: 2077-92F
Powering on the 5U expansion enclosure: 2077-92F Use the following procedure to provide power to the 2077-92F expansion enclosure as part of the initial installation process or after a service procedure. Before you begin Important: 108 Storwize V5000 Gen2: Quick Installation Guide... -
Page 135: Features On The Front Of The 2077-92F Expansion Enclosure
• To support the 2077-92F expansion enclosure, the Storwize V5000 Gen2 system requires software version 7.8.0. If software version 7.8.0 is not installed on the system, do not connect or power on the expansion enclosure. • Before you connect the power cables to the rear of the enclosure, always check that the expansion enclosure is secured in the rack. - Page 136 3. Verify that the expansion enclosure and its components are operating as expected. On the back of the expansion enclosure, all four fans and the expansion canister indicators ( in Figure 118 on page 111) become active when the power is connected. 110 Storwize V5000 Gen2: Quick Installation Guide...
-
Page 137: Powering Off The Expansion Enclosure: 2077-92F
Figure 118. Features on the rear of the 2077-92F expansion enclosure Power cable connector for PSU 2 Power cable retention clamps Fan module Fan release latch Fan fault indicator Expansion canister SAS ports and indicators Expansion canister indicators Power cable connector for PSU 1 4. -
Page 138: Storwize V5000 2077-92F Expansion Enclosure Leds And Indicators
The display panel ( ) contains three LEDs that describe the operational status of the expansion enclosure. Table 20 on page 113 describes the function and meaning of the LEDs on the front display panel. 112 Storwize V5000 Gen2: Quick Installation Guide... -
Page 139: Leds On The Front Of A Power Supply Unit
Table 20. Display panel LEDs Function Color Status Description Power Green The expansion enclosure power is on; this LED is controlled by the expansion enclosure. The expansion enclosure power is off. Identify Blue Identifies the expansion enclosure; this LED is controlled by the system. -
Page 140: Led Indicators On Drives
Activity Green The drive is ready to be used. Flashing The drive is operating and I/O is occurring. The drive is not installed or an installed drive is not ready to be used. 114 Storwize V5000 Gen2: Quick Installation Guide... -
Page 141: Leds On A Secondary Expansion Module
Table 22. LED indicators on drives (continued) Function Color Status Description Fault Amber A fault occurred on the drive. The LED is turned off when the drive is removed and replaced. Flash The drive is being identified, a fault might or might not be detected. -
Page 142: Leds On The Back Of The Expansion Enclosure
Figure 124. LEDs on the back of the expansion canister Canister fault Canister status Canister power SAS link fault SAS link operational Canister release handles Table 24 on page 117 describes the values and meaning of each LED. 116 Storwize V5000 Gen2: Quick Installation Guide... -
Page 143: Storwize V5000 Gen2 5U Expansion Enclosure Parts
At least one of the four lanes is connected. Storwize V5000 Gen2 5U expansion enclosure parts In the 5U expansion enclosure, all replaceable parts are customer-replaceable units (CRUs). Note: All of the information that is listed in the following tables for the 2077-92F expansion enclosure is also applicable to the 2078-92F expansion enclosure. - Page 144 (2078-xxx). Note: The part numbers for the tier 1 flash drives vary, depending on the model type and warranty of the Storwize V5000 Gen2 system. Table 26 on page 119 summarizes the values. 118 Storwize V5000 Gen2: Quick Installation Guide...
- Page 145 Other expansion enclosure parts Table 27 on page 119 summarizes the part numbers for other parts. The values are the same for all Storwize V5000 Gen2 systems that support the 2077-92F expansion enclosure. Table 27. Other expansion enclosure parts FRU Part...
-
Page 146: Connecting Ethernet Cables To The Node Canisters
Figure 125 on page 120 shows the Ethernet cabling and the ports on the back of a Storwize V5010 system. Figure 125. Connecting the Ethernet cables to a Storwize V5010 system Figure 126 on page 121 shows the Ethernet cabling and the ports on the back of a Storwize V5020 system. 120 Storwize V5000 Gen2: Quick Installation Guide... -
Page 147: Connecting The Ethernet Cables To A Storwize V5020 System
Figure 126. Connecting the Ethernet cables to a Storwize V5020 system c) Optionally, connect Ethernet port 2 of each node canister in the system to a second IP network, as shown by the blue cable connection in Figure 125 on page 120 and Figure 126 on page 121. This second port can be used to provide a redundant connection to the system management interfaces;... -
Page 148: Connecting Ethernet Cables To 1 Gbps Iscsi 4-Port Host Interface Adapters
These ports are numbered 3 and 4. Figure 129 on page 123 shows the 2 Ethernet ports on a 25 Gbps Ethernet (RoCE) adapter, as seen from the back of a Storwize V5020 node canister. . 122 Storwize V5000 Gen2: Quick Installation Guide... -
Page 149: Connecting Fibre Channel Cables To A 10 Gbps Iscsi-Fcoe 4-Port Host Interface Adapter
Figure 129. Example of a Storwize V5020 system with a 2-port 25 Gbps Ethernet host interface adapter Figure 130 on page 123 shows the ports (labeled 3 and 4) on a 25 Gbps Ethernet (RoCE) adapter, as seen on the back of a Storwize V5030 node canister. Figure 130. -
Page 150: Connecting Fibre Channel Cables To A Fibre Channel Adapter In The Enclosure
1. Connect the required number of Fibre Channel cables to the node canisters in the control enclosure. Both canisters must have the same number of cables connected. Figure 134 on page 125 shows an example Storwize V5020 system with two Fibre Channel cables connected to each canister. 124 Storwize V5000 Gen2: Quick Installation Guide... -
Page 151: Connecting A Control Enclosure To A Host With Onboard Sas Connectors
Figure 134. Example Storwize V5000 Gen2 configuration with two Fibre Channel cables per canister 2. If you want to connect additional Fibre Channel cables, make sure to connect the same number of cables to each canister. Figure 135 on page 125 shows an example Storwize V5020 configuration with four Fibre Channel cables connected to each node canister. -
Page 152: Mini Sas Hd To Mini Sas Hd Cable
To install the cables, complete the following steps. 1. Connect the required number of SAS cables. Refer to the "Planning" section of the IBM Knowledge Center for instructions on determining the number of cables required. Note: When you connect cables to the SAS ports on the left side of the node canister, each host must be connected to both canisters. -
Page 153: Powering On The System
Results Figure 138 on page 127 shows the location of the onboard 12 Gbps SAS ports on a Storwize V5020 system. In this example, the optional 4 port 12 Gbps SAS host adapter is also installed. Figure 138. Location of available SAS ports on a Storwize V5020 system Powering on the system After you install all hardware components, you must power on the system and check its status. -
Page 154: Expansion Canister Leds
PSU on the back of the enclosure. 5. From the rear of the control enclosure, check the LEDs on each node canister. (See Figure 141 on page 128.) Figure 141. Node canister LEDs Power Status Fault 128 Storwize V5000 Gen2: Quick Installation Guide... - Page 155 The canister is ready with no critical errors when Power is illuminated, Status is flashing, and Fault is off. If a canister is not ready, refer to the "Procedure: Understanding the system status using the LEDs" topic in "Troubleshooting". Chapter 2. Installing the system hardware 129...
- Page 156 130 Storwize V5000 Gen2: Quick Installation Guide...
-
Page 157: Chapter 3. Configuring The System
• Microsoft Internet Explorer (IE) 11 and Microsoft Edge 42 • Google Chrome 69 IBM supports higher versions of the browsers if the vendors do not remove or disable function that the product relies upon. For browser levels higher than the versions that are certified with the product, customer support accepts usage-related and defect-related service requests. - Page 158 Refresh the browser. For Microsoft Internet Explorer, complete the following steps: a. In Internet Explorer, click Tools > Internet Options. b. Click Privacy. Under Settings, move the slider to the bottom to allow all cookies. 132 Storwize V5000 Gen2: Quick Installation Guide...
-
Page 159: User Name And Password For System Initialization
c. Click OK. d. Refresh your browser. For Google Chrome, complete the following steps: a. On the menu bar in the Google Chrome browser window, click Settings. b. Click Show advanced settings. c. In the Privacy section, click Content settings. d. -
Page 160: Procedure: Initializing The System By Using The Technician Port
) on Storwize V5020 systems. Figure 142. Storwize V5010 technician port Figure 143. Storwize V5020 technician port Storwize V5030 systems have a dedicated technician port. Figure 144 on page 135 shows the location of the port ( 134 Storwize V5000 Gen2: Quick Installation Guide... -
Page 161: Configuring A System To Be Nebs-Compliant
Figure 144. Storwize V5030 technician port 4. Connect an Ethernet cable between the port of the personal computer that is configured in step “2” on page 134 and the technician port. After the connection is made, the system will automatically configure the IP and DNS settings for the personal computer if DHCP is available. -
Page 162: Adding An Expansion Enclosure To An Existing System
2. Install the new enclosure in the rack. 3. Connect the node canisters to the storage area network. 4. Configure the zoning on the SAN switches. The correct zoning provides a way for the ports to connect to each other. 136 Storwize V5000 Gen2: Quick Installation Guide... - Page 163 5. Run the following command to erase the enclosure vital product data (VPD). satask chvpd -resetclusterid 6. Wait until both nodes are online again, and then start the management GUI. Typically, it takes a few minutes before both nodes are online again. 7.
- Page 164 138 Storwize V5000 Gen2: Quick Installation Guide...
-
Page 165: Appendix A. Accessibility Features For The System
See your browser or screen-reader software Help for a list of keyboard shortcuts that it supports. IBM and accessibility See the IBM Human Ability and Accessibility Center for more information about the commitment that IBM has to accessibility. ©... - Page 166 140 Storwize V5000 Gen2: Quick Installation Guide...
-
Page 167: Appendix B. Where To Find The Statement Of Limited Warranty
Appendix B. Where to find the Statement of Limited Warranty The Statement of Limited Warranty is available in both hardcopy format and in the Storwize V5000 IBM Knowledge Center. The Statement of Limited Warranty is included (in hardcopy form) with your product. See “Publications and related libraries ”... - Page 168 142 Storwize V5000 Gen2: Quick Installation Guide...
-
Page 169: Notices
Consult your local IBM representative for information on the products and services currently available in your area. Any reference to an IBM product, program, or service is not intended to state or imply that only that IBM product, program, or service may be used. Any functionally equivalent product, program, or service that does not infringe any IBM intellectual property right may be used instead. -
Page 170: Trademarks
International Business Machines Corp., registered in many jurisdictions worldwide. Other product and service names might be trademarks of IBM or other companies. A current list of IBM trademarks is available on the web at Copyright and trademark information at www.ibm.com/legal/copytrade.shtml. -
Page 171: Homologation Statement
Contact an IBM representative or reseller for any questions. Electromagnetic compatibility notices The following Class A statements apply to IBM products and their features unless designated as electromagnetic compatibility (EMC) Class B in the feature information. When attaching a monitor to the equipment, you must use the designated monitor cable and any interference suppression devices that are supplied with the monitor. -
Page 172: Japan Electronics And Information Technology Industries Association (Jeita) Notice
Tel: 914-499-1900 Der verantwortliche Ansprechpartner des Herstellers in der EU ist: IBM Deutschland GmbH Technical Relations Europe, Abteilung M456 IBM-Allee 1, 71139 Ehningen, Germany Tel: +49 800 225 5426 e-mail: Halloibm@de.ibm.com Generelle Informationen: Das Gerät erfüllt die Schutzanforderungen nach EN 55024 und EN 55032 Klasse A. -
Page 173: Japan Voluntary Control Council For Interference (Vcci) Notice
Japan Voluntary Control Council for Interference (VCCI) Notice Korea Notice People's Republic of China Notice Russia Notice Taiwan Notice Notices 147... -
Page 174: United States Federal Communications Commission (Fcc) Notice
Properly shielded and grounded cables and connectors must be used in order to meet FCC emission limits. IBM is not responsible for any radio or television interference caused by using other than recommended cables and connectors, or by unauthorized changes or modifications to this equipment. - Page 175 Index Numerics direct current power supply units connecting to power source 12 1 Gbps iSCSI 4-port host interface card connectors 11 Ethernet cables 122 LEDs 11 10 Gbps iSCSI-FCoE 4-port host interface card replaceable units 13 Fibre Channel cables 123 2077-92F 2078-92F power supply removing 85...
- Page 176 SAS cables 21, 24, 106, 125 send a comment xxiv Statement of Limited Warranty 141 static-sensitive devices xxi superuser 133 support rails 2077-92F 2078-92F 43 150 Storwize V5000 Gen2: Quick Installation Guide...
- Page 178 IBM®...
Need help?
Do you have a question about the Storwize V5000 Gen2 and is the answer not in the manual?
Questions and answers