Table of Contents
Advertisement
Advertisement
Table of Contents

Subscribe to Our Youtube Channel
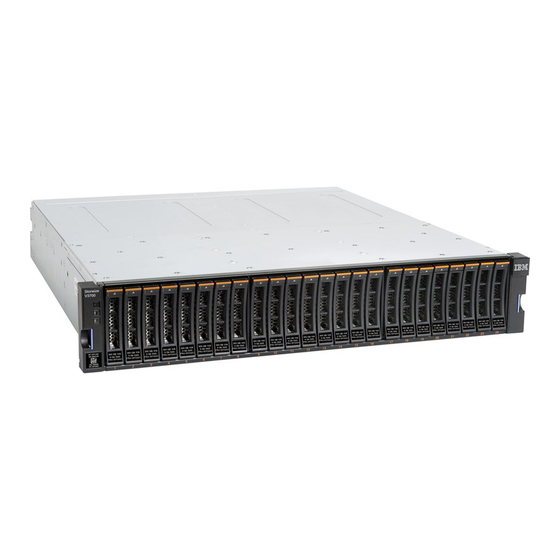
Related Manuals for IBM Storwize V3700


Summary of Contents for IBM Storwize V3700
- Page 1 IBM Storwize V3700 Quick Installation Guide GC27-4219-01...
- Page 2 Before using this information and the product it supports, read the general information in “Notices” on page 51, the information in the “Safety and environmental notices” on page ix, as well as the information in the IBM Environmental Notices and User Guide , which is provided on a DVD.
-
Page 3: Table Of Contents
Initializing the system with a Microsoft Windows Who should use this guide . . xv computer . . 46 Storwize V3700 library and related publications . . xv Initializing the system with an Apple Macintosh How to order IBM publications . . xvii computer . - Page 4 Storwize V3700: Quick Installation Guide...
-
Page 5: Figures
Figures Rear view of a Storwize V3700 control enclosure 5 Reinstalling the canister cover . . 30 Data ports in the rear of the control enclosure Installing a node canister . . 31 Rear view of a Storwize V3700 expansion Removing a filler panel . - Page 6 Storwize V3700: Quick Installation Guide...
-
Page 7: Tables
Tables IBM websites for help, services, and Steps for different installation scenarios information . xv Storwize V3700 model numbers . Storwize V3700 library . xvi Default user name and password for the IBM documentation and related websites xvii management GUI . - Page 8 Storwize V3700: Quick Installation Guide...
-
Page 9: Safety And Environmental Notices
A danger notice indicates the presence of a hazard that has the potential of causing death or serious personal injury. (D002) 2. Locate IBM Systems Safety Notices with the user publications that were provided with the Storwize V3700 hardware. 3. Find the matching identification number in the IBM Systems Safety Notices. Then review the topics concerning the safety notices to ensure that you are in compliance. -
Page 10: Caution Notices For The Storwize V3700
Ensure that you understand the caution notices for Storwize V3700. Use the reference numbers in parentheses at the end of each notice, such as (C003) for example, to find the matching translated notice in IBM Systems Safety Notices. CAUTION: Use safe practices when lifting. - Page 11 Electrical voltage and current from power, telephone, and communication cables are hazardous. To avoid a shock hazard: v Connect power to this unit only with the IBM provided power cord. Do not use the IBM provided power cord for any other product.
-
Page 12: Special Caution And Safety Notices
Heavy equipment–personal injury or equipment damage might result if mishandled. (D006) Special caution and safety notices This information describes special safety notices that apply to the Storwize V3700. These notices are in addition to the standard safety notices supplied and address specific issues relevant to the equipment provided. -
Page 13: Handling Static-Sensitive Devices
Take additional care when you handle devices during cold weather because heating reduces indoor humidity and increases static electricity. Environmental notices This publication contains all the required environmental notices for IBM Systems products in English and other languages. The IBM Systems Environmental Notices and User Guide (ftp:// public.dhe.ibm.com/systems/support/warranty/envnotices/... - Page 14 Storwize V3700: Quick Installation Guide...
-
Page 15: About This Guide
Storwize V3700. Storwize V3700 Information Center The IBM Storwize V3700 Information Center contains all of the information that is required to install, configure, and manage the Storwize V3700. The information center is updated between Storwize V3700 product releases to provide the most current documentation. - Page 16 Agreement for Machine Code for the Storwize V3700 product. IBM documentation and related websites Table 3 on page xvii lists websites that provide publications and other information about the Storwize V3700 or related products or technologies. Storwize V3700: Quick Installation Guide...
-
Page 17: How To Order Ibm Publications
Some publications are available for you to view or download at no charge. You can also order publications. The publications center displays prices in your local currency. You can access the IBM Publications Center through the following website: www.ibm.com/e-business/linkweb/publications/servlet/pbi.wss... -
Page 18: How To Get Information, Help, And Technical Assistance
Before calling for support, be sure to have your IBM Customer Number available. If you are in the US or Canada, you can call 1 (800) IBM SERV for help and service. From other parts of the world, see http://www.ibm.com/planetwide for the number that you can call. - Page 19 If you have questions about how to use the machine and how to configure the machine, sign up for the IBM Support Line offering to get a professional answer. The maintenance supplied with the system provides support when there is a problem with a hardware component or a fault in the system machine code.
-
Page 20: What's New
Taking this advice while deploying your system can save issues further down the line. Contact your local IBM Sales or IBM Support for this offering availability and to purchase it, if available in your country. -
Page 21: Chapter 1. Before You Begin The Installation
Important information: v This guide presumes that you have read the planning information regarding your physical environment that is available from the Storwize V3700 Information Center. v Ensure that any cables that you are supplying are available for installation. -
Page 22: Enclosure
Complete these steps for each expansion enclosure that you add. Be familiar with the following information v See “Caution notices for the Storwize V3700” on page x and “Danger notices for Storwize V3700” on page x for a summary of the situations that can be potentially hazardous to you. - Page 23 Electrical voltage and current from power, telephone, and communication cables are hazardous. To avoid a shock hazard: – Connect power to this unit only with the IBM provided power cord. Do not use the IBM provided power cord for any other product.
-
Page 24: Reviewing Your Packing Slip
__ – Two rail springs __ – Two sets of rail mounting screws __ – Two sets of alternative rail mounting pins (large and small) for non-IBM racks __ v Two power cords for connection to rack mounted power distribution units... -
Page 25: Identifying The Hardware Components
Control enclosure components Figure 1 shows the rear view of a control enclosure and identifies the location of the power supply units and node canisters. Figure 1. Rear view of a Storwize V3700 control enclosure 1 Node canisters 2 Power supply units Note: Figure 1 shows the node canisters in their initial configuration, with no host interface card options installed. - Page 26 Figure 2 shows the rear view of a Storwize V3700 control enclosure and identifies the location of the ports. Figure 2. Data ports in the rear of the control enclosure 1 USB ports. Each canister has two USB ports. One port is used during installation.
-
Page 27: Rear View Of A Storwize V3700 Expansion
Expansion enclosure components Figure 3 shows the rear view of an expansion enclosure and identifies the location of power supply units and expansion canisters. Figure 3. Rear view of a Storwize V3700 expansion enclosure 1 Expansion canisters 2 Power supply units Figure 4 shows the rear view of an expansion canister and identifies the SAS port locations. -
Page 28: Verifying Environmental Requirements
This documentation assumes that you have completed the physical planning for the environment of your system. If you have not done the environmental planning for your system, see the Storwize V3700 physical installation planning topic in the Storwize V3700 Information Center. Storwize V3700: Quick Installation Guide... -
Page 29: Reviewing Enclosure Location Guidelines
If you are installing a control enclosure plus one or more expansion enclosures, follow these guidelines. v Each Storwize V3700 enclosure to be installed requires 2U of rack space. v Each assembled enclosure weighs more than 18kg. There must be sufficient space at the front of the rack for two persons to carry the enclosure safely. - Page 30 Storwize V3700: Quick Installation Guide...
-
Page 31: Chapter 2. Installing The Hardware
1. Locate the rack mounting rails and screws (Figure 6). The rail assembly consists of two rails that must be installed in the rack cabinet. Figure 6. Rack mounting rails and screws 2. Remove the springs that are taped to one of the rails. © Copyright IBM Corp. 2012, 2013... -
Page 32: Installing The Rail Spring
Attach the circle end of the spring around the stud on the rail (see Figure 7). b. Pulling on the spring, attach the hook end of the spring to the tab on the rail. Figure 7. Installing the rail spring Storwize V3700: Quick Installation Guide... -
Page 33: Hole Locations In The Front Of The Rack
19-inch IBM rack cabinet. If you are installing the storage enclosure in a non-IBM rack cabinet, you may need to replace the set of medium bracket pins on the front and rear of the rail with either the small or large bracket pins that are included in the rail kit. -
Page 34: Opening The Hinge Brackets
Figure 9. Opening the hinge brackets 6. Align the holes in the rail bracket with the holes on the front and rear rack cabinet flanges. Ensure that the rails are aligned on the inside of the rack cabinet. Storwize V3700: Quick Installation Guide... -
Page 35: Closing Hinge Brackets And Installing Rear
7. On the rear of the rail, press the two bracket pins into the holes in the rack flanges and close the rear hinge bracket to secure the rail to the rack cabinet flange (see Figure 10). Figure 10. Closing hinge brackets and installing rear screw 8. -
Page 36: Installing The Enclosures
4. Secure the enclosure with a screw in the rack mounting screw hole. Storwize V3700: Quick Installation Guide... -
Page 37: Installing Options In The Control Enclosure
5. Reinstall the left and right end caps as shown in Figure 11 on page 16. The left end cap has indicator windows that align with the status LEDs (light-emitting diodes) on the edge of the enclosure. a. Ensure that the serial number of the end cap matches the serial number on the rear of the enclosure. -
Page 38: Opening The Node Canister
Unlatch the release levers and pull them open. The canister moves out of the slot approximately 0.6cm (0.25 inch). b. Slide the canister out of the enclosure. IN IN IN IN Figure 12. Removing a node canister Storwize V3700: Quick Installation Guide... -
Page 39: Removing The Canister Cover
2. Turn the canister over and open the cover as shown in Figure 13. a. Press the recessed blue touch points on the cover. b. Slide the cover away from the thumbscrew end of the canister. Figure 13. Removing the canister cover Chapter 2. -
Page 40: Installing An 8 Gbps Fibre Channel 4-Port Host Interface Card
1. Remove the SFP transceivers from the host interface card (Figure 14). To remove an SFP transceiver, swing the release handle open and use it to pull the transceiver out of the port. Figure 14. Host interface card and SFP transceivers Storwize V3700: Quick Installation Guide... -
Page 41: Installing 8 Gbps Fibre Channel 4-Port Host Interface Card
2. Loosen the retaining thumbscrew 1 as shown in Figure 15. Figure 15. Installing 8 Gbps Fibre Channel 4-port host interface card 1 Retaining thumbscrew 2 Filler handle 3 Host interface card 4 Catch slot 3. From inside the canister, grasp the filler handle 2 and slide the filler plate toward the thumbscrew to disengage the plate from the catch slot 4 . -
Page 42: Installing A 10 Gbps Iscsi-Fcoe 2-Port Host Interface Card
To install the host interface card, complete the following steps. 1. Remove each SFP transceiver from the host interface card. To remove an SFP transceiver, swing the release handle open and use it to pull the transceiver out of the port. Storwize V3700: Quick Installation Guide... -
Page 43: Installing 10 Gbps Iscsi-Fcoe 2 Port Host Interface Card
2. Loosen the retaining thumbscrew 1 as shown in Figure 16. Figure 16. Installing 10 Gbps iSCSI-FCoE 2 port host interface card 1 Retaining thumbscrew 2 Filler handle 3 Host interface card 4 Catch slot 3. From inside the canister, grasp the filler handle 2 and slide the filler plate toward the center of the canister to disengage the plate from the catch slot. - Page 44 10. Reinstall the SFP transceivers that were removed in step 1 on page 22. To install a transceiver, push it fully into the port and close the release handle. Note: Return the SFP transceivers to the same ports they were removed from. Storwize V3700: Quick Installation Guide...
-
Page 45: Installing A 1 Gbps Iscsi 4-Port Host Interface Card
Installing a 1 Gbps iSCSI 4-port host interface card If you purchased an FC ACHL 1 Gbps iSCSI 4-port host interface card that was not pre-installed for you, you must install it in the node canister. Before you begin The 1 Gbps iSCSI 4-port host interface card is installed in the node canisters in the control enclosure. -
Page 46: Installing A Sas 4-Port Host Interface Card
Do not start installation until you have two of the SAS 4-port host interface card options. Procedure To install the host interface card, complete the following steps. 1. Loosen the retaining thumbscrew 1 as shown in Figure 18 on page 27. Storwize V3700: Quick Installation Guide... -
Page 47: Installing Sas 4-Port Host Interface Card
Figure 18. Installing SAS 4-port host interface card 1 Retaining thumbscrew 2 Filler handle 3 Host interface card 4 Catch slot 2. From inside the canister, grasp the filler handle 2 and slide the filler plate toward the center of the canister to disengage the plate from the catch slot. 3. -
Page 48: Installing An 8 Gb Cache Memory Upgrade
8 GB. The memory module is inserted into memory slot 2, located between the existing memory module and the battery (Figure 19). Figure 19. Where to install the cache memory upgrade Storwize V3700: Quick Installation Guide... - Page 49 Procedure To install the memory module option, complete the following steps. 1. Open the retaining clip on each end of the memory module connector as shown in Figure 20. Attention: To avoid breaking the retaining clips or damaging the memory module connectors, open and close the clips gently.
-
Page 50: Closing The Node Canister
Align the four hook slots on the cover with the pins on the canister. b. Slide the cover toward the latch and release levers until it locks into place. Figure 21. Reinstalling the canister cover Storwize V3700: Quick Installation Guide... -
Page 51: Installing A Node Canister
2. Turn the canister over and install it in the control enclosure as shown in Figure 22. a. With the latch and release levers fully extended, slide the canister into the enclosure until the levers begin to move inwards. b. Simultaneously close both latch and release levers. IN IN IN IN Figure 22. -
Page 52: Installing Disk Drives
Figure 23. Removing a filler panel 1 Filler panel 2. Touch the static-protective package that contains the drive to any unpainted surface on the outside of the enclosure. 3. Remove the drive from the package. Storwize V3700: Quick Installation Guide... - Page 53 4. Install the drive in the empty slot as shown in Figure 24. a. Ensure that the drive-tray handle is in the open (unlocked) position. b. Align the drive assembly with the guide rails in the slot. c. Gently push the drive assembly into the slot until the drive stops. d.
-
Page 54: Connecting Sas Cables To Expansion Enclosures
Arrange your cables to provide access to: – USB ports. USB port access is required when you use a USB flash drive to configure the system. Storwize V3700: Quick Installation Guide... - Page 55 – The enclosures themselves. Access is required to the hardware for servicing and for safely removing and replacing components using two or more people. Procedure To install the cables, complete the following steps. 1. Using the supplied SAS cables, connect the control enclosure to the first expansion enclosure as shown in Figure 26 on page 36.
-
Page 56: Connecting The Sas Cables
Connect SAS port 2 of the right expansion canister in the previous expansion enclosure to SAS port 1 of the right expansion canister in the newly installed expansion enclosure. Note: A control enclosure can support up to four expansion enclosures. Storwize V3700: Quick Installation Guide... -
Page 57: Connecting Ethernet Cables For System Management
Connecting Ethernet cables for system management To provide system management connectivity, you must connect Ethernet cables to Ethernet port 1 of each node canister in the control enclosure. This connection can optionally also be used for iSCSI host connection. Ethernet port 2 can optionally be connected to provide a second system management address, a second iSCSI host connection, or both. -
Page 58: Connecting Fibre Cables To A 10 Gbps Iscsi-Fcoe 2-Port Host Interface Card
Results Figure 29 on page 39 shows an example configuration with a pair of Ethernet cables connected to port 3 in each canister, and another pair connected to port 4 in each canister. Storwize V3700: Quick Installation Guide... -
Page 59: Connecting Fibre Channel Cables To An 8 Gbps Fibre Channel 4-Port Host Interface Card
TxRx TxRx Figure 29. Example configuration with two pairs of Ethernet cables connected to 10 Gbps iSCSI-FCoE 2-port host interface cards Connecting Fibre Channel cables to an 8 Gbps Fibre Channel 4-port host interface card If you installed an 8 Gbps Fibre Channel 4-port host interface card, you must connect Fibre Channel cables to it. -
Page 60: Connecting Sas Cables To A Host
Mini SAS HD to Mini SAS HD (Figure 32) v Mini SAS HD to Mini SAS (Figure 33) Figure 32. Mini SAS HD to Mini SAS HD cable Figure 33. Mini SAS HD to Mini SAS cable Storwize V3700: Quick Installation Guide... -
Page 61: Example Configuration With Three Sas Cables
Note: When inserting SAS cables, make sure the connector is oriented correctly. v When connecting to the SAS ports on the left side of the node canister, the blue pull tab must be below the connector. v When connecting to a SAS 4-port host interface card, the blue pull tab must be above the connector. -
Page 62: Powering On The System
1 Power 2 Status 3 Fault The canister is ready with no critical errors when Power is illuminated, Status is illuminated, and Fault is off. If a canister is not ready, refer to the Procedure: Storwize V3700: Quick Installation Guide... -
Page 63: Node Canister Leds
Understanding the system status using the LEDs topic in the troubleshooting section of the Storwize V3700 Information Center. 3. Wait for all expansion canisters to finish powering on. 4. Plug the power cord of each power supply in the control enclosure into a properly grounded electrical outlet. - Page 64 Storwize V3700: Quick Installation Guide...
-
Page 65: Chapter 3. Configuring The System
Internet Explorer (IE) 8 and 9 v Google Chrome 24 IBM supports higher versions of the browsers as long as the vendors do not remove or disable functionality that the product relies upon. For browser levels higher than the versions that are certified with the product, customer support accepts usage-related and defect-related service requests. -
Page 66: User Name And Password For System Initialization
If a problem is identified with the browser, IBM might investigate potential solutions or work-arounds that the client can implement until a permanent solution becomes available. User name and password for system initialization During the initialization procedure, you will need to log in to the Storwize management GUI. -
Page 67: Initializing The System With An Apple Macintosh
– The IP address of a Network Time Protocol (NTP) server for automated setting of date and time – The IP address of a simple mail transfer protocol (SMTP) server for sending notificatication of alerts 2. Locate the USB flash drive that was shipped with your order in the documentation package. -
Page 68: Initializing The System With A Linux Computer
Note: The other options in the initialization tool are used to reset the service IP address or the superuser password. Initializing the system with a Linux computer To initialize a new system with a Linux computer, use the initialization tool that was shipped with your order. Storwize V3700: Quick Installation Guide... - Page 69 Before you begin v Begin this procedure after you have installed all the enclosures, drives and other options you have purchased. v You need a personal computer to complete the initialization procedure. The personal computer must have: – A USB port –...
-
Page 70: Adding An Expansion Enclosure To An Existing System
5. Start the management GUI. 6. Select Monitoring > System Details. 7. Select the system name in the tree. 8. Select Actions > Add Enclosures > Expansion only. 9. Continue to follow the on-screen instructions. Storwize V3700: Quick Installation Guide... -
Page 71: Notices
Web sites. The materials at those Web sites are not part of the materials for this IBM product and use of those Web sites is at your own risk. - Page 72 IBM may use or distribute any of the information you supply in any way it believes appropriate without incurring any obligation to you. Licensees of this program who wish to have information about it for the purpose of enabling: (i) the exchange of information between independently created...
-
Page 73: Trademarks
IBM, therefore, cannot guarantee or imply reliability, serviceability, or function of these programs. The sample programs are provided "AS IS", without warranty of any kind. IBM shall not be liable for any damages arising out of your use of the sample programs. -
Page 74: Industry Canada Compliance Statement
Properly shielded and grounded cables and connectors must be used in order to meet FCC emission limits. IBM is not responsible for any radio or television interference caused by using other than recommended cables and connectors, or by unauthorized changes or modifications to this equipment. -
Page 75: Germany Electromagnetic Compatibility Directive
Klasse A ein. Um dieses sicherzustellen, sind die Geräte wie in den Handbüchern beschrieben zu installieren und zu betreiben. Des Weiteren dürfen auch nur von der IBM empfohlene Kabel angeschlossen werden. IBM übernimmt keine Verantwortung für die Einhaltung der Schutzanforderungen, wenn das Produkt ohne Zustimmung der IBM verändert bzw. -
Page 76: People's Republic Of China Class A Statement
People's Republic of China Class A Statement Taiwan Class A compliance statement Taiwan Contact Information This topic contains the product service contact information for Taiwan. IBM Taiwan Product Service Contact Information: IBM Taiwan Corporation 3F, No 7, Song Ren Rd., Taipei Taiwan Tel: 0800-016-888... -
Page 77: Korean Communications Commission Class A Statement
Fax: 0049 (0)711 785 1283 Email: mailto: tjahn @ de.ibm.com Taiwan Contact Information This topic contains the product service contact information for Taiwan. IBM Taiwan Product Service Contact Information: IBM Taiwan Corporation 3F, No 7, Song Ren Rd., Taipei Taiwan Tel: 0800-016-888... - Page 78 Storwize V3700: Quick Installation Guide...
-
Page 79: Index
1 Gbps iSCSI 4-port 25 electronic emission notices identifying 5 10 Gbps iSCSI-FCoE 2-port 22 Deutschsprachiger EU Hinweis 55 list 4 8 Gbps Fibre Channel 4-port 20 European Union (EU) 54 help xviii © Copyright IBM Corp. 2012, 2013... - Page 80 Storwize V3700 library related publications xv Taiwan contact information 56, 57 electronic emission notice 56 technical assistance xviii trademarks 53 USB flash drive initializing the system Apple Macintosh 47 Linux 49 Microsoft Windows 46 Storwize V3700: Quick Installation Guide...
- Page 82 Part Number: 00AR171 Printed in USA GC27-4219-01...
Need help?
Do you have a question about the Storwize V3700 and is the answer not in the manual?
Questions and answers