Advertisement
Quick Links
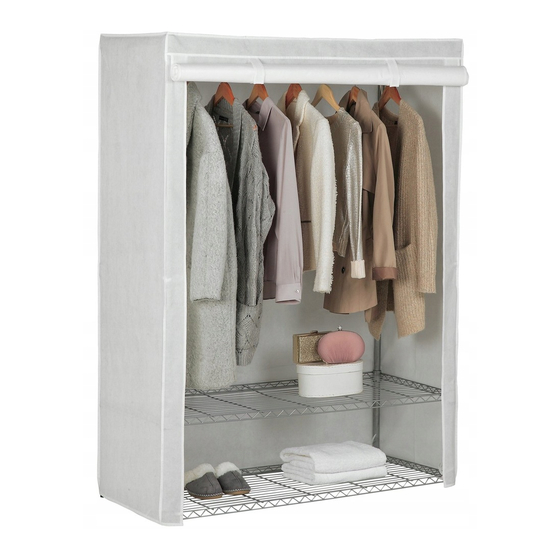
Double Heavy Duty Covered Rail-White/Black
Assembly lnstructions - Please keep for future reference
Dimensions
Width - 117cm
Depth - 50cm
Height - 160cm
Important - Please read these instructions fully before starting assembly
If you need help or have damaged or missing parts,call the Customer helpline:
460/9830
487/5846
0345 6400800
Issue 1-25/0
/15
Advertisement

Related Manuals for Argos 460/9830


Summary of Contents for Argos 460/9830
- Page 1 Double Heavy Duty Covered Rail-White/Black Assembly lnstructions - Please keep for future reference 460/9830 487/5846 Dimensions Width - 117cm Depth - 50cm Height - 160cm Important - Please read these instructions fully before starting assembly If you need help or have damaged or missing parts,call the Customer helpline:...
- Page 2 Safety and Care Advice Important - Please read these instructions fully before starting assembly • Check you have all the • Assemble the unit as close to its Only use hand screwdrivers. components and tools listed on final position (in the same room) •...
-
Page 3: Components - Parts
Components - Parts If you need help or have damaged or missing parts, call the Cust omer helpline: 0345 6400800 Please check you have all the parts listed below 1 Thin rods x 2pcs(80cm) 2 Thin rods with screw thread x 2pcs(80cm) 3 Shelf x 3pcs(117x50cm) 4 Thin rods x 2pcs(85cm) 5 Thin rods with screw... - Page 4 Assembly Instructions Step 1 Step 1 Note: It would be useful to ask someone to help you at this stage. a: Attach connector 9 to thin rods 1 and 2 b: Insert shelf 3 into thin rod 1 and 2 , then fix shelf 3 in the bottom c: Attach plastic part 9 to the desire position as...
- Page 5 Assembly Instructions Step 2 a: Attach plastic part 9 to the desire position as shown.Insert support bar 6 into the rod 4 b: Attach plastic part 9 to the desire position as shown. Insert shelf 3 into the rod 4 and c: Attach hanging rail 7 to the shelf 3 as shown.
- Page 6 Assembly Instructions Step 3 a: Fitting the cover into the assembled frame as shown in the figure. Note: It is recommended that two people fit the cover to the frame. b: Fasten the ties at bottom.
- Page 7 Assembly Instructions Step 4 Fixing to wall wall It is recommended that the wardrobe is fixed to a wall. Note: Top panel The correct type of fixing must be used for your wall,seek professional advice if doubt. Mark the fixing hole on the wall and remove the wardrobe.
Need help?
Do you have a question about the 460/9830 and is the answer not in the manual?
Questions and answers