Table of Contents
Advertisement
INSTRUCTIONS
Cell Counter model R1
Automated Cell Counter
This instruction manual is for the Olympus Cell Counter model R1.
To ensure the safety, obtain optimum performance and to familiarize
yourself fully with the use of this product, we recommend that you
Optical Measuring Instrument
study this manual thoroughly before operating this product, and always
keep this manual at hand when operating this product.
Retain this instruction manual in an easily accessible place near the
work desk for future reference.
Advertisement
Table of Contents
Troubleshooting

Subscribe to Our Youtube Channel
Related Manuals for Olympus R1


Summary of Contents for Olympus R1
- Page 1 Cell Counter model R1 Automated Cell Counter This instruction manual is for the Olympus Cell Counter model R1. To ensure the safety, obtain optimum performance and to familiarize yourself fully with the use of this product, we recommend that you...
- Page 2 OSS licenses associated with this product may permit you to obtain source code for certain software which Olympus has an obligation to provide in accordance with the terms and conditions applied to the OSS. You may obtain a copy of this source code from the following URL.
-
Page 3: Table Of Contents
1.2 Key Features --------------------------------------------------------------------------------------- 1.3 Product Contents --------------------------------------------------------------------------------- 1.4 Product Specifications --------------------------------------------------------------------------- 1.5 Product Description ------------------------------------------------------------------------------- 1.5.1 Front View of the R1 ----------------------------------------------------------------------- 1.5.2 Rear View of the R1 ------------------------------------------------------------------------ 1.5.3 Cell Counting Slide ------------------------------------------------------------------------- Chapter 2 – Setting up --------------------------------------------------------------------------- 2.1 Installation ------------------------------------------------------------------------------------------... -
Page 4: Safety Precautions
Olympus. Disassembling the instrument invalidates its warranty. 12. The USB memory provided with this product is for exclusive use with the R1. Do not use it for any other purpose. 13. Commercial USB memories may not be compatible with this product. - Page 5 In no event shall Olympus accept any returned instrument (including its components) that might have been used or contaminated in some labs, including but not limited to, infectious disease or...
-
Page 6: Intended Use
Perform cell counting within three minutes of mixing samples with trypan blue for accurate cell viability measurements. If necessary, count your sample twice (duplicate readings) and take an average. As the R1 is calibrated before shipping, recalibration before use is not necessary. However, if recalibration is needed, please refer to Section 2.3.3: Settings: Background Calibration. -
Page 7: Chapter 1 - Introduction
Simply prepare a cell sample solution with or without trypan blue and the R1 does the rest, doing away with the subjectivity and time expenditure of manual cell counting. -
Page 8: Product Contents
1.3 Product Contents The R1 product package contains the following components. Component Quantity Power Cord (with AC adapter) USB memory Upon receiving the product package, please inspect its contents to ensure that all parts have been included and that no damage has occurred during shipping. The warranty does not cover damage that may occur during shipping and handling. -
Page 9: Product Specifications
Cell Diameter Range 3-60 µm (optimal range: 8-30 µm) Cell Viability Range 0-100% Image Resolution 5 MP Image Type TIFF (Optimized for R1 only) Software R1 software Documentation Processing Time (manual focusing) or 15 (autofocusing) seconds at ~1 x 10... -
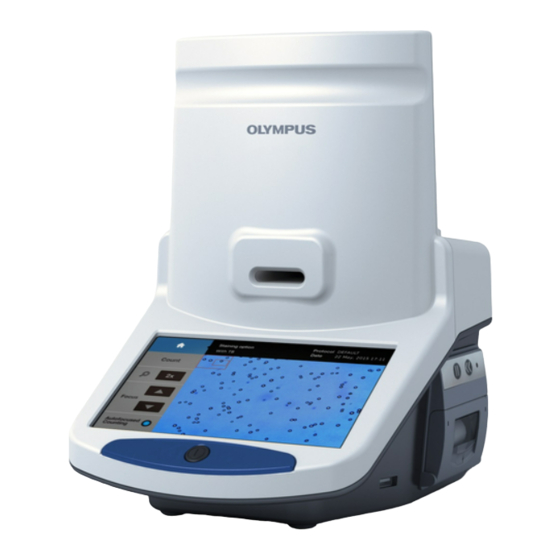
Page 10: Product Description
The front of the R1 has a touchscreen, a power button, a counting slide port to insert Cell Counting Slides, and a USB port for easy data transfer. The right side of the R1 has a built-in printer, which allows for the immediate printing of results. -
Page 11: Cell Counting Slide
The Cell Counting Slide is a disposable, polystyrene cell counting slide that consists of two chambers, A and B. The depth of each chamber is 100 µm. The R1 counts the cells in 0.5 µL, which is comparable to five (1 mm x 1... -
Page 12: Chapter 2 - Setting Up
Upon receiving the product package, unpack the instrument and its accessories to check that all parts have been included (see Section 1.3: Product Contents). Contact Olympus if anything is missing. When transporting the instrument, carefully grip the touchscreen ledge with one hand and the bottom of the opposite side with the other hand as shown below. -
Page 13: Installation: Placing The Ferrite Core
2.1.2 Installation: Placing the ferrite core Take a ferrite core and open it. Place the plug side of the cable of the AC adapter in the ferrite core as shown in the figure. Close the ferrite core. Ferrite Core The AC adapter cord and power cord are vulnerable to bending and twisting. Do not apply excessive force. -
Page 14: Startup/Main Menu
2.2 Startup/Main Menu Push the power button below the touchscreen to turn the instrument on. The company logo will appear, followed by the main menu. The main menu has a power icon and four options: count, review, protocol, and settings. For more detailed instructions on when and how to turn the instrument on or off, see Section 6.1: Turning On/Off. -
Page 15: Settings
2.3 Settings The instrument is preset at the time of manufacture and may be used immediately. Users may adjust the settings of the instrument as desired. Select settings from the main menu. The Settings screen displays: a home icon: press this icon to return to the main menu, ... -
Page 16: Settings: Staining Options
Ensure that the dilution factor in your set protocol is set to “1”. The R1 is optimized for use with trypan blue. Low contrast from not using trypan blue may lead to suboptimal results. The dilution factor will not change automatically. Upon changing the Staining Options, users must manually adjust the dilution factor accordingly. - Page 17 When Without Trypan Blue is selected, the following window will appear. When With Trypan Blue is selected, the following window will appear. Press OK to select the desired staining option. Otherwise, press Cancel to close the window. < Press to return to the Settings screen. Choose the appropriate protocol or adjust the dilution factor accordingly (see Section 3.1: Protocol Parameters and Section 3.2.
-
Page 18: Settings: Counting Options
2.3.2 Settings: Counting Options Users can choose to turn Auto Exposure mode on or off. Auto Exposure mode automatically adjusts the light settings for each count to ensure the accuracy of counting results regardless of the brand, concentration, and shade of trypan blue used. Auto Exposure mode is especially important when using higher concentrations of trypan blue. -
Page 19: Settings: Date/Time
2.3.3 Settings: Date/Time The R1 uses a 24-hour clock and is preset to Korean time. Adjust the settings to the local date and time for accurate record keeping. Press [Date/Time] in the Settings screen. Select the desired field to delete the existing value. Input the desired values with the number panel on the right. -
Page 20: Settings: Software Updates
2.3.4 Settings: Software Updates Olympus continually provides software updates to ensure optimal performance. The existing version of software is displayed in the startup screen and the Settings screen. Download the most recent version from the Olympus website (www.olympus-lifescience.com) into the root directory of a compatible USB memory. -
Page 21: Settings: Background Calibration
2.3.5 Settings: Background Calibration Background calibration adjusts for the specific shade of the trypan blue stain used for counting and is a prerequisite for the successful detection of cells. Users must recalibrate the background after each software update or when using a different brand or concentration of trypan blue. Press [Background Calibration] in the Settings screen. - Page 22 Do not turn the instrument off during this process. Mix one part 0.4% trypan blue stain with an equal volume of distilled water, PBS, or plain medium. Put 10 µL of the diluted trypan blue stain into the chamber of a new Counting Slide. A window will appear with directions for Calibration Step 2 when Calibration Step 1 is complete.
- Page 23 Do not remove the slide or turn off the instrument during this process. Press Exit to return to the Settings screen when Calibration Step 2 is complete. The background calibration value and date will have changed in the Settings Screen.
-
Page 24: Chapter 3 - Protocol Settings
Chapter 3 – Protocol Settings The R1 provides a default protocol that can be used for most common cell lines. Users may create and save up to 300 unique protocols. 3.1 Protocol Parameters The R1 protocols have the following modifiable parameters:... -
Page 25: Creating And Editing Protocols
3.2 Creating and Editing Protocols Select protocol from the main menu. The Protocol screen includes a list of saved protocols. The selected protocol is highlighted in blue. The parameters of the selected protocol are displayed in the right panel. The DEFAULT protocol cannot be modified or deleted. - Page 26 To create a new protocol, select New Protocol and press Load. Press Delete to delete the selected protocol. Press Edit to modify the selected protocol. This will activate the arrows for each parameter, turning them a solid grey. Press the arrows to adjust the values of each parameter as desired. Press Save as.
-
Page 27: Protocol Selection
3.3 Protocol Selection Select the desired protocol in the Protocol screen. Press Load to apply the selected protocol. Now the instrument is ready to count cells with the selected protocol. Important! Merely selecting a protocol does not mean that it has been put into effect. To apply the selected protocol, make sure to press Load. -
Page 28: Chapter 4 - Counting Cells
Chapter 4 – Counting Cells 4.1 Instrument Preparation Select count from the main menu. The staining option, set protocol, date, and time appear in the panel at the top of the Count screen. To change the staining option, see Section 2.3.1: Settings: Staining Options. To change the protocol, see Section 3.3: Protocol Selection. -
Page 29: Sample Preparation
4.3 Slide Insertion Insert the Counting Slide face up and sample-side first into the counting slide port of R1. The R1 can only analyze the inserted chamber. Do not insert the Counting Slide facedown. -
Page 30: Focusing
4.4 Focusing The R1 provides two focusing options: autofocusing and manual focusing. The R1 has an autofocusing algorithm optimized for cell counting that works in tandem with a novel focusing mechanism that rapidly obtains the Z position of the sample by the application of a small voltage to a liquid lens. The elimination of mechanical parts removes noise and significantly reduces the need for servicing. - Page 31 Press [Count] to start counting. The R1 counts the cells in 0.5 µL, which is comparable to five (1 mm x 1 mm) squares on a standard hemocytometer. Counting time will vary with protocol, cell size, and cell concentration. With the DEFAULT protocol, cell samples...
-
Page 32: Results
4.6 Results The R1 has onboard data analysis software that allows users to analyze cell count and viability data immediately. 4.6.1 Results: Image View Press [Image] to view the captured image of the analyzed cell sample. Use a finger or a stylus to navigate the image. The Tag and magnifier buttons are to the right of the image. - Page 33 The Tag function allows users to verify the instrument’s counting accuracy immediately. Press Tag to label what was counted as live cells with green circles and dead cells with red circles. Press Tag again to remove the labels.
-
Page 34: Results: Histogram And Gating
The R1 provides a gating function that can be controlled by the gating bar on the bottom of the screen. Select the desired light grey limit icon. The selected icon will become red. - Page 35 Press the arrows on either end of the size to alter the minimum and maximum size limits. The gating function is helpful for monitoring co-cultured cells with distinct sizes and the exclusion of noncellular particles. Press Apply to set the size gating limits. The count results will adjust accordingly. Press Cell number to change the Y-axis to Cell Concentration.
-
Page 36: Results: Dilution Calculator
4.6.3 Results: Dilution Calculator Users may use the onboard dilution calculator to compute dilutions for subsequent experiments. Press [Dilution] and the dilution calculator will appear. The dilution calculator starts out with the concentration of total cells (live and dead) as the current concentration. The current concentration options are Total, Live, Dead, and Custom, allowing users to set the current concentration to be the total cell concentration, live cell concentration, dead cell concentration, or a custom cell concentration by pressing the black box below the Current Concentration value. -
Page 37: Results: Saving And Printing
4.6.4 Results: Saving and Printing The R1 provides the option of saving and/or printing results. Press [Save/Print] in the Results screen. The Save/Print screen has three saving options. Saving Options Description Analyzed Image Tagged image of live and dead cells... - Page 38 Using the onscreen keyboard, name the count as desired. Users may add the date to the name by pressing the Add Date/Time button. Press Save to save to a USB memory. A folder of the same name will be created to contain all the files generated.
- Page 39 HL-60-16042017_143541.pdf HL-60-16042017_143541_RAW.tif HL-60-16042017_143541_TAG.tif...
- Page 40 A summary of each count performed is automatically saved to the R1. The R1 stores up to 1000 counts onboard. Alternatively, press Print. The printed report will contain the cell count results and protocol details. Cell Count Report File name: HL-60- 16042017_143541 Date: 16 Apr., 2017 14:35...
-
Page 41: Chapter 5 - Review Previous Results
USB memory and [Previous Counts] looks up data stored directly on the R1. Insert a USB memory to the USB port of the R1. Press [Review Files] to select an R1-generated folder from the USB memory. The cell count results and corresponding image will appear on the right side of the screen. - Page 42 If available in the folder, a tagged image will appear below the results. The image may be magnified with the magnifier. Press [Previous Counts] to see a list of up to 1000 previous counts and their summarized results. Data can be exported to a USB memory as individual CSV files.
-
Page 43: Chapter 6 - Maintenance And Troubleshooting
* If the USB memory is removed from the instrument while it is turned on, reports might not be saved properly. 6.2 Cleaning Turn the R1 off and disconnect the power cable before cleaning. Ensure that liquids do not enter any part of the instrument during cleaning. -
Page 44: Troubleshooting
USB memory. Insert the damaged software USB properly. Press [Software Updates] in the Settings screen. If the problem persists, contact Olympus. Check to see there is enough paper in the printer paper LED on printer receptacle. -
Page 45: Chapter 7 - Power Cord Selection
If a power cord has not been provided, please select the proper power cord for the instrument by referring to the Specifications and Certified Cords table below. If you use a non-approved power supply for Olympus products, Olympus can no longer warrant the electrical safety of the instrument. - Page 46 Table 2: HAR Flexible Cords APPROVAL ORGANIZATIONS AND CORDAGE HARMONIZATION MARKING METHODS Alternative Marking Utilizing Printed or embossed Black-Red-Yellow Thread Harmonization Marking Approval Organization (Length of color section in mm) (May be located on jacket or insulation of internal wiring) Black Yellow Comite Electrotechnique Belge...
- Page 47 Manufactured by OLYMPUS CORPORATION Shinjuku Monolith, 2-3-1, Nishi-Shinjuku, Shinjuku-ku, Tokyo 163-0914, Japan Distributed by OLYMPUS EUROPA SE & CO. KG Wendenstrasse 14-18, 20097, Hamburg, Germany OLYMPUS CORPORATION OF THE AMERICAS 3500 Corporate Parkway, P.O. Box 610, Center Valley, PA 18034-0610, U.S.A.
Need help?
Do you have a question about the R1 and is the answer not in the manual?
Questions and answers