Table of Contents
Advertisement
Modules described
in this manual
U-HGLGPS
U-LLG150/300
U-LLGAD
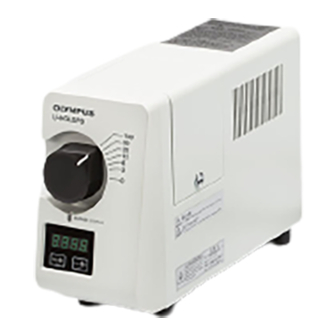
This instruction manual is for the Light source Model U-HGLGPS.
To ensure the safety, obtain optimum performance and to familiarize yourself fully with the use of this
light source, we recommend that you study this manual thoroughly before operating this system.
Retain this instruction manual in an easily accessible place near the work desk for future reference.
LIGHT GUIDE ILLUMINATION
INSTRUCTIONS
SYSTEM
A X 8 1 0 4
Advertisement
Table of Contents

Related Manuals for Olympus U-HGLGPS


Summary of Contents for Olympus U-HGLGPS
- Page 1 LIGHT GUIDE ILLUMINATION SYSTEM This instruction manual is for the Light source Model U-HGLGPS. To ensure the safety, obtain optimum performance and to familiarize yourself fully with the use of this light source, we recommend that you study this manual thoroughly before operating this system.
- Page 2 Equipment, this symbol indicates that the product must not be disposed of as unsorted municipal waste, but should be collected separately. Refer to your local Olympus distributor in EU for return and/or collection systems available in your country. NOTE: This equipment has been tested and found to comply with the limits for a Class A digital device, pursuant to Part 15 of the FCC Rules.
-
Page 3: Table Of Contents
CONTENTS IMPORTANT -- Be sure to read this section for safe use of the equipment. -- Maintenance and Storage ......2 Getting Ready ..............MODULE NOMENCLATURE ASSEMBLY Mounting of Power Cord ......5 Mounting of Light Guide ......4 OPERATION Turning OFF the lamp ........6 Turning ON the lamp ........6 Counter Display ..........7 Adjustment of the brightness ....7... -
Page 5: Important
40 mm. Always use the power cord provided by Olympus. If no power cord is provided, please select a proper power cord by referring to the section “PROPER SELECTION OF THE POWER CORD” at the end of this instruction manual. If the proper power cord is not used, product safety performance cannot be warranted. -
Page 6: Getting Ready
If you cannot dispose of it by yourself, bring it to the Olympus sales office. Before disposing of this product, be sure to follow the regulations and rules of your local government. -
Page 7: Module Nomenclature
U-HGLGPS MODULE NOMENCLATURE Light source U-HGLGPS Light volume adjustment dial Lighting display LED Counter (P.7) Reset switch Lamp switch Light guide entrance Power cord connector Fuse (P.9) Power switch /(ON) / \(OFF) Liquid light guide adapter Liquid light guide U-LLGAD... -
Page 8: Assembly
ASSEMBLY Mounting the Light Guide (Figs. 1 to 3) Hold the connector of the light guide and insert it to the light guide socket of the light source unit. Fig. 1 Loosen the light guide fixing screws with the Allen screwdriver provided with the microscope. - Page 9 Fig. 4 connecting the power cord and other cords. • Always use the power cord provided by Olympus. If no power cord is provided, please select a proper power cord by referring to “PROPER SELECTION OF THE POWER CORD” at the end of this instruction manual.
-
Page 10: Operation
OPERATION Turning ON the lamp (Figs. 6 & 7) Turn / (ON) the power switch on the back side of the light source unit. The software version appears in the counter, and then (after approximately 3 seconds), the accumulated lighting time of the lamp appears. -
Page 11: Adjustment Of The Brightness
U-HGLGPS Adjustment of the brightness (Fig. 10) Rotate the light volume adjustment dial to adjust the light volume. The light volume can be adjusted in 7 levels. Each numerical number indicates the percentage (0—100%) of each light volume where the maximum light volume is 100%. - Page 12 If the lighting display LED lights red If the equipment does not work properly, e.g. the lamp is not turned on, etc., the lighting display LED lights red. Follow the procedures described below. Lighting display LED lights red Turn O (OFF) the power switch on the back side of the Light Guide, and unplug the power cord plug from the outlet.
-
Page 13: Replacement Of Fuse
U-HGLGPS Replacement of the Lamp (Figs. 13 to 15) << Applicable lamp >> DC130W SHI Lamp (USHIO INC. SHI-130 OL) • Before replacing the lamp, be sure to turn \ (OFF) the power CAUTION switch and unplug the power cord from the outlet, and wait (more than 40 minutes as a guide) until the lamp replacement cover and the lamp are cooled down sufficiently. -
Page 14: Troubleshooting Guide
Under certain conditions, performance of the unit may be adversely affected by factors other than defects. If problems occur, please review the following list and take remedial action as needed. If you cannot solve the problem after checking the entire list, please contact your local Olympus representative for assistance. Trouble... -
Page 15: Specifications
U-HGLGPS SPECIFICATIONS Item Specification Input rating 100-240 V ±10 % $ ( 90-264 V ) , 50/60 Hz 2.0 A Lamp DC130W SHI lamp SHI-130 OL Light guides Liquid light guide(1.5m/3.0m) : U-LLG 150/300 Light guide adapter Liquid light guide adapter : U-LLGAD Dimensions / Weight 111(W)X195(H)X317(D) 3.5±0.3kg... -
Page 16: Lamp Housing Inspection Sheet
{ If there is any ( ) mark noted, immediately stop use of the product, and contact Olympus for detailed inspections or replace the lamp housing. { If you detect an abnormality other than that listed below or with other Olympus product, also stop the use of the product and contact Olympus for detailed inspections. - Page 17 If no power cord is provided, please select the proper power cord for the equipment by referring to “ Specifications ” and “ Certified Cord ” below: CAUTION: In case you use a non-approved power cord for Olympus products, Olympus can no longer warrant the electrical safety of the equipment.
- Page 18 Table 2 HAR Flexible Cord APPROVAL ORGANIZATIONS AND CORDAGE HARMONIZATION MARKING METHODS Alternative Marking Utilizing Printed or Embossed Harmoni- Black-Red-Yellow Thread (Length zation Marking (May be located of color section in mm) Approval Organization on jacket or insulation of internal wiring) Black Yellow...
- Page 20 Distributor Tengrant Ltd. Tel.: +86(021)5428 6005 Fax: +86(021)5428 6005-8002 www.tengrant.com 2011 07-02...
Need help?
Do you have a question about the U-HGLGPS and is the answer not in the manual?
Questions and answers