Table of Contents
Advertisement
Quick Links
Modules described
in this manual
SZ2-LGB
SZ2-LGSF
SZ2-LGSI
SZ2-LGDF
SZ2-LGDI
SZ2-LGR
LIGHTGUIDE ILLUMINATOR
This instruction manual is for the Olympus Lightguide Illuminator System. To ensure the safety,
obtain optimum performance and to familiarize yourself fully with the use of this equipment,
we recommend that you study this manual thoroughly before operating the system.
Retain this instruction manual in an easily accessible place near the work desk for future reference.
This publication is printed on 100% recycled paper
INSTRUCTIONS
SYSTEM
A X 6 6 2 7
Advertisement
Table of Contents

Related Manuals for Olympus SZ2-LGB


Summary of Contents for Olympus SZ2-LGB
- Page 1 LIGHTGUIDE ILLUMINATOR SYSTEM This instruction manual is for the Olympus Lightguide Illuminator System. To ensure the safety, obtain optimum performance and to familiarize yourself fully with the use of this equipment, we recommend that you study this manual thoroughly before operating the system.
-
Page 2: Table Of Contents
3-1 Installing the SZ2-LGB Lightguide Illuminator..................6-7 Mounting (Replacing) the Halogen Bulb Connecting the AC Adapter 3-2 Attaching the SZ2-LGB Lightguide Illuminator .................... 7 Attaching on the SZ2-ST Standard Stand Attaching on the SZ2-LGBST LGB Stand 3-3 Attaching the Light Guide and Other Accessories ................ 8-9... -
Page 3: Safety Precautions
5. Be sure to supply power from a grounded, 3-conductor power outlet using the proper power cord. If the power outlet is not grounded properly, Olympus can no longer warrant the electrical safety performance of the equipment. 6. To shut down the power supply immediately in a case of emergency, set the light intensity control knob to “... - Page 4 Indicates that the main switch is OFF. Warnings Warning indications are placed at parts where special precaution is required when handling and using the equipment. Always heed the warnings. Illuminator (SZ2-LGB) Warning indication position STM6-LM (Bulb mount pull-out knob) [High temperature warning] Getting Ready 1.
- Page 5 Caution If the system is used in a manner not specified by this manual, the safety of the user may be imperiled. In addition, the equipment may also be damaged. Always use the equipment as outlined in this instruction manual. The following symbols are used to set off text in this instruction manual.
-
Page 6: System Diagram
SZ2-LGCL Transmitted Light SZ2-LGR Guide Adapter Flexible Light Guide SZ2-TLGAD SZ2-LGSF Interlock Light Guide SZ2-LGSI Lightguide Illuminator Transmitted Illumi- SZ2-LGB nation attachment SZ2-ILA Interlock Dual Light Guide SZ2-LGDI Light Guide Holder SZ2-LGHL Standard Stand SZ2-ST AC adapter Power cord * The SZ2-LGCL collector lens can be mounted. -
Page 7: Nomenclature
NOMENCLATURE Lightguide Illuminator (Note) The following figure shows the view when the bulb mount is pulled out. SZ2-LGB Light guide port Vent hole For air exhaust. Halogen bulb 12V22WHAL Screw hole & projection Use for stand installation. AC adapter jack... -
Page 8: Assembly
?Consult the System Diagram and confirm the mounting positions of the modules. # Before assembly, remove dirt and dust from the modules and perform operations carefully so as not to damage them. 3-1 Installing the SZ2-LGB Lightguide Illuminator Mounting (Replacing) the Halogen Bulb (Fig. 1) ²... -
Page 9: Attaching The Sz2-Lgb Lightguide Illuminator
3. Insert the plug 6 of the power cord into the power outlet 7. Connect the power cord to a grounded, 3-conductor power outlet using the proper power cord. If the power outlet is not grounded properly, Olympus can no longer warrant the electrical safety per- formance of the equipment. Fig. 4... -
Page 10: Attaching The Light Guide And Other Accessories
LIGHTGUIDE ILLUMINATOR SYSTEM 3-3 Attaching the Light Guide and Other Accessories Attaching the Light Guide (Input End) (Fig. 7) Align marking · 1 on the light guide (input end) with marking · 2 on the light guide port, and insert the light guide all the way into the port. ²... - Page 11 SZ2-LGR 1. Screw the SZ-LGR66 ring light guide adapter 1 into the threaded section of the auxiliary objective mount at the extremity of the SZ2 microscope body. 2. Loosen the clamping knob 3 of the SZ2-LGR ring light guide 2. 3.
-
Page 12: Operation
LIGHTGUIDE ILLUMINATOR SYSTEM OPERATION 4-1 Adjusting the Light Guide Angle (Interlock Light Guide Only) } Angle adjustment is not necessary for the flexible light guide provided that it is attached to the normal position. In the position that does not hinder observation, hold the output end section 1 of the light guide with a hand and irradiate the light on the specimen. -
Page 13: Adjusting The Light Guide Brightness
4-2 Adjusting the Light Guide Brightness }The light intensity control knob 1 is also used as the main switch. 1. Turn the light intensity control knob 1 clockwise until it clicks. This turns the illuminator on at the minimum light intensity. 2. -
Page 14: Specifications
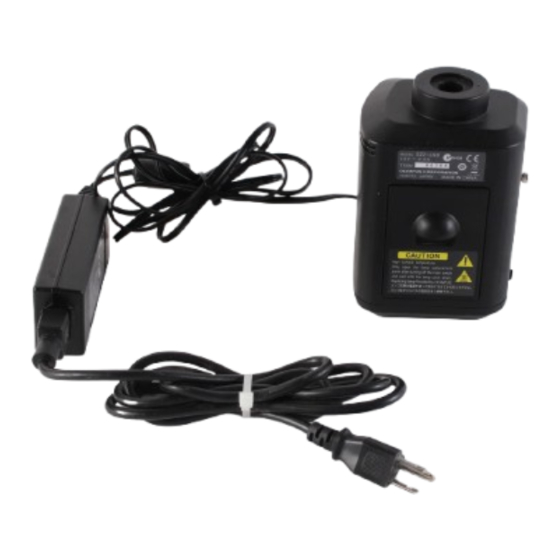
Light balance between branches ––– 90% or more 90% or more ––– ––– Lightguide Illuminator SZ2-LGB Item Specification Rated voltage AC adapter Input: 100-240 V AC, 50/60 Hz. Output: 12 V DC, 2 A Lamp bulb Halogen bulb (with dichroic mirror) -
Page 15: Troubleshooting
Under certain conditions, performance of the system may be adversely affected by factors other than defects. If problems occur, please review the following list and take remedial action as needed. If you cannot solve the problem after checking the entire list, please contact Olympus. Irregularity description... -
Page 16: Proper Selection Of The Power Supply Cord
If no power supply cord is provided, please select the proper power supply cord for the equipment by referring to “ Specifications ” and “ Certified Cord ” below: CAUTION: In case you use a non-approved power supply cord for Olympus products, Olympus can no longer warrant the electrical safety of the equipment. - Page 17 Table 2 HAR Flexible Cord APPROVAL ORGANIZATIONS AND CORDAGE HARMONIZATION MARKING METHODS Alternative Marking Utilizing Printed or Embossed Harmoniza- Black-Red-Yellow Thread (Length tion Marking (May be located on Approval Organization of color section in mm) jacket or insulation of internal wir- ing) Black Yellow...
Need help?
Do you have a question about the SZ2-LGB and is the answer not in the manual?
Questions and answers