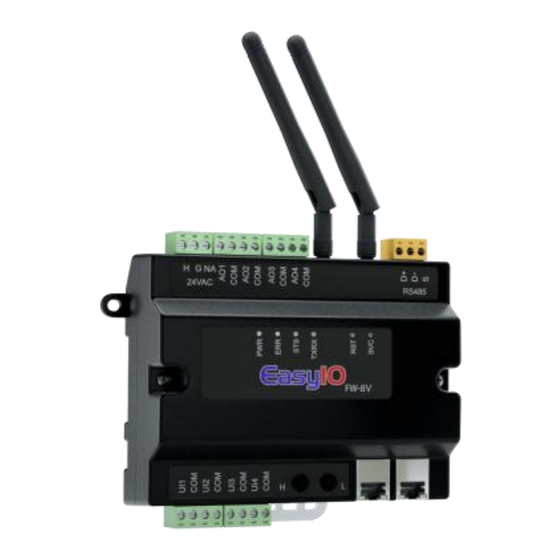
EasyIO FW Series Installation Manual
Hide thumbs
Also See for FW Series:
- Connectivity manual (41 pages) ,
- User reference (30 pages) ,
- Firmware upgrade manual (12 pages)
Advertisement
Advertisement

Summary of Contents for EasyIO FW Series
- Page 1 EasyIO FW Series– Installation Guide v2.0 FW Series Installation Guide...
- Page 2 EasyIO FW Series– Installation Guide v2.0 Document Change Log May 2017 Document created. Dec 2018 Updated disclaimer and support channel emails addresses June 2019 Updated FW-28 new model...
- Page 3 While every effort has been made to assure the accuracy of this document, EasyIO Holdings Pte Ltd is not responsible for damages of any kind, including without limitation consequential damages, arising from the application of the information contained herein.
- Page 4 EasyIO FW Series– Installation Guide v2.0 Federal Communication Commission Interference Statement This equipment has been tested and found to comply with the limits for a Class B digital device, pursuant to Part 15 of the FCC Rules. These limits are designed to provide reasonable protection against harmful interference in a residential installation.
-
Page 5: Table Of Contents
EasyIO FW Series– Installation Guide v2.0 Table of Contents Introduction ..............................6 Dimension ............................... 7 FW-28 ................................. 7 FW-14 ................................. 9 FW-08 , FW-08V ............................11 Physical Installation Instructions ........................13 Wireless Antenna Installation ........................16 Removing the Top Cover ..........................17... -
Page 6: Introduction
EasyIO FW Series– Installation Guide v2.0 Introduction This document provides the installation guide/mounting guide for the EasyIO FW Series controller. Do not mount the EasyIO FW Series: In an area where excessive moisture, corrosive fumes or explosion vapors are present. -
Page 7: Dimension
EasyIO FW Series– Installation Guide v2.0 Dimension FW-28 Below are the dimensions FW-28. - Page 8 EasyIO FW Series– Installation Guide v2.0 Alternate mounting option dimension...
- Page 9 EasyIO FW Series– Installation Guide v2.0 FW-14 Below are the dimensions FW-14. Top View. Width including terminal block connectors is approx 124mm...
- Page 10 EasyIO FW Series– Installation Guide v2.0 Side view and back view. Improved DIN rail mounting for easy dismantling. Alternate mounting option dimension...
- Page 11 EasyIO FW-14– Installation Guide v1.0 FW-08 , FW-08V Below are the dimensions FW-08 and FW-08V. Both models dimension are identical. Top View. Width including terminal block connectors is approx 124mm...
- Page 12 EasyIO FW-14– Installation Guide v1.0 Side view and back view. Improved DIN rail mounting for easy dismantling. Alternate mounting option dimension...
-
Page 13: Physical Installation Instructions
EasyIO FW-14– Installation Guide v2.0 Physical Installation Instructions The procedure below is for FW-14 model. The procedure is same for FW-08,FW-08V and FW-28. Step 1 Securely fasten the DIN rail to the enclosure base plate. Typical industrial DIN rail, 35mm Step 2 Use a screwdriver to unlock the 2 numbers of locking clips. - Page 14 EasyIO FW-14– Installation Guide v2.0 Step 3 Position the EasyIO FW Series on the DIN rail mount till it hooks over the top edge of the DIN rail. Push the controller towards the bottom part of the DIN rail Step 4 Press/flatten the EasyIO FW Series to make sure the bottom of the base cover touches the enclosure base plate.
- Page 15 Image shows a typical “DIN rail end clip(end stopper)” The EasyIO FW Series comes with 2 mounting holes as optional mounting. Occasionally if DIN rail mounting is not practical, you can use screws to mount the EasyIO FW Series to an enclosure base plate.
-
Page 16: Wireless Antenna Installation
The procedure is same for FW-08, FW-08V and FW-28. Step 1 Each unit of EasyIO FW Series comes with two 2.4GHz 2dBi with male SMA connector antennas. The antennas are screw type connectors. Locate the two RP-SMA female connectors at the top right corner of the EasyIO FW Series. -
Page 17: Removing The Top Cover
EasyIO FW-14– Installation Guide v2.0 Step 3 For better wireless reception reposition the antenna. Hold the antenna plastic body to reposition them. Removing the Top Cover The procedure below is for FW-14 model. The procedure is same for FW-08, FW-08V and FW-28 Step 1 Use a Philips screwdriver to unscrew the 2 Philips screws located on top the top cover. -
Page 18: Technical Support
EasyIO FW-14– Installation Guide v2.0 Technical Support For technical issue, please contact respective region support channel. Worldwide and Asia Pacific Support support@easyio.com Americas Support support@easyio.pro Europe Support support@easyio.eu...


Need help?
Do you have a question about the FW Series and is the answer not in the manual?
Questions and answers