Advertisement
Advertisement

Subscribe to Our Youtube Channel
Related Manuals for York Fitness Performance Rower


Summary of Contents for York Fitness Performance Rower
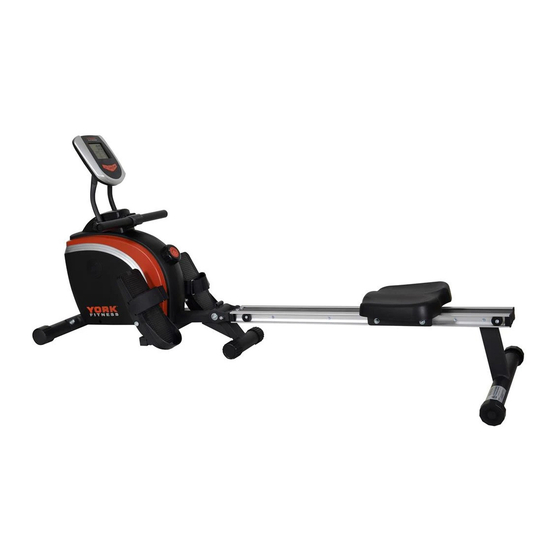
- Page 1 Owner’s Manual Performance Rower Item #YRK56037A www.yorkfitness.com.au...
-
Page 2: Table Of Contents
CONTENTS SAFETY PRECAUTIONS EXPLODED DIAGRAM 9-10 PRE-ASSEMBLY CHECK LIST PART LIST 11-13 HARDWARE PARTS LIST CONSOLE INSTRUCTIONS ASSEMBLY INSTRUCTION EXERCISE INSTRUCTIONS 15-16 WARRANTY 17-19 IMPORTANT SAFETY PRECAUTIONS This exercise machine is built for optimum safety. However, certain precautions apply whenever you operate a piece of exercise equipment. Be sure to read the entire manual before you assemble or operate your machine. -
Page 3: Pre-Assembly Check List
PRE-ASSEMBLY CHECK LIST NO.1 NO.3 NO.9 NO.14 L/R NO.17 NO.26 NO.11 NO.28 PART NO. DESCRIPTION Q’TY Main frame Front stabilizer w/end caps Console 14L/R Pedal (L/R) Pedal support tube Slide rail Rear stabilizer w/end caps Seat User manual Hardware www.yorkfitness.com.au www.yorkfitness.com.au www.yorkfitness.com.au... -
Page 4: Hardware Parts List
HARDWARE PARTS LIST DESCRIPTION DRAWINGS Carriage bolt M8*65 End cap for slide rail L/ R Curved washer Domed nut Allen screw M6*12 Flat washerΦ6*Φ17 Axle for pedal Carriage bolt M8*45 Cushion rubber Allen screw M8*20 Allen screw M8*16 Flat washerΦ8*Φ17 Box wrench Allen key L4 Allen key L6... -
Page 5: Assembly Instruction
ASSEMBLY INSTRUCTION Step 1 Attach the front stabilizer (3) to the main frame (1). Secure using two carriage bolts (2), two curved washers (6) and two domed nuts (7). Connect the sensor wire (21) to the sensor wire from the back of the console (9). Attach the console (9) to the console bracket (62) and tighten with two screws (10). - Page 6 Step 3 Attach the rear stabilizer (28) to the back of the slide rail (26). Secure using four allen bolts (24) and four flat washers (25). Insert the slide rail (26) onto the U type connect tube (58). Secure using six allen bolts (24) and six flat washers (25).
- Page 7 5L 5R Step 4 Pull out the ball pin (55) from the main frame (1) and unfold it as following angle. Note: Before insert ball pin #35 to fold the trainer, 1. Slightly lift up the main frame. 2. Assure the fixation holes are on equal position. 3.
- Page 8 CHECK ALL BOLTS AND NUTS ARE TIGHTENED BEFORE USING THE MACHINE www.yorkfitness.com.au www.yorkfitness.com.au www.yorkfitness.com.au...
-
Page 9: Exploded Diagram
EXPLODED DIAGRAM 33 31 33 31 www.yorkfitness.com.au www.yorkfitness.com.au www.yorkfitness.com.au... - Page 10 74 31 www.yorkfitness.com.au www.yorkfitness.com.au www.yorkfitness.com.au...
-
Page 11: Part List
PARTS LIST DESCRIPTION PART NO. Main frame Carriage bolt M8*65 Front stabilizer End cap for front stabilizer End cap for slide rail L End cap for slide rail R Curved washer Domed nut Tension control knob w/cable Console Screw M5*10 Seat Allen screw M6*12 Flat washerΦ6*Φ17... - Page 12 PARTS LIST Spring clutch w/rope Chain cover L Chain cover R Adjusting screw sets Snap spring Bearing 6001 Flange nut Flywheel Hex head bolt 8*105 Self-tapping screw ST5*15 Plastic spacer Magnet assembly Bushing for handlebar Hex head screw M6*25 Hex head nut M6 Sensor bracket Handlebar cover Spring washerΦ8...
- Page 13 PARTS LIST PART NO. DESCRIPTION Plastic spacer Axle for flywheel Flat washer Bolt Nylon tape Crank cover www.yorkfitness.com.au www.yorkfitness.com.au www.yorkfitness.com.au...
-
Page 14: Console Instructions
CONSOLE INSTRUCTIONS Please note: You must insert the batteries into the back of the console before using this machine Once the batteries are installed, the console will enter CLOCK mode and display 0.00. The hour will flash on 0. You can press the UP/DOWN keys to adjust the hour & press MODE to confirm and move to the minutes. The minutes will flash 00, you can press the UP/DOWN keys to adjust the minutes and press the MODE key to set. -
Page 15: Exercise Instructions
EXERCISE INSTRUCTIONS Using your ROWING MACHINE will provide you with several benefits, it will improve your physical fitness, tone muscle and in conjunction with a calorie controlled diet help you lose weight. 1. The Warm Up Phase This stage helps get the blood flowing around the body and the muscles working properly. It will also reduce the risk of cramp and muscle injury. - Page 16 MUSCLE TONING To tone muscle while on your Performance Rower you will need to have the resistance set quite high. This will put more strain on your leg muscles and may mean you cannot train for as long as you would like.
Need help?
Do you have a question about the Performance Rower and is the answer not in the manual?
Questions and answers