
Subscribe to Our Youtube Channel
Related Manuals for York Fitness Aspire 2 in 1


Summary of Contents for York Fitness Aspire 2 in 1
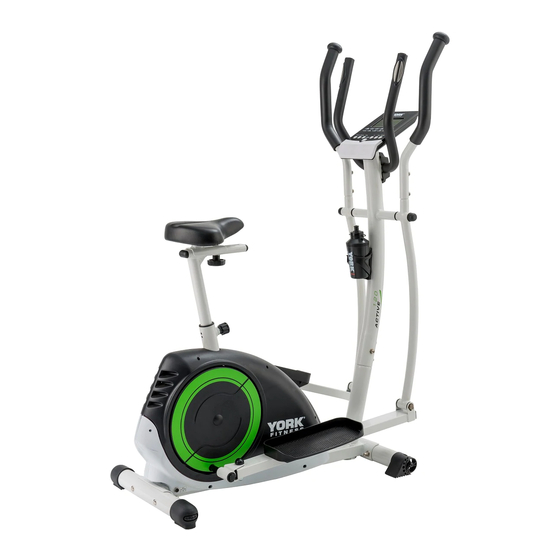
- Page 1 Owner’s Manual Aspire 2 in 1 Cycle Cross Trainer 52058 V1.0 13OCT2012 www.yorkfitness.com...
-
Page 2: Table Of Contents
Table of contents Congratulations on Contents purchasing your exercise Safety information equipment from Customer support Assembly instructions Operational instructions You have chosen a high quality, safe and innovative piece of equipment as your training partner and we Troubleshooting are certain it will keep you motivated on the way to achieving your personal fitness goals. -
Page 3: Safety Information
Always use the correct adjustment pin / fixing. • Due to our continuous policy of product development, York Fitness reserves the right to • Always check that any pins / fixings are tight and change specifications without notice. secure before use and after adjustment. -
Page 4: Customer Support
IMPORTANT!! - Please retain your sales receipt, York Fitness Customer Care may request proof of purchase to validate eligibility for warranty service. Warranty cover starts from the date shown on the proof of purchase. - Page 5 PREPARE YOUR WORK AREA - It is important you assemble the product in a clean and uncluttered space. WORK WITH A FRIEND - We recommend you have someone assist you with the assembly as some of the components are quite heavy. OPEN THE CARTON - Check any warnings on the carton and make sure you have it the right way up.
-
Page 6: Assembly Instructions
Assembly instructions Make sure you have the following parts: G (1pc) F (1pc) S (1pc) O (1pc) U (1pc) A (1pc) R (1pc) B (1pc) V (1pc) E (1 set) Z (1pc) N (1 set) C (1pc) H (1 set) STEP 1 N-1x4 N-4x4... - Page 7 STEP 2 STEP 3 www.yorkfitness.com...
- Page 8 Assembly instructions STEP 4 N-5x4 N-11 N-4x4 N-12 N-12x2 N-3x6 N-10 N-13x2 N-10 N-13 N-10x2 STEP 5 N-5x2 N-3x2 N-4x2 www.yorkfitness.com...
-
Page 9: Final Check
STEP 6 N-15x2 N-14x2 N-9x4 N-8x4 N-7x4 N-15 N-5x6 N-3x6 N-14 N-4x4 N-6x2 STEP 7 A-2x4 Final Check Your exercise equipment is now assembled. Please make the following final checks: • Make sure all screws / bolts are tightened. • Make sure the equipment is on a flat, level surface. -
Page 10: Operational Instructions
Operational instructions Adjusting The Resistance This cross trainer features a speed independent braking (resistance) system. The resistance is controlled by a magnet, which is moved closer or further away from the flywheel - the closer the magnet is to the flywheel the higher the resistance. -
Page 11: Display Functions
Console: DISPLAY DESCRIPTION • Increase resistance level • Setting selection. Down • Decrease resistance level • Setting selection. Mode • Confirm setting or selection. Reset • Press and hold for 2 seconds, computer will reboot and start from user setting. •... -
Page 12: Manual Mode
Operational instructions Power On Plug in power supply, computer will power on and display all segments on LCD for 2 seconds. After 4 minutes without pedaling or pulse input, console will enter into power saving mode. Press any key may wake the console up. Manual Mode Press START in main menu to start workout in manual mode. -
Page 13: Troubleshooting
WATT Mode 1. Press UP or DOWN to select workout program, choose WATT and press Mode to enter. 2. Press UP or DOWN to preset WATT target. (default: 120) 3. Press UP or DOWN to preset TIME. 4. Press START/STOP key to start workout. (Press UP or DOWN to adjust Watt level.) 5. -
Page 14: Fitness Guide
Fitness guide Correct Cycling Form • Sit on the cycle, with your feet on the pedals and inside the pedal straps. • Ensure that the seat height is adjusted correctly - you should be stable and balanced whilst on the saddle. The basic rule for getting the seat height right is that as the pedal reaches its lowest point, the leg is almost straight. -
Page 15: Heart Rate Training
How Long Should I Exercise For? That really depends on your current level of fitness. If you’re just starting out on a new exercise program, you should start gradually and build up - do not try to do too much too quickly. 30 minutes, 3 times a week should be enough. Don’t push yourself too hard - you should never feel exhausted during or following exercise. -
Page 16: Exploded Drawing
Exploded drawing N-13 N-12 N-11 N-10 N-15 N-14 www.yorkfitness.com... - Page 17 P-10 D-12 D-11 D-5 D-6 D-10 L-10 K-10 L-11 K-11 M-8 M-9 I-5 I-2 I-3 www.yorkfitness.com...
-
Page 18: Part List
Part list YORK REF. REF. DESCRIPTION QTY. YORK REF. REF. DESCRIPTION QTY. 52058A00 COMPUTER SET 52058J04 RIGHT CHAIN COVER 52058A01 COMPUTER (SM-2761-67) 52058J05 SCREW (ST4.2X1.4X20L) 52058A02 BOLT (M5*0.8*10L ) 52058J06 SCREW (ST4.2*20L) 52058B00 FIXING BAR SET 52058K00 FIXING PLATE FOR MAGNET SET 52058B01 FIXING BAR 52058K01... - Page 19 YORK REF. REF. DESCRIPTION QTY. 52058P00 PEDAL SUPPORT SET 52058P01 PEDAL SUPPORTING TUBE 52058P02 SQUARE CAP (30*60*15) 52058P03 NUT (M10*1.5*10T) 52058P04 FLAT WASHER (D20*D11*2.0T) 52058P05 BUSHING - D19.15X(D25.6X32)XL(17+3) 52058P06 BUSHING (D29*D11.9*9T) 52058P07 C-CLIP (D21.5XD17.5X1.2T) 52058P08 JOINT 52058P09 FLAT WASHER (D24*D13.5*2.5T) 52058P10 P-10 LADDER BOLT (M10*1.5*58L 8.8)
- Page 20 www.yorkfitness.com...
Need help?
Do you have a question about the Aspire 2 in 1 and is the answer not in the manual?
Questions and answers