Advertisement
Quick Links
Advertisement

Subscribe to Our Youtube Channel
Related Manuals for Casall INFINITY 1.3B


Summary of Contents for Casall INFINITY 1.3B
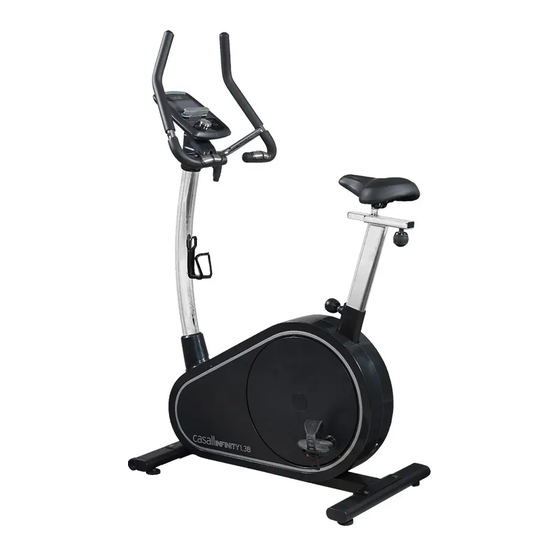
- Page 1 Casall INFINITY 1.3B Bike 91021...
- Page 2 Important: Please locate your serial number and record in the box below for service support purposes. Serial number Serial number here: ...
- Page 3 I N F I N I T Y 1 . 3 B No:J-2 Allen Bolt M7*P1.0*30L (1) No:J-4 Spring Washer No:J-3 Regular Washer No:J-5 Bushing 12*40L (1) 7*2t(2) 7*1t(2) N o : J - 7 S c r e w M 3 * 1 4 L ( 2 ) No:J-8 Metal cover (1) No:J-6 C-shape knob M7*65L(1) a l l e n b o l t M 8 * 1 6 L ( 4 )
-
Page 4: Assembly Diagram
Assembly Diagram... - Page 5 EXPLODED DIAGRAM...
-
Page 6: Parts List
PARTS LIST Description Specifications Q'TY COMPUTER & SCREW A-1,A-2 1SET CHEST BELT 1 PC HANDLEBAR 1 PC HAND PULSE SET 1SET FOAM GRIP 270Lxφ23x5mm 2 PC FOAM GRIP 360xφ23x5mm 2 PC CAP FOR HAND PULSE WIRE 2 PC CAP FOR HANDBLEBAR 2 PC SCREW FOR HANDLEBAR M3x20L... - Page 7 ROUND DISC D-22 2 PC NUT FOR DISC D-23 M10xP1.25x10T 2 PC CAP FOR ROUND DISC D-24 2 PC SCREW FOR DISC D-25 M4x14L 8 PC FLAT WASHER D-26 φ15xφ16x1t 8 PC CROSS DISC (L) D-27 CAP FOR CHAIN COVER SCREW HOLES D-28 OVAL 4 PC...
-
Page 8: Step 2 Pedal Assembly
Step 1 Foot Tube Assembly Attach the Front Stabilizer (pt.F-1) to the Main Frame (pt.D-1) using two M8x16 Allen bolt (pt.J-1) Attach the Rear Stabilizer (pt.F-6) to the Main Frame (pt.D-1) using two M8x16 Allen bolt (pt.J-1). M8*16L Step 2 Pedal Assembly 1. - Page 9 Step 3 --Seat Tube Assembly 1. Assemble the seat (pt.G-7) to the Slider. The Slider can be adjusted in different angles. Tighten the two Nuts under the Seat using a screwdriver. In addition, the Slider can be adjusted in horizontal level by loosing the Knob. 2.
- Page 10 Step 4-Handlebar post Assembly 1. Please remove the M8x16 Allen bolt (pt.D-3) and flat washers (pt.D-4) from the main frame (pt.D-1) 2. Take the Handlebar post cover (pt.D-30) and pass it through Handlebar post (pt.C-1) 3. Hold the Handlebar post (pt.C-1) and connect the Lower computer cable (pt.D-2) to the Upper computer cable (pt.
- Page 11 Step 5- Handlebar and Computer Assembly 1. Attach the Handlebar (pt.B-1) to the Handlebar post (pt.C-1) using the clamp (pt.J-8). Fix firmly with one Flat washers (pt.J-3), one Spring washer (pt.J-4) and one Fixing bolt (pt.J-2). 2. Pass the hand-pulse wire (pt.B-8) through the hole. 3.
- Page 12 Step 6- R/L Cover and Bottle holder Assembly 1. Attach the Rear cover (pt.C-5) using two of M3x14L Screws (pt.J-7) and one of M5xP0.8x14L Screws (pt.C-4) . 2. Attach the Front cover (pt.C-6) using M5xP0.8x14L Screws (pt.C-4) the Handlebar T-Knob (pt.J-6) using one set of Flat Washer (pt.J-3), Spring Washer (pt.J-4) and one Bushing (pt.J-5).
- Page 13 2. Adjust the belt to the position shown on the sketch. The distance between the belt and the monitor should be 80cm ±10 . Make sure user is directly in front of the monitor at all times. Fit hi way App INSTRUCTION MANUAL ...
- Page 14 As soon as the computer is connected with power supply, an acoustic signal sounds and all of the displays are shown on LCD for 2 seconds. Then wheel diameter (78.0) will be shown briefly, as well as unit KM (K) text would display on the right. DISPLAYS and BUTTON FUNCTION Training Values Display Range Setting Range TIME 0:00 ~ 99:59 min. 0:00 ~ 99:00 min. SPEED 0.0 ~ 99.9 KM / ...
- Page 15 Hand sensor for measueement * The display in the center field depends on the type of exercise that has been set. The computer provides a number of ways to vary the exercise session and make it more motivating. The following exercising are available: ‐Manual Training (training without programs) ‐Training with Programs ( there are 12 programs built‐in, P01~P12) ‐Training with your own program (User program) ‐Training with the Heart Rate program (H.R.C) ‐Training with set output value (WATT) Starting exercise immediately Once a power connection has been established, the computer will full display 2s and show wheel diameter in SPEED window ,then enter into workout setting mode. ...
- Page 16 ‐You can adjust the level of resistance on the pedals while exercising by rotating joggle wheel up or down. The newly set value will be shown under the LOAD window (default value is Level 1).Without KEY entry for 3 seconds, the Load level value will change to WATT value. ‐Press START/STOP to end exercising. All exercising value will remain (HR signal would not effect). Selecting a Program to do training Once a power connection has been established, MANUAL is flashing in the display. ‐Rotate joggle wheel to go between M(Manual)→P(Program)→♥ (H.R.C.)→W(Watt)→U(User) cyclically. ‐Choose P (Program) and press joggle wheel to confirm. The programs are preset with profiles. Rotate the joggle wheel to select one from the 12 preset profiles. Set the desired session time with joggle wheel press STATR/STOP to start workout. ...
- Page 17 ‐Press joggle wheel to select H.R.C. and enter by pressing it. Choose HRC55‐‐>HRC75‐‐>HRC90‐‐>TARGET. With HRC55,HRC75,HRC90, the max. Heart rate will be calculated by the computer automatically. ‐With the TARGET program, the preset value 100 will be shown. Rotate joggle wheel to set a value between 30~230 and confirm. The program has been saved. ‐Set the desired session time with joggle wheel and press STATR/STOP to start workout. For this program, it is necessary to keep your hands on the sensor grips or wear chest strap while exercising so that computer can detect and display your heart rate value. Program sequence: ...
- Page 18 ‐Set the desired session time with joggle wheel and press STATR/STOP to start workout. ‐You can adjust the level of resistance on the pedals while exercising by rotating joggle wheel up or down. The newly set value will be shown under the LOAD window. Without KEY entry for 3 seconds, the Load level value will change to WATT value. Measuring your pulse with the hand sensors The hand sensor are not medical products, but rather exercising tools designed for the approxl-mate measurement and displaying of the pulse rate when exercising with the exercise bike.
- Page 19 NOTE: 1. Once console is connected to tablet via Bluetooth, the console will power off. 2. Please exit Fit Hi Way app and turn off the Bluetooth from the smart device, then the console will power on again. 3. If console operation or display abnormally, please Power-off and restart it. The manual will be updated from time to time, the consumer can get the newest version by scanning the QR code or link to the website as below.
Need help?
Do you have a question about the INFINITY 1.3B and is the answer not in the manual?
Questions and answers