Table of Contents
Advertisement
Quick Links
f i r e - p a r t s . c o m
WARNING:
If the information in this manual is
not followed exactly, fire or explosion may result
causing property damage, personal injury or loss of
life.
— Do not store or use gasoline or other flammable
vapors and liquids in the vicinity of this or any
other appliance.
— WHAT TO DO IF YOU SMELL GAS
· Do not try to light any appliance.
· Do not touch any electrical switch; do not use
any phone in your building.
· Immediately call your gas supplier from a
neighbor's phone. Follow the gas supplier's
instructions.
· If you cannot reach your gas supplier, call the
fire department.
— Installation and service must be performed by a
qualified installer, service agency or the gas
supplier.
Installer: Please leave this manual with the appliance owner for future reference
7116 Beatty Dr
Mission, BC V2V 6B4
Canada
OPTIMA 20 - 1
Gas Fireplace Insert
For use with natural gas
U
SERS'
I
NSTALLATION
O
PERATION &
Room Heater
or Propane
M
AINTENANCE
M
ANUAL
C
U
Master Contract: 214018
200-0177
Oct 2003
Advertisement
Table of Contents

Related Manuals for Archgard Optima 20-1


Summary of Contents for Archgard Optima 20-1
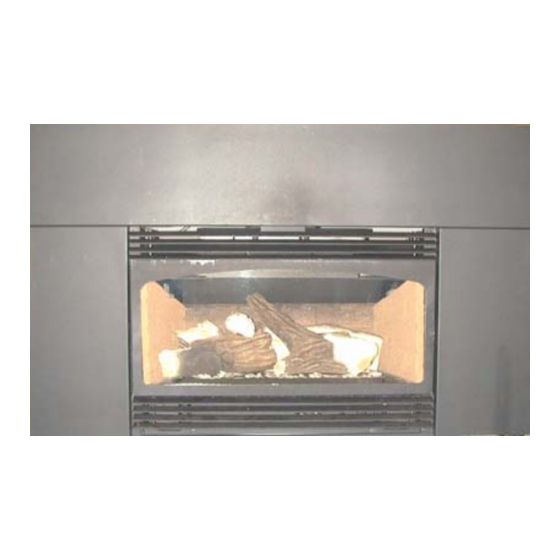
- Page 1 OPTIMA 20 - 1 Gas Fireplace Insert Room Heater For use with natural gas or Propane SERS’ NSTALLATION f i r e - p a r t s . c o m PERATION & AINTENANCE WARNING: If the information in this manual is not followed exactly, fire or explosion may result ANUAL causing property damage, personal injury or loss of...
- Page 2 f i r e - p a r t s . c o m...
-
Page 3: Table Of Contents
CONTENTS INTRODUCTION GENERAL INFORMATION APPLIANCE DESCRIPTION DIMENSIONS AND CLEARANCES 7 - 8 GAS CONNECTION VENTING INSTRUCTIONS ELECTRICAL CONNECTIONS SURROUND (FACEPLATE) INSTALLATION 12 - 13 GLASS DOOR REMOVAL AND INSTALLATION LOG PLACEMENT 15 - 18 OPERATING INSTRUCTIONS 19 - 20 MAINTENANCE TROUBLESHOOTING 22 - 23 f i r e - p a r t s . -
Page 4: Introduction
INTRODUCTION INTRODUCTION Congratulations on choosing an Archgard fireplace. The Optima 20 is one of the most advanced fireplace insert heaters available. It is solidly designed using the latest technology and manufactured to the highest quality. It is our aim to provide you with an appliance with many trouble-free years of reliable service. -
Page 5: General Information
- ANSI Z21.88a-1998/CSA 2.33a-M98, Vented Gas Fireplace Heater Insert - CAN/CGA-2.17-M91, Gas-Fired Appliances for Use at High Altitudes Please contact Archgard Industries Ltd., if you have any questions regarding the certification of this appliance. INSTALLATION CODES This appliance must be installed by a qualified gas appliance installer. -
Page 6: Appliance Description
PTIMA 20 - 1 APPLIANCE DESCRIPTION TOP VIEW ON-OFF SWITCH SPILL SAFETY SWITCH f i r e - p a r t s . c o m SLIDING FLUE CONNECTOR FRONT VIEW TOP GRILL GLASS DOOR BRICK PANELS BOTTOM GRILL... -
Page 7: Dimensions And Clearances
PTIMA 20 - 1 DIMENSIONS AND CLEARANCES APPLIANCE DIMENSIONS With standard aluminum surround 24 1/4” (622 mm) 16 3/8” (416mm) 16” (406 mm) 17 7/8” (454 mm) 38” (965 mm) f i r e - p a r t s . c o m 11 3/8”... - Page 8 PTIMA 20 - 1 DIMENSIONS AND CLEARANCES Cont... CLEARANCES TO COMBUSTIBLES WARNING: Failure to position the parts in accordance with these diagrams or failure to use SIDE VIEW only parts specifically approved with this appliance may result in property damage or personal Combustible mantle allowed in injury.
-
Page 9: Gas Connection
PTIMA 20 - 1 GAS CONNECTION PRECAUTIONS This appliance must be installed by a qualified gas installer and the installation must conform to the installation codes. This appliance needs fresh air for safe operation and must be installed so there are provisions for adequate combustion and ventilation air. -
Page 10: Venting Instructions
PTIMA 20 - 1 VENTING INSTRUCTIONS VENTING Before starting, check the condition of the chimney. If necessary, have it cleaned of any soot or creosote. The appliance is equipped with a vent safety shutoff system and a safety control system designed to protect against improper venting of combustion products. The appliance will function for short periods and shut down the pilot light if it is not connected to a proper venting system that is a minimum of 10ft (3m) high, or if there are blockages in the vent. -
Page 11: Electrical Connections
PTIMA 20 - 1 ELECTRICAL CONNECTIONS ELECTRICAL CONNECTIONS The Optima 20 comes complete with an electrical cord and plug already installed. If you need to run an electrical lead to the appliance instead, follow the instructions listed below. Have a qualified electrician run a set of 120VAC supply lines to the lower left side of the fireplace before installing the appliance. -
Page 12: Surround (Faceplate) Installation
PTIMA 20 - 1 SURROUND INSTALLATION Trim Instructions for the Surround for the DSK, ESK & LSK Surround Using the trim clips provided, join the left side trim (which has notch cut for rocker switch) to the top trim as shown in (Fig.1). Repeat with the right side trim. Peel the backing from the sticky tape, then slip the assembled trim over the surround. - Page 13 PTIMA 20 - 1 SURROUND INSTALLATION Cont... SPILL SWITCH: The spill switch is located in a critical location to shut off the appliance in the event the draft is insufficient. It is located above, and in front of, the draft hood. Do not tamper with its location. In the event of insufficient draft, the heat from the venting gases shuts off the pilot flame.
-
Page 14: Glass Door Removal And Installation
PTIMA 20 - 1 FLAT DOOR REMOVAL & INSTALLATION GLASS DOOR WARNING: Do not attempt to remove the glass door when the appliance is hot. Removing the Glass Door Release the two latches underneath the door. Lift out the bottom of the door and lift the whole door assembly up and off the two locating tabs at the top of the door assembly. -
Page 15: Log Placement
After opening the log set package, inspect the logs to ensure that no damage has occurred inside the package. Please report any damage immediately to your Archgard dealer. Gas and vent connection should be made before installing the logs on the steel burner. - Page 16 PTIMA 20 - 1 LOG PLACEMENT Cont... Step 1. Locate Log #1 (bottom of log will be stamped with 09) and place it on the steel pin. Refer to page 15 for corresponding pin locations. LOG # 1 f i r e - p a r t s . c o m Step 2.
- Page 17 PTIMA 20 - 1 LOG PLACEMENT Cont... Step 3. Locate Log #3 (bottom of log will be stamped with 74) and place it on the steel pin. Refer to page 15 for corresponding pin locations. LOG # 3 f i r e - p a r t s . c o m Step 4.
- Page 18 PTIMA 20 - 1 LOG PLACEMENT Cont... Step 5. Locate Log #5 (bottom of log will be stamped with 69) and place it on the steel pin. Refer to page 15 for corresponding pin locations. LOG # 1 LOG # 5 LOG # 2 f i r e - p a r t s .
-
Page 19: Operating Instructions
PTIMA 20 - 1 OPERATION INSTRUCTIONS FOR YOUR SAFETY, READ BEFORE LIGHTING INITIAL OPERATION • Check that the appliance is properly vented and connected to the gas supply • Check that the logs and branches are properly placed • Check that all external parts, such as grills, door and faceplate are properly attached and fastened •... - Page 20 PTIMA 20 - 1 OPERATION INSTRUCTIONS Cont.. AUTOMATIC VALVE START-UP PROCEDURE Set the thermostat, if present, to the lowest level. Press slightly and turn the control knob clockwise to the OFF position and wait 5 minutes; thus allowing any gases to escape which may have accumulated in the combustion chamber.
-
Page 21: Maintenance
PTIMA 20 - 1 MAINTENANCE CAUTION : Do not conduct maintenance on the appliance while it is operating or while it is still hot. CLEANING THE APPLIANCE The exterior painted surfaces, glass and gold trims may be cleaned with a soft, non-abrasive cloth and water or a suitable, mild, non-abrasive cleaner. -
Page 22: Troubleshooting
PTIMA 20 - 1 TROUBLESHOOTING Please check to make sure the instructions are followed exactly before attempting troubleshooting of the appliance. WARNING: Troubleshooting and servicing of gas and electrical devices of the appliance should only be conducted by a qualified service technician. SYMPTOM ACTION Pilot will not light after pressing... - Page 23 PTIMA 20 - 1 TROUBLESHOOTING Cont... SYMPTOM ACTION The main burner does not turn 3. If using an optional thermostat, check to make sure the thermostat is on with the pilot lit. set high enough to turn on the appliance. (Cont’d) 4.
-
Page 24: Wiring Diagrams
PTIMA 20 - 1 WIRING DIAGRAMS SPEED CONTROL CONVECTION BLOWER 110F (43ºC) N.O. THERMAL SNAP SWITCH black black white black NEUTRAL CONVECTION BLOWER white 120 VAC LINE green To Fan Mount GROUND (with star washer) f i r e - p a r t s . c o m MILLIVOLT VALVE OPTIONAL WALL PILOT ASSEMBLY... -
Page 25: Servicing
SERVICING SERVICING UNDER WARRANTY Before servicing, read the Terms and Conditions section of the Archgard warranty at the back of the manual. Contact the Archgard authorized dealer where you purchased the appliance from and provide them with details of the problem and the installation information which the installer has filled out at the back of the manual. - Page 26 PTIMA 20 - 1 SERVICING Cont... CHECKING MAIN BURNER ORIFICE • Remove the glass door and the ceramic logs. • Unscrew the 2 screws holding the burner to the floor. • Lift the burner up and away from the orifice cap. •...
- Page 27 Replace in reverse order. There is a notch in the head to line it up correctly on replacement. Ensure the head is pushed down all the way. Call your local Authorized Archgard Dealer to pur- chase the correct fuel conversion kit for your gas Retaining clip appliance.
-
Page 28: Replacement Parts
311-0066 Ceramic Brick Panel - Left Hand 314-0000 Gasket GF - Tadpole 1.38” 826-0050 Replacement Burner Optima 20-1 / 30-2 826-0008 Louver Assembly - Top Louver 826-0013 Louver Assembly - Bottom Louver Parts can be ordered through your local dealer or distributor by giving ITEM # and DESCRIPTION... -
Page 29: Warranty
This Limited Warranty is made by ARCHGARD INDUSTRIES LTD., hereinafter referred to as “Archgard”. Archgard warrants to the original purchaser of an Archgard gas burning fireplace (s) that the product will be free of defects in materials and workmanship under normal use and service, for a “lifetime”. - Page 30 PTIMA 20 - 1 NOTES…... f i r e - p a r t s . c o m...
-
Page 31: Warranty Registration Card
PTIMA 20 - 1 Postage WARRANTY REGISTRATION ARCHGARD INDUSTRIES LTD. 7116 BEATTY DRIVE MISSION, B.C. CANADA V2V 6B4 FOLD DOWN AT LINE f i r e - p a r t s . c o m FOLD DOWN AT LINE & TAPE CLOSED... - Page 32 f i r e - p a r t s . c o m...
- Page 33 Archgard Industries Ltd. 7116 Beatty Drive Mission, B.C. V2V 6B4 f i r e - p a r t s . c o m Canada Telephone: (604) 820 - 8262 Telephone Toll Free: 1 - 877 - 820 - 9800...
Need help?
Do you have a question about the Optima 20-1 and is the answer not in the manual?
Questions and answers