Table of Contents
Advertisement
Quick Links
WARNING:
FIRE OR EXPLOSION HAZARD
Failure to follow safety warnings exactly could result in
serious injury, death, or property damage.
−
Do not store or use gasoline or other flammable vapors
or liquids in the vicinity of this or any other appliance.
−
WHAT TO DO IF YOU SMELL GAS:
•
Do not try to light any appliance.
•
Do not touch any electrical switch; do not use any
phone in your building.
•
Immediately call your gas supplier from a
neighbor's phone. Follow the gas suppliers
instructions.
•
If you can not reach your gas supplier, call the fire
department.
−
Installation and service must be performed by a
qualified installer, service agency or the gas supplier.
Installation Manuals available through your local dealer or visit
our website at: www.archgard.com
INSTALLER: LEAVE THIS MANUAL WITH THE APPLIANCE.
CONSUMER: RETAIN THIS MANUAL FOR FUTURE REFERENCE.
ARCHGARD FIREPLACE PRODUCTS
7116 Beatty Drive
Mission, BC V2V 6B4 Canada
INSTALLATION, OPERATION, AND
GAS FIRED DIRECT VENT
This appliance may be installed in an aftermarket
permanently located, manufactured home (USA only) or
mobile home where not prohibited by local codes.
This appliance is only for use with the type of gas indicated
on the rating plate. This appliance is not convertible for use
with other gases, unless a certified kit is used.
SIT 820
Gas Fireplace Energy Efficiency
Gas Fireplace Energy Efficiency
63.13%
Rating
Based on CSA P.4.1-15
MAINTENANCE MANUAL
Harmonia 22
Model: 22-DVIM22LN-1
FIREPLACE INSERT
S/N 230000 AND UP
SIT 821
66.14%
Rating
Based on CSA P.4.1-15
200-0064-01
August 30, 2021
Advertisement
Table of Contents

Related Manuals for Archgard Harmonia 22


Summary of Contents for Archgard Harmonia 22
- Page 1 Installation and service must be performed by a qualified installer, service agency or the gas supplier. Installation Manuals available through your local dealer or visit our website at: www.archgard.com INSTALLER: LEAVE THIS MANUAL WITH THE APPLIANCE. CONSUMER: RETAIN THIS MANUAL FOR FUTURE REFERENCE.
-
Page 2: Table Of Contents
12.2 Pilot Conversion 21.0 Frequently Asked Questions 12.4 Complete the Conversion 22.0 Replacement Parts List 12.3 Convert the Gas Valve Archgard Limited Warranty 13.0 Venting Instructions 13.1 Approved Venting Components 13.2 Min/Max Vent Run 13.3 Using a Co-linear to Coaxial Adapter 26 14.0 Barrier Screen Installation... -
Page 3: Introduction
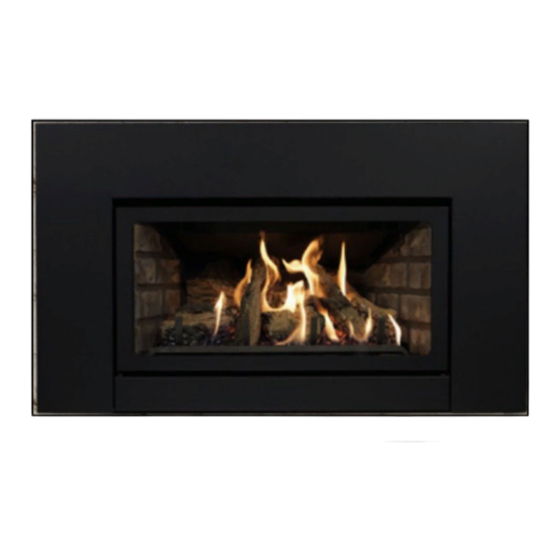
Harmonia is described as having a heart that is completely pure, without bad thoughts whatsoever. The Harmonia 22 is among the most advanced Direct Vent Insert heaters available today. It is solidly designed using the latest technology and manufactured to the highest quality. -
Page 4: Safety Information
For more information, visit www.P65Warnings.ca.gov. Each Archgard Gas Fireplace is checked and tested at the factory prior to being packaged and shipped to our dealers and finally installed in your home. Before leaving this unit with the customer, the installer must ensure that the appliance is firing correctly and that the electrical system is in working order. -
Page 5: Technical Information
Commonwealth of Massachusetts: This appliance has been manufactured in accordance with Massachusetts code 248 CMR 5.00. Approval Code: TBD. (http://license.reg.state.ma.us/public/licque.asp). Please contact Archgard Industries Ltd., if you have any questions regarding the certification of this appliance. 3.2 Installation Codes This appliance must be installed by a qualified gas appliance installer. The installation must conform with the local codes or, in the absence of local codes, with the current National Fuel Gas Code ANSI Z223.1/ NFPA 54 in the US, or Installation Code CAN/... -
Page 6: Rating Plate
(CO) poisoning and possible death. ONLY DOORS CERTIFIED WITH THE APPLIANCE SHALL BE USED. For use only with barrier part # 22-BS. Follow installation instructions. Made in Canada by: Archgard Industries Ltd. 7116 Beatty Dr., Mission, B.C. August 2021 303-6022-01 MANUFACTURE DATE:... -
Page 7: Installation Checklist
Installation 5.0 Installation Checklist This standard installation checklist is to be used by the installer in conjunction with, not instead of, the instructions contained within this installation manual. Customer: Date Installed: Install Address: Location of Fireplace: Installer: Solid Fuel Zero Clearance Install: (Section 9.2) IF NO, WHY NOT? Was the bottom of the existing zero clearance firebox removed? Was a 0.15"... -
Page 8: Appliance Overview
Installation 6.0 Appliance Overview 6.1 Rating Plate Location The rating plate is located under the firebox, behind the control access cover. See Section 6.4 for information on accessing the controls. Rating Plate Location Figure 6.1.01: 6.2 Appliance Overview The valve and control module are located underneath the fireplace. -
Page 9: Accessing The Controls
Installation 6.4 Accessing the Controls The controls for the 22-DVIM22LN-1 are located underneath the fireplace and are accessed by flipping down the control access cover shown in Figure 6.4.01. Figure 6.4.01: 6.5 Identifying the Controls See Figure 6.5.01 for Identification of the controls. See Operation Section 19.0 for operation instructions. Optional Piezo Gas Shut-off... -
Page 10: Electrical Connections
The 22-DVIM22LN-1 may be wired to a thermostat, wall switch, or third party remote control. An optional variable 6 speed fan kit is available from your local authorized Archgard dealer. Do not cut or remove the grounding prong from the main power supply plug on the optional fan kit. -
Page 11: Appliance Dimensions
Installation 8.0 Appliance Dimensions Front View 25.485in 10.518in 12.765in 25.291in Side View 23.000in 3.000in Top View 17.976in 12.995in 13.485in 1.423in 16.885in 15.885in 16.885in 22.923in Figure 8.0.01:... -
Page 12: Minimum Opening Dimensions
Installation 9.0 Minimum Opening Dimensions The following opening dimensions show the absolute minimum opening size allowable for the 22-DVIM22LN-1. This appliance may be configured to accommodate a variety of openings and aesthetic preferences. Depending on the configuration of the surround, the minimum opening dimensions may change. Refer to Section 9.1 for installation options. -
Page 13: Surround Configuration Options
Installation 9.1 Surround Configuration Options The surround may be adjusted to accommodate a variety of openings and aesthetic preferences. The following table indicates opening dimensions required for each possible position of the surround. The dimensions indicated in the images below correspond with the locations shown in Figure 9.0.01. Minimum Depth Minimum Depth Position 1... - Page 14 Installation Adjusting the Surround To change the position of the surround brackets, remove the Tek screws securing each bracket, move the bracket to the desired location and reinsert the screws. Position 1 Position 2 Position 3 Minimum Depth: Door Flush: Screen Flush: The screen and door both extend The screen extends outside of the...
-
Page 15: Factory Built Fireplaces
Installation 9.2 Factory Built Fireplaces The following information applies to Factory Built (metal) Wood-Burning Fireplace installations: Trim panels must not seal ventilation openings in the fireplace. Any parts that are removed must be saved and reinstalled if the insert is ever removed. If the factory-built fireplace has no gas access hole(s) provided, an access hole of 1 1/2” (38.1 mm) or less may be drilled through the lower sides or bottom of the firebox in a proper workmanship-like manner. -
Page 16: Refacing A Masonry Fireplace
Installation 9.3 Refacing a Masonry Fireplace Using Steel Studs and Cement Board on Wood Fireplaces Brick or rock facing may be removed and replaced with noncombustible material such as steel studs and cement board. Using Steel Studs and Cement Board on Wood Fireplaces WARNING: Only facing material may be removed. -
Page 17: Clearances To Combustibles
Installation 10.0 Clearances to Combustibles WARNING Failure to position the parts in accordance with these diagrams or failure to use only parts specifically approved with this appliance may result in property damage or personal injury. CAUTION: This appliance is designed for use in any masonry or factory-built, wood-burning fireplace. It cannot be enclosed by combustible material and used as a factory built gas fireplace (zero clearance fireplace). -
Page 18: Sidewall Clearances
Installation 10.2 Sidewall Clearances Maintain a minimum of 7" (17.8 cm) clearance from the side of the door to sidewalls or mantel supports. 16” 7" 7" (17.8 cm) (17.8 cm) Non Combustible Zone 31 3/4” Figure 10.2.01 10.3 Hearth Clearances Any hearth that extends outward in front of the insert may have any combustible material up to the bottom of the gas fireplace insert. -
Page 19: Gas Connections
2 psi dry gas meter the unit will rate lower as the calculation has to correct for the higher pressure in the meter. If the unit is over- rated, contact your authorized Archgard dealer. The following calculation equation gives a rough estimation as it does not correct for temperature and pressure. -
Page 20: Conversion Kit Instructions
Installation 12.0 Conversion Kit Instructions IMPORTANT: This fireplace is Natural gas ready. If converting to LP gas, follow instructions below. WARNING: This conversion kit shall be installed by a qualified service agency in accordance with the manufacturers instructions and all applicable codes and requirements of the authority having jurisdiction. If the information in these instructions is not followed exactly, a fire, explosion or productions of carbon monoxide may result, causing property damage, personal injury or loss of life. -
Page 21: Complete The Conversion
Installation 12.3 Convert the Gas Valve Push orifice strip tab all the way against the hex fitting. (See Figure 12.2.03) On the SIT valve, use a #20 Torx or a slotted screwdriver to remove and discard the three pressure-regulator mounting screws (item A) the pressure regulator tower (item B) and the spring dia- phragm assembly (item C). -
Page 22: Venting Instructions
Installation 13.0 Venting Instructions WARNING: Operation of this heater when not connected to a properly installed and maintained venting system can result in carbon monoxide (CO) poisoning and possible death. The appliance must not be connected to a chimney flue serving a separate solid fuel burning appliance. -
Page 23: Approved Venting Components
Use a non silicone sealant such as Mil-Pac and three (3) screws or gear clamps to seal the liner at each end. Figure 13.0.04: Figure 13.0.03: 13.1 Approved Venting Components Archgard Venting Components Vent Component Part Number Vertical Termination 999-INS-TK 3"... - Page 24 Installation Third Party Venting Components Selkirk Duravent Amerivent 3" Flex (10ft) 95270310 AFE10-03 3ALKE10 3" Flex (25ft) 95270325 AF3-25L 3DFA-25 1730250 3" Flex (30ft) 95270330 3" Flex (35ft) 95270335 AF3-35L 3DFA-35 TC-3AL35 1730350 3" Flex (50ft) 95270350 AF3-50L TC-3AL50 3ALKE50 3"...
-
Page 25: Min/Max Vent Run
Installation 13.2 Min/Max Vent Run Instructions for installing venting and terminations (see list for approved venting and terminations). Install the termination cap being sure to provide sufficient space (around and on top) so you do not impede the flow of air, both into and out of the cap. -
Page 26: Using A Co-Linear To Coaxial Adapter
General Information 13.3 Using a Co-linear to Coaxial Adapter The gas fireplace can be converted from co-linear to coaxial when it is desired to remove a section of the masonry fireplace chimney to below the roof line. WARNING This appliance must be installed by a qualified gas appliance installer. The installation must conform with the local codes or, in the absence of local codes, with the current National Fuel Gas Code ANSI Z223.1/ NFPA 54 in the US, or Installation Code CAN/ CGA-B149.1 in Canada. -
Page 27: Barrier Screen Installation
Installation 14.0 Barrier Screen Installation If barrier becomes damaged, the barrier shall be replaced with the manufacturer's barrier for this appliance (Part Number: 22-BS). The door and barrier screen install together using the same screws. Be sure to place the Glass Door over the tabs on the top of the firebox prior to installing the screen. -
Page 28: Glass Door Installation
Installation 15.0 Glass Door Installation WARNING: Do not operate appliance with the glass front cracked or broken. Replacement of the glass should be done by a licensed or qualified service person. Do not attempt to remove the glass door when the appliance is hot. Be sure there are no fingerprints left on the glass panels during install or when cleaning as high temperatures can bake these prints on permanently. -
Page 29: Surround Installation
Installation 16.0 Surround Installation • Make sure the gas and electrical lines are properly connected to the appliance • Slide the unit into the fireplace and slide the excess flue liner material back onto the chimney • Align the four mounting brackets on the surround with the adjustable tabs located on the fireplace •... -
Page 30: Installing The On/Off Switch
Installation 16.1 Installing the ON/OFF Switch Step 1: Pass the switch wires through the opening in the side of the surround. Press the switch into place. Figure 16.1.01: Step 2: Pass the wires between the fireplace and fireplace Step 3: Plug the wires into the valve as shown. Keep wires down surround. -
Page 31: Bottom Filler Plate
Installation 16.2 Bottom Filler Plate After installing the surround, align the Bottom Filler Plate included with your fireplace with the underside of the surround. Slide the plate under the lower edges on the surround as shown. Figure 16.2.01: Align the plate. Figure 16.2.02: Slide the plate in place. -
Page 32: Surround Dimensions
Installation 16.3 Surround Dimensions Front View Side View Three-sided Surrounds 22-SKSBS 22-SKLBS 6.00" (15.24 cm) 9.00" (22.86 cm) 38.11" (96.80 cm) 44.11" (112.04 cm) 23.95" (60.83 cm) 25.95" (65.91 cm) 1.00" (2.54 cm) 1.00" (2.54 cm) 2.92" (7.42 cm) 2.92" (7.42 cm) Figure 16.3.01: Four-sided Surrounds Front View... - Page 33 Installation Decorative Plinths Archgard decorative plinths add a base that is slightly wider than the surround, turning your fireplace into a true work of art. 22-DPSS2 22-DPSS4 22-DPSS6 2.16" (5.49 cm) 4.16" (10.57 cm) 6.16" (15.65 cm) 38.58" (98.00 cm) 38.58"...
- Page 34 Installation Decorative Trims Archgard decorative trims add definition to your Archgard surround by adding black, brushed nickel, or gold plated trims around the firebox. 79.02cm 31.11in 79.02cm Three-sided Decorative Trims 31.11in Model Description 6.35cm 22-DTBK Black Decorative Trim 2.50in 6.35cm...
-
Page 35: Firebox Liner Installation
The following steps highlight the procedure for installing brick panel firebox liners. Handle the panels with care as they are delicate. Inspect the panels to ensure that no damage has occurred inside the package. Please report any damage immediately to your Authorized Archgard Dealer. Before you begin: •... -
Page 36: Reflective Glass Installation
Inspect the panels to ensure that no damage has occurred inside the package. Please report any damage immediately to your Authorized Archgard Dealer. Be sure there are no fingerprints left on the glass panels during install or when cleaning as high temperatures can bake these prints on permanently. -
Page 37: Media Installation
18.1 Log Set The Archgard burner and fiber logs set are designed to give a realistic fire package. Care must be given when first installing the logs or when removed for servicing, as they can be damaged or broken if not handled properly. - Page 38 Installation Step 3: Place Log #2 at the back of the firebox. The left side rests Step 4: Place a single row of black embers along the burner ports on the locator pin in the back-left corner of the burner. The right at the back of the burner.
- Page 39 Installation Step 9: Fill the burner with black embers, leaving the two areas Step 10: Place platinum embers randomly over the black embers. indicated clear for the remaining logs. Do not block burner ports. Do not pile or stack the embers. Leave clear Figure 18.1.10: Figure 18.1.11:...
- Page 40 Installation Figure 18.1.15: Part # Item Description Item # Item Description 310-6222 6 Piece Log Set 310-6222-5 Log 5 (center right) 310-6222-1 Log 1 (right side) 310-6222-6 Log 6 (center left) 310-6222-2 Log 2 (rear) 310-0020 Black Embers (2 cup bag) 310-6222-3 Log 3 (front left) 310-0019...
-
Page 41: Operation
Operation 19.0 Operation 19.1 Before Lighting WARNING: If you do not follow these instructions exactly, a fire or explosion may result causing property damage, personal injury or loss of life. Do not operate the appliance with the glass front removed, cracked or broken. Replacement of broken glass should be done by a licensed or qualified service person. -
Page 42: Lighting Instructions
Operation 19.3 Lighting Instructions 11-3/4” SHEET The following information may be found on the fireplace rating plate. See Section 6.1 for the rating plate location. FOR YOUR SAFETY READ BEFORE LIGHTING POUR VOTRE SÉCURITÉ VEUILLEZ LIRE AVANT L’ALLUMAGE WARNING: If you do not follow these instructions exactly, a fire of explosion may result causing property damage, personal injury or loss of life. -
Page 43: Lighting The Fireplace
Operation 19.4 Lighting The Fireplace Before you begin: • Read the instructions fully before starting • Ensure the fireplace is off and cool before lighting the pilot • Flip down the control access cover (see Section 6.4) Step 1: Make sure the On/Off switch on the surround is in the Step 2: The valve should be in the OFF position. - Page 44 Operation Step 7: Turn the hi - lo button to adjust the height of the burner Note: Once the pilot is lit, the main burner is controlled using the flame. on/off wall switch or thermostat. WARNING: NEVER operate this appliance with the barrier screen removed.
-
Page 45: Maintenance
Maintenance 20.0 Maintenance CAUTION: Do not conduct maintenance on the appliance while it is operating or while it is still hot. Always verify proper operation after servicing. 20.1 Cleaning and Routine Maintenance The exterior painted surfaces, glass, and metal plated trims may be cleaned with a soft, non-abrasive cloth and water or a suitable, mild, non-abrasive cleaner. -
Page 46: Servicing Under Warranty
All service work under warranty must be conducted by a qualified Archgard service technician. Before servicing, read the terms and conditions of the warranty at the back of this manual. Contact the authorized Archgard dealer where you purchased the appliance from and provide them with details of the problem, along with the initial installation information (from the front of this manual). -
Page 47: Adjusting The Primary Air
WARNING: Servicing of this appliance must be conducted by a qualified service technician. Improper servicing, adjustment or alteration of this appliance may cause property damage, personal injury or loss of life. All servicing should be conducted with the appliance cold. All replacement parts must be authorized by Archgard for suitability. -
Page 48: Replacing The Burner
WARNING: Servicing of this appliance must be conducted by a qualified service technician. Improper servicing, adjustment or alteration of this appliance may cause property damage, personal injury or loss of life. All servicing should be conducted with the appliance cold. All replacement parts must be authorized by Archgard for suitability. Before you begin: •... -
Page 49: Replacing The Pilot
All servicing should be conducted with the appliance cold. All replacement parts must be authorized by Archgard for suitability. CAUTION: Label all wires prior to disconnection when servicing controls. Wiring errors can cause improper and dangerous operation. -
Page 50: Replacing The Valve
All servicing should be conducted with the appliance cold. All replacement parts must be authorized by Archgard for suitability. CAUTION: Label all wires prior to disconnection when servicing controls. Wiring errors can cause improper and dangerous operation. - Page 51 Maintenance Step 7: Remove the valve bracket from the valve. This will be used for the new valve upon installation. Figure 20.8.05: Installation is the reverse of removal. Note: When reattaching the gas inlet line, brace the fitting on the opposite side of the gas valve.
-
Page 52: Replacing The Piezo Igniter
Maintenance 20.9 Replacing the Piezo Igniter WARNING: Servicing of this appliance must be conducted by a qualified service technician. Improper servicing, adjustment or alteration of this appliance may cause property damage, personal injury or loss of life. All servicing should be conducted with the appliance cold. -
Page 53: Replacing The Optional Fan
Maintenance 20.10 Replacing the Optional Fan WARNING: Servicing of this appliance must be conducted by a qualified service technician. Improper servicing, adjustment or alteration of this appliance may cause property damage, personal injury or loss of life. All servicing should be conducted with the appliance cold. - Page 54 Maintenance Step 5: Unplug the fan wire. Step 6: Remove the old fan from the fireplace. Save the insulation board to be used during installation of the new fan. Figure 20.10.05: Figure 20.10.06: Step 7: Remove the (3) Tek Screws holding the fan to the fan mounting bracket.
-
Page 55: Replacing The Optional Fan Speed Control
Maintenance 20.11 Replacing the Optional Fan Speed Control WARNING: Servicing of this appliance must be conducted by a qualified service technician. Improper servicing, adjustment or alteration of this appliance may cause property damage, personal injury or loss of life. All servicing should be conducted with the appliance cold. -
Page 56: Replacing The Optional Fan Thermal Sensor
Maintenance 20.12 Replacing the Optional Fan Thermal Sensor WARNING: Servicing of this appliance must be conducted by a qualified service technician. Improper servicing, adjustment or alteration of this appliance may cause property damage, personal injury or loss of life. All servicing should be conducted with the appliance cold. -
Page 57: Wiring Schematic
Maintenance 20.13 Wiring Schematic Piezo Igniter ON / OFF Main Burner Switch Optional Remote Switch or Thermostat Pilot White Wire (-) TP Red Wire (+) TP TH Gas Valve Figure 20.13.01:... -
Page 58: Troubleshooting
Maintenance 20.14 Troubleshooting Please check to make sure the instructions are followed exactly before attempting troubleshooting of the appliance. WARNING: Troubleshooting and servicing of gas and electrical devices of the appliance should only be conducted by a qualified ser- vice technician. SYMPTOM ACTION Pilot will not light after pressing... - Page 59 Check for defective fan. My pilot has gone out after being The Harmonia 22 is equipped with one of two possible valves. One of those options includes lit and stable for several days. a 7 day Pilot on Demand (POD) Timer. This timer will turn the pilot off automatically if there has been no main burner activity for 7 continuous days.
-
Page 60: Frequently Asked Questions
Q. My fan/blower makes a “whirring” or “humming” noise. A. Your Archgard gas appliance uses a powerful fan to push heated air into your room. It is not unusual to hear a “humming” noise when your fan is running. Note: the sound will change depending on the setting that your fan speed control is set at. -
Page 61: Replacement Parts List
Maintenance 22.0 Replacement Parts List Item # Item Description Unit 200-0064-01 Owner's Manual - English 200-0064F-01 Owner's Manual - French 22-BS Barrier Screen 308-0013 or SIT 820 Gas Valve or 308-0018 SIT 821 Gas Valve with CPOD (see the rating label on the fireplace) 305-0013 Fan Speed Control 308-0005... -
Page 62: Archgard Limited Warranty
Date of Purchase • Problem Description NOTE: Warranty will be void if work is carried out by an unqualified person(s). Only original Archgard parts may be used. Please consult your Archgard dealer or representative if in doubt about a replacement part(s). •... - Page 63 POSTAGE WARRANTY REGISTRATION ARCHGARD INDUSTRIES LTD. 7116 BEATTY DRIVE MISSION, B.C. CANADA V2V 6B4 FOLD DOWN AT LINE FOLD DOWN AT LINE & TAPE CLOSED Model # : 22-DVIM22LN-1 Serial #: Date Installed: Name: Address: City: State/Prov: ZIP: Phone: ( _____ ) Dealer’s Name &...
Need help?
Do you have a question about the Harmonia 22 and is the answer not in the manual?
Questions and answers