Table of Contents
Advertisement
Quick Links
Advertisement
Table of Contents

Related Manuals for Silca Technica EU


Summary of Contents for Silca Technica EU
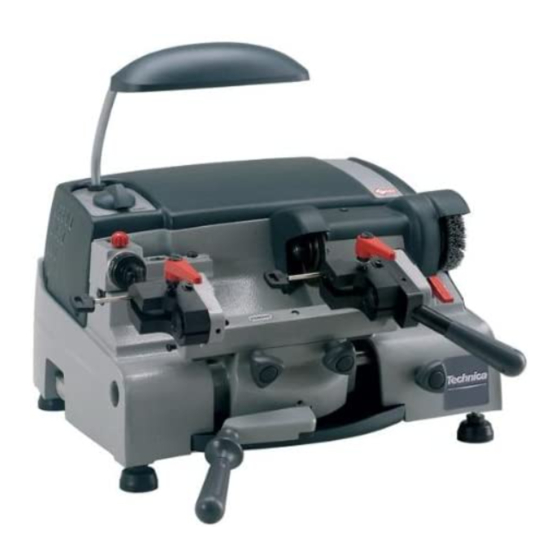
- Page 1 Technica EU Technica EU Operating manual D429725XA vers. ®...
- Page 2 This manual has been drawn up by SILCA S.p.A. All rights reserved. No part of this publication may be reproduced or used in any form or by any means (photocopying, microfilm or other) without the written permission of SILCA S.p.A. Edition: july 2005 Printed in Vittorio Veneto by SILCA S.p.A.
-
Page 3: Table Of Contents
INDEX GUIDE TO THE MANUAL ......................1 GENERAL ..........................2 MACHINE DESCRIPTION ..................4 Main Characteristics ...................4 Working parts .....................5 Technical Data ....................6 Accessories provided ..................6 Safety .........................7 Electric circuit .....................7 TRANSPORT ......................8 Packing .......................8 Unpacking ......................8 Machine handling ....................8 MACHINE INSTALLATION AND PREPARATION ............9 Checking for damage ..................9 Positioning ......................9 Description of work station .................9... -
Page 5: Guide To The Manual
Operating manual - English GUIDE TO THE MANUAL This manual has been produced to serve as a guide for users of the TECHNICA EU key-cutting machine. Read it carefully; it is essential if you wish to operate your machine safely and efficiently. -
Page 6: General
If the key-cutting machine is used differently or for purposes different from those described in this manual, the customer will forego any rights he may have over Silca. Furthermore, unforeseen danger to the operator or any third parties may arise from incorrect use of the machine. - Page 7 Technica EU Operating manual - English • Machine identification The machine TECHNICA EU is provided with an identification label which includes the machine’s serial number (fig. Manufacturer’s SILCA S.p.A. identity Via PODGORA 20 (Z.I.) ® 31029 VITTORIO V.TO (TV) ITALY Tel.
-
Page 8: Machine Description
1.1 Main Characteristics • CUTTING UNIT WITH CARRIAGE The key-cutting unit contains the working parts of the TECHNICA EU key-cutting machine, which carry out reading and cutting of the original key and the necessary finishing off. The working parts are: Cutter: The cutter is the part of the key-cutting machine used to cut keys. -
Page 9: Working Parts
Technica EU Operating manual - English 1.2 Working parts Fig. 5 A - master switch A1- main plug with fuses B - motor switch / speed commutator C - cutter C1- cutting tool housing D - tracer point D1- tracer point spring locking knob... -
Page 10: Technical Data
Operating manual - English Technica EU 1.3 Technical Data MOTOR: 2 speed single phase, 230V-50Hz CUTTER: ø 80 x 1,5 x 22 super rapid steel (HSS) CUTTER SPEED: speed 1 = 320 rpm (for steel keys) speed 2 = 650 rpm (for brass keys) -
Page 11: Safety
Technica EU Operating manual - English 1.5 Safety • UTTER MOTOR PROTECTION ATTENTION: the cutter motor is protected from overheating by a device (inside the motor) that stops it when it reaches a dangerous temperature. This condition can occur when the machine motor is left on continuously, with high ambient temperatures or in severe working conditions. -
Page 12: Transport
2.1 Packing The packing for TECHNICA EU is designed to ensure safe transportation and protect the machine and all its parts. It comprises a pallet base (b) to which the machine is attached, and a cardboard box as a cover (a) (fig. 6). -
Page 13: Machine Installation And Preparation
3.1 Checking for damage TECHNICA EU is solid and compact and will not normally damage if transport, unpacking and installation have all been carried out according to the instructions in this manual. However, it is always advisable to check that the machine has not suffered any damage. -
Page 14: Regulation And Use Of The Machine
Operating manual - English Technica EU REGULATION AND USE OF THE MACHINE To get the most out of your key-cutting machine, check gauging periodically. 4.1 Micrometric tracer point The choice of using a micrometric tracer point on a machine for cutting bit and pump keys allows perfect rapid reading, as well as prompt resolution of the tiny variations in depth presented by worn keys. -
Page 15: Using The Key Stops
4.4 Using the key stops The TECHNICA EU key-cutting machine is provided with two pairs of key stops: one pair (J) (fig. 11) is already fitted to the clamps, the other pair (J2) is with the accessories in the tool box. -
Page 16: Checking And Gauging
Operating manual - English Technica EU 4.6 Checking and gauging There are two types of regulation for the TECHNICA EU key-cutting machine, defined as axial gauging and depth gauging. cutting spaces cutting depths Fig. 14 4.6.1 A XIAL GAUGING ON BIT DOUBLE BIT KEYS Axial gauging is regulation of the spaces for the cuts on the key (fig. -
Page 17: Depth Gauging
Technica EU Operating manual - English 4.6.2 D EPTH GAUGING Depth calibration is regulation of the cutting depth (fig. 14, page 12). Depth gauging should be checked periodically to ensure perfect efficiency for the machine, and whenever the cutter or tracer point is replaced (due to wear or job changeover. -
Page 18: Cutting Operations
Operating manual - English Technica EU 4.7 Cutting operations ATTENTION: to work in complete safety, pay special attention to the following recommendations: • start the motor only when all the operations with the carriage have been carried out (securing keys, etc.) -
Page 19: Cutting Bit And Double Bit Keys - Female
Technica EU Operating manual - English 4.9 Cutting bit and double bit keys - female To cut female keys it is necessary to use the two universal centering pins supplied (chap. 1.4, page 6). 1) Use the knob (S) to lock the right-hand clamp in a horizontal position. -
Page 20: Maintenance
Although the TECHNICA EU key-cutting machine does not require special maintenance, it is advisable to check and, if necessary, replace the parts subject to wear, such as: the belt, cutting tool, tracer point. Replacement is simple and can be carried out by the operator. -
Page 21: Replacing The Cutter
Technica EU Operating manual - English 5.4 Replacing the cutter ATTENTION: turn the machine off and unplug it. 1) Loosen the 3 screws (C2) on the cutter shield and remove (fig. 23). 2) Remove the carriage (see chap. 5.2). 3) Place the locking bar into the special hole in the cutter shaft (fig. 24). -
Page 22: Belt Replacement And/Or Tensioning - Belt Tightening Pulley Replacement
Operating manual - English Technica EU 5.6 Belt replacement and/or tensioning - Belt tightening pulley replacement ATTENTION: Turn the machine off and unplug it. 1) Take out the 4 screws (V1) on the top cover and remove by lifting a little and turning. -
Page 23: Belt Tightening Pulley Replacement
Technica EU Operating manual - English 5.6.1 B ELT TIGHTENING PULLEY REPLACEMENT Follow the instructions for replacing the belt up to point 8, then: 1) Loosen the 2 screws (W4) on the plate and remove the unit (fig. 29). 2) Pull the belt tightening pulley upwards. -
Page 24: Condenser (Motor) And/Or Feeder (Lamp) Replacement
Operating manual - English Technica EU 5.8 Condenser (motor) and/or Feeder (lamp) replacement ATTENTION: Turn the machine off and unplug it. 1) Remove the swarf tray. 2) Use the lever to raise the carriage and secure by tightening the knob (G) (fig. 31). -
Page 25: Speed Commutator
Technica EU Operating manual - English 5.9 Speed commutator 0 = stop Speed 1 = 1st speed: 320 rpm 2 = 2nd speed: 650 rpm 1st speed Fig. 33 2nd speed 5.9.1 R EPLACING THE COMMUTATOR ATTENTION: turn the machine off and unplug it. -
Page 26: Motor Replacement
Operating manual - English Technica EU 5.10 Motor replacement ATTENTION: turn the machine off and unplug it. 1) Remove the swarf tray (V). 2) Loosen the 3 screws (C2) on the cutter shield and remove (fig. 27, page 18). 3) Remove the 4 screws (V1) on the top cover and remove by lifting it slightly and turning (fig. 26, page 18). -
Page 27: Replacing The Fuses
Fuses must always be replaced with others of the same type (rapid or delayed) and with the same Amps, as shown in the manual. The TECHNICA EU key-cutting machine has 2 fuses placed in the inlet socket (fig. 40) to protect the key-cutting machine from sudden changes in voltage or short circuits. -
Page 28: Decommissioning
ASTE DISPOSAL EEC standards lay down special regulations for waste disposal (*). Machine TECHNICA EU is a durable machine and is also re-usable. Recycling is an ecologically sound practice to be recommended. Packing As the packing in which the machine is transported is made of cardboard and wood it can be re-used if intact or used as fuel for the production of heat (e.g. -
Page 29: After Sales Service
7.1 How to request service The guarantee attached to TECHNICA EU key-cutting machines ensures free repairs or replacements of faulty parts within twelve months of purchase. All other service calls must be arranged by the customer with Silca or with a Silca service centre. - Page 30 SILCA S.p.A. Via Podgora, 20 (Z.I.) 31029 VITTORIO VENETO (TV) Tel. 0438 9136 Fax 0438 913800 www.silca.it Member of the Kaba Group...
Need help?
Do you have a question about the Technica EU and is the answer not in the manual?
Questions and answers