
Subscribe to Our Youtube Channel
Related Manuals for Silca Futura Auto


Summary of Contents for Silca Futura Auto
- Page 1 AUTO FUTURA Operating manual Translation of the original instructions D449934XA vers. 1.0...
- Page 2 (c) 2019 SILCA S.p.A. - Vittorio Veneto This manual has been drawn up by SILCA S.p.A. All rights reserved. No part of this publication can be reproduced or circulated by any means whatsoever (photocopies, microfi lm or other) without the consent of SILCA S.p.A.
-
Page 3: Table Of Contents
INDEX USE OF THE MANUAL ............................1 GENERAL WARNINGS ............................4 MACHINE DESCRIPTION ..........................5 1.1 MAIN OPERATING PARTS ......................... 6 1.2 SAFETY ............................... 7 1.3 TECHNICAL DATA ............................8 1.4 ACCESSORIES PROVIDED ........................9 HANDLING ..............................10 2.1 PACKING ..............................10 2.2 UNPACKING .............................. - Page 4 7.5 CHECKING AND REPLACING FUSE ....................... 27 7.6 BATTERY REPLACEMENT ........................28 7.7 ACCESS TO THE UPPER COMPARTMENT .................... 29 7.8 REPLACING THE ELECTRICAL CONTACT BRUSH ................30 7.9 REPLACING THE ELECTRICAL CONTACT BRUSH SET ............... 30 DISPOSAL ..............................31 ASSISTENZA ..............................
-
Page 5: Use Of The Manual
This manual must be read and its contents acquired by those who will use it. Manufacturer’s ID FUTURA AUTO has an ID plate located on the back of the machine, showing the serial number. Fig. 1 - Silca Fig. 2 - Minda Silca (*) see chap. - Page 6 FUTURA AUTO Operating manual TERMINOLOGY For those inexperienced in the subject of keys and key cutting, below is an illustration of the most frequently used terms: Fig. 3 1) Head 5) Tip 2) Neck 6) STANDARD cutting 3) Shoulder stop...
- Page 7 FUTURA AUTO Operating manual GRAPHICS IN THE MANUAL Obligation to read Pay attention the manual GRAPHICS ON THE FUTURA AUTO KEY-CUTTING MACHINE Do not clean with Obligation to read Adhesive label compressed air the manual Mass - RPM Copyright Silca 2019...
-
Page 8: General Warnings
• Always use Silca Original Spare Parts. Beware of imitations! NORMAL USE FUTURA AUTO is a key-cutting machine and must be installed and used according to the rules and specifi cations established by the manufacturer. The key-cutting machine must be used only by skilled personnel (professional use). -
Page 9: Machine Description
FUTURA AUTO operates only when connected to a TABLET containing a Silca program. FUTURA AUTO uses the tracer to decode vehicle keys with standard cuts and track type cuts. It can cut keys (in ferrous materials in general, brass, silver nickel, etc.) having: •... -
Page 10: Main Operating Parts
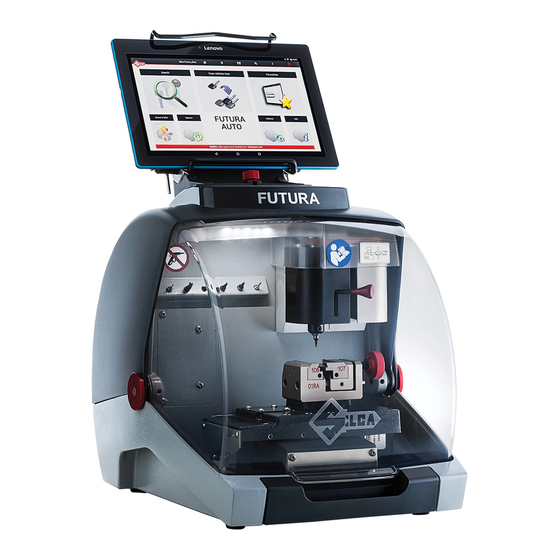
FUTURA AUTO Operating manual 1.1 MAIN OPERATING PARTS Fig. 6 - Tablet stand - Tablet - Safety shield - Lamp - Cover - Cutter - Cutter shaft - Gauge (01VA clamp) - Tracer 07T - Tracer movement lever - Tool compartment... -
Page 11: Safety
1.2 SAFETY FUTURA AUTO is entirely built in compliance to the Machine Directives. The operations for which it has been designed are easily carried out with no risk to the operator. The adoption of general safety precautions and observation of the instructions provided by the manufacturer in this manual eliminate all human error, unless deliberate. -
Page 12: Technical Data
FUTURA AUTO Operating manual 1.3 TECHNICAL DATA Electricity supply: Machine: 24V d.c.- 5,5 Amp. - 130W Power pack: 90/264V a.c. - 50/60Hz - 220W MEANWELL GST220A24-R7B Cutter motor: 24V d.c. Cylindrical cutters: 01LW - 02LW - 06LW : carbide, coated... -
Page 13: Accessories Provided
FUTURA AUTO Operating manual 1.4 ACCESSORIES PROVIDED FUTURA AUTO comes with a set of accessories for its operation and maintenance (tools, hex wrenches...) supplied in a special tool kit comprising: cutter 01LW cutter 02LW cutter 06LW cutter 12L tracer point 06T... -
Page 14: Handling
FUTURA AUTO Operating manual 2 HANDLING The FUTURA AUTO key-cutting machine is easy to handle and there are no special hazards involved in moving The packed machine can by carried manually by one person. 2.1 PACKING The packing for the FUTURA AUTO key-cutting machine ensures safe handling of the machine and all its components. -
Page 15: Machine Installation And Preparation
3.1 CHECKING FOR DAMAGE FUTURA AUTO is a solid compact machine and will not break if handling, unpacking and installation are carried out to the instructions in this manual. However, it is good practice to check that the machine has not been damaged. -
Page 16: Separate Parts
5) Fit the tablet into its stand (Fig. 16). Fig. 13 Fig. 14 Fig. 15 Fig. 16 Fig. 17 6) Connect the tablet USB/Micro USB cable to the USB tablet port (Y) located on the back of Futura AUTO. Copyright Silca 2019... -
Page 17: Power Pack And Lead
Operating manual 3.4.2 Power pack and lead Fig. 18 Fig. 19 Connect FUTURA AUTO to the power pack (W) and connect the latter to the power supply with the power lead (W2). Fig. 20 3.4.3 Fixing bracket If the key-cutting machine is transported and used on a vehicle, e.g. a van, it must be prepared as follows: 1) Turn off the machine and detach the power lead. -
Page 18: Work Station Description
FUTURA AUTO Operating manual 3.5 WORK STATION DESCRIPTION One operator is enough to operate the machine, which has the following operating parts: • General ON/OFF/emergency button (R) located on the right-hand side of the machine • Clamp 01RA holding clamp for keys with track cuts (P) •... -
Page 19: Tablet Regulation And Use
4) Select the required language, hold down and drag to position 1. 5) Select Silca Keyboard (if desired) 6) To quit • For all software functionalities on board the Silca key-cutting machine, see the SOFTWARE OPERATING GUIDE on your tablet (Ch .10). -
Page 20: Clamps
FUTURA AUTO Operating manual 5 CLAMPS 5.1 CLAMP FOR FLAT KEYS WITH STANDARD CUTS - 01VA Fig. 25 - clamp 01VA The use of one of the clamp sides is required, according to the type of key to be decoded and/or cut by copying or by code (Fig. -
Page 21: Use Of The Shoulder Gauge
FUTURA AUTO Operating manual 5.1.1 Use of the shoulder gauge The gauge is used to position fl at vehicle keys with stop (Stop 0) (chap.5.1.2). Fig. 27 Fig. 28 Fit the sample key into the clamp with the stop up against the gauge (Fig. 28). - Page 22 FUTURA AUTO Operating manual TIP STOP 1 2 3 Fig. 30 : Stop 1 - 2 - 3 Fig. 31 : Stop 4 According to the length of the stem the following accessories are provided to install keys with tip stops (chap.1.4): •...
-
Page 23: Clamp For Track Keys - 01Ra
FUTURA AUTO Operating manual 5.2 CLAMP FOR TRACK KEYS - 01RA Fig. 32 According to the type of key to be decoded and/or cut, follow the instructions in the Silca tablet program regarding: • clamp • use of jaws (Q1) and (Q2) •... - Page 24 FUTURA AUTO Operating manual • KEYS WITH STOP (eg. HU66... ) To correctly align keys with stop (Stop 0) the A45 adapter (supplied) is required to be opsitioned in the 107 or 106 jaw (according to the type of the profi...
-
Page 25: Removing / Fitting Clamps 01Va And 01Ra
FUTURA AUTO Operating manual 5.3 REMOVING / FITTING CLAMPS 01VA AND 01RA 1) Raise the safety shield. 2) Loosen the grub screw (P2) and remove the clamp by pulling it towards the operator. 3) Carefully clean the clamp support seat. -
Page 26: Fitting Optional Jaws Into The 01Ra Clamp
FUTURA AUTO Operating manual 5.4.1 FITTING OPTIONAL JAWS INTO THE 01RA CLAMP 1) Raise the safety shield. 2) Loosen and remove the knob (P1) (Fig. 44). 3) Use your fi ngers to pull the jaw to be removed out towards the operator (Fig. 45). -
Page 27: Using Tracer 07T
FUTURA AUTO Operating manual 5.5 USING TRACER 07T The tracer 07T is used to read/decode fl at keys and track keys. This tracer may or may not be required according to the type of key to be decoded and the dimensions involved. -
Page 28: Cleaning
FUTURA AUTO Operating manual 6 CLEANING • Keep the operational parts of the machine as clean as possible by brushing away the chippings in areas where they accumulate during cutting operations. • Under no circumstances should compressed air be used to clear the work zone of chippings as this will blow them onto the moving parts. -
Page 29: Maintenance
The FUTURA AUTO key-cutting machine does not need special maintenance, but it is good practice to check and if necessary replace parts subject to wear: cutter, tracer point, belt. -
Page 30: Cylindrical Cutter And/Or Tracer Point Replacement
FUTURA AUTO Operating manual 7.3 CYLINDRICAL CUTTER AND/OR TRACER POINT REPLACEMENT 1) Raise the safety shield. 2) Rotate the cutter shaft (G1) by hand and take the grub screw (G2) to the front of the machine. 3) Use a hex key to loosen the grub screw (G2) and remove the tool. -
Page 31: Checking And Replacing Fuse
Fuses must always be replaced with the same amperage and type (rapid or delayed), as indicated in this manual. FUTURA AUTO has 1 fuse: 4 Amps delayed Protects the cutters motors and their electronic controls (24 d.c.) Follow the instructions below to check and, if necessary, replace: 1) Turn off the key-cutting machine and unplug. -
Page 32: Battery Replacement
FUTURA AUTO Operating manual 7.6 BATTERY REPLACEMENT ATTENTION: only specialised personnel can change the battery. 1) Turn the machine off and unplug it from its power supply cable. 2) Access the rear compartment (chap.7.2). 3) Use insulated screwdriver to remove the fl at battery. -
Page 33: Access To The Upper Compartment
FUTURA AUTO Operating manual 7.7 ACCESS TO THE UPPER COMPARTMENT 1) Turn the machine off and unplug it from its power supply cable. 2) Remove the tablet and its holder. 3) Loosen the 2 rear screws (E1). 4) Loosen the 2 side screws (E2) and remove the 2 washers (E3). -
Page 34: Replacing The Electrical Contact Brush
FUTURA AUTO Operating manual 7.8 REPLACING THE ELECTRICAL CONTACT BRUSH 1) Turn the machine off and unplug it from its power supply cable. 2) Access the upper compartment (cap.7.7). 3) Loosen the screw (V1) and remove the electrical contact plate (V) and brush (S). -
Page 35: Disposal
FUTURA AUTO Operating manual 8 DISPOSAL For correct disposal please refer to current standards. INFORMATION FOR USERS OF PROFESSIONAL EQUIPMENT From “Actuation of Directive 2012/19/EU regarding Waste Electrical and Electronic Equipment (WEEE)” The symbol of a crossed waste bin found on equipment or its packing indicates that at the end of the product’s useful life it must be collected separately from other waste so that it can be properly treated and recycled. -
Page 36: Assistenza
9.1 HOW TO REQUEST SERVICE The guarantee attached to the key-cutting machines ensures free repairs or replacements of faulty parts within 24 months of purchase. All other service calls must be arranged by the customer with Silca or with a Silca service center. -
Page 37: Software Operating Guide
FUTURA AUTO Operating manual 10 SOFTWARE OPERATING GUIDE The FUTURA AUTO SOFTWARE OPERATING GUIDE is on the Tablet. Go to the “Options” > “Info” menu and tap on the appropriate icon (Fig. 70). Fig. 70 Copyright Silca 2019... - Page 38 FUTURA AUTO Operating manual Copyright Silca 2019...
-
Page 39: Electrical Diagrams
FUTURA AUTO Operating manual 11 ELECTRICAL DIAGRAMS J13 X axis motor J12 X axis sensor J9 not used J14 Y axis motor J15 Y axis sensor J18 Z axis motor J1006 J17 Z axis sensor n.2 CANopen J19 not used... - Page 40 FUTURA AUTO Operating manual STEP MOTOR X AXIS light blue green MOTHER BOARD J13 yellow STEP MOTOR Y AXIS white/red green MOTHER BOARD J14 white/green STEP MOTOR Z AXIS white/red green MOTHER BOARD J18 white/green X AXIS SENSOR yellow brown...
- Page 41 FUTURA AUTO Operating manual TRACER POINT SENSOR black brown MOTHER BOARD J22 light blue MICRO CARTER LED LAMP black MOTHER BOARD J2 LED LAMP RGB green brown black MOTHER BOARD J8 green light blue blue light blue ELECTRIC CONTACT MOTHER BOARD J21...
- Page 42 FUTURA AUTO Operating manual USB PORTS MOTHER BOARD J1005 VIEW A CUTTER MOTOR + MICRO CARTER Cutter motor laser MOTHER BOARD J7 Micro carter POWER SUPPLY MOTHER BOARD J4 +24V black black EMERGENCY PUSH BUTTON ETHERNET PORT MOTHER ETHERNET BOARD J3...
- Page 43 FUTURA AUTO Operating manual Led lamp lampada led Led Lampe Lampe Led Lampara Led Lâmpada Led Led lamp Ethernet- Etherner port Porta ethernet Port Ethernet Puerto ethernet Porta ethernet Ethernetpoort Anschluss Power feeder Alimentatore Speisegerat Alimentateur Alimentador Alimentador Voedingseenheid +24V...
Need help?
Do you have a question about the Futura Auto and is the answer not in the manual?
Questions and answers