Table of Contents
Advertisement
Advertisement
Table of Contents

Related Manuals for AURATON R30 RT


Summary of Contents for AURATON R30 RT
- Page 1 R30 RT O W N E R ’ S M A N U A L w ww . au raton . pl...
- Page 3 AURATON R30 RT 8 independently settable temperatures for day and night time The AURATON R30 RT temperature regulators allow for setting up to eight independent temperatures for day and night time with the resolution of one minute. The user can select time ranges for various temperatures depending on his or her requirements.
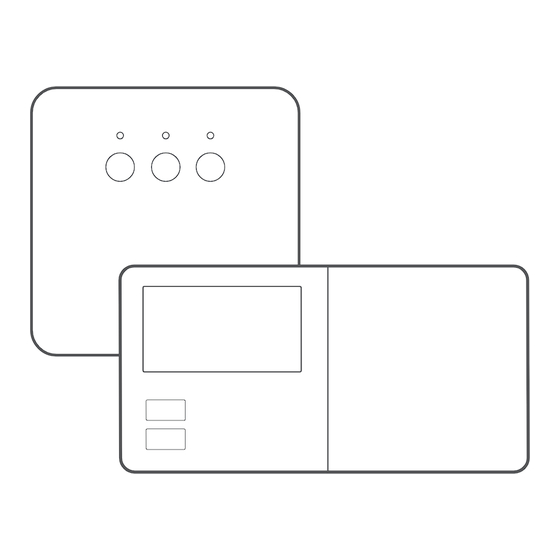
- Page 4 Description of the AURATON R30 RT temperature regulator On the right side of the front panel of the regulator you will find a sliding cover. There are buttons under the cover. You can replace batteries by removing the cover completely.
- Page 5 1. Day of week ( Indicates the current day of week. Every day is assigned a number. 2. Temperature In the normal mode of operation, the regulator displays the temperature in the room it is installed in. 3. Temperature unit Informs that the temperature is displayed in degrees Celsius ( 4.
- Page 6 Description of the AURATON RT receiver The AURATON RT receiver works with the wireless AURATON R30 RT controller. The received is installed near the heating or air conditioning device and may work with the load of 16A/10A. diode indicating that...
- Page 7 Selecting the proper location for temperature regulator Proper operation of the regulator is greatly affected by its location. Installing it in a place with no air circulation or exposed to direct sunlight causes improper regulation of tem- perature. In order to ensure proper operation, the regulator must be installed on an interior wall of a building (partition wall).
- Page 8 AURATON RT receiver by unscrewing the screws half way out. 2. Connect the heating device to the terminals of the control connection of the AURATON RT receiver. Follow the service instruction of the heating device. The COM (common) and NO...
- Page 9 Fastening the temperature regulator to the wall 1. Drill two holes 6 mm in diameter in the wall (use the template attached to the manual to mark the spacing between these holes). 2. Insert plastic wall plugs (included in the kit). 3.
- Page 10 (5 mm). 4. Put the wall plugs in the drilled holes. 5. Fasten the AURATON RT receiver to the wall using screws so that the receiver is well fastened. NOTE: If the wall is wooden, there is no need to use wall plugs. In such a case, drill two holes 2.7 mm in diameter instead of 5 mm, and screw the screws directly into the wood.
- Page 11 ) – a single sound signal is emitted - on the AURATON RT receiver and by holding it pressed for at least 3 s until the LED diode starts blinking with green light (double sound signal) – then the button must be released.
- Page 12 NOTE: If the power supply of the AURATON RT receiver is switched off and then switched on after the RESET, the receiver automatically goes into the “pairing” mode for 120 seconds.
- Page 13 Starting-up the regulator for the first time After the proper placement of batteries in the battery holder, all segments of the LCD display are displayed (display test) for one second; during the next second, the software version number is displayed. Following that, the regulator enters time setting mode;...
- Page 14 Setting the clock In order to set the clock: 1. Press the button until the icon is displayed, informing that the regulator has entered the time setting mode, and the hour field starts flashing. 2. Using the buttons, set the desired hour value.
- Page 15 PROGRAMMING The memory of the regulator allows for saving up to eight programs for weekdays, eight programs for Saturday and the same for Sunday. This allows for exceptionally precise planning of temperature in the building depending on the time of day Factory programs (for modification) Weekdays...
- Page 16 2. Assigning a day to the program Press the button to select days to be assigned to the program. A segment with days of week will start flashing in the top part of the display. Using the buttons, you can assign: –...
- Page 17 5. When all programs are inactive, the regulator remains turned off. Programming the manual , vacation and anti-freezing temperature The AURATON R30 RT regulator allows for setting three kinds of temperature: • manual temperature ( ) – within the range from 5°C to 30°C • vacation temperatureą ( ) –...
- Page 18 Manual control When, for any reason, you would like to suspend execution of the program for a certain period of time, the temperature can be set manually for a specified time. In such a case you have to: 1. Press the button.
- Page 19 Anti-freeze mode The AURATON R30 RT regulator is equipped with a setpoint for the anti-freeze tem- perature. This setpoint can be set within the range from 4 to 10°C. (Factory set at 7°C) The anti-freeze mode is used during a prolonged period of absence or outside the heat- ing season and is designed to prevent water in the heating system from freezing 1.
- Page 20 Configuration settings: backlight colour, hysteresis, delay, offset, clock calibration Configuration settings are presented for changing in the following order backlight hysteresis delay offset clock colour change change change change calibration To enter the configuration settings change mode press the buttons simultaneously and hold them for 5 seconds until the display backlight starts flashing.
- Page 21 CLOCK CALIBRATION This function is used for correcting the clock in case of deviations. When poor operation of the clock is observed during a week, determine the value of incorrect displays. This value, expressed in seconds, should be entered into the controller. Example 1: After one week, the controller indicates time accelerated by 1 minute and 20 seconds (60+20=80), in which case the clock should be delayed by setting „C -80”.
- Page 22 AURATON RT AURATON R30 RT AURATON T-2 AURATON H-1 Receiver connected Wireless Wireless thermometer Window handle to the heating device temperature regulator (sold separately) (sold separately) A simplified schematic of connecting the AURATON RT receiver with the heating device heating device...
- Page 23 • The AURATON T-2 thermometer provides information about the current temperature only, without the capability of changing it manually. A) The manual setpoint – pairing the AURATON R30 RT regulator with the RT receiver allows for setting the temperature manually and controlling it in the location of the fastening of the R30 RT regulator.
- Page 24 R30 RT regulator and/or the T-2 thermometer. B) The window is pivoted. If at least one window is pivoted, the temperature set in the AURATON R30 RT regu- lator is lowered in AURATON RT receiver down to 3°C. This state will be maintained until closing.
- Page 25 24 hours of operation until the problem is removed. • When both signals return (from the AURATON R30 RT regulator and the T-2 thermom- eter), the error is cancelled and the receiver enters its normal mode of operation.
- Page 26 This prevents the occurrence of an electric arc, significantly extending the relay service time. • The AURATON RT receiver is equipped with a unique algorithm for analysing the ON - OFF cycles. The entire heating cycle from the last 24 hours is recorded in the memory of the RT receiver.
- Page 27 The AURATON RT receiver connection schematics CONTROL HEATING DEVICE e.g. a gas furnace ELECTRIC HEATING DEVICE MAX ~230V 16A – PROTECTIVE...
- Page 28 LED (the RT receiver) / LCD (the regulator) resistive 16 A Maximum load current for relay contacts: inductive / capacitive 10 A AURATON R30 RT power supply: 2 x AA alkaline battery AURATON RT power supply: 230V AC, 50Hz AURATON RT radio frequency:...
- Page 30 A template for drilling holes for fastening the AURATON RT receiver (1:1 scale)
- Page 32 20190218...
Need help?
Do you have a question about the R30 RT and is the answer not in the manual?
Questions and answers