Table of Contents
Advertisement
Advertisement
Table of Contents
Troubleshooting

Related Manuals for BRP Ski-Doo OXYGEN


Summary of Contents for BRP Ski-Doo OXYGEN
- Page 1 OXYGEN HELMET USER GUIDE...
- Page 2 USER GUIDE OXYGEN ENGLISH...
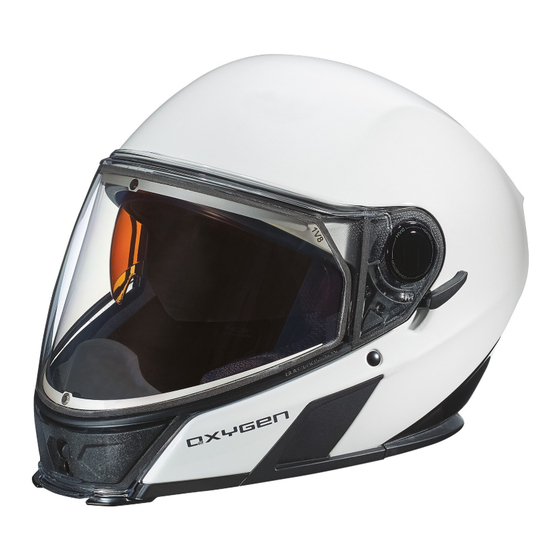
- Page 3 Ski-Doo Helmet CONGRATULATIONS! You have made an excellent choice with the BRP Ski-Doo® OXYGEN helmet. The OXYGEN helmet is the result of the very latest design and manufacturing methods. This helmet combines the top characteristics of a sport helmet with the comfort of a touring helmet.
-
Page 4: Table Of Contents
........................17 4. LED UTILITY LIGHT BATTERIES REMPLACEMENT 1. HOW TO PUT THE HELMET ON I. BRP SERVICE I. BRP SERVICE ........ I. BRP SERVICE I. BRP SERVICE ................................................ -
Page 5: General
1. SAFETY INFORMATION protection to the head. It complies with U.S. Federal Motor Vehicle Safety This helmet is backed by the BRP warranty and a network of authorized Standard 218. dealers ready to provide the parts, service or accessories that you may require. -
Page 6: The Helmet
B. THE HELMET 3. AEROACOUSTICS 1. ANATOMY OF THE HELMET Various features developed by BRP make the helmet agreeably quiet as far as aeroacoustics are concerned, while providing optimized acoustic feedback when riding. M-Forge® outer shell Rear signature light Aeroacoustics values may vary according to the type of snowmobile, fairing... -
Page 7: Protective Collar
B. THE HELMET INSTALLING THE PROTECTIVE COLLAR 4. PROTECTIVE COLLAR 1. 1. 1. 1. Insert the 4 “arrow snaps” on the chin The protective collar reduces air intrusion and unpleasant effect of the wind plastic strip inside their specific housing. created when you ride by flowing into the helmet. -
Page 8: Micrometric Chin Strap
B. THE HELMET OPENING AND CLOSING To close the chinstrap fastener, slide the ratchet tongue step by step into the 5. MICROMETRIC CHIN STRAP locking buckle. If you find that the chinstrap fits too loosely around your chin, The retention system of the OXYGEN helmet comes with a ratchet fastener. slide the ratchet tongue one step further into the locking buckle. -
Page 9: Face Shield
B. THE HELMET 6. FACE SHIELD INSTALLING THE FACE SHIELD Changing the visor shield is easy to do without tools. To replace the visor, it is helpful to place the helmet on a flat surface or on your lap while seated. 1 1 1 1 . -
Page 10: Sun Visor
B. THE HELMET 7. SUN VISOR OPERATION 5 5 5 5 ..Once both sides are in position, The sun visor is operated by the lever press the face shield pivots gently positioned on the left side of the helmet, towards helmet with... -
Page 11: Magnetic Connector
B. THE HELMET 8. MAGNETIC CONNECTOR INSTALLING THE SUN VISOR 1. 1. 1. 1. Make sure your magnetic connector and your helmet power outlet are clean. 1. 1. 1. 1. Make sure the sun visor mechanism is in low position. (Sun visor lever up) 2. -
Page 12: Rear Light
11..Put the new BRP logo over the upper at the top of the rear light module. screw. 5 5 5 5 ..Then disconnect the two connectors by Make sure that the surface is clean;... -
Page 13: Face Shield Mechanism
B. THE HELMET 10. FACE SHIELD MECHANISM REMOVING / REPLACING THE FACE SHIELD MECHANISM 5 5 5 5 ..Take a new mechanism and connect the 1 1 1 1 ..Remove the face shield as described in electrical wire as shown, by tightening the the “6. -
Page 14: Noise Control System
B. THE HELMET WARNING WARNING WARNING WARNING 11. NOISE CONTROL SYSTEM Always be alert for sounds – Your helmet may impair your hearing. Your helmet is equipped with noise reduction ear pads. You can adjust the Your helmet is not a form of hearing protection. pads position to achieve the desired comfort by following the steps below: 12. - Page 15 B. THE HELMET REMOVING THE HEAD LINER REMOVING THE CHEEK PADS 1. 1. 1. 1. First, remove the protective collar. 1. 1. 1. 1. First remove the protective collar. (See instruction page 6) (See instruction page 6) 2. 2. 2. 2. Second, remove the cheek pads. 2 2 2 2 .
-
Page 16: Ventilation System
B. THE HELMET 13. VENTILATION SYSTEM 14. BREATH GUARD The OXYGEN helmet has a two-way adjustable ventilation system. As needed, The breath guard reduces fogging of the visor caused by breathing. you can modulate the air flow as per three distinct configurations: REMOVING THE BREATH GUARD 1. -
Page 17: Remote Control
B. THE HELMET 15. REMOTE CONTROL If the red LED is lighted, this means that a short circuit happened, follow the The OXYGEN helmet has been designed to perform at very cold temperatures, steps below: but to keep the performances without compromising the comfort, you can 1. -
Page 18: Fit & Usage
C. FIT & USAGE 2. PROPER FIT 1. HOW TO PUT THE HELMET ON 1. 1. 1. 1. Make sure the sun visor is retracted into the helmet shell. WARNING WARNING WARNING WARNING Wearing the wrong helmet size can increase the risk of serious injury or death 2. -
Page 19: Put The Helmet Off
We highly recommend that you get your helmet cables connected by an is too big. If the helmet is constricting or painful, it is too small. authorized BRP dealer so that he can refer to the vehicle’s shop manual to determine the best connection point. - Page 20 For more details, see your authorized BRP dealer. • Put on your helmet as described in the “2. PROPER FIT” section of this • Option 1b: Via the battery power outlet intended for this purpose (sold manual;...
-
Page 21: Communication System Installation
C. FIT & USAGE STEP 4 STEP 4 STEP 4 STEP 4 Repeat these steps for the other NCS. 5. COMMUNICATION SYSTEM INSTALLATION STEP 5 STEP 5 STEP 5 STEP 5 Picture 1: Picture 1: Re-position the NCS inside your helmet and make sure the wires go out of Picture 1: Picture 1: STEP 1... -
Page 22: Before Every Ride
D. BEFORE EVERY RIDE 3. CHECKING THE FACE SHIELD AND SUN VISOR 1. CHECKING THE HELMET Inspect regularly your helmet for damage. Small superficial scratches will not The protective film used during shipping should be removed before use. impair the protective function of your helmet. Before every ride, check that the mechanisms of the face shield and sun visor WARNING WARNING... -
Page 23: Other Important Information
Use only original parts, replacement parts and accessories that BRP has Different factors can contribute to the occurrence of frostbite such as: expressly approved for your helmet! • Length of time a person is exposed to the cold;... -
Page 24: Care And Maintenance
F. CARE AND MAINTENANCE WARNING WARNING WARNING WARNING 3. OUTER SURFACE OF THE FACE SHIELD Never use Never use Never use Never use petroleum petroleum petroleum petroleum- - - - based based based based chemicals, solvents, gasoline, cleaning agents or chemicals, solvents, gasoline, cleaning agents or chemicals, solvents, gasoline, cleaning agents or chemicals, solvents, gasoline, cleaning agents or... -
Page 25: Sun Visor
F. CARE AND MAINTENANCE 6. SUN VISOR The helmet should be replaced after 3 to 5 years, depending on use and care. Although the outer shell is in principle capable of a longer service life, the 6.1 CLEANING THE SUN VISOR occurrence of material fatigue and wear to other components, as well as the The sun visor should only be cleaned with a soft and, if necessary, slightly overall action of the helmet and the unknown conditions in which the helmet... -
Page 26: Troubleshooting Guide
Replace it if necessary. Your power source is higher than 18 Vdc. 7. If the problem is still not resolved, go to your authorized BRP dealer for detailed inspection. Check if the heating visor has been damaged. Replace it if necessary. -
Page 27: Troubleshooting Guide
2. Check if there are any broken parts. DYSFUNCTIONING Replace them by new ones if necessary. 3. If the problem is still not resolved, go to your authorized BRP dealer for detailed inspection. Make sure your face shield is properly closed. ICE FORMATION ON FACE You should hear/feel a “click”. -
Page 28: Accessories And Spare Parts
For safety reasons, all other parts of the helmet should be replaced by a BRP • 9290170990 : (S, M, L) fits Small, Medium, Large dealer only. • 9290171490 : (XL, 2XL, 3XL) fits Extra Large, 2 Extra Large, 3 Extra Large... - Page 29 Oxygen rear signature light Oxygen rear signature light Oxygen rear signature light Oxygen rear signature light • 9290160090 Helmet BRP logo 1in Helmet BRP logo 1in Helmet BRP logo 1in Helmet BRP logo 1in • 4487000008 M M M M ini ini ini ini fus fuse e e e •...
-
Page 30: Led Utility Light Installation
H. ACCESSORIES AND SPARE PARTS 3. LED UTILITY LIGHT INSTALLATION STEP 3 STEP 3 STEP 3 STEP 3 ST ST ST STEP 1 EP 1 EP 1 EP 1 Install the accessory light by positioning the upper corners first, then tilt it Picture 1: Picture 1: Picture 1:... -
Page 31: Led Utility Light Batteries Remplacement
H. ACCESSORIES AND SPARE PARTS 4. LED UTILITY LIGHT BATTERIES REMPLACEMENT S S S S TEP 1 TEP 1 TEP 1 TEP 1 Using the Phillips #1 screw driver delivered with the LED Utility Light, remove the screws on each side of the utility light batteries cover and set them aside. Note: Be careful not to drop the screws and/or unscrew the utility light screws. -
Page 32: Brp Service
North America 1. REPAIR SERVICE Skaldenstraat 125 565 de la Montagne Street The OXYGEN helmet is a BRP quality product that has been designed and B-9042 Gent Valcourt (Québec) J0E 2L0 manufactured using the latest development and production methods. If a...
Need help?
Do you have a question about the Ski-Doo OXYGEN and is the answer not in the manual?
Questions and answers