Table of Contents
Advertisement
Advertisement
Table of Contents

Related Manuals for BRP ADVEX


Summary of Contents for BRP ADVEX
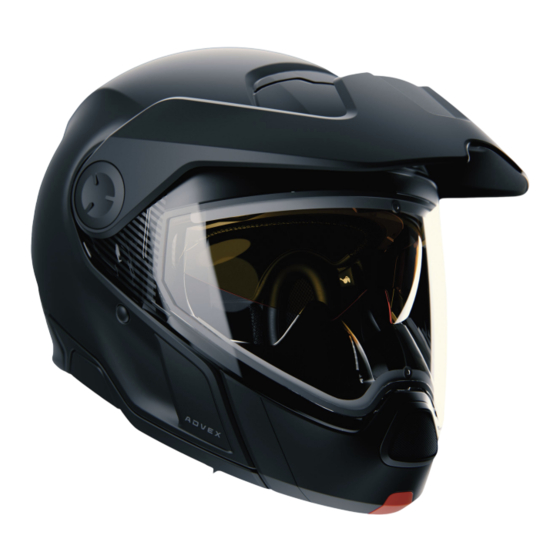
- Page 1 ADVEX HELMET USER GUIDE...
- Page 2 USER GUIDE ADVEX ENGLISH...
- Page 3 CONGRATULATIONS! You've made an excellent choice with the BRP ADVEX Helmet. The ADVEX helmet is the result of years of research and engineering to create the best product possible for you and your next ride. With the convenience of a modular helmet coupled with the best features of a full face helmet you are sure to hit the trail in comfort.
-
Page 4: Table Of Contents
1. ACCESSORIES 9. REAR LIGHT (IF EQUIPED WITH ELINQ) 2. REPLACEMENT PARTS 10. FACE SHIELD MECHANISM 11. NOISE CONTROL SYSTEM I. BRP SERVICE ............26 12. INNER LINER 1. REPAIR SERVICE 13. INNER LINER 2. LIMITED WARRANTY 14. VENTILATION SYSTEM J. -
Page 5: General
WARNING Riding a motorized vehicle can be extremely dangerous. This helmet This helmet is backed by the BRP warranty and a network of authorized provides limited protection to the head. It complies with U.S. Federal dealers and distributors ready to provide the parts, service, or accessories Motor Vehicle Safety Standard 218 (DOT FMVSS 218) and/or the United that you may require. -
Page 6: Minimal Requirement
A. GENERAL 2. MINIMAL REQUIREMENT 2. HELMET SIZING If your new ADVEX helmet is equipped with electrified feature such as a Helmet size heated visor who require to be operated on a 12VDC power source (normally in between 11.5VDC to 16.5VDC). -
Page 7: Chin Curtain
B. THE HELMET 3. CHIN CURTAIN 4. Slide out the chin curtain from the rear neck portion. To fully remove the The chin curtain reduces air intrusion and unpleasant effect of the wind protective collar, pull gently on the rear created when you ride by flowing into the helmet. -
Page 8: Micrometric Chin Strap
4. MICROMETRIC CHIN STRAP INSTALLING THE CHIN CURTAIN The retention system of the ADVEX helmet comes with a ratchet fastener. This locking system is easy to use and enables you to adjust the chinstrap perfectly to your head every time you put the helmet on. -
Page 9: Breath Guard
INSTALLATION AND ADJUSTMENT When adjusting the chinstrap, make sure that it rests firmly but not For optimal performance of the ADVEX helmet, it is essential to ensure uncomfortably around your chin. To open the chinstrap, pull the red ribbon that the breath guard is properly installed and adjusted. -
Page 10: Face Shield
B. THE HELMET 6. FACE SHIELD 5. On one side, pull the lever of the face shield mechanism downward Changing the face shield is easy to do without tools. To replace the visor, release the lower tab of the face shield. it is helpful to place the helmet on a flat surface on soft cloth or on your lap while seated. -
Page 11: Sun Visor
B. THE HELMET 6. FACE SHIELD 5. Once both sides are in position, press the face shield pivots gently INSTALLING THE FACE SHIELD towards helmet with simultaneous closing movement to ensure proper latching. 1. Insert the upper tab of the face shield into the specific location on the face shield mechanism. - Page 12 B. THE HELMET 7. SUN VISOR INSTALLING THE SUN VISOR REMOVING THE SUN VISOR 1. Turn the helmet face shield to the open 1. Make sure the sun visor mechanism is in position. low position. (Sun visor lever back) 2. Insert the sun visor between helmet inner and outer shell and fit it on to the 2.
-
Page 13: Magnetic Connector (If Equiped With Elinq)
If the wires are stuck into the shell, do not 2. Plug the eLinQ connector directly into the power outlet of your ADVEX helmet. force on the rear light module, you could damage it. Gently pull the wires out of the The power outlet and eLinQ connector might shell. -
Page 14: Face Shield Mechanism
Grab the wires and try to pull them gently out of the shell. 11. Put the new BRP logo over the upper TYPICAL screw. TYPICAL 4. Once you have access to the screw, Make sure that the surface is clean;... - Page 15 NOTICE Do not pull directly on the electrical wires, you could damage them. 5. Take a new mechanism and connect the electrical wire as shown, by tightening the screw to 0.3 Nm. TYPICAL Make sure there is no free play in the connection once the screw is fully tightened.
-
Page 16: Noise Control System
12. INNER LINER Your helmet is equipped with noise reduction ear pads. You can adjust the The replaceable inner lining of the ADVEX helmet is washable and pads position to achieve the desired comfort by following the steps below: ensures both an excellent fit and improved ventilation of the helmet. - Page 17 B. THE HELMET 12. INNER LINER REMOVING THE HEAD LINER 1. First, remove the rear portion of the REMOVING THE CHEEK PADS head liner. The head liner is attached to 1. With the face shield in the open the inner shell with 2 snaps (on each position, detach the Velcro and the 3 side of the neck) and a frontal portion,...
-
Page 18: Inner Liner
13. INNER LINER 14. VENTILATION SYSTEM INSTALLING THE HEAD LINER The ADVEX helmet has a two-way adjustable ventilation system. As needed, you can modulate the air flow: 1. Insert the frontal plastic strip under the notches of the other plastic strip 1. -
Page 19: Fit & Usage
B. THE HELMET 14. VENTILATION SYSTEM 2. PROPER FIT In all cases, it allows you to increase or reduce the air flow to reach the WARNING desired level of comfort. Wearing the wrong helmet size can increase the risk of serious injury or death in an accident. -
Page 20: Take The Helmet Off
We highly recommend that you get your helmet cables connected by an 5. FASTEN THE CHIN STRAP authorized BRP dealer so that he can refer to the vehicle’s service manual Tight it under your jaw until it remains no slack in the strap, and the strap to determine the best connection point. - Page 21 Ensure that the cables stay away from any moving parts. Do not let the power cables become entangled in the vehicle and do not drive over them. Only use BRP approved extension cord. If the cables are damaged, stop using them. Discard and replace them with new OEM BRP cables.
-
Page 22: Before Every Ride
D. BEFORE EVERY RIDE 1. CHECKING THE HELMET 3. CHECKING THE FACE SHIELD AND SUN VISOR Regularly inspect your helmet for damage. Small superficial scratches will The protective film used during shipping should be removed before use. not impair the protective function of your helmet. Before every ride, check that the mechanisms of the face shield and sun visor are working properly and that the face shield and sun visor will WARNING... -
Page 23: Other Important Information
What causes frostbite to occur? Different factors can contribute to the occurrence of frostbite such as: Use only original parts, replacement parts and accessories that BRP has • Length of time a person is exposed to the cold; expressly approved for your helmet! •... -
Page 24: Care And Maintenance
Do not use any cleaning agents. 2. INTERIOR CLEANING The inner lining of the ADVEX helmet can be removed completely. The head and cheek pads can be washed by hand using a mild soap solution (e.g. with highly diluted standard mild detergent) at a maximum temperature of 30 °C. -
Page 25: Sun Visor
F. CARE AND MAINTENANCE 5. SUN VISOR The helmet should be replaced after 3 to 5 years after the date of purchase, depending on use and care. Although the outer shell is in 5.1 CLEANING THE SUN VISOR principle capable of a longer service life, the occurrence of material fatigue and wear to other components, as well as the overall action of the helmet The sun visor should only be cleaned with a soft and, if necessary, slightly and the unknown conditions in which the helmet has been used, make it... -
Page 26: Troubleshooting Guide
3. Remove the face shield and make sure that the visor internal lens is properly sealed to detect fogging in between the two ___lenses. Replace it if necessary. NO HEATING AND/OR 4. At IDLE, load shedding might happen on some vehicles, including BRP snowmobiles equipped with a 420W magneto. Run the FOG APPEARING ON ___engine at higher RPM THE MAIN VISOR (Rotation Per Minutes) a few minutes and it should turn on the main visor heating. -
Page 27: Accessories And Spare Parts
Original BRP accessories are available at your authorized BRP dealer. To dealer. find BRP dealers in your area, use the dealer search on the BRP website: BRP ask that you provide a precise description of the claim as well as a www.brp.com copy of your receipt. -
Page 28: How To Contact Us
Japan Room Dubai, level 12, Platinum Tower For your nearest authorized BRP dealer or distributor or for more information on BRP products, please visit our web site: 233 Tai Cang Road www.brp.com ® ™ and the BRP logo are trademarks of Bombardier Recreational Products inc. or its affiliates.
Need help?
Do you have a question about the ADVEX and is the answer not in the manual?
Questions and answers