Advertisement
Quick Links
IMPORTANT
Carefully remove all the parts from the carton and
place them individually on a soft cloth to prevent
scratches or other damage.
Carefully and strictly follow these assembly instructions
to ensure a completed product as designed.
Do not use power tools above 8 volts to assemble.
Part List
A.
Top
1 pc.
D.
Side Panel
1 pc.
For assembly see instructions in carton 88 5531 752.
Home Styles Customer Service: www.homestyles-furniture.com,
servicedesk@homestyles-furniture.com,
88 5531 751
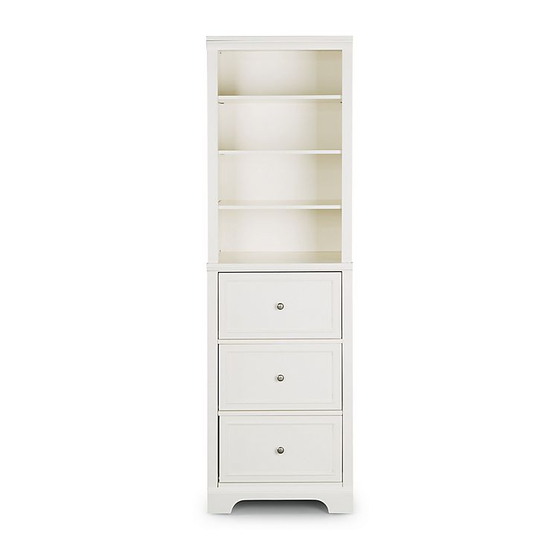
Closet Wall Drawer Unit
B.
Front Rail
1 pc.
E.
Side Panel
1 pc.
888-680-7460, 877-831-0319
C.
Shelf
3 pcs.
F.
Back Panel
1 pc.
Advertisement

Subscribe to Our Youtube Channel
Related Manuals for Home Styles 88 5531 751


Summary of Contents for Home Styles 88 5531 751
- Page 1 Part List Shelf 1 pc. 3 pcs. Front Rail 1 pc. Side Panel Side Panel Back Panel 1 pc. 1 pc. 1 pc. For assembly see instructions in carton 88 5531 752. Home Styles Customer Service: www.homestyles-furniture.com, servicedesk@homestyles-furniture.com, 888-680-7460, 877-831-0319...
-
Page 2: Hardware List
4 pcs. 1 pc. 16 pcs. (+1 extra) 2 pcs. Carton 88 5531 751 is also needed for assembly. Tool(s) required for assembly: Phillips screwdriver, Level, Drill (8 volts or less), 3/8” Drill Bit Home Styles Customer Service: www.homestyles-furniture.com, servicedesk@homestyles-furniture.com,... - Page 3 Assembly Instructions 6/8 IMPORTANT Ÿ To help reduce the risk of the unit tipping over, the Tipover Restraint must be installed following these instructions exactly. STEP 9 Anchor in wall Wall Screw Pre-drilled hole Bracket Drill a 3/8” hole in wall in-line with at top of unit on wall the pre-drilled hole at top of unit.
- Page 4 Assembly Instructions 8/8 Drawer (O) STEP 1 Attach O2 to O3 and O4, then flip the locks. (See Figure A) Figure 2 STEP 2 Slide O5 into the grooves in O3 and O4. Be sure to push O5 all the way forward so it meets O2. STEP 4 STEP 3 Attach Knob with...
- Page 5 Part List Shelf 1 pc. 3 pcs. Front Rail 1 pc. Side Panel Side Panel Back Panel 1 pc. 1 pc. 1 pc. For assembly see instructions in carton 88 5531 762. Home Styles Customer Service: www.homestyles-furniture.com, servicedesk@homestyles-furniture.com, 888-680-7460, 877-831-0319...
- Page 6 1 pc. 16 pcs. (+1 extra) 2 pcs. Carton 88 5531 761 is also needed for assembly. Tool(s) required for assembly: Phillips screwdriver, Level, Drill (8 volts or less), 3/8” Drill Bit Home Styles Customer Service: www.homestyles-furniture.com, servicedesk@homestyles-furniture.com, 888-680-7460, 877-831-0319...
- Page 7 Assembly Instructions 6/7 IMPORTANT Ÿ To help reduce the risk of the unit tipping over, the Tipover Restraint must be installed following these instructions exactly. STEP 9 Anchor in wall Wall Screw Pre-drilled hole Bracket Drill a 3/8” hole in wall in-line with at top of unit on wall the pre-drilled hole at top of unit.
- Page 8 Part List Front Rail 1 pc. 1 pc. Side Panel Side Panel Back Panel Back Panel 1 pc. 1 pc. 1 pc. 1 pc. For assembly see instructions in carton 88 5531 772. Home Styles Customer Service: www.homestyles-furniture.com, servicedesk@homestyles-furniture.com, 888-680-7460, 877-831-0319...
- Page 9 16 pcs. (+1 extra) 4 pcs. 2 pcs. Carton 88 5531 771 is also needed for assembly. Tool(s) required for assembly: Phillips screwdriver, Level, Drill (8 volts or less), 3/8” Drill Bit Home Styles Customer Service: www.homestyles-furniture.com, servicedesk@homestyles-furniture.com, 888-680-7460, 877-831-0319...
- Page 10 Assembly Instructions 7/8 IMPORTANT Ÿ To help reduce the risk of the unit tipping over, the Tipover Restraint must be installed following these instructions exactly. STEP 10 Anchor in wall Wall Screw Pre-drilled hole Bracket Drill a 3/8” hole in wall in-line with at top of unit on wall the pre-drilled hole at top of unit.
Need help?
Do you have a question about the 88 5531 751 and is the answer not in the manual?
Questions and answers