Stanley Errigal Training Manual
Hide thumbs
Also See for Errigal:
- Assembly, installation and operating instructions (16 pages) ,
- Installation and operating instructions manual (15 pages) ,
- Instruction manual (20 pages)
Table of Contents
Advertisement
Advertisement
Table of Contents

Related Manuals for Stanley Errigal


Summary of Contents for Stanley Errigal
- Page 1 Errigal Wood Burner Training Manual...
-
Page 2: Table Of Contents
Contents Page No. Section 1: Overview Product Features Technical Specifications Accessories Section 2: Installation Flue Connection Clearance to Combustibles Ventilation Requirements Pre-Installation Assembly Section 3: Operation Lighting the Cooker Controlling the Fire Refuelling Overnight Burning Flue Cleaning General Cleaning Section 4: Part Replacement Procedure Appendix 1: Warranty Policy... - Page 3 Section 1: Overview Page 1...
-
Page 4: Overview
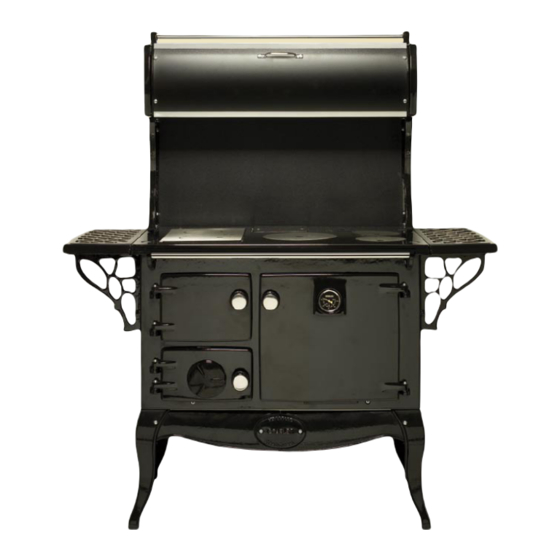
Section 1: Overview Page 1 Section 1: Overview Product Features Figure 1.1: Schematic of Cooker Technical Specifications Description Unit Weight Log Size Inches Flue Outlet Inches Oven Volume 3022 Oven Size Inches 15 (D) x 13 (H) x 15 ½ (W) Hotplate Area Firebox Size Inches... -
Page 5: Accessories
54” 5/8 22 “ ¼ 11” ½ 28” 11/20 1” 13/20 6” 3/10 Accessories There are three accessory items available for the Errigal Cooker that can enhance the cooker appearance and add extra surface & storage space. They can be fitted either during or after the... - Page 6 Section 1: Overview Page 3 Figure 1.4 Platerack & Splashback Assembly – Part Code: AWPWBCD The platerack when fitted increases the overall height of the cooker by 20” and provides an increased plate storage area of 35” (wide) x 11” deep. If the flue pipe is to be connected to the top outlet connection on the bonnet, the platerack assembly must be fitted before the flue pipe is fitted to the cooker as shown in Figure 1.2.
- Page 7 Section 1: Overview Page 4 Position the warming shelf so that the top face is flush with the surface of the hob & the front edge is in line with the front edge of the hob and tighten all screws to secure in position.
-
Page 8: Installation
Section 2: Installation Page 5 Section 2: Installation Flue Connection Note: It is imperative that all requirements regarding the flue system are adhered to when installing the cooker, as a failure to do so could result in a loss in performance of the cooker. Basic Flue Requirements ... - Page 9 Section 2: Installation Page 6 Connection to Existing Chimney The Chimney should adhere to the basic flue requirements and also the following: The chimney should be inspected for condition and code compliance prior to installation. The chimney must be constructed in accordance with NFPA 211 code. ...
-
Page 10: Clearance To Combustibles
Section 2: Installation Page 7 Fabricated Flues Fabricated Flues should adhere to the basic flue requirements and also the following: The flue pipe should be 6” internal diameter and of a Factory Built UL Listed Residential Type HT & Building Heating appliance chimney and acceptable to the local building core. - Page 11 Section 2: Installation Page 8 Figure 2.5: Hearth Dimensions The following clearances to combustible materials must be maintained at all times: From the front of the unit – 48” From the back of the unit (Top Outlet Configuration) – 16” ...
- Page 12 Section 2: Installation Page 9 Figure 2.7 The clearances may be reduced with the use of protection for the combustible walls and ceilings. If ULC/UL Labelled Heat Shields installed in accordance with the manufacturers instructions or any shields complying with the requirements of the “Installation Code for Solid Fuel Fired Appliances CAN31336”...
-
Page 13: Ventilation Requirements
Section 2: Installation Page 10 Ventilation Requirements The air supply to this appliance must conform to the relevant regulations and the minimum effective air requirement for this appliance is 65 cm All air vents fitted direct to the outside of the building should be fire proofed, sealed to prevent the ingress of moisture and fitted as specified by the relevant local &... - Page 14 Section 2: Installation Page 11 Figure 2.10 Figure 2.11 Fit the back heat shield to the back of the cooker using the four self tapping screws on each side. Configure the cooker for top flue outlet or back outlet configuration as required as described in Section 2.1 –...
-
Page 15: Operation
Section 3: Operation Page 12 Section 3: Operation Lighting the Cooker Note: The first few fires should be relatively small to permit the cement seals to set and to season the cooker. During these firings it will be necessary to have a window open to vent any fumes produced from coatings being burnt off that are added to aid storage of the unit. -
Page 16: Controlling The Fire
Section 3: Operation Page 13 Figure 3.2 Figure 3.3 Controlling the Fire When the fire has been established, turn the oven damper clockwise to the open position and the turn the flue damper clockwise to the closed position. The burn rate of the fuel is then controlled using the spin valve (58) on the fire door. -
Page 17: Overnight Burning
Section 3: Operation Page 14 Figure 3.4 Overnight Burning As with the settings required to achieve certain oven temperatures, a little bit of practice will be required to determine the control settings required to achieve an overnight burn. The following guideline procedure will help to determine what control settings are required with the spin valve &... - Page 18 Section 3: Operation Page 15 All soot deposits on the top of the oven underneath the hob should be brushed into the firebox and using the flue brush provided with the cooker, the back flue pathway underneath the bonnet should be cleaned (see Figure 3.7). Figure 3.6 Figure 3.7 All soot deposits which have accumulated on the side of the oven should be brushed...
-
Page 19: General Cleaning
Section 3: Operation Page 16 General Cleaning Cleaning of the different constituent parts is carried as follows: Part Cleaning Guidelines Mild Steel Parts Use only washing up liquid in hot water with a lint free cloth. Dry off and apply a coat of good quality polish. Ovens Grease spillages will burn off from the oven interior when the oven is hot and any other loose materials can be wiped away with a cloth when... -
Page 20: Part Replacement Procedure
Section 4: Part Replacement Procedures Page 17 Section 4: Part Replacement Procedures... - Page 21 Section 4: Part Replacement Procedures Page 18 Parts List FRONT – B00152AZZ BONNET RING – B00147AZZ OVEN DOOR – B00148AZZ HOB PROTECTION SMALL PLATE – Q00140AXX OVEN DOOR ASSEMBLY – L00309AEN LINTH JOINING CLIP – Q00134AXX ASHPIT DOOR – B00150AXX BONNET –...
- Page 22 Section 4: Part Replacement Procedures Page 19 Rope Seals Seal Rope Size Length (Metres) Fire Door Ø9.5mm (J00003AXX) 0.81 Ashpit Door Ø9.5mm (J00003AXX) 0.77 Oven Door Ø9.5mm (J00003AXX) 1.47 Oblong Hotplate Ø9.5mm (J00003AXX) 1.24 Door Seal & Door Catch Adjustment To replace any of the door seals, remove the old sealing rope from the door and clean any cement &...
- Page 23 Section 4: Part Replacement Procedures Page 20 Figure 4.3 Grate Removal To remove the grate casting (41), lift the back of the grate up slightly to allow for it to be pulled forward out through the ashpit door opening as shown in Figure 4.4. Figure 4.4...
- Page 24 Section 4: Part Replacement Procedures Page 21 Replacement of Cast Iron Liners The following procedure should be used to remove and replace the cast iron firebox liners: Lift up the bottom front fire lining (48) to remove it as shown in Figure 4.5. Unscrew the ¼”...
- Page 25 Section 4: Part Replacement Procedures Page 22 Hob Replacement If the cooker is connected to the chimney system using the top flue configuration, it will be necessary to disconnect the flue system and bonnet (55) before removing the hob using the following procedure: Remove all the loose parts from the top of the hob i.e.
- Page 26 Section 4: Part Replacement Procedures Page 23 Figure 4.10 Side Panel Replacement Remove the outer back sheet iron (77) by removing the four self tapping screws (two on each side) to allow access to the side panel fixing screws (one on each side) located on the back edge of the side panel (65/66).
- Page 27 Failure to comply with the installation requirements will void your warranty. Waterford Stanley reserve the right to replace any part due to manufacturing defect that fails within the warranty period under the terms of the warranty. The unit must be used for normal domestic purposes only and in accordance with manufacturer's operation instructions.
- Page 28 Page 25 Appendix 2: Platerack & Splashback Parts List Parts List Blanking Cup – B00244AZZ RH Standard – B00246AZZ Slotted Rack Section – B00242AZZ Inner Splashback – F00684AXX Towel Rail – V00148AXX Outer Splashback – F00685AXX LH Standard – B00245AZZ Filler Section –...
- Page 29 Page 26 Appendix 3: Side Shelf Parts List PARTS LIST 1. WARMING SHELF—B00241AXX 2. BRACKET TO SHELF—B00240BXX 3. 1/4 X 3/4” HEX HEAD BOLTS x 2 4. 3/8” WASHER x 1 5. 1/4” X 1” HEX HEAD BOLTS x 1 6.
- Page 30 Page 27 Appendix 4: Warming Oven & Splashback Parts List Warming Oven Parts List Door End Piece – B00260AZZ Outer Door Panel – F00226AXX LH Cottage – B00262AZZ Warming Oven Body – F00229BXX RH Cottage – B00263AZZ Warming Oven Standard – B00264AZZ RH Towel Rail Bracket –...
Need help?
Do you have a question about the Errigal and is the answer not in the manual?
Questions and answers