
Related Manuals for Stanley K1200


Summary of Contents for Stanley K1200
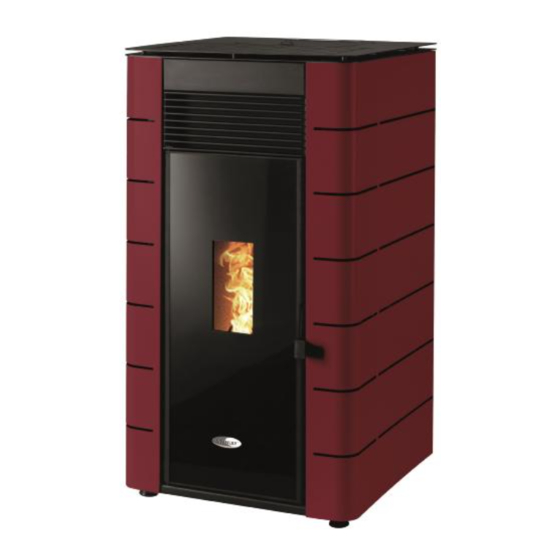
- Page 1 K1200 - K1700- K2300 Wood Pellet Boiler Stove Installation and Operating Instructions Read these instructions carefully before installing, using and servicing the stove.
-
Page 3: Table Of Contents
Contents SETTING THE LANGUAGE FOR THE FIRST TIME........................4 STANLEY PELLET STOVE WARRANTY ..........................5 PACKAGE CONTENT ................................6 ............................. 6 NPACKING THE FREE STANDING FIRE SAFETY PRECAUTIONS ............................... 6 : ..........................7 OR YOUR SAFETY WE RECOMMEND THAT TECHNICAL SPECIFICATIONS .............................. -
Page 4: Setting The Language For The First Time
CE conformity mark; The Boiler pellet stoves are manufactured in compliance with the EN 14785:2008 Standards WATERFORD STANLEY bears no responsibility for any damage to the stove if it is installed by non-qualified personnel; WATERFORD STANLEY is not responsible for any damage to stoves not installed and used in compliance to the instructions included in this manual;... -
Page 5: Stanley Pellet Stove Warranty
All warranty claims must be reported to the Waterford Stanley Service Department and must be submitted with the product serial number (located on the data plaque at the rear of the product), date of purchase, proof of purchase (if requested) and details of the specific nature of the problem. -
Page 6: Package Content
Waterford Stanley is not liable for any damages to the stove if the specified precautions, warnings and operating procedures are not followed. Waterford Stanley stoves are easy to operate and special attention was given to their components in order to protect users and installers against accidental damages. -
Page 7: For Your Safety, We Recommend That
For your safety, we recommend that: · Make sure you fully read and understand this instruction manual before using the boiler pellet stove as a biomass heating stove. · · Make sure that the hydronic/ plumbing circuit was correctly assembled and connected to the water supply before turning on the boiler pellet stove. -
Page 8: Technical Specifications
Technical specifications FEATURES K1200 K1700 K2300 Units Weight 1110 Height 1150 1210 Width Depth Diameter of the flue pipe Reservoir capacity Maximum heating m³ capacity Maximum Heat Output to 10.3 14.2 18.8 boiler Maximum Heat Output to room Minimum Heat output to... - Page 9 Front Rear Side Figure 2 Dimensions of the K1200 Front Rear Side Figure 3 Dimensions of the K1700 Front Rear Side Figure 4 Dimensions of the K2300...
- Page 10 Figure 5 K1200 Connections Figure 6 K1700 Connections Figure 7 k2300 Connections...
-
Page 11: Installation Of The Boiler Pellet Stove
· Connect the flue, the K1200 requires an 80mm diameter flue connection, while the K1700 & K2300 require a 100mm diameter flue from the flue outlet to a cleaning Tee , it should be connected to a 125mm flue/ chimney liner. -
Page 12: K1200 Assembly Of Removable Parts
Before installing the casings, you should check if the package is complete and in good condition. Any possible damage or missing elements should be reported before proceeding with the installation. This section describes how to install the casings for the k1200 Stove. To install the casings, the installer must have available:... -
Page 13: K1700 & K2300 Assembly Of Removable Parts
K1700 & K2300 Assembly of removable parts After the installation, the stove should be fitted with the removable covers. - Top front cover To install the top front cover, place it over the stove (Figure-8a) and then tighten the screws that secure it to the top panel of the stove (Figure 8b). -
Page 14: Installation Requirements
Installation requirements The minimum distance between the free-standing pellet fire stove and particularly flammable surfaces is specified in Figure 17. The top of the stove must be at least 100cm separated from the ceiling, especially in rooms with ceilings consisting of flammable materials. -
Page 15: Installation With A Chimney
The boiler pellet stove has a circular pipe (Æ 50mm) that may be connected to the exterior of the house. An outside air kit and adaptor from 50-100 is available to order from Waterford Stanley. -
Page 16: Hydronic Installation
* The boiler model pellet stove is equipped with a circulating pump, an expansion vessel (6 litre volume in the K1200 & K1700 models ,10 litre volume in the K2300 model) and a 3-bar safety valve; A calculation must be made in each individual installation to check the required size of the expansion vessel and additional vessel added if required. -
Page 17: Use Of The Boiler Pellet Stove
Use of the Boiler pellet stove Recommendations Before starting up the stove, please check the following: · Guarantee that the stove is properly connected to the power mains using the 230VAC power cable. Figure 21 – Electric power plug. · Check to see whether the pellet reservoir is supplied with pellets. -
Page 18: Remote Control And Display
Remote control and display MODE MENU 20.5ºC 16:03 Figure23 – Remote control and display Key to toggle between manual and automatic mode and exit menus (esc). b) Key to access menus and confirmation key (ok). c) Key to start/stop the stove and reset error messages. d) Key to scroll the menus to the left, o r to reduce the set point e) Key to scroll menus to the right or increase t h e s e t p o i n t... -
Page 19: Display Information Summary
Display information summary 9.2.1 Menu Menu indicating that the stove power is "off", the room temperature in ºC and Time. MODE MENU 20.5ºC 16:03 Selecting the operation mode: to select the operation mode, press the “mode” key to select “Manu” for manual mode or “Auto” Note: For boiler models manual mode is unavailable. - Page 20 · Year To set the year press “set”. The display starts to flash. Press the “+” or “-” key to select the desired year and then “ok” to confirm. Press "esc" to return to the " Date and Time " menu then "+" month menu. The Timer menu appears. •...
-
Page 21: Timer
9.2.4 Timer The stove is equipped with a timer that allows the stove to be turned on or off at a specified time. Setting the timer/s Step 1 Press the “set” button twice followed by the “+” button to display “ chrono” Step 2 Press the “set”... -
Page 22: Sleep
It is not possible to enable the timer until the programs are set. Step 6 is to enable program 1. Step 2 is to enable the timer function. 9.2.5 Sleep The "Sleep" menu allows you to setup the time you want the stove to turn off. MODE MENU SLEEP... - Page 23 This operation is only available in automatic mode. To activate the eco mode, press "set". The display starts to flash. Select "On" or "Off" using the "-" and "+" keys. Press "set" to confirm the selection. Press "esc" to return to the previous menu and "+" to go to the (Lighting) menu. MODE MENU <...
- Page 24 the correct percentage. Press "ok" to confirm. Press the "+" key to go to the " (Power settings) menu. - Power settings This feature allows you to increase or decrease by 25% the quantity of pellets at each power level. Press "set". The display starts to flash.
-
Page 25: User Info
The technical menu is not available to the end user since it includes exclusively factory settings that must never be changed. User Info This menu contains some user information regarding the Free-Standing Fire stove. Press "set"; the " (File Code) menu appears. Display software/firmware code Press the "+"... -
Page 26: Start-Up
Worm drive rotation time ("On"). Ventilation power level. Hydraulic circuit pressure 10 Start-up To start operating the Boiler pellet stove, press the start/stop button for 3sec. The display should indicate " Lighting " until the completion of this phase. The pellets will pass through the supply channel to the burning basket (combustion chamber), where they will be ignited using a heat resistor. -
Page 27: Filling The Pellet Reservoir
10.3 Filling the pellet reservoir Figure 24 1 – Open the pellet reservoir lid at the top of the stove by sliding the bolt sideways, as shown in Figure 24. 2 – Pour the pellets into the reservoir, as shown in Figure 25. Figure 25 –... -
Page 28: Maintenance
11 Maintenance The Waterford Stanley boiler model pellet stove requires careful maintenance. The most important thing is to remove the ash from the pellet burning area at regular intervals. This can be easily done by using a simple household vacuum cleaner. It should be cleaned after burning approximately 30kg of pellets. -
Page 29: Weekly Maintenance K1700 & K2300
Note: See the warning label and read the maintenance instructions in chapter 12. 11.2 Weekly Maintenance K1700 & K2300. To perform maintenance on the boiler model pellet stove, clean the airflow pipes. To do this, raise the lid on the top of the stove (Figure 29-a) and then turn (Figure 29-b) and lift the levers inside several times (Figure 29-c) to make the dirt accumulated inside the pipes fall out. -
Page 30: Additional Cleaning K1200
Figure 31 – a) Burning basket; b) Ash basket c) Cleaning the burn basket. Figure 32– Cleaning the interior of the stove 11.3 Additional cleaning K1200 Additional cleaning should be performed after every 600-800 kg of pellets consumed or once a year whichever comes first. - Page 31 For the backboiler unit, the procedure involves cleaning the air flow pipes and turbulators. To do this, open the lid on the top of the unit (Figure 35-a and b) and remove the four sticks (Figure 35-c and 35-d). Then pull the turbulators up (Figure 35- e). A vacuum cleaner must be used to clean this area (Figure 35-f) and the interior of the pipes can be cleaned with a steel brush.
- Page 32 11.4 K1700/ K2300 Additional cleaning should be performed after every 600-800 kg of pellets consumed or once a year whichever comes first. For the boiler stove, the procedure involves cleaning the air flow pipes and turbulators. To do this, open the lid on the top of the stove (Figure 36-a) and remove the six wing nuts securing each turbulator set (Figure 36-b and 36-c).
-
Page 33: Cleaning The Glass
If flue gases are not being extracted properly, we recommend you clean heat exchanger and the extractor as shown in Figures 37and 38. However, we recommend that you perform this procedure at least once a year. Figure 37 – a) Remove the screws; b) Remove the extractor Figure 38 –... -
Page 34: Alarms / Failures / Recommendation List
12 Alarms / failures / recommendation list 12.1 Alarms Alarm Code Troubleshooting - the worm drive channel is empty - restart the stove Maximum time 2400 - resistance burnt – replace resistance Ignition failure - the burning basket has been incorrectly installed Temperature under: - 104ºF (40°C) (air... -
Page 35: Exploded Views
13 Exploded views K1200... - Page 36 K1200...
- Page 37 Spare Parts K1200 k1200SPBLK K1200 SIDE PANEL BLACK SET k1200SPCT K1200 SIDE PANEL CLARET SET k1200SPOAK K1200 SIDE PANEL OAK SET k1200SPWH K1200 SIDE PANEL WHITE SET CO0802000000000 Expansion vessel 6L CO0315000000050 Water pressure sensor 0-3 Bar IC0402000260000 Ash Pan...
- Page 38 K1700...
- Page 39 Exploded view. K2300...
- Page 40 Parts list K1700 Parts list k2300 K1700SP Side panel 17kW 1 . K2300SP Side panel 23kW CO0802000000000 Expansion vessel 6L 2 . CO0802000000001 Expansion vessel 10L CO0315000000050 Water pressure sensor 0-3 Bar 3 . CO0315000000050 Water pressure sensor 0-3 Bar CO0803010000000 3 bar safety valve 4 .
-
Page 41: Electrical
14 Electrical 14.1 Electrical diagram of the Boiler pellet stove. Figure 44 – Electrical diagram 14.2 Remote switched connection. The volt free connection on the rear of the stove can be used to provide a remote call for heat. The product can be set up with a remote timeclock, room thermostats and motorised valves using the standard S plan configuration where the auxiliary switch wires of the motorised valve can be connected to the remote connections in place of the wires in the picture below providing a call for heat. -
Page 42: Circulation Pump
15 Circulation pump 15.1 Performance graphs for the UPSO 15-70 130mm circulating pump Figure 46 – Performance graphs for the circulating pump 15.2 Circulating pump User interface The user interface was designed with a single button, a red/green LED and four yellow LEDs Figure 47–... - Page 43 Maximum head (m) Configuration Table 2 – Pump settings Alarms If the pump detects one or more errors, the LED 1 changes from green to red when the alarm is activated the yellow LED indicates the type of alarm (see Table 6), if we have several alarms at the same time, the yellow LED indicates the alarm with higher priority, the priority sequence is defined on table as follows: Display Priority...
-
Page 44: Installation Diagrams
16 Installation Diagrams Simple connection only the central heating radiators Figure 2 – Simple connection only the central heating radiators Note: - The room thermostat should have 1 to 2 ° C of hysterisis. - Water temperature controlled regulation "On" - Modulating pump "On"... - Page 45 Connection to central heating radiators and sanitary water combined with solar panel Figure 51 – Connection to central heating radiators and sanitary water combined with solar panel Example: electrical connection of a thermostat (ambient air monitoring) of a differential thermostat connected to the deposit and three-way valve to a relay box Figure 52 –...
- Page 46 Figure53 Connection of pellet boiler using 2 way valves and automatic bypass. Figure 54...
- Page 47 Connection to central heating radiators with supplementary boiler and sanitary water combined with solar panel. Figure 55 – Connection to central heating radiators with another boiler support and sanitary water combined with solar panel Note: - The Differential thermostat must have a hystersis of 15 to 25 °C. - Water temperature controlled regulation "Off"...
-
Page 48: Life Cycle Of A Boiler Pellet Stove
Symbols Figure 57 – Symbols 17 Life cycle of a Boiler pellet stove Around 90% of the materials used in the manufacture of these stoves are recyclable, thus helping to reduce environmental impact and contributing to the sustainable development of the Planet. End-of-life stoves should be returned to authorised waste processing systems. - Page 49 · Flow chart 2 – Switching off the pellet stove. Note The circulating pump is turned off when the water temperature reaches below 40ºC.
- Page 50 Supplied by. Waterford Stanley Ltd., Unit 401-403, IDA Industrial Estate, Cork Road, Waterford, Ireland. Tel: (051) 302300 www.waterfordstanley.com...
Need help?
Do you have a question about the K1200 and is the answer not in the manual?
Questions and answers