Advertisement
Quick Links
Virtuo II Quick Start Guide
900962-001 Rev. 00 November 2015
This guide is an overview of the Virtuo II installation process. For a complete copy of the Virtuo II Installation and Setup
Guide (p/n 900961-001), visit the TouchTunes Operator Dashboard at
About this Guide
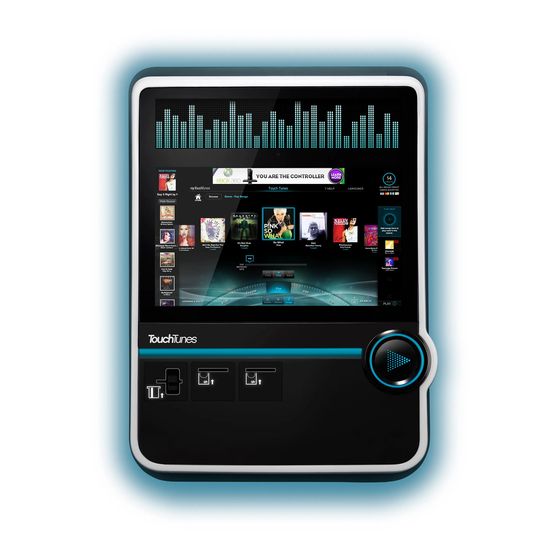
This manual refers to the following models:
•
Virtuo II 700778-002 (US model)
•
Virtuo II 700779-001 (Canadian model)
IMPORTANT SAFETY INFORMATION
Read this important safety information before proceeding
with product installation.
• READ THESE INSTRUCTIONS.
• KEEP THESE INSTRUCTIONS.
• HEED ALL WARNINGS.
• FOLLOW ALL INSTRUCTIONS.
The Lightning Flash with arrow head symbol within an
equilateral triangle is intended to alert the user to the
presence of un-insulated "dangerous voltage" within
the product enclosure that may be of sufficient
magnitude to constitute a risk of shock to persons.
The exclamation point within an equilateral triangle is
intended to alert the user to the presence of important
operating and maintenance (servicing) instructions in
the literature accompanying the product.
WARNING: Do not defeat the safety purpose of the
polarized or grounding-type plug. A polarized plug has
two blades with one wider than the other. A grounding
type plug has two blades and a third grounding prong.
The wide blade or the third prong are provided for your
safety. If the provided plug does not fit into your outlet,
consult an electrician for replacement of the obsolete
outlet.
WARNING: TO REDUCE THE RISK OF FIRE OR
ELECTRIC SHOCK, DO NOT EXPOSE THIS
APPARATUS TO RAIN OR MOISTURE AND
OBJECTS FILLED WITH LIQUIDS, SUCH AS
VASES, SHOULD NOT BE PLACED ON THIS
APPARATUS
DO NOT USE THIS APPARATUS NEAR WATER.
WARNING: TO REDUCE THE RISK OF FIRE OR
ELECTRIC SHOCK, THIS APPARATUS SHALL BE
CONNECTED TO A MAINS SOCKET OUTLET WITH
A PROTECTIVE EARTHING CONNECTION.
TO COMPLETELY DISCONNECT THIS APPARATUS
FROM THE AC MAINS, DISCONNECT THE POWER
SUPPLY CORD PLUG FROM THE AC RECEPTACLE
1 of 10
https://operator.touchtunes.com
THE MAINS PLUG OF THE POWER SUPPLY CORD
OR APPLIANCE COUPLER SHALL REMAIN
READILY ACCESSIBLE
WARNING: The speaker output of this unit can exceed
10 Watts and could cause a shock injury. Connection
to speakers should be performed by a skilled person in
compliance with local building codes. Class 2 wiring is
required for speaker cables. Use of external speakers
outside the ratings stated at the speaker jack may
result in a shock injury or damage to the unit, or
equivalent.
CAUTION: Do not use Virtuo II immediately after
transferring the unit from a cold place to a warm place
as condensation may have occurred on internal
components. Wait for the unit to reach room
temperature before using it.
IMPORTANT: See product enclosure for safety-related
markings.
No serviceable parts inside, please contact
TouchTunes Customer Support for service.
Clean only with dry cloth.
Do not block any ventilation openings. Install in
accordance with the manufacturers instructions.
Do not install near any heat sources such as radiators,
heat registers, stoves, or other apparatus (including
amplifiers) that produce heat.
Protect the power cord from being walked on or
pinched particularly at plugs, convenience
receptacles, and the point where they exit from the
apparatus.
Only use attachments/accessories specified by the
manufacturer.
Unplug this apparatus during lightning storms or when
unused for long periods of time.
Refer all servicing to qualified service personnel.
Servicing is required when the apparatus has been
damaged in any way, such as power-supply cord or
plug is damaged, liquid has been spilled or objects
have fallen into the apparatus, the apparatus has been
exposed to rain or moisture, does not operate
normally, or has been dropped.
.
Advertisement

Related Manuals for TouchTunes Virtuo II Series


Summary of Contents for TouchTunes Virtuo II Series
- Page 1 900962-001 Rev. 00 November 2015 This guide is an overview of the Virtuo II installation process. For a complete copy of the Virtuo II Installation and Setup Guide (p/n 900961-001), visit the TouchTunes Operator Dashboard at https://operator.touchtunes.com About this Guide...
- Page 2 Because locations have different floor plans, TouchTunes does not address these issues in this Guide. Virtuo Floor Stand Step 1: Move the crate as close as possible to...
- Page 3 3. Assemble the wall bracket: 5. Using at least two people, lift Virtuo II so that its top is slightly higher than the top of the wall bracket. A) Install a screw on the wall, at 56 inches from the floor, in the horizontal center of the area where you will install Virtuo II.
- Page 4 10.Using the figure below, identify the location of the 7. Using your fingers, push in and then tighten the thumb holes for the wall bracket screws used to secure screw (clockwise) on the hard drive tray until the Virtuo II to the wall bracket. thumb screw is securely tightened.
- Page 5 You will later configure the communications settings for the broadband network so the Virtuo II can contact the 3. Set the power rocker switch on the Virtuo II’s power TouchTunes server using this connection. strip to ON. Step 7: Connect Audio Speakers to Virtuo II 1.
- Page 6 Logged In: whether the jukebox is logged into the WARNING: Booting the system can take up to ten TouchTunes server. The jukebox must be able to log (10) minutes, and the screen can be blank for up to 90 into the TouchTunes server to receive activation seconds during the initialization procedure.
- Page 7 • Data Access: whether the jukebox can communicate Virtuo II communicates with the TouchTunes servers with TouchTunes server to receive updates from the and downloads the most recent software build. TouchTunes Dashboard. The jukebox must have data access to receive any new settings you may have Step 13: Set Up the Remote Control made to it via the TouchTunes Dashboard.
- Page 8 Learn the Remote ID Pre-programmed Remote Control Keys 1. On the Operator Interface, open the Hardware Function Options screen. Give promotional credit: Press and release this button to add a credit to the jukebox. Credits are deducted from the promotional credit count. The promotional credit feature is enabled/disabled on the Credit Settings...
- Page 9 2. In the COIN & BILL ACCEPTOR area, press the TEST button. Step 16: Reapply Filters and Credit Rules If you are replacing a TouchTunes jukebox (for example, an Ovation) with a Virtuo II jukebox, you must manually apply music filters and credit rules from the old jukebox to the Virtuo II if you want such filters and rules to apply to the Virtuo II.
- Page 10 TouchTunes Music Corporation TouchTunes Music Corporation Technical Support 847-353-1954 400 Sainte Croix Avenue, Suite 200 E 850 Third Ave, Suite 15C www.touchtunes.com Montreal, Quebec, New York, NY 10022 Canada, H4N 3L4 Copyright © 2015 TouchTunes Music Corporation 10 of 10...
Need help?
Do you have a question about the Virtuo II Series and is the answer not in the manual?
Questions and answers