Advertisement
April 2005
900148-001
About this guide
This guide explains how to install and activate the Maestro Digital
Jukebox. Maestro is different from conventional jukeboxes, both in the
way it operates and in the way it is installed. It is therefore strongly
recommended that you review this guide thoroughly before you begin.
For detailed information on planning your installation, refer to the Maestro
Operator's Manual on the TouchTunes web site.
Service and support
For service and support issues, call the TouchTunes 24/7 Service Hotline
at 888-711-5853. You must provide the Jukebox ID number to obtain
service. This number can be found underneath the front of Maestro or
inside to the right of the fan.
Components
Maestro ships in several boxes. If any component appears to be damaged,
do not attempt to use or install the system. Notify TouchTunes or your
local distributor immediately.
Verify that you have received the following components:
Maestro
1
Maestro Digital Jukebox with power line installed
1
Maestro wall bracket
1
Thumbscrew wing nut (on the wall bracket)
1
Parts kit containing:
1 Remote control
1 Remote control mounting bracket
2 AAA batteries
2 Keys (ilco #549)
1 Air filter
1 Female RCA to DIN Adapter, P/N: 300141-012
1 Male RCA to DIN Adapter, P/N: 300143-012
1 Phone cable with RJ11 connectors (7 feet)
1 Terminal connector (four-position Euro-style). Used to
connect an optional microphone.
Hard drive (shipped separately)
Dimensions and weight
Height
Crated
48"
Uncrated
32.5"
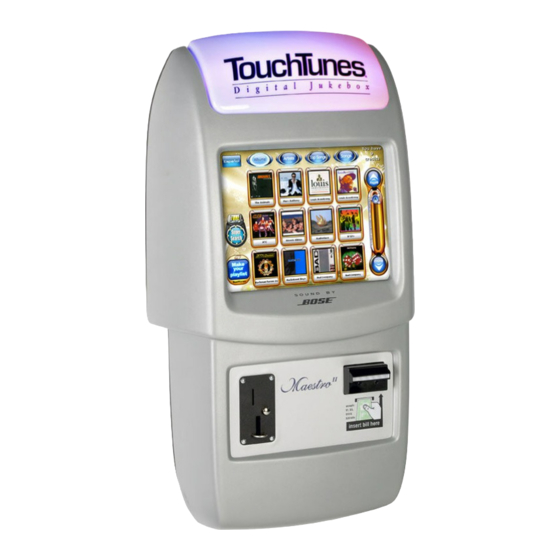
Maestro II Jukebox
Quick Start Guide
Width
Depth
Weight
28"
14"
80 lbs.
19"
8"
60 lbs.
Important safety information
Read all safety instructions before installing this product.
CAUTION: Maestro components are heavy and represent a
serious safety hazard if their mounting system should fail.
Therefore, installation should only be performed by an
experienced installer or licensed contractor that is familiar with
standard rigging, mounting, and hanging practices, as
recognized by a licensed engineer or governmental agency in
your area.
CAUTION: Maestro mounting components are UL listed and
CSA approved only when used as specified in this guide. Any
other use or modification of the mounting components is
expressly prohibited, as this may present an unacceptable risk
of structural failure.
CAUTION: Do not install Maestro near any heat sources, such
as radiators, heat registers, stoves, or other apparatus
(including amplifiers) that produce heat.
CAUTION: Do not defeat the safety purposes of the polarized
or grounding-type plug. A polarized plug has two blades with
one blade wider than the other. A grounding-type plug has two
blades and a third grounding prong. The wider blade or the
third grounding prong are provided for your safety. If the
provided plug does not fit in your outlet, consult an electrician
for replacement of the obsolete outlet.
CAUTION: See product enclosure for safety related markings
and refer to the Maestro Operator's Manual on the TouchTunes
web site for additional safety information.
CAUTION: Dispose of used batteries in accordance with the
regulations in your area. Do not incinerate.
CAUTION: The lights inside Maestro contain mercury. Disposal
of this material may be regulated in your area due to
environmental considerations. For disposal or recycling
information, please contact your local authorities or the
Electronic Industries Alliance at www.eiae.org.
1 of 12
Advertisement
Table of Contents

Related Manuals for TouchTunes Maestro II


Summary of Contents for TouchTunes Maestro II
- Page 1 Maestro ships in several boxes. If any component appears to be damaged, do not attempt to use or install the system. Notify TouchTunes or your CAUTION: Do not install Maestro near any heat sources, such local distributor immediately.
-
Page 2: Important Concepts
This occurs as follows: Important: Sleep mode must always be used when moving the jukebox. • If the jukebox fails to communicate with the TouchTunes server for Nightly song queue purge several consecutive days, a red telephone icon appears in the top This feature automatically deletes all unplayed songs that are in the queue right corner of the Attract screen. -
Page 3: Installation Tips
Maestro requires an analog telephone line to communicate with the Recommended parts and tools TouchTunes server. Once connected, Maestro will call out once daily at the • Phone line polarity tester (available at Radio Shack). time you specify (typically during non-business hours). This daily •... -
Page 4: Components Overview
Fan: Provides cooling. A replacement filter is supplied in the parts kit. c Night Mode button: Turns off the monitor, lights, and bill collector. The jukebox computer remains active so it can call the TouchTunes g Connector panel: This is where audio connections are made, the server at the preset time. - Page 5 If you need RCA outputs, a category 5 to RCA converter is available Replace the lock (optional) from TouchTunes (part number 700003-001). All Maestro consoles are keyed alike. Therefore, for security Route the cables through the strength-relief bracket and either up or reasons, you may want to replace the lock.
-
Page 6: Initialize Screen
In the box, set the time during which the CALLING WINDOW jukebox can use the phone line to call the TouchTunes server. Time is specified using military time (i.e., 00:00 equals midnight). The more time you make available, the more songs the jukebox will be able to download. - Page 7 The password should have been sent to you by fax prior to delivery waiting and then pauses twice before continuing to dial. of the jukebox. If you did not receive your password, call TouchTunes at 1-888-711-5853. c. If using a broadband connection, enable the...
- Page 8 Test and set sound levels If you successfully connected to the TouchTunes server and the registration password you entered was correct, communications will automatically finish and the Attract screen will open. (If the Open the Sound Mixer screen password was incorrect, you will be prompted to enter it again.) On the Operator menu, touch SOUND MIXER.
- Page 9 Define pricing Define music settings In this step you test the coin and bill acceptors, set pricing levels for Open the Music Settings screen credits, and define the number of service and promotional credits that are On the Operator menu, touch MUSIC SETTINGS. The Music Settings available.
- Page 10 About the Carrier frequency it is playing. By default, the remote setup to communicate with Maestro II. If you need to change it to communiate with another jukebox, do the following: 1. Press the PAUSE and F1 keys at the same time and hold them down until the red indicator light blinks two times.
-
Page 11: Remote Control
The computer inside the jukebox is always Power Press to turn the jukebox monitor and audio running since it calls TouchTunes every night. For this reason, the subsystem on or off. The jukebox computer jukebox should never be turned off by pulling its plug or shutting remains on. - Page 12 TouchTunes Digital Jukebox, Inc. TouchTunes Music Corporation Technical Support 3, Commerce Place, 4th Floor 180 Lexington Drive 888-711-5853 Montreal, Quebec, Buffalo Grove, Il 60089 www.touchtunes.com Canada, H3E 1H7 Copyright © 2005 TouchTunes Music Corporation Printed in Canada...
Need help?
Do you have a question about the Maestro II and is the answer not in the manual?
Questions and answers