Cypress HX2VL Quick Start Manual
Hide thumbs
Also See for HX2VL:
- Quick start manual (2 pages) ,
- Manual (9 pages) ,
- Quick start manual (2 pages)
Advertisement
Quick Links
1
Insert the kit CD into the CD drive of your
PC. Review kit contents.
3
To connect to the PC, plug the USB A to B
cable into the hub's upstream connector.
Plug the other end of the cable into one of
the PC's host controller ports.
The hub is now ready for any low speed, full
speed, or high speed devices to be plugged
into the ports. The four ports on the hub are
labeled Port 1, Port 2, Port 3, and Port 4.
HX2VL DEVELOPMENT KIT
QUICK START GUIDE
2
Plug the wall mounted power supply into an
AC power receptacle providing power in the
range 100 V to 240 V, 50 Hz or 60 Hz.
Connect the power supply plug to the hub's
'DC Supply' jack.
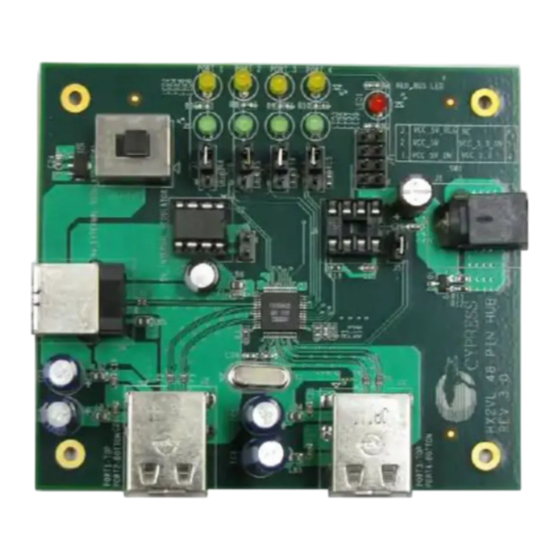
4
Connect a USB device to any of the four
downstream ports. Use jumpers J7 to J10
(port status) in position 2 or 3 to enable the
port LEDs. The green LED indicates that the
port is enabled.
The amber LED indicates that the port has an
exception condition. The operating system
commands the HX2VL to turn off the port and
set the amber LED until the condition is
cleared.
Advertisement

Subscribe to Our Youtube Channel
Related Manuals for Cypress HX2VL


Summary of Contents for Cypress HX2VL
- Page 1 The four ports on the hub are exception condition. The operating system labeled Port 1, Port 2, Port 3, and Port 4. commands the HX2VL to turn off the port and set the amber LED until the condition is cleared.
- Page 2 HX2VL-CY4608 Development Board Details For the latest information about this kit, visit http://www.cypress.com/?id=3624 © 2011 Cypress Semiconductor Corporation. All rights reserved. All trademarks or registered trademarks referenced herein are the properties of their respective owners. Doc #: 001-73201 Rev. **...
Need help?
Do you have a question about the HX2VL and is the answer not in the manual?
Questions and answers