MIR MiR1000 User Manual
Hide thumbs
Also See for MiR1000:
- Operating manual (34 pages) ,
- Quick start manual (54 pages) ,
- Commissioning manual (13 pages)
Table of Contents
Advertisement
Advertisement
Table of Contents

Related Manuals for MIR MiR1000


Summary of Contents for MIR MiR1000
- Page 1 User guide (en) Date: 09/2019 Revision: v.1.2...
- Page 2 Copyright © 20162019 by Mobile Industrial Robots A/S. Contact the manufacturer: Mobile Industrial Robots A/S Emil Neckelmanns Vej 15F DK-5220 Odense SØ www.mir-robots.com Phone: +45 20 377 577 Email: support@mir-robots.com CVR: 35251235 MiR1000 User guide (en) 09/2019 - v.1.2 ©Copyright 2019: Mobile Industrial Robots A/S.
-
Page 3: Table Of Contents
4.2. Connecting to the robot interface 4.3. Driving the robot in manual mode 4.4. Checking the hardware status 4.5. Charging the robot 4.6. Shutting down the robot 4.7. Creating and configuring a map 5. Planning 5.1. Analysis of the work environment 5.2. MiR1000 user roles... - Page 4 5.4. Creating efficient missions 5.5. Create mission 5.6. Mission editor 5.7. Error handling 5.8. Handover testing 6. Product presentation 6.1. Main features of MiR1000 6.2. Identification label 6.3. MiR1000 control panel 6.4. MiR1000 operating modes 6.5. MiR1000 external parts 6.6. MiR1000 internal parts 6.7.
-
Page 5: About This Document
Available in multiple languages. MiR1000 Lift Operating guide The operating guide that describes how to set up and use MiR1000 with MiR1000 Lift. MiR1000 EU Pallet Lift Operating guide The operating guide that describes how to set up and use MiR1000 with MiR1000 EU Pallet Lift. -
Page 6: Document History
Select Show Certificates to see the list of certificates for the robot. • Distributor site > How to http://www.mobile-industrial-robots.com/en/account/how-to/ This page contains how-to articles that describe how to perform specific tasks with MiR products. • Distributor site > Troubleshooting This page contains troubleshooting guides to solve common issues with MiR products. - Page 7 Create mission, Mission editor, Lift modifications Updated status lights Added notice regarding using smart phones in flight mode for manual driving 2019-10-08 New section: 2.7.X Updating MiR500 software MiR1000 User guide (en) 09/2019 - v.1.2 ©Copyright 2019: Mobile Industrial Robots A/S.
-
Page 8: Safety
Alerts against unsafe practices. • Take proper precautions to avoid damage or injury. NOTICE Indicates important information, including situations that can result in damage to equipment or property. MiR1000 User guide (en) 09/2019 - v.1.2 ©Copyright 2019: Mobile Industrial Robots A/S. -
Page 9: General Safety Precautions
The robot can not see staircases going downwards and holes in the floor. • Mark staircases or holes on maps with Forbidden zones. • Keep the maps up to date. MiR1000 User guide (en) 09/2019 - v.1.2 ©Copyright 2019: Mobile Industrial Robots A/S. -
Page 10: Intended Use
2.3. Intended use MiR1000 is intended to be commissioned and used in indoor industrial environments where access for the public is restricted. For details about the environmental conditions in which the robot should operate, see Technical specifications on our website. -
Page 11: Foreseeable Misuse
2. Safety MiR1000 is designed and all risks are considered when used with one of the following types of top applications: • MiR1000 Lift used with MiR Lift Pallet Rack. • MiR1000 EU Pallet Lift used with MiR EU Pallet Rack. -
Page 12: Risk Assessment
MiR1000. The risk assessment must cover not only MiR1000 itself, but also take into account potential potential load transfer stations, work cells and the environment it will be used in. See MiR100 and MiR200 Risk Analysis on the distributor page. -
Page 13: Residual Risks
Nevertheless, if a limit is violated, the safety system issues a category 0 stop (stopping by “immediate removal of power to the machine actuators according to IEC 60204-1”) followed by a controlled brake which brings MiR1000 to a stop. See Technical specifications on our website for more details. - Page 14 Safe load position The safe load position safety function ensures that the robot will not drive, while MiR1000 Lift or MiR1000 EU Pallet Lift is not in the lowest position and hence there is a risk of compromising stability. The safe load position safety system consists of interlock switches that detect if the lift modules are in the lowest position or not.
-
Page 15: Safety-Related Electrical Interfaces
External emergency stop button input This input is for connection of an optional emergency stop button. If activated, the safety system issues a category 0 stop followed by a controlled brake which brings MiR1000 to a stop. Must be manually deactivated by activation of the restart button. - Page 16 Activated by an emergency stop button or emergency stop input. MiR1000 User guide (en) 09/2019 - v.1.2 ©Copyright 2019: Mobile Industrial Robots A/S.
-
Page 17: Lithium Battery
2.10. Lithium battery This section contains safety precautions related to lithium batteries in MiR robots. NOTICE MiR does not support any additional batteries applied to the MiR1000 by the customer. WARNING Lithium battery packs may get hot, explode or ignite and cause serious injury if they are abused electrically or mechanically. -
Page 18: Getting Started
MiR robot REST API reference • MiRCharge 48V Operating Guide • MiR1000 Lift Operating Guide • MiR1000 EU Pallet Lift Operating Guide • MiR username and passwords • CE declaration of conformity MiR1000 User guide (en) 09/2019 - v.1.2 ©Copyright 2019: Mobile Industrial Robots A/S. -
Page 19: Unpacking Mir1000
This is necessary since the robot drives out of the box on the ramp. Remove the screws that attach the walls of the box to the box lid and the base of the box. Remove the lid from the box. MiR1000 User guide (en) 09/2019 - v.1.2 ©Copyright 2019: Mobile Industrial Robots A/S. - Page 20 3. Getting started Take the folder with the printed documents and the USB drive out of the box. Remove the walls of the box and the protective foam blocks. MiR1000 User guide (en) 09/2019 - v.1.2 ©Copyright 2019: Mobile Industrial Robots A/S.
- Page 21 3. Getting started Cut the protective straps. For increased visibility, you can add the supplied high visibility stickers to the four corners of the robot. MiR1000 User guide (en) 09/2019 - v.1.2 ©Copyright 2019: Mobile Industrial Robots A/S.
- Page 22 Place the lid of the box so that you can use it as a ramp. Align the lid so that it is flush with the base of the box. Remove the wheel stop board from the pallet to let the robot drive on the ramp. MiR1000 User guide (en) 09/2019 - v.1.2 ©Copyright 2019: Mobile Industrial Robots A/S.
-
Page 23: Commissioning
Open the rear maintenance hatch. To open the hatch, push two buttons on the hatch and pull the hatch. Turn the battery disconnect switch to position ON. The On/Off button turns blue. See MiR1000 control panel on page 54. MiR1000 User guide (en) 09/2019 - v.1.2 ©Copyright 2019: Mobile Industrial Robots A/S. - Page 24 The robot turns on the red indicator lights and starts the software initialization process. When the initialization process ends, the robot goes into the emergency stop mode. MiR1000 User guide (en) 09/2019 - v.1.2 ©Copyright 2019: Mobile Industrial Robots A/S.
-
Page 25: Connecting To The Robot Interface
Follow these steps to connect to the robot interface: Using your pc, tablet or phone, connect the WiFi access point of the robot. The access point name has the following format:MiR_VXXXX. MiR1000 User guide (en) 09/2019 - v.1.2 ©Copyright 2019: Mobile Industrial Robots A/S. -
Page 26: Driving The Robot In Manual Mode
Put the Operating mode key into the Manual mode (turn to the right). In the robot interface, select the joystick icon. The joystick control appears. Select Manual control. The Restart button on the robot starts blinking. MiR1000 User guide (en) 09/2019 - v.1.2 ©Copyright 2019: Mobile Industrial Robots A/S. - Page 27 Press the Restart button. The status lights turn blue indicating that the robot is in Manual mode. Note! The robot is shown with an EU pallet lift. MiR1000 User guide (en) 09/2019 - v.1.2 ©Copyright 2019: Mobile Industrial Robots A/S.
- Page 28 4. Commissioning Drive the robot using the joystick. MiR1000 User guide (en) 09/2019 - v.1.2 ©Copyright 2019: Mobile Industrial Robots A/S.
-
Page 29: Checking The Hardware Status
MiR Robot Interface 2.0 Reference Guide. 4.5. Charging the robot A charger cable and an external charger is not part of the MiR1000 standard delivery. To charge MiR1000 using the cable charger: MiR1000 User guide (en) 09/2019 - v.1.2 ©Copyright 2019: Mobile Industrial Robots A/S. - Page 30 Connect the charger cable to the charging connector on the robot. For information about the charging time, see the robot specifications at www.mir- robots.com. MiR1000 User guide (en) 09/2019 - v.1.2 ©Copyright 2019: Mobile Industrial Robots A/S.
-
Page 31: Shutting Down The Robot
On/Off button turns blue. If shutting the robot down for transportation or service/repair, the battery disconnect switch must be turned off as well and the battery cable disconnected, see MiR1000 User guide. 4.7. Creating and configuring a map The robot requires a map to operate. -
Page 32: Planning
This chapter describes what needs to be considered before and during the installation of MiR1000 in the company. It is worth spending some time defining what tasks MiR1000 must do in the work environment. The correct setup and thorough training of the users will result in a successful and safe installation of MiR1000. - Page 33 The following illustrations show how the robot sees the surrounding environment. The laser scanners detect a dynamic object in the bottom left corner. Human eyes see the chair and surrounding details. MiR1000 User guide (en) 09/2019 - v.1.2 ©Copyright 2019: Mobile Industrial Robots A/S.
-
Page 34: Mir1000 User Roles
The 3D camera will detect more details of the chair when it is close enough to it. 5.2. MiR1000 user roles Introducing MiR1000 into the company will require some changes to the environment and the people working with the robot to achieve the optimal benefits. Spending some time defining and preparing the users will make the robot a much more effective collaborative robot and will form a positive and safe experience. - Page 35 The direct user also needs to know who is responsible for MiR1000, so they can get help if the robot is not running missions as it should.
- Page 36 Guide. Training of the users It is very important to spend time on training the different users of MiR1000. It is unlikely that all users will need to know all the features of the robot. Teaching should be done at different levels, to make it as simple as possible for the different users.
-
Page 37: Creating An Efficient Map
5.3. Creating an efficient map After the preliminary analyses of the work environment and the work flows of the people working there, spending time on creating a good map is important for MiR1000 to work safely and efficiently. Creating a robust, reliable map for dynamic environments will pay off, as the map is the basis of the robot’s ability to navigate its surroundings. - Page 38 Issue: MiR1000 will always plan the shortest path from A to B. If this is through a large highly dynamic area, the robot will re-plan its path several times. The re-planning happens because...
- Page 39 Issue: MiR1000 will stop if a person steps out in front of it. In a transient work flow area, the robot will stop and reassess its paths many times a day, thereby wasting valuable time.
- Page 40 This may cause the robot to believe that there is enough space (if the posts are far enough apart) below the shelf to pass through. MiR1000 will then plan a path underneath the shelves, but when it comes closer, the camera will see the obstacle.
- Page 41 The shelves are marked as a Forbidden zone in the map. Pallet rack When MiR1000 docks to a pallet rack, personnel detection means are temporarily muted. This could cause a dangerous situation, if a person steps in front of the robot and the pallet rack.
-
Page 42: Creating Efficient Missions
Missions within missions By using simple missions, you can set up missions inside missions. This way, simple missions can be re-used in different, bigger and more complex missions. MiR1000 User guide (en) 09/2019 - v.1.2 ©Copyright 2019: Mobile Industrial Robots A/S. -
Page 43: Create Mission
Enter a short description of the mission (optional). • Site If more than one site exists, select which site you want the mission belong to from the list. MiR1000 User guide (en) 09/2019 - v.1.2 ©Copyright 2019: Mobile Industrial Robots A/S. - Page 44 When you save the new mission, it will be placed in the selected group and can be used as an embedded mission of other missions. MiR1000 User guide (en) 09/2019 - v.1.2 ©Copyright 2019: Mobile Industrial Robots A/S.
- Page 45 A Charging action must be preceded by a Docking action where the robot moves to a previously defined charging position near the charging station. MiR1000 User guide (en) 09/2019 - v.1.2 ©Copyright 2019: Mobile Industrial Robots A/S.
-
Page 46: Mission Editor
Set the parameters for the selected action by selecting the gear icon at the far right of the action line. Change mission settings The name of the mission and the group it belongs to may be changed. MiR1000 User guide (en) 09/2019 - v.1.2 ©Copyright 2019: Mobile Industrial Robots A/S. - Page 47 You can save a copy of a mission and give it a new name. That way it is easy to create a new mission based on the settings of an existing one. MiR1000 User guide (en) 09/2019 - v.1.2 ©Copyright 2019: Mobile Industrial Robots A/S.
-
Page 48: Error Handling
Failure to reach destination • Unexpected events in the system An error causes a full system stop. The robot is paused until a person acknowledges the error and clears it. MiR1000 User guide (en) 09/2019 - v.1.2 ©Copyright 2019: Mobile Industrial Robots A/S. -
Page 49: Handover Testing
Reference Guide. 5.8. Handover testing It is very important to schedule time for handover testing. The new users of MiR1000 might have new questions after they start using the robot or new issues or situations might have appeared. Handover testing is important because it improves safety, increases users’ happiness with the robot and increases return of investment. - Page 50 Future possibilities After the initial installation of MiR1000, it is a good idea to inform users of other possibilities they might find useful after having used the robot for some time. This could include: •...
- Page 51 Contact customers yourself in the beginning to make sure they are happy and the product is working satisfactorily. A good handover also includes making a risk assessment. Read more in Risk assessment on page 12. MiR1000 User guide (en) 09/2019 - v.1.2 ©Copyright 2019: Mobile Industrial Robots A/S.
-
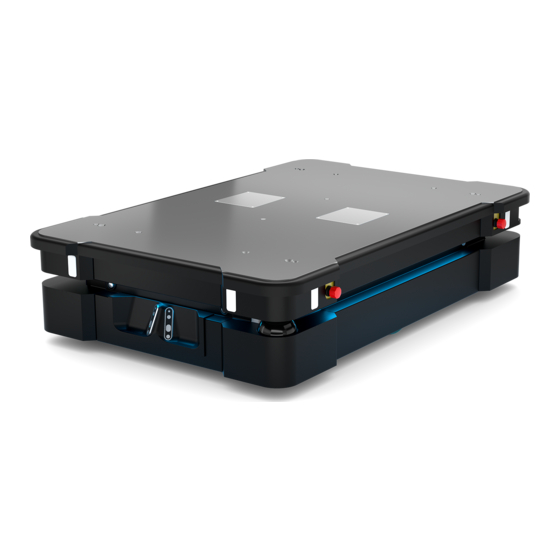
Page 52: Product Presentation
6. Product presentation 6. Product presentation MiR1000 is an autonomous mobile robot that can transport loads up to 1000 kg and pallets indoors within production facilities, warehouses, and other industrial locations. Users operate MiR1000 via a web-based user interface, which is accessed via a browser on a PC, smartphone or tablet. - Page 53 A lift platform may be mounted on MiR1000 enabling it to automate the internal trans- port of US standard 40x48 pallets. • MiR1000 EU Pallet Lift A pallet lift for EU pallets may be mounted on MiR1000 enabling it to automate the internal transport of EU pallets. • MiR Lift Pallet Rack Use a MiR Lift Pallet Rack with MiR1000 Lift.
-
Page 54: Identification Label
6. Product presentation To read more about the add-ons, go to www.mir-robots.com. 6.2. Identification label The identification label of MiR1000 is placed above the MiR controller behind the rear maintenance hatch. Mobile Industrial Robots A/S declares that MiR1000 meets the requirements of the applicable EC directives. - Page 55 Pressing the button stops the robot. After pressing this button, you must press the Restart button to let the robot continue operating. Color indication: • Red: The robot is on. Restart Pressing this button: MiR1000 User guide (en) 09/2019 - v.1.2 ©Copyright 2019: Mobile Industrial Robots A/S.
-
Page 56: Mir1000 Operating Modes
In this mode, the robot executes the programmed mission. After switching the key to this mode, you can remove the key and the robot will continue driving autonomously. The joystick is disabled in the robot interface. MiR1000 User guide (en) 09/2019 - v.1.2 ©Copyright 2019: Mobile Industrial Robots A/S. - Page 57 In the prompt dialog, select Yes to acknowledge the muting of personnel detection means. The status and the signal lights start flashing yellow, the robot is ready to drive with muted personnel detection means. MiR1000 User guide (en) 09/2019 - v.1.2 ©Copyright 2019: Mobile Industrial Robots A/S.
-
Page 58: Mir1000 External Parts
6. Product presentation 6.5. MiR1000 external parts MiR1000 User guide (en) 09/2019 - v.1.2 ©Copyright 2019: Mobile Industrial Robots A/S. - Page 59 6. Product presentation This section presents the parts of MiR1000 that are visible on the outside. 1. Left cover plate: access to power 8. Proximity sensors: eight pcs., two interface, GPIO interface and in each corner behind corner Ethernet interface...
- Page 60 For more information on mounting top modules, see Mounting a top module on page 76. 2. M12 lifting holes; one in each corner used for fixation of transportation eye bolts. MiR1000 User guide (en) 09/2019 - v.1.2 ©Copyright 2019: Mobile Industrial Robots A/S.
-
Page 61: Mir1000 Internal Parts
6. Product presentation 6.6. MiR1000 internal parts Most internal parts of MiR1000 are reached through maintenance hatches that open to different compartments: • Front compartment • Rear compartment • Side compartments • Top compartments Front compartment The front compartment holds the electronic components that may need regular service or replacement, such as PC, main control board and safety PLC. - Page 62 Turn the two levers 180°. The right lever goes from top to bottom and the left lever goes from bottom to top. Then pull out the compartment drawer while holding underneath it and lifting slightly. MiR1000 User guide (en) 09/2019 - v.1.2 ©Copyright 2019: Mobile Industrial Robots A/S.
- Page 63 7. Power board: controlling power distribution for motor controller, PC and safety PLC 3. Access point/Router 8. Motor controller 4. Robot computer 9. Safety PLC 5. Buzzer MiR1000 User guide (en) 09/2019 - v.1.2 ©Copyright 2019: Mobile Industrial Robots A/S.
- Page 64 6. Product presentation Rear compartment The rear compartment holds the robot’s battery. To open the rear compartment: Push the two white buttons. Pull the hatch. MiR1000 User guide (en) 09/2019 - v.1.2 ©Copyright 2019: Mobile Industrial Robots A/S.
- Page 65 On position. When turned off, the brakes are released, and the robot can be pushed manually Side compartments The side compartments contain the right- and left-hand side bogies and drive wheels. MiR1000 User guide (en) 09/2019 - v.1.2 ©Copyright 2019: Mobile Industrial Robots A/S.
- Page 66 1. Connector for status light band 2. Drive wheel Top compartments The two top compartments hold interfaces to external units, for example MiR1000 EU Pallet Liftor MiR1000 Lift. To open a top compartment, remove four screws and lift off the top cover.
-
Page 67: Sensor System
Collaboration between the robot’s internal and external sensors ensures that the robot can navigate in the environment and most importantly secures that it can operate safely among MiR1000 User guide (en) 09/2019 - v.1.2 ©Copyright 2019: Mobile Industrial Robots A/S. - Page 68 Internal sensors Safety laser scanners The safety laser scanners on MiR1000 are of the type AOPDDR (active opto-electronic protective device responsive to diffuse reflection). AOPDDR is a protective device that uses opto-electronic transmission and reception elements to detect the reflection of the optical radiation generated by the protective device.
- Page 69 When mapping, the safety laser scanner’s view is reduced to 20 m to support that maps will get the highest possible quality. The safety laser scanners see up to 20 m when mapping an area. MiR1000 User guide (en) 09/2019 - v.1.2 ©Copyright 2019: Mobile Industrial Robots A/S.
- Page 70 The active protective field is automatically selected based on the speed of MiR1000. A person or object within an active protective field will bring the robot to a protective stop and the robot will remain stopped until the protective field is free.
- Page 71 Horizontally in an angle of 114° and 250 mm to the first view of ground. The camera readouts are used as 3D point cloud data. They are not recording recognizable objects or people. MiR1000 User guide (en) 09/2019 - v.1.2 ©Copyright 2019: Mobile Industrial Robots A/S.
- Page 72 6. Product presentation The following illustrations show the fields of view of the cameras. The two 3D cameras can see objects up to 1700 mm above floor height. MiR1000 User guide (en) 09/2019 - v.1.2 ©Copyright 2019: Mobile Industrial Robots A/S.
- Page 73 6. Product presentation The two 3D cameras have a horizontal field of view of 114°. MiR1000 User guide (en) 09/2019 - v.1.2 ©Copyright 2019: Mobile Industrial Robots A/S.
-
Page 74: Light Indicators
• Status lights An LED light band on all four sides of the robot uses colors and light motion patterns to MiR1000 User guide (en) 09/2019 - v.1.2 ©Copyright 2019: Mobile Industrial Robots A/S. - Page 75 When the robot drives with muted personnel detection means, for example when docking to a pallet rack, all signal lights blink yellow. For more information, see Muting of the personnel detection means on page 57. MiR1000 User guide (en) 09/2019 - v.1.2 ©Copyright 2019: Mobile Industrial Robots A/S.
-
Page 76: Applications
7.1. Mounting a top module MiR1000 has four M10 holes for mounting top modules as shown in Figure 7.1. The tightening torque is 47 Nm. MiR1000 User guide (en) 09/2019 - v.1.2 ©Copyright 2019: Mobile Industrial Robots A/S. - Page 77 M12 holes. Certain top modules may require the installation of an extra emergency stop button. Perform risk assessment according to standard ISO 12100, see Risk assessment on page 12 MiR1000 User guide (en) 09/2019 - v.1.2 ©Copyright 2019: Mobile Industrial Robots A/S.
- Page 78 Mobile Industrial Robots. Perform risk assessment according to standard ISO 12100, see Risk assessment on page 12 CAUTION Stay within the specifications for weight and the payload’s center of gravity, Payload specifications on page 89. MiR1000 User guide (en) 09/2019 - v.1.2 ©Copyright 2019: Mobile Industrial Robots A/S.
-
Page 79: Lift Modifications
7. Applications 7.2. Lift modifications Additional holes can be added to the MiR1000 Lift for custom applications. However, it is important not to damage any vital parts of the lift when doing so. Top plate of the lift 1. Material: Steel (S355) 2. - Page 80 The drawings above only show where you can make minor modifications without damaging the product. You should not use it for any other meas- urements or calculations. MiR1000 User guide (en) 09/2019 - v.1.2 ©Copyright 2019: Mobile Industrial Robots A/S.
- Page 81 7. Applications NOTICE It is only possible to modify the MiR1000 Lift, not the MiR1000 EU Pallet Lift. MiR1000 User guide (en) 09/2019 - v.1.2 ©Copyright 2019: Mobile Industrial Robots A/S.
-
Page 82: Maintenance
Once a week carry out the following maintenance tasks: Parts Maintenance tasks Robot top plate and Clean the robot on the outside with a damp cloth. sides Do not use compressed air. MiR1000 User guide (en) 09/2019 - v.1.2 ©Copyright 2019: Mobile Industrial Robots A/S. -
Page 83: Regular Checks And Replacements
Part Maintenance Interval Robot top plate Check mounting. Does it sit evenly Check monthly and replace as on top of the robot with needed. connections accessible. MiR1000 User guide (en) 09/2019 - v.1.2 ©Copyright 2019: Mobile Industrial Robots A/S. - Page 84 To check the ESD tail, open the Check every six months and left-hand side maintenance hatch replace as needed. and make sure that the tail has contact with the ground. MiR1000 User guide (en) 09/2019 - v.1.2 ©Copyright 2019: Mobile Industrial Robots A/S.
- Page 85 MiR Lift Pallet Rack are intact and visible. Safety stickers Check if the safety stickers on the Check every six months and robot are still intact and visible. replace as needed. MiR1000 User guide (en) 09/2019 - v.1.2 ©Copyright 2019: Mobile Industrial Robots A/S.
-
Page 86: Packing For Transportation
Protective foam blocks: Side blocks and the top layer. • Protective corner braces. The braces prevent the robot from being damaged by the trans- port straps. • Screws. MiR1000 User guide (en) 09/2019 - v.1.2 ©Copyright 2019: Mobile Industrial Robots A/S. - Page 87 The lithium battery is subject to transport regulations. Make sure that you follow the safety precautions in this section and the instructions in section Packing for transportation on the MiR1000 User guide (en) 09/2019 - v.1.2 ©Copyright 2019: Mobile Industrial Robots A/S.
- Page 88 United Nations Regulation of Dangerous Goods, UN 3171. Special transport documentation is required to comply with these regulations. This may influ- ence both transport time and costs. MiR1000 User guide (en) 09/2019 - v.1.2 ©Copyright 2019: Mobile Industrial Robots A/S.
-
Page 89: Payload Specifications
The following drawings illustrate the center of mass (CoM) specifications for safe operation at different payloads. The specifications apply to payloads of up to 1000 kg. Side view 750 kg MiR1000 User guide (en) 09/2019 - v.1.2 ©Copyright 2019: Mobile Industrial Robots A/S. - Page 90 9. Payload specifications Front view 750 kg MiR1000 User guide (en) 09/2019 - v.1.2 ©Copyright 2019: Mobile Industrial Robots A/S.
- Page 91 9. Payload specifications Top view 750 kg MiR1000 User guide (en) 09/2019 - v.1.2 ©Copyright 2019: Mobile Industrial Robots A/S.
- Page 92 9. Payload specifications Side view 1000 kg MiR1000 User guide (en) 09/2019 - v.1.2 ©Copyright 2019: Mobile Industrial Robots A/S.
- Page 93 9. Payload specifications Front view 1000 kg MiR1000 User guide (en) 09/2019 - v.1.2 ©Copyright 2019: Mobile Industrial Robots A/S.
- Page 94 9. Payload specifications Top view 1000 kg MiR1000 User guide (en) 09/2019 - v.1.2 ©Copyright 2019: Mobile Industrial Robots A/S.
-
Page 95: Interface Specifications
Top compartments on page 66. 10.1. General purpose interfaces This section describes the general purpose interfaces located in the left-hand side compartment on the top side of MiR1000. MiR1000 User guide (en) 09/2019 - v.1.2 ©Copyright 2019: Mobile Industrial Robots A/S. - Page 96 Intended for high power loads like motors or actu- ators. Ground. Always on when robot is on. Intended for low power use like powering an external PLC. Ground. MiR1000 User guide (en) 09/2019 - v.1.2 ©Copyright 2019: Mobile Industrial Robots A/S.
- Page 97 Pin numbers: male connector viewed from the front (left) and wiring diagram (right). A variety of top applications requires a general purpose and "simple-to-use" digital I/O (GPIO). MiR1000 User guide (en) 09/2019 - v.1.2 ©Copyright 2019: Mobile Industrial Robots A/S.
- Page 98 1A @ 24V Output 1. Protected return. 1A @ 24V Output 2. Protected return. 1A @ 24V Output 3. Protected return. 1A @ 24V Output 4. Protected return. MiR1000 User guide (en) 09/2019 - v.1.2 ©Copyright 2019: Mobile Industrial Robots A/S.
- Page 99 Ethernet connection. Pin numbers (left) and wiring diagram (right). The communication interface is 10/100 Mbit Ethernet using a M12 connector. See Connector list on page 103. Various protocols can be supported, e.g. Modbus. MiR1000 User guide (en) 09/2019 - v.1.2 ©Copyright 2019: Mobile Industrial Robots A/S.
-
Page 100: Safety Interfaces
Auxiliary emergency stop is designed to support emergency stop and other safety functions. The following table contains the description of the pins of the Auxiliary emergency stop interface. Pin number Signal name Description Test output Test output MiR1000 User guide (en) 09/2019 - v.1.2 ©Copyright 2019: Mobile Industrial Robots A/S. - Page 101 Pin numbers: female connector viewed from the front (left) and wiring diagram (right). The Auxiliary safety functions interface is designed to support emergency stop and other safety functions. MiR1000 User guide (en) 09/2019 - v.1.2 ©Copyright 2019: Mobile Industrial Robots A/S.
- Page 102 Reduced speed 2 Input - circuit broken will result in that the robot can not drive fast. Unassigned Unassigned. Unassigned Unassigned. Safe RTN Safe return - Ground. MiR1000 User guide (en) 09/2019 - v.1.2 ©Copyright 2019: Mobile Industrial Robots A/S.
-
Page 103: Connector List
We recommend the following connectors for the five different interfaces. Connector name Connector type Power M23 6p GPIO M17 17p Ethernet M12 4p Auxiliary Emergency Stop M17 8p Auxiliary Safety Functions M17 17p MiR1000 User guide (en) 09/2019 - v.1.2 ©Copyright 2019: Mobile Industrial Robots A/S. -
Page 104: Updating Mir1000 Software
Download the latest version of MiR Software Robot / Hook / Fleet 2 version x.x.x. Connect your computer to the WiFi of the robot you would like to update. Access the robot's interface by going to the website mir.com in your preferred web browser and sign in. - Page 105 Navigate to System > Software versions and select Upload software Locate and select the downloaded software package. It may take a few minutes for the package to successfully upload. MiR1000 User guide (en) 09/2019 - v.1.2 ©Copyright 2019: Mobile Industrial Robots A/S.
Need help?
Do you have a question about the MiR1000 and is the answer not in the manual?
Questions and answers