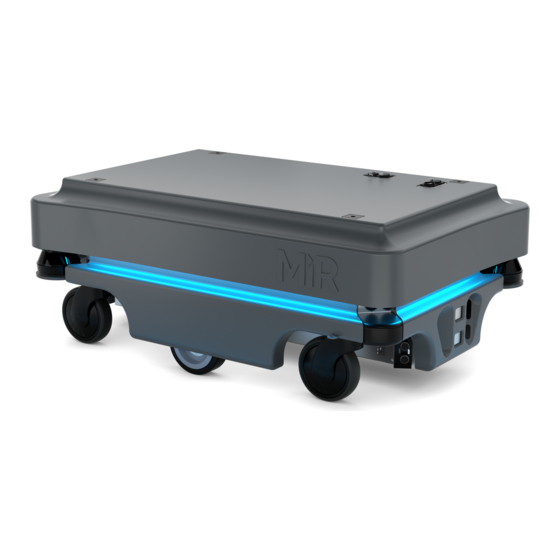
MIR MiR100 Quick Start Manual
Hide thumbs
Also See for MiR100:
- User manual (194 pages) ,
- Operating manual (47 pages) ,
- Quick start manual (44 pages)
Summary of Contents for MIR MiR100
- Page 1 October 2017 v.1.02017 v.1.2 with MiR Robot Interface 2.0 Quick Start 300003-en, 1.6 - 01/2019...
- Page 2 To meet the CE marking requirements, the emergency stop must be mounted before the robot is used. Doc version Release date HW release 2018-02-02 2018-08-20 2019-01-04...
-
Page 3: About This Quick Start
About this Quick Start About this Quick Start This Quick Start guides you through the unpacking and starting up of the MiR100™. Further information on how to create maps, setting up missions etc. is found in the MiR Robot Interface 2.0 Reference guide. Information on product specifications, maintenance and troubleshooting is found in the MiR100™... -
Page 4: Unpacking The Mir100
Unpacking the MiR100™ Step Action Remove pallet lid and take out the box with the MiR100 kit. Remove the top foam, foam blocks on the sides and the pallet frames. Place the pallet cover as a ramp at the robot’s rear end. - Page 5 The second cable is for an extra battery. Before putting the cover back on, make sure that the battery disconnect switch is on (the two yellow indicators pointing to • • • 01/2019 v.1.6 MiR100™ Quick Start Robot Interface 2.0, 300003-en, • • •...
- Page 6 If a top module is going to be mounted on top of the robot, the emergency stop must be placed in a position where it is easy to reach. See MiR100 User Guide. Connect the antenna to the connector on top of the robot cover. Remove the plastic cap from the connector before fixing the antenna.
- Page 7 • • • 01/2019 v.1.6 MiR100™ Quick Start Robot Interface 2.0, 300003-en, • • •...
-
Page 8: Getting Connected
The robot light switches to blue, indicating that the robot is in manual mode and can be controlled by the joystick. • • • 01/2019 v.1.6 MiR100™ Quick Start Robot Interface 2.0, 300003-en, • • •... -
Page 9: Charging The Robot
The robot arrives with a charged battery and can drive for up to three hours before recharging is required. Follow these steps to charge the robot using the enclosed charging cable: • • • 01/2019 v.1.6 MiR100™ Quick Start Robot Interface 2.0, 300003-en, • • •... - Page 10 Turn off the rocker switch and disconnect the cable from the robot. Slide the corner cover back on. The robot detects both cable and activated charging-button and will go into emergency stop in both cases. • • • 01/2019 v.1.6 MiR100™ Quick Start Robot Interface 2.0, 300003-en, • • •...
-
Page 11: Testing The Robot
Before using the robot, you are recommended to check that all components and processes inside the robot work as intended. 1. Log on to the MiR Robot interface, see Getting connected on page 6. Go to Monitoring > Hardware health. -
Page 12: Shutting Down The Robot
If shutting the robot down for transportation or service/repair, the battery disconnect switch must be turned off as well and the battery cable disconnected, see MiR100 User Guide. • • • 01/2019 v.1.6 MiR100™ Quick Start Robot Interface 2.0, 300003-en, • • •... -
Page 13: General Safety Notes
• Turn off the main power immediately after removal of the top cover Risk of personal injury and/or damage to the robot. Turn off main power relay to avoid short circuit. • • • MiR100™ Quick Start Robot Interface 2.0, 300003-en, 01/2019 v.1.6 • • •... -
Page 14: Lithium Battery
Rinse well with water and immediately seek medical care. If left untreated, the battery fluid could cause damage to the eye. • Use only the original charger and always follow the instructions from the battery manufacturer. • • • MiR100™ Quick Start Robot Interface 2.0, 300003-en, 01/2019 v.1.6 • • •... - Page 15 Lithium battery • • • MiR100™ Quick Start Robot Interface 2.0, 300003-en, 01/2019 v.1.6 • • •...
-
Page 17: Copyright And Disclaimer
All rights reserved. No parts of this manual may be reproduced in any form without the express written permission of Mobile Industrial Robots ApS (MiR). MiR makes no warranties, express or implied, in respect of this document or its contents. In addition, the contents of the document is subject to change without prior notice.


Need help?
Do you have a question about the MiR100 and is the answer not in the manual?
Questions and answers