Advertisement
Quick Links
Advertisement

Subscribe to Our Youtube Channel
Related Manuals for Titan Fitness PLTRAINER1


Summary of Contents for Titan Fitness PLTRAINER1
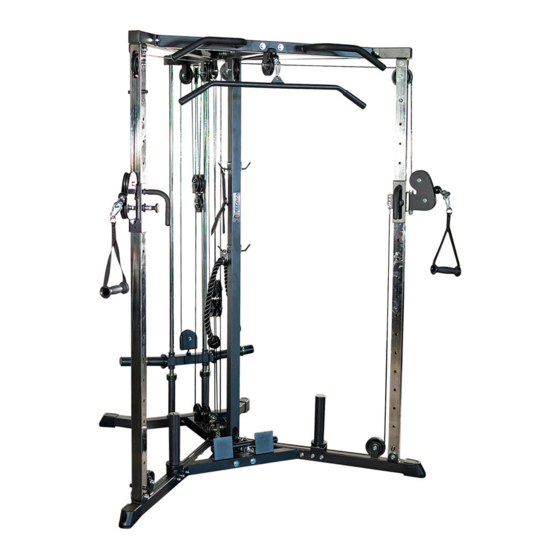
- Page 1 O W N E R ’ S M A N U A L MPN(s): PLTRAINER1-PLTRAINER2 SKU(s): 400868 UPC(s): 840009205927...
- Page 2 P A R T S D I A G R A M / E X P L O D E D V I E W...
- Page 3 DESCRIPTION DESCRIPTION Base Frame (38) Shock Absorber RubberΦ77*Φ47.5*13 Middle Base Frame (39) End Cap Φ48*2 Front Base Frame (40) End Cap □50*2 Right Base Frame (41) Pulley Spacer Bush Left Base Frame (42) Front Pipe Sleeve Upright Frame (43) Rubber Sleeve Top Cross Frame (44) End Cap Φ25*2.5...
- Page 4 A S S E M B L Y I N S T R U C T I O N S Step 1 Hex Bolt M10*25 (58). Install the Guide Rod(9) to Base Frame (1), using the Base Frame (1) , Middle Base Frame (2)and Front Base Frame (3) using Flat Washer Φ11*Φ20*2 Assemble (68) , Flat Washer Φ10.5*Φ30*2.5 (69) ,Nut M10 (72)and Hex Bolt M10*70 (62).
- Page 5 Step 2 Connect Right Base Frame(4), Left Base Frame(5), Middle Base Frame (2)and Front Base Frame (3), using Flat Washer Φ11*Φ20*2 (68) , Flat Washer Φ10.5*Φ30*2.5 (69) ,Nut M10 (72), Hex Bolt M10*70 (62) and Hex Bolt M10*75 (63). Please tighten all the bolts .
- Page 6 Step 3 using Flat Washer Φ11*Φ20*2 (68),Nut M10 (72) Install Middle Upright Frame (8) on the Middle Base Frame (2), and Hex Bolt M10*75 (63). 2. Put the Shock Absorber Rubber (37) ,Heighten Frame (15) ,Shock Absorber Rubber (51) and Bar Plate Holder on the Guide Rod (9) .Then assemble the Pulley Frame (24) on Bar Plate Holder(16).Tighten the Nut.
- Page 7 Step 4 1. Assemble the Top Cross Frame (7) on Middle Upright Frame(8) and Guide Rod(9), using Flat Washer Φ 11*Φ20*2 (68),Nut M10 (72) , Hex Bolt M8*25 (58) and Hex Bolt M10*75 (63). 2. Install the Fixing Frame (17) on the Handle Bar Frame (12) using Flat Washer Φ9*Φ16*1.6 (67) and Hex Bolt M8*12 (56).
- Page 8 Install Right Cross Frame(10), Left Cross Frame(11) on Top Cross Frame (7) and Handle Bar Frame (12) , using Flat Washer Φ11*Φ20*2 (68) , Flat Washer Φ10.5*Φ30*2.5 (69) ,Nut M10 (72), Hex Bolt M10*70 (62) and Hex Bolt M10*75 (63). Step 6...
- Page 9 1. Put the Right Sliding Frame(13) and Left Sliding Frame(14) on Upright Frame(6). 2. Install the Upright Frame(6) on Right&Left Base Frame(4&5) and Right&Left Cross Frame(10&11), using Flat Washer Φ11*Φ20*2 (68),Nut M10 (72) and Hex Bolt M10*75 (63). 3. Fixing the Rubber Sleeve(43) on Upright Frame (6) using Hex Socket Head Bolt M6*15(66).
- Page 10 1. Install the J-Hook(19) on the Middle Upright Frame (8) using Flat Washer Φ9*Φ16*1.6 (67) and Hex Bolt M8*12 (56). 2. Install the Upright Bar Plate Holder(20) on Right& Left Base Frame(4&5) using Flat Washer Φ11*Φ20*2 (68) , Nut M10 (72), and Hex Bolt M10*70 (62). 3.
- Page 11 1. Fixing the pulley(35) on the Top Cross Frame (7) using Pulley Spacer Bush(41), Flat Washer Φ11*Φ20*2 (68),Nut M10 (72), Hex Bolt M10*45 (60), Hex Bolt M10*65 (61) and Hex Bolt M10*75 (63). 2. Remove the Fixing frame(Z), Washer(Y) and Stopper(X) from the Upper cable(28),then through each pulley(A)(B)(C)(D)(E)(F)(G)(H)(G)(F)(E)(D)(C)(J)(K) in turn as drawing, and the stopper (X), Washer(Y) and Fixing frame(Z), using Flat Washer Φ11*Φ20*2 (68),Nut M10 (72) and Hex Bolt M10*35 (59).
- Page 12 1. Fixing the pulley(35&36) on the Base Frame using Flat Washer Φ11*Φ20*2 (68),Nut M10 (72) and Hex Bolt M10*45 (60). 2. The Lower Cable(29) through each pulley(L)(M)(N)(O)(P) in turn as drawing, then fixing by Flat Washer Φ11*Φ20*2 (68),Nut M10 (72) and Hex Bolt M10*35 (59). Please tighten all the bolts and nuts.
- Page 13 2. Remove the Fixing frame(Z), Washer(Y) and Stopper(X) from the cable(30),then through each pulley(R)(S)(T)(U)(V)(W) in turn as drawing, and the stopper (X), Washer(Y) and Fixing frame(Z), using Flat Washer Φ11*Φ20*2 (68),Nut M10 (72) and Hex Bolt M10*35 (59). Please tighten all the bolts and nuts. Step 11 Install all Accessories on the Machine.
- Page 15 This concludes the PLTRAINER Owner’s Manual. If applicable to your product, make sure to tighten all nut- and-bolt combinations before use. Enjoy! DISCLAIMER This equipment must be used with care by capable and competent individuals under supervision, if necessary. The use of any fitness equipment, including this one, involves the potential risk of injury. You accept and assume full responsibility for any and all injuries, damages (both economic and non-economic), and losses of any type, which may occur, and you fully and forever release and discharge Titan, its insurers, employees, officers, directors, associates, and agents from any and all claims, demands, damages, rights of action, or causes of action, present or future, whether the...
Need help?
Do you have a question about the PLTRAINER1 and is the answer not in the manual?
Questions and answers