Table of Contents
Advertisement
Quick Links
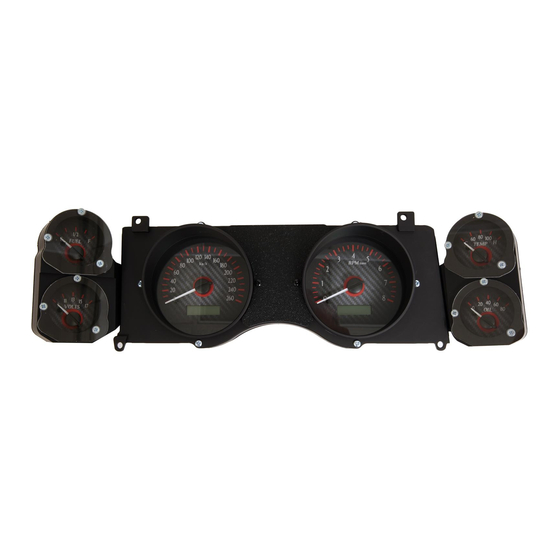
VHX-70C-CAM
Dakota Digital VHX Instrument Installation
For 1970-'81 Chevy Camaro
Your new VHX-70C-CAM kit includes:
VHX Display
Universal Sender
Pack
Installation Manuals
Switch Assembly
CAT5 Cable
Control Box
Installation
1. First remove the four screws holding the bezel to the dash. These four screws will be re-used for the
VHX installation. If you wish to re-use the stock bezel, now is a good time to clean the bezel.
Manual #650370A
Advertisement
Table of Contents

Related Manuals for Dakota Digital VHX-70C-CAM


Summary of Contents for Dakota Digital VHX-70C-CAM
- Page 1 VHX-70C-CAM Dakota Digital VHX Instrument Installation For 1970-‘81 Chevy Camaro Your new VHX-70C-CAM kit includes: VHX Display Universal Sender Pack Installation Manuals Switch Assembly CAT5 Cable Control Box Installation 1. First remove the four screws holding the bezel to the dash. These four screws will be re-used for the VHX installation.
- Page 2 2. Remove the four screws holding the gauges into the dash. These screws will be re-used for the VHX gauge installation. 3. Connect the CAT5 cable to the system. As the assembled cluster is installed into the dash, take care when routing this cable to the control box.
- Page 3 4. Secure the VHX system to the dash with the original four screws. 5a. Remove the protective tape from the clear lens and align the bezel with the gauges. Watch carefully as you align the bezel so you don’t scratch or damage the lens.
- Page 4 6. Secure the bezel to the dash with the four original screws. Refer to the main manual for wiring instructions to complete the VHX installation. WARNING: This product can expose you to chemicals including lead, which is known to the State of California to cause cancer and birth defects or other reproductive harm.
Need help?
Do you have a question about the VHX-70C-CAM and is the answer not in the manual?
Questions and answers